Pages

Crispy Sesame Crackers - a yeast cracker!

Barry noticed this recipe in the 7/12/2020 Sunday Food edition of the Salina Journal and suggested I give them a try. I made them as instructed using our pasta machine to roll the dough as thin as possible. I have included the original instructions as printed in the paper + also a few notes on how I used the pasta machine. I discovered they needed to bake longer than instructed so have included those notes in the recipe. 
These are great as hummus dippers. 

 CRISPY SESAME CRACKERS
Recipe from “Mustards Grill Napa Valley Cookbook” by Cindy Pawlcyn with Brigid Callinan
1 1/2 teaspoons active dry yeast
1 teaspoon granulated sugar
1/3 cup warm water
1/3 cup plus 1 teaspoon cold water, divided
2 cups all-purpose flour, or more as needed
1 tablespoon butter, cut up
2 teaspoons salt
1 egg
2 tablespoons sesame seeds, preferably a mix of black and white 
  1. Combine the yeast, sugar and warm water together in the bowl of an electric mixer or a large bowl. Let rest 8 to 10 minutes, until it becomes foamy. 
  2. Add 1/3 cup of the cold water, then add the flour, butter and salt. Mix to combine with the dough hook or a wooden spoon.
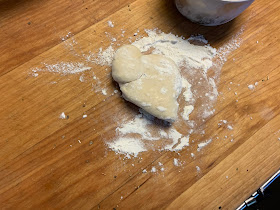
  3. If using a mixer, mix the dough on medium speed until smooth and elastic, pulling the dough down off the hook if it climbs it. If mixing by hand, turn the shaggy dough out onto cutting board and knead for 5 to 8 minutes, until the dough is smooth and elastic. If the dough is sticky, add a little more flour.
  4. Gather into a ball, place the dough in an oiled bowl, turn to coat lightly, cover, and set it aside in a warm place to rise until doubled in size, 1 to 1 1/2 hours.
  5. Preheat oven to 350 degrees.
  6. The goal is to make the crackers paper-thin. The easiest way to do this is to use a pasta machine. If you don’t have one, take manageable sized pieces of dough and, on a lightly floured surface, roll them out as thinly as possible into strips that are 3 to 4 inches wide and 6 inches long. It helps to roll out the pieces of dough, let them rest for 5 or 6 minutes, and then roll them out again, repeating if necessary. (To use a pasta machine for rolling: Set up pasta machine and turn the dial to level 1— run each dough ball through the machine, returning flattened ball to floured surface if sticky. Next turn dial to 2 and repeat; continue until cracker is paper thin; continue go up to level 6. Note: If dough begins to tear, you have taken it too far.)

  7. Lay the strips of dough on a nonstick baking sheet or a baking sheet lined with parchment paper. 
  8. Beat together the egg with the remaining 1 teaspoon cold water, and brush the crackers with this egg wash.
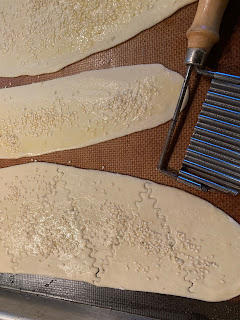
  9. Sprinkle with the sesame seeds, then score the strips of dough to make triangular shapes; they will break apart into individual crackers when they bake.

  10. Turning the crackers as necessary, bake for 7 to 10 minutes until they are a deep gold. (It took at least an additional 6 minutes to achieve a deep golden brown color and a crispy cracker; just watch carefully at this point.)
  11. Remove to a rack to cool, then store in an airtight container for up to 1 week — or less, if humidity is high. (I have kept ours in a glass jar for a couple of weeks.)
Recipe without photos . . .
 CRISPY SESAME CRACKERS
Recipe from “Mustards Grill Napa Valley Cookbook” by Cindy Pawlcyn with Brigid Callinan
1 1/2 teaspoons active dry yeast
1 teaspoon granulated sugar
1/3 cup warm water
1/3 cup plus 1 teaspoon cold water, divided
2 cups all-purpose flour, or more as needed
1 tablespoon butter, cut up
2 teaspoons salt
1 egg
2 tablespoons sesame seeds, preferably a mix of black and white 
  1. Combine the yeast, sugar and warm water together in the bowl of an electric mixer or a large bowl. Let rest 8 to 10 minutes, until it becomes foamy. 
  2. Add 1/3 cup of the cold water, then add the flour, butter and salt. Mix to combine with the dough hook or a wooden spoon.
  3. If using a mixer, mix the dough on medium speed until smooth and elastic, pulling the dough down off the hook if it climbs it. If mixing by hand, turn the shaggy dough out onto cutting board and knead for 5 to 8 minutes, until the dough is smooth and elastic. If the dough is sticky, add a little more flour.
  4. Gather into a ball, place the dough in an oiled bowl, turn to coat lightly, cover, and set it aside in a warm place to rise until doubled in size, 1 to 1 1/2 hours.
  5. Preheat oven to 350 degrees.
  6. The goal is to make the crackers paper-thin. The easiest way to do this is to use a pasta machine. If you don’t have one, take manageable sized pieces of dough and, on a lightly floured surface, roll them out as thinly as possible into strips that are 3 to 4 inches wide and 6 inches long. It helps to roll out the pieces of dough, let them rest for 5 or 6 minutes, and then roll them out again, repeating if necessary. (To use a pasta machine for rolling: Set up pasta machine and turn the dial to level 1— run each dough ball through the machine, returning flattened ball to floured surface if sticky. Next turn dial to 2 and repeat; continue until cracker is paper thin; continue go up to level 6. Note: If dough begins to tear, you have taken it too far.)
  7. Lay the strips of dough on a nonstick baking sheet or a baking sheet lined with parchment paper. 
  8. Beat together the egg with the remaining 1 teaspoon cold water, and brush the crackers with this egg wash.
  9. Sprinkle with the sesame seeds, then score the strips of dough to make triangular shapes; they will break apart into individual crackers when they bake.
  10. Turning the crackers as necessary, bake for 7 to 10 minutes until they are a deep gold. (It took at least an additional 6 minutes to achieve a deep golden brown color and a crispy cracker; just watch carefully at this point.)
  11. Remove to a rack to cool, then store in an airtight container for up to 1 week — or less, if humidity is high. (I have kept ours in a glass jar for a couple of weeks.)

Traditional Rolled Pie Crust made in food processor

I've adapted my favorite pie crust recipe so that it can be made in the food processor for steps #1-4 with EXCELLENT results! I may never go back to the original method! 

Traditional Rolled Pie Crust w/ food processor option
Lately I've been using the food processor for steps #1-4 with EXCELLENT results! I'VE ADDED FOOD PROCESSOR EXPLANATIONS & PHOTOS TO ORIGINAL DIRECTIONS. 
                                                For one 10” pie crust            For two 8 or 9” shells or 
                                                                                                one 8 or 9” double crust
All-purpose flour                    1 1/2 cups                                2 1/4 cups
Salt                                          1/2 teaspoon                            3/4 teaspoon
Shortening, (Crisco®)              1/2 cup                                    3/4 cup
Cold water                               3 to 4 tablespoons                   5 to 6 tablespoons 
  1. Stir flour and salt together in mixing bowl. With a pastry blender, cut in shortening thoroughly.  FOOD PROCESSOR (FP) METHOD:  ADD THE INGREDIENTS TO WORK BOWL OF FOOD PROCESSOR & BLEND USING AN ON/OFF MOTION. 
    I use butter flavor Crisco®.
  2. Particles should be size of tiny peas.
  3. Sprinkle water into the flour mixture, a tablespoon at a time. Mix lightly with a fork after each tablespoon of water until all flour is moistened. FP METHOD: ADD WATER THROUGH OPENING IN TOP OF FOOD PROCESSOR.
  4. Mix dough thoroughly just until it cleans the sides of the bowl. At this point just the right amount of gluten has developed to produce a tender, flaky crust. FP METHOD: DOUGH WILL FORM INTO A COHESIVE BOWL IN FOOD PROCESSOR.
  5. Gather the dough together with your hands and press firmly into a ball. If dough does not hold together, 1 or 2 additional teaspoons water may be added.

  6. To roll pastry, use a pastry cloth or wax paper which has been lightly sprinkled with flour.  Use a stockinet-covered rolling pin or place another piece of wax paper to cover the ball of dough.

  7. For two-crust pie, divide dough in half.  Place half of dough cut side down.  Flatten dough into circle to provide starting point for rolling out the pastry.
  8. Roll from center to outside edges in all four direction.  For even thickness, lift rolling pin as you approach outer edge.  If edges begin to break, pinch together at once.
  9. Keep pastry circular and roll it about 1 1/2” larger all around than inverted pie pan.  Fold pastry in half or wrap around rolling pin.. Carefully transfer to pie pan.
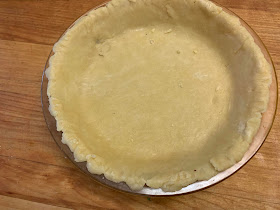
  10. Unfold. To prevent stretching, ease pastry gently into pan and press toward center of pan with fingertips.  Stretching causes shrinkage during baking.  
  11. Trim and fold under excess crust overhand. Finish edges by crimping or using favorite method of finishing edge. 
    Lightly press a fork along the edge of the crust for a super simple edging. 
One-Crust Pies = Roll pasty about 2” beyond edge of inverted pan. Ease into pan. Trim to about 1” from edge. Make edge by folding pastry under.  Flute edges or decorate as desired. Or, add the pastry to a tart pan and trim edges even with the fluted top edge of the pan.
  • Pre-bake crusts for cream pies or other refrigerated pies such as fresh strawberry  or peach. These crusts should be pricked (to prevent puffing) and are generally baked for about 8 to 10 minutes at 475°.
  • Add fillings that are to be baked (such as pumpkin or pecan) to an unbaked crust.  Do not prick  the crust when adding filling (the weight of the filling prevents air pockets and puffing).  Follow recipe directions for baking temperature and length of baking
Two-Crust PiesAdd filling of choice to bottom crust. Top with second crust, trim and tuck extra dough under bottom crust finish edges.  Bake according to filled pie recipe directions.

Recipe without photos . . . 
Traditional Rolled Pie Crust w/ food processor option
Lately I've been using the food processor for steps #1-4 with EXCELLENT results! I'VE ADDED FOOD PROCESSOR EXPLANATIONS TO ORIGINAL DIRECTIONS. 
                                                For one 10” pie crust            For two 8 or 9” shells or 
                                                                                                one 8 or 9” double crust
All-purpose flour                    1 1/2 cups                                2 1/4 cups
Salt                                          1/2 teaspoon                            3/4 teaspoon
Shortening (Crisco®)              1/2 cup                                    3/4 cup
Cold water                               3 to 4 tablespoons                   5 to 6 tablespoons 
  1. Stir flour and salt together in mixing bowl. With a pastry blender, cut in shortening thoroughly.  FOOD PROCESSOR (FP) METHOD:  ADD THE INGREDIENTS TO WORK BOWL OF FOOD PROCESSOR & BLEND USING AN ON/OFF MOTION. 
  2. Particles should be size of tiny peas.
  3. Sprinkle water into the flour mixture, a tablespoon at a time. Mix lightly with a fork after each tablespoon of water until all flour is moistened. FP METHOD: ADD WATER THROUGH OPENING IN TOP OF FOOD PROCESSOR.
  4. Mix dough thoroughly just until it cleans the sides of the bowl. At this point just the right amount of gluten has developed to produce a tender, flaky crust. FP METHOD: DOUGH WILL FORM INTO A COHESIVE BOWL IN FOOD PROCESSOR.
  5. Gather the dough together with your hands and press firmly into a ball. If dough does not hold together, 1 or 2 additional teaspoons water may be added.
  6. To roll pastry, use a pastry cloth or wax paper which has been lightly sprinkled with flour.  Use a stockinet-covered rolling pin or place another piece of wax paper to cover the ball of dough.
  7. For two-crust pie, divide dough in half.  Place half of dough cut side down.  Flatten dough into circle to provide starting point for rolling out the pastry.
  8. Roll from center to outside edges in all four direction.  For even thickness, lift rolling pin as you approach outer edge.  If edges begin to break, pinch together at once.
  9. Keep pastry circular and roll it about 1 1/2” larger all around than inverted pie pan.  Fold pastry in half or wrap around rolling pin.. Carefully transfer to pie pan.
  10. Unfold. To prevent stretching, ease pastry gently into pan and press toward center of pan with fingertips.  Stretching causes shrinkage during baking.  
  11. Trim and fold under excess crust overhand. Finish edges by crimping or using favorite method of finishing edge. 
One-Crust Pies Roll pasty about 2” beyond edge of inverted pan. Ease into pan. Trim to about 1” from edge. Make edge by folding pastry under.  Flute edges or decorate as desired. Or, add the pastry to a tart pan and trim edges even with the fluted top edge of the pan.

  • Pre-bake crusts for cream pies or other refrigerated pies such as fresh strawberry  or peach. These crusts should be pricked (to prevent puffing) and are generally baked for about 8 to 10 minutes at 475°.
  • Add fillings that are to be baked (such as pumpkin or pecan) to an unbaked crust.  Do not prick  the crust when adding filling (the weight of the filling prevents air pockets and puffing).  Follow recipe directions for baking temperature and length of baking
Two-Crust PiesAdd filling of choice to bottom crust. Top with second crust, trim and tuck extra dough under bottom crust finish edges.  Bake according to filled pie recipe directions.

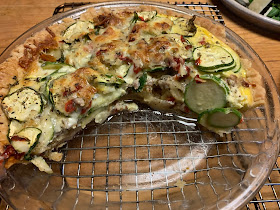
Zucchini Quiche

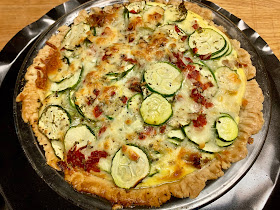
Another tasty way to celebrate zucchini season! We served it with a Roasted Beet Garden Salad as we enjoyed the bounty of our garden. 

Zucchini Quiche  Makes one 9” or 10” quiche 
Filling
  3 tablespoons olive oil
  1 onion, chopped
  About 4 oz. button mushrooms, sliced 
  1 tablespoon fresh basil, chopped or 1 tsp. dried
  1 tablespoons fresh oregano, chopped or 1 tsp. dried 
  1 tablespoon fresh parsley, chopped or 1 tsp. dried
  Salt and pepper to taste
  3 cups zucchini sliced
  1 (4 oz.) jar pimentos, drained - optional
  2 cups cheese, shredded such as mozzarella or cheddar
  3 eggs
  1/2 cup whole milk

1/2 lb. browned bulk sausage, optional
One 9” or 10” unbaked pie shell                                   


  1. Preheat oven to 375°. 
  2. Veggies: In a medium skillet heat the olive oil and add in basil, oregano and parsley. Add onion and allow to sauté for 3 to 4 minutes. 
  3. Once soft and translucent add in mushrooms, cook several minutes and then add zucchini and allow to soften. Add pimentos and set aside to slightly cool.
     
  4. Egg Mixture: In a small bowl, whisk together milk and eggs; set aside.


  5. Assemble: Place cooked sausage over the pastry, alternate with the sautéed vegetables and and cheese. (Quiche could be assembled and put back in the refrigerator until ready to bake).
  6. Right before baking, carefully pour egg mixture over the zucchini.

  7. Bake the quiche: Bake on the lower oven rack from 30 to 40 minutes or until a knife inserted near the center comes out clean and crust is golden brown. To avoid over browning, cover the edges loosely with foil for the last 15 minutes of baking time. 
  8. Let cool for 10 minutes before serving. 
TIPS:
Egg based quiche needs to be refrigerated within 2 hours of cooling. 
Quiche will last in the fridge for 3 to 4 days in an airtight container. It can also be frozen for 2 to 3 months. 
The best option for reheating quiche is in the oven. Preheat your oven to 325°, cover your quiche with aluminum foil and bake for about 15 minutes.

Recipe without photos . . .
Zucchini Quiche  Makes one 9” or 10” quiche 
Filling
  3 tablespoons olive oil
  1 onion, chopped
  About 4 oz. button mushrooms, sliced 
  1 tablespoon fresh basil, chopped or 1 tsp. dried
  1 tablespoon fresh oregano, chopped or 1 tsp. dried 
  1 tablespoon fresh parsley, chopped or 1 tsp. dried
  Salt and pepper to taste
  3 cups zucchini sliced
  1 (4 oz.) jar pimentos, drained - optional
  2 cups cheese, shredded such as mozzarella or cheddar
  3 eggs
  1/2 cup whole milk

1/2 lb. browned bulk sausage, optional
One 9” or 10” unbaked pie shell                                  


  1. Preheat oven to 375°. 
  2. Veggies: In a medium skillet heat the olive oil and add in basil, oregano and parsley. Add onion and allow to sauté for 3 to 4 minutes. 
  3. Once soft and translucent add in mushrooms, cook several minutes and then add zucchini and allow to soften. Add pimentos and set aside to slightly cool. 
  4. Egg Mixture: In a small bowl, whisk together milk and eggs; set aside.


  5. Assemble: Place cooked sausage over the pastry, alternate with the sautéed vegetables and and cheese. (Quiche could be assembled and put back in the refrigerator until ready to bake).
  6. Right before baking, carefully pour egg mixture over the zucchini.

  7. Bake the quiche: Bake on the lower oven rack from 30 to 40 minutes or until a knife inserted near the center comes out clean and crust is golden brown. To avoid over browning, cover the edges loosely with foil for the last 15 minutes of baking time. 
  8. Let cool for 10 minutes before serving. 
TIPS:
Egg based quiche needs to be refrigerated within 2 hours of cooling. 
Quiche will last in the fridge for 3 to 4 days in an airtight container. It can also be frozen for 2 to 3 months. 
The best option for reheating quiche is in the oven. Preheat your oven to 325°, cover your quiche with aluminum foil and bake for about 15 minutes. 

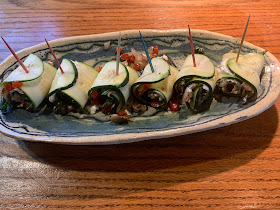
Zucchini Roll Ups

Its that time of year . . . when the zucchini are abundant and I'm on the lookout for new ways to include it in our menu.
This idea combines a cooked veggie filling with softened cream cheese spread on a long, thin slice of zucchini. These are crisp, crunchy and tasty BUT need to be eaten shortly after assembling as they become "watery" if allowed to set for too long. 
We used these as a fresh and healthy side dish but they would also be used for snacks or appetizers. 

Zucchini Roll Ups
Zucchini - sliced longwise as thin as possible (I used a mandolin)
Spreadable Cream Cheese
Seasoned Salt
Sautéed Veggie Mix -- in this case: diced onions, one kale leaf finely chopped, a couple of chopped mushrooms sautéed in just a little olive oil
Chopped Pimentos 
  1. Lay out sliced zucchinis and spread with a thin layer of cream cheese. Sprinkle lightly with seasoned salt.
  2. Spoon on a thin layer of sautéed veggie mix and a few pimentos.


  3. Roll up beginning with narrowest end. Secure with toothpick.
  4. Eat immediately or shortly after preparation. 
Recipe without photos . . .
Zucchini Roll Ups
Zucchini - sliced longwise as thin as possible (I used a mandolin)
Spreadable Cream Cheese
Seasoned Salt
Sautéed Veggie Mix -- in this case: diced onions, one kale leaf finely chopped, a couple of chopped mushrooms sautéed in just a little olive oil
Chopped Pimentos 
  1. Lay out sliced zucchinis and spread with a thin layer of cream cheese. Sprinkle lightly with seasoned salt.
  2. Spoon on a thin layer of sautéed veggie mix and a few pimentos.
  3. Roll up beginning with narrowest end. Secure with toothpick.
  4. Eat immediately or shortly after preparation. 

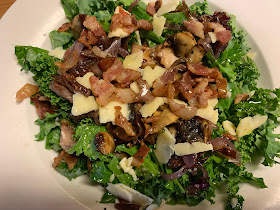
Green Goodness Kale Salad w/ Wiebe premium white Cheddar

 THIS IS DEFINITELY A BOWL OF GREEN GOODNESS! 

It was billed as Killer Kale Salad on today’s taped edition of The Pioneer Woman, but I’ve renamed it and made just a few changes – most notably using the premier  white cheddar from Jason Wiebe DairyCottonwood River Reserve— in place of goat cheese. 
I also made the salad for 2 but am including the original amounts that serve 6. We ate it as a main course salad so I did add a bit more bacon and cheese in proportion to the amount of kale.

YES, KALE CAN BE QUITE CHEWY but this salad does several things that makes it very palatable including:
  • It is cut into small, bite size pieces. 
  • Part of the dressing is added to the kale and allowed to set briefly.
  • Warm veggies and bacon are added to the kale causing it to just slightly wilt and release just a little of its chewiness. 
Green Goodness Kale Salad   6 servings 
4 slices thin bacon, cut into bits
1 tablespoon butter
1 whole medium red onion, halved & sliced
8 oz. weight white mushrooms, sliced
1/2 cup white wine
Salt & pepper, to taste
4 oz. weight Jason Wiebe Cottonwood River Reserve White Cheddar, thinly sliced
Dressing:
   3/4 cup olive oil
   1/4 cup balsamic vinegar (I used white balsamic )
   1 teaspoon fresh thyme leaves or 1/2 teaspoon dried 
   Salt & pepper, to taste
1 bunch kale
  1. Fry the bacon bits until slightly crisp. Drain on a paper towel. 
  2. Pour out most of the grease and add the butter to the skillet. Add the onions and cook them over medium-low heat for 10 to 15 minutes, until soft. Remove them to a plate. 
  3. Add the mushrooms, stir, then add the wine, and salt and pepper. Turn the heat to medium-high and cook the mushrooms for several minutes, until most of the wine has evaporated and the mushrooms are soft. Remove them from the heat and set them aside. 
  4. Dressing: Add the olive oil, vinegar, thyme, salt, and pepper to a mason jar and shake it to combine. 
  5. Remove the kale leaves from the stalks, then roll them up in batches and slice very thinly. Place the kale in a serving bowl or in individual serving dishes.
  6. Add about half the dressing and toss; let set briefly.
  7. Then add mushrooms, onions, and bacon and toss again. Finally, add the Jason Wiebe Cottonwood River Reserve White Cheddar.
  8. Add more dressing if needed, and toss. (Reserve extra dressing for another use.) 
Recipe without photos . . .
Green Goodness Kale Salad   6 servings 
4 slices thin bacon, cut into bits
1 tablespoon butter
1 whole medium red onion, halved & sliced
8 oz. weight white mushrooms, sliced
1/2 cup white wine
Salt & pepper, to taste
4 oz. weight Jason Wiebe Cottonwood River Reserve White Cheddar, thinly sliced
Dressing:
   3/4 cup olive oil
   1/4 cup balsamic vinegar (I used white balsamic )
   1 teaspoon fresh thyme leaves or 1/2 teaspoon dried 
   Salt & pepper, to taste
1 bunch kale
  1. Fry the bacon bits until slightly crisp. Drain on a paper towel. 
  2. Pour out most of the grease and add the butter to the skillet. Add the onions and cook them over medium-low heat for 10 to 15 minutes, until soft. Remove them to a plate. 
  3. Add the mushrooms, stir, then add the wine, and salt and pepper. Turn the heat to medium-high and cook the mushrooms for several minutes, until most of the wine has evaporated and the mushrooms are soft. Remove them from the heat and set them aside. 
  4. Dressing: Add the olive oil, vinegar, thyme, salt, and pepper to a mason jar and shake it to combine. 
  5. Remove the kale leaves from the stalks, then roll them up in batches and slice very thinly. Place the kale in a serving bowl or in individual serving dishes.
  6. Add about half the dressing and toss; let set briefly.
  7. Then add mushrooms, onions, and bacon and toss again. Finally, add the Jason Wiebe Cottonwood River Reserve White Cheddar.
  8. Add more dressing if needed, and toss. (Reserve extra dressing for another use.) 

Roasted Beet Salad w/ Cottonwood River Reserve Cheese from Wiebe Dairy


I've made several versions of roasted beet salad but the addition of Wiebe Dairy's premier Cottonwood River Reserve Cheese elevates this version to the highest level. 
Jason Wiebe cheeses are all the rage at Facebook's Shop Kansas Farms group. We found Wiebe cheese at Hildebrand Dairy's retail store and at the local Farmer's Market; it can also be ordered from the Jason Wiebe Dairy website  Astatement on their site says, "Our natural raw milk cheese and pasteurized milk cheese is made in Kansas on the farm (Farmstead cheese) from grade-A milk. Our goal is to make the best cheese you have ever eaten."
This is what they have to say about their Cottonwood River Reserve Cheese: "Cottonwood River Cheddar is a raw milk aged cheddar with an unique process that develops a full, slightly sweet flavor without the acid bite of a typical aged cheddar. It is pale yellow in color, body is firm, and is getting outstanding reviews since starting to market it in summer 2011." Barry and I both think it is OUTSTANDING! 

Roasted Beet Salad w/ Cottonwood River Reserve Cheese 
Garden Lettuce — tear into bite-sized pieces
Roasted Beets — peel, dice, toss in olive oil, season w/ salt & pepper and roast @ 400° for about 15 to 20 minutes or until tender; I allow a handful of beets per salad
Toasted Walnuts — spread walnuts in an even layer on baking sheet; bake 4 to 5 minutes to enhance the nut’s natural flavor
Cottonwood River Reserve Cheddar Cheese
Salt & pepper to taste or as desired 
  1. Arrange lettuce on plates; top with roasted beets and toasted walnuts. 
  2. Slice or shave thin strips of Cottonwood River Reserve Cheddar Cheese over each salad.
  3. Drizzle with Sunflower Oil Dressing and add salt and pepper if desired.
RED, WHITE & BLUE – This salad becomes patriotic with red beets, white Cheddar and a blue plate!
Other beet salad recipes on our site include: 

Butterflake Herb Rolls using the “tangzhong technique”

The basic recipe comes from King Arthur Flour. A “Tips from Bakers” suggestion at the end details how to adjust this recipe to incorporate the “tangzhong technique”— an Asian method for increasing the softness and shelf life of yeast bread and rolls. Rather than scrolling back and forth from the recipe to the explanation at the end of the post, I have incorporated those adjustments into the body of the actual recipe.
The original recipe makes  two (2) 8 1/2" x 4 1/2" loaves with 10 folder rolls (each cut with a 3 1/2 - 4 " round cutter) per pan. For just two people, I used three smaller pans; we ate one and froze the other two. 
I also adjusted their filling to utilize fresh herbs from our garden but have included King Arthur’s filling recipe, along with variations, below the recipe. 

Butterflake Herb Rolls using the “tangzhong technique”     Make three 7" x 3" loaves
Tangzhong 
3 tablespoons King Arthur Unbleached All-Purpose Flour a
1/2 cup whole milk 
  1. Combine ingredients in a saucepan set over medium-high heat. Cook the mixture, whisking constantly, until it thickens and forms a thick slurry; this will take about 1 1/2 to 2 1/2 minutes. 
  2. Transfer the cooked mixture to a bowl, let it cool to lukewarm until it’s time tocombine it with the remaining flour, milk, and other dough ingredients.
Dough
1/2 cup milk
4 tablespoons butter, cold
3 tablespoons granulated sugar
2 teaspoons salt
2 large eggs
2 teaspoons instant yeast or active dry yeast
4 cups King Arthur Unbleached All-Purpose Flour
Optional —1/3 cup dried potato flakes or 2 tablespoons potato flour for increased moistness

Garden Herb Filling
8 tablespoons salted butter, softened
2 tablespoons chopped chives
1 clove garlic, finely minced & smashed with a little salt
2 teaspoons chopped rosemary
1 teaspoon thyme leaves
  1. Combine the milk, butter, sugar, and salt in a microwave-safe measuring cup or bowl; or in a saucepan. Heat, stirring, until the butter melts. Let the mixture cool to lukewarm.
  2. Transfer the milk mixture to a mixing bowl, and add the eggs, yeast, 3 cups of the flour, potato flour and the tangzhong;mix. Knead the dough, adding the remaining flour at needed, until dough is smooth. The dough will remain somewhat sticky, but should definitely form a ball. During the summer or in a warm/humid climate you may have to add the remaining 1/4 cup flour.
  3. Place the dough in a greased container, cover, and let it rise for about 90 minutes, until it's puffy though not necessarily doubled in bulk. Note: The dough can be slow to rise, especially in the winter. Let it in the bowl until it's noticeably puffy, albeit not necessarily doubled in size. 
    Dough as it appears in bowl just out of the mixer.
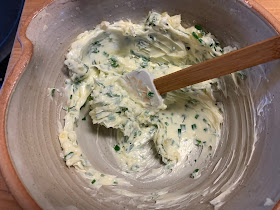
  4. While the dough is rising, place the filling ingredients in a bowl and mix to combine.
  5. Prepare three  7" x 3" loaves by spraying or greasing. Line the bottom of each pans with parchment paper to insure easy removal.
  6. After the dough has risen, deflate it. Place the dough on a lightly greased or lightly floured surface (your preference), and roll/pat it about 1/4" thick. 
  7. Using a 3" cutter, cut 24 circles.
  8. Spread the butter-herb filling on half of each circle, fold in half, and place 8 of the folded circles fold-side down in one of 3 prepared loaf pan. Repeat with the remaining circles. Brush any remaining herb butter over the top of loaves.

  9. Cover the pans with greased plastic and let the dough rise for about 90 minutes, until it's puffy and starting to fill the pan. Towards the end of the rising time, preheat the oven to 350°F. Note: The shaped loaves can be slow to rise, especially in the winter. Once the loaves are in the pans, let them rise until they reach about 3/4 of the way up the pan. This could take as long as 2 hours or so if your house is on the cool side.
  10. Uncover the loaves, and bake them for 25 to 30 minutes at 350°F. Bread baked in a ceramic pan will take 5 to 7 minutes longer to bake than in a metal one. Tent the loaves with foil if they look like they're browning too quickly. Internal temperature should be at least 190°F.
  11. Remove the bread from the oven and turn loaves out of the pan. Serve warm. Store any leftovers, well wrapped, at room temperature for several days; freeze for longer storage.


King Arthur’s Herb Filling:
8 tablespoons unsalted butter, softened
1/2 teaspoon salt
1 teaspoon grated onion or chopped chives
1 clove garlic, minced
1/2 teaspoon caraway seeds or chopped fennel seed
1/2 teaspoon dried basil, crushed
1/4 teaspoon dried oregano, crushed
1/8 to 1/4 teaspoon cayenne pepper, to taste

Variations from the King Arthur website.
Savory Filling Adjustments: substitute your favorite dried or fresh herbs for the chives, garlic, seeds, and herbs in the recipe. Or use olive oil instead of butter in the dough, and pesto instead of butter as the filling. Or mix grated cheese into the butter mixture and sprinkle more cheese on top before baking.
Sweet Filling Adjustments: use 1/2 cup baker's cinnamon filling (a KA commercial combo of cinnamon, sugar &  dry shortening), or a mixture of butter and maple sugar instead of the herb filling. Drizzle the top of the baked loaf with confectioners' sugar glaze if you like. 

Recipe without photos . . .
Butterflake Herb Rolls using the “tangzhong technique”     Make three 7" x 3" loaves
Tangzhong 
3 tablespoons King Arthur Unbleached All-Purpose Flour a
1/2 cup whole milk 
  1. Combine ingredients in a saucepan set over medium-high heat. Cook the mixture, whisking constantly, until it thickens and forms a thick slurry; this will take about 1 1/2 to 2 1/2 minutes. 
  2. Transfer the cooked mixture to a bowl, let it cool to lukewarm until it’s time tocombine it with the remaining flour, milk, and other dough ingredients.
Dough
1/2 cup milk
4 tablespoons butter, cold
3 tablespoons granulated sugar
2 teaspoons salt
2 large eggs
2 teaspoons instant yeast or active dry yeast
4 cups King Arthur Unbleached All-Purpose Flour
Optional —1/3 cup dried potato flakes or 2 tablespoons potato flour for increased moistness

Garden Herb Filling
8 tablespoons salted butter, softened
2 tablespoons chopped chives
1 clove garlic, finely minced & smashed with a little salt
2 teaspoons chopped rosemary
1 teaspoon thyme leaves
  1. Combine the milk, butter, sugar, and salt in a microwave-safe measuring cup or bowl; or in a saucepan. Heat, stirring, until the butter melts. Let the mixture cool to lukewarm.
  2. Transfer the milk mixture to a mixing bowl, and add the eggs, yeast, 3 cups of the flour, potato flour and the tangzhong;mix. Knead the dough, adding the remaining flour at needed, until dough is smooth. The dough will remain somewhat sticky, but should definitely form a ball. During the summer or in a warm/humid climate you may have to add the remaining 1/4 cup flour.
  3. Place the dough in a greased container, cover, and let it rise for about 90 minutes, until it's puffy though not necessarily doubled in bulk. Note: The dough can be slow to rise, especially in the winter. Let it in the bowl until it's noticeably puffy, albeit not necessarily doubled in size. 
  4. While the dough is rising, place the filling ingredients in a bowl and mix to combine.
  5. Prepare three  7" x 3" loaves by spraying or greasing. Line the bottom of each pans with parchment paper to insure easy removal.
  6. After the dough has risen, deflate it. Place the dough on a lightly greased or lightly floured surface (your preference), and roll/pat it about 1/4" thick. 
  7. Using a 3" cutter, cut 24 circles.
  8. Spread the butter-herb filling on half of each circle, fold in half, and place 8 of the folded circles fold-side down in one of 3 prepared loaf pan . Repeat with the remaining circles. Brush any remaining herb butter over the top of loaves.
  9. Cover the pans with greased plastic and let the dough rise for about 90 minutes, until it's puffy and starting to fill the pan. Towards the end of the rising time, preheat the oven to 350°F. Note: The shaped loaves can be slow to rise, especially in the winter. Once the loaves are in the pans, let them rise until they reach about 3/4 of the way up the pan. This could take as long as 2 hours or so if your house is on the cool side.
  10. Uncover the loaves, and bake them for 25 to 30 minutes at 350°F. Bread baked in a ceramic pan will take 5 to 7 minutes longer to bake than in a metal one. Tent the loaves with foil if they look like they're browning too quickly. Internal temperature should be at least 190°F.
  11. Remove the bread from the oven and turn loaves out of the pan. Serve warm. Store any leftovers, well wrapped, at room temperature for several days; freeze for longer storage.