Dinner & a Movie – Evening in Paris! Casserole-roasted Pork w/ Cabbage

Instead of an evening out, we opted for an evening in . . . complete with a French-inspired movie, Midnight in Paris, and menu. Don’t be too impressed by the name of our entrée -- Rôti de Porc aux Chou is simply Casserole-roasted Pork with Cabbage. It might even be considered peasant-fare but it was mighty good, and not all that complicated to prepare.
The recipe came from Mastering the Art of French Cooking by Julia Child, Louisette Betholle and Simone Beck. Yes, I’m having fun perusing the pages of the cookbook as I recall the foods we ate while in France a couple of years ago. No, I have no plans to make all of the recipes in the book nor will I devote a large part of this blog to those recipes!
Using the French-themed dishes that a friend gave me for my last birthday (thanks Judy!), I even created a French bistro-inspired tablescape to go along with the menu. Barry was impressed and it added to the ambience of the evening.

Rôti de Porc aux Chou (Casserole-roasted Pork with Cabbage) 6 servings
Julia’s recipe w/ my adjustments . . .
3 lb. roast of pork (I used a Boston-butt cut)
4 tablespoons cooking oil or bacon grease (I used a little of both)
1 large yellow or white onion, sliced
5 to 6 carrots, peeled & cut into thick chunks
2 to 3 cloves of garlic, peeled
1 teaspoon Kosher salt
¾ teaspoon coarsely ground pepper
1 bay leaf
1 tablespoon dried parsley flakes or about 4 sprigs fresh
5 to 6 sprigs of fresh thyme or about 1 teaspoon dried
1 lb. (about 6 cups) green/white cabbage, cut into 1/2” slices and a kettle containing 7 to 8 quarts of rapidly boiling water with 1½ teaspoons salt per quart of water
Salt & pepper, to taste

1.  Preheat oven to 325°. Dry the pork roast thoroughly with paper towels. Heat the oil in a large ovenproof casserole. When oil is almost smoking (set fire/burner to moderately high heat), place pork, fat side down in the casserole and brown on all sides. This will take about 10 minutes. (As this cooks, complete step #4.) Remove pork to a side dish.
Pork has been browned on all sides.
2.  Pour all but 2 spoonsful of fat out of the casserole. Stir in onions, carrots and garlic; add bay leaf, parsley and thyme sprigs. Cover, reduce heat and cook slowly for about 5 minutes.
Veggies and herbs have been cooked for 5 minutes.
3.  Place the pork back in the casserole, fattiest side up. Season with salt and pepper. Cover and put in preheated oven for about 1 to 1½ hours.
Browned pork is re-added to the casserole. It is not necessary to add any
liquid as the pork will release fat and juices as it bakes (covered) in the oven.
4.  Drop the cabbage into the boiling water. Bring rapidly to the boil and boil uncovered for 2 minutes. Immediately drain in a colander, and run cold water over the cabbage for a minute or two. Drain thoroughly and set aside.
Cabbage is cooking in pot of boiling & salted water.
5.  After the pork has cooked for 1 to 1½ hours, arrange the cabbage around it. Season with additional salt and pepper and baste with the juices that have accumulated in the casserole. Cover, bring to a simmer on stove top and then return it to the oven until the pork in done and the cabbage is tender (about another hour). Baste the cabbage several times with the meat juices during this period.

Pork as it is baking and being basted during the last hour of cooking.

6.  Transfer pork to a platter; remove bay leaf and thyme stems. Lift the cabbage and carrots out of the casserole with a fork and spoon so it will drain, and arrange it around the meat. Season with salt and pepper if necessary. Pour the juices (au jus) in the casserole over the cabbage or put in a small bowl and several on the side. Decorate the platter with sprigs of fresh thyme, if desired.
Pork is done; it is fork tender; notice the au jus that has formed.
French-inspired Menu:
Spinach & Tomato Salad w/ Celery Seed Dressing
Rôti de Porc aux Chou (Casserole-roasted Pork with Cabbage)
Crusty French-style Bread
Barry is ready to eat!

Everyday or Company's Coming . . . Marinated Veggie Salad

     Today it was a simple, everyday salad for just Barry and me. But with a few additions, this salad can easily be dressed up for company. It’s a great way to add raw veggies to your diet and add variety to the daily (or company) fare. Also, good for pot-luck dinners.
     And on a humorous note, every time I either read or write a reference to "dressing" a salad, it reminds me of a joke our niece, Erin, told us several years ago. 
Q. Why did the tomato blush? A. Because he saw the salad, dressing!

Everyday Marinated Veggie Salad 
Vary amounts according to the number of servings or, vary ingredients based on available vegetables.
Italian salad dressing (clear, not creamy)
1 spoonful or so of ranch-style dressing mix  
¼ of a small red onion, thinly sliced 
3 to 4 large mushrooms, sliced
12 grape tomatoes, cut in half lengthwise
Spinach or red leaf lettuce

1.  Combine Italian salad dressing and ranch dressing mix.
2.  Pour over veggies, except spinach or lettuce, that have been combined in a storage container.
Prepared veggies for a simple version of the marinated salad.

Veggies have been dressed and are go in the fridge for marinate for several hours.
3.  Stir and cover; chill for several hours.
4.  Spoon onto a spinach or lettuce-lined salad plate or serving bowl.

Company’s Coming Marinated Veggie Salad  12 to 14 servings
Add all of the suggested extras or adjust to your own taste . . .
1 (8 oz.) bottle Italian salad dressing
1 (0.4 oz.) envelopes ranch-style dressing mix  
4 medium zucchini, thinly sliced
½ to ¾  of a small red onion, thinly sliced 
8 oz. pkg. of button mushrooms, sliced
About 24 grape tomatoes, cut in half lengthwise or use about 4 oz. of diced pimientos or jarred red peppers, drained
2 (14 oz.) can artichoke hearts, drained & halved (packed in liquid)
1 (6 oz.) can pitted ripe olives, drained
1 (6 oz.) can bamboo shoots, drained

1.  Combine Italian salad dressing and ranch dressing mix.
2.  Pour over veggies, except spinach or lettuce, that have been combined in a storage container.
3.  Stir and cover; chill for several hours.
4.  Spoon onto a spinach or lettuce-lined salad plate or serving bowl.

Lettuce Tacos

Fill a lettuce leaf (I used Romaine but iceberg or butter lettuce works well, too)  with whatever you have on hand -- in this case it was leftover BBQ pork (or use seasoned ground beef or chicken, etc.) just a little shredded cheese (try using grated carrots instead) and Pico de Gallo. It's simple, healthy and a way to cut  calories. The only problem -- they are messy to eat so see my solution below.

Arranging the meat, cheese and pico on the lettuce leaf.

I simply wrapped the lettuce in waxed paper and used it as a holder as I consumed my taco.

Egg Noodles 101 – Mother & Me

Mother (Phyllis Newell) and me making noodles.
    My mother’s homemade noodles are the BEST! If I was asked to identify the Best Food My Mother Ever Made, her homemade noodles, along with roasted chicken and mashed potatoes (not one starch but two) would head the top of the list.
     Mother learned to made them from her mom and she said, “She never used a recipe!” And, neither does my mom – which makes it difficult to replicate. Mom had four sisters but was the only one who really mastered the skill of noodle making. I’m trying to learn but, the truth is -- mine don’t yet measure up to Grandma and Mom’s standard and since Mom makes such good noodles, it’s easy to just let her do it!
     However, after teaching a class on egg foams (we made angel food cake, meringues, 7-minute frosting, etc.), I had an abundance of egg yolks. And, since practice makes perfect, I enlisted Mom for another lesson in noodle making. I admit – I’m not sure I’ll ever to able to “dump and pour” so I've listed the measurements (more or less) below for future reference.
    We made three batches of noodles (about 4½ lb.) and reminisced about past family dinners . . . a great way to spend a rainy afternoon! My mother uses Gold Medal Wondra® flour (a high-quality, bleached, enriched all-purpose instant flour milled from a select blend of wheats; it is extra fine and quick-mixing) but she admitted that her mother used just plain all-purpose flour. I asked her why she had switched and she replied simply, “I just like it!”

Mom's Homemade Egg Noodles
10 egg yolks + 2 whole egg
1/4 to 1/3 cup half-and-half or canned evaporated milk
1 teaspoon salt                       
1 teaspoon baking powder
Gold Medal® Wondra flour – about 3 to 4 cups+

Cooking Tip:
If not otherwise stated, you may assume that large eggs are used in most recipes. 
1 large egg generally yields: 1+ tablespoon yolk, 2 1/4 tablespoons white or 3 1/4 tablespoons total.

1.     Mix yolks, egg, milk, salt and baking powder in mixing bowl; add Wondra® flour, a little at a time, until dough can be handled. 
Mom mixes up the dough in one of Barry's handmade pottery bowls.
2.     Knead dough lightly, working in additional flour as needed.
Mom kneads the noodle dough on a floured surface.
3.     Divide dough into 3 or 4 pieces.
4.     Dust a work surface with additional flour and roll dough thin (about 1/8”) – be sure to move rotate dough as you roll in order to keep it from sticking. Repeat until out pieces have been rolled.
Mom begin rolling out a small ball of dough on a floured surface.
Mom rolls the dough into an elongated oval shape.
It helps to fold dough over periodically and make sure
it is not sticking to the floured surface.
5.    Leave sheets of rolled dough out to dry, turning occasionally for even drying. 
We arranged the sheets of dough on tea  towels.
They were allowed to dry several hours and we turned them 4 or 5 times.
6.     When dry, put 2 to 3 sheets of noodles together and cut very thin.
Mom shows me how to roll the sheets together for quick cutting. 
Note -- when noodles are dry enough, they roll easily & can be cut into thin noodles
Notice how thin Mom is cutting the noodles!
7.     Shake noodles out and leave on drying surface until dry.
Since we made noodles on a rainy day, it took a long time for them to dry.
As a matter of fact, Mom suggested that I cover them and leave overnight.
I did and they were ready to bag the next morning.
8.  Use immediately or bag and freeze for later use.
Bagged noodles are ready to go into the freezer.
To prepare Mom's Chicken and Noodles
1.     Roast a whole chicken according to standard recipe directions (my mom liskes to use a roasting bag). Cool and remove chicken from bone.
2.     Cook noodles in canned chicken broth — bring broth to a boil and add noodles.  Cook until noodles are tender, about 10 to 15 minutes. If you prefer thickened noodles, add some Wondra® flour to broth as noodles cook.
Serve noodles over homemade mashed potatoes along with roasted chicken. YUM!


FAMILY HISTORY -- Homemade chicken and noodles always makes me think of my grandmother.. Grandma was widowed at a young age and raised five daughters by herself. In a family cookbook I put together about 20 years ago, her daughters marvel at her abilities to juggle many tasks (she was a registered nurse, cared for her parents and took in boarders) yet made time for family mealtime. She was an amazing woman!
My maternal grandmother and her five daughters often  enjoyed Chicken & Homemade Noodles for Sunday dinners.


The Jeffries Family, Back row from left - Betty, Phyllis (my mom),  Olive.
Front row from left, Loletha, Bessie (my grandmother), Loletha.

                                               The Jeffries girls as teens.  Front to back -
 Phyllis (my mom), Waunita. Olive, Loletha and Betty.

Hippity Hop — Goldfish Easter Carrots

I saw the idea for Goldfish Carrot on Pinterest but did not have a cone shaped bag
 . . . so here’s what I did:

Goldfish Easter Carrots
Goldfish – a 6.6 oz. bag makes 6 carrot favors
Gallon sized plastic bags
Green ribbon, rick rack, etc.

1.  Using a gallon sized plastic bag, I cut a circular shape from opposite corners of bag as shown below.
I used a marker to designate where to cut on the bag.
Normally (when not taking photos) I just cut without drawing a line.
2.  In order to avoid a really fat carrot, I folded the bag in half (see example below) and then just filled one half of the resulting hollow area.


Bring one side of the cut bag to the seam edge.  Fill the top section with goldfish,
leaving the bottom section empty.
3.  Tie top with green ribbon or rickrack, adjusting the crackers so they bag simulates the shape of a carrot.
After tying the bag shut, I am attempting to point out that their is a section of the bag not filled with goldfish; it
is simply folder under and stays in place with the ribbon tie.

Carrot Crackers make nice Easter favors.

Eat It & Lose Soup

     After seeing this recipe in a magazine (Woman’s World,  October 3, 2011), Barry was determined to try this soup. However, in my estimation, the name was not at all appealing (Fat Flush Soup) so I came up with a new one!  
     The soup is hearty and filling, uses everyday ingredients, and tastes good. Barry has varied the meats, added other veggies (Brussels sprouts, cabbage, squash, spinach, kale, etc.), used a variety of beans and experimented with different herbs and spices.
     The originator of this soup is Ann Louise and on her blog she offers advice for sensible eating.
     Barry’s been following Ann’s suggestions and eating this soup once a day for a couple of weeks . . . and has taken off a few pounds.
   
Eat It & Lose Soup! (Ann Louise’s Original Fat Flush Soup) Make 12 to 14 cups / 1 serving = 3 cups

2 teaspoons olive oil

Some of Barry's prepped veggies
for soup - above & below . . .
1¼ lbs. lean ground beef, turkey or shredded chicken

1 onion, chopped

2 cloves garlic, chopped

1 bell pepper, seeded and chopped

8 oz. mushrooms, chopped

1 (14 oz.) can crushed tomatoes

1 (32 oz.) bottle reduced-sodium tomato or vegetable cocktail juice

1 tablespoon fresh lemon juice

1 (14 oz.) can black, navy or pinto beans, rinsed and drained

1 tablespoon ground cumin
 
1/8 teaspoon cayenne, or to taste
 (he's been increasing this amount ever since he read that cayenne pepper supposedly boosts metabolism)
¼ cup each fresh cilantro and parsley, chopped


1.     In stockpot, heat olive oil over medium-high setting. Sauté meat/poultry until cooked through, about 5 minutes. Drain and set aside.
2.     Sauté onion, garlic, peppers and mushrooms until soft, about 5 minutes.
3.     Stir in remaining ingredients, except cilantro and parsley. Cover and simmer 20 minutes. Stir in cilantro and parsley. 
4.     Cover; simmer 10 minutes longer. Store soup in refrigerator up to 5 days. Freezes well. 


Great Brunch or Lunch Recipe — Twice-Baked Cheddar-Green Onion Soufflés . . . + Gluten & Dairy Free Version

Spinach & Strawberry Salad
accompanied the soufflé.
Click here for complete Menu.
   Marie Simmons contributed this recipe to the Spring 2102 issue of Cooking Club magazine. I immediately knew that it was a recipe that I wanted to try. And, I was not disappointed. As a matter of fact, I (and my guests) give it rave reviews!
     Here’s what the magazine said about the recipe, “These individual soufflés can be baked a day ahead in custard cups or ramekins, cooled, removed to a small baking sheet and refrigerated. The next day, pop them in a hot oven for 15 to 20 minutes, and watch them puff up slightly and turn soft and tender.”
     Although the magazine says it makes six servings, I easily filled eight (3/4 cup capacity) ramekins (may depend of egg size -- I used large but I've also noticed that there are variable size eggs in a carton). The recipe also divided the green onions, adding them in two different steps; I simply added them all at the same time. My changes (to the original recipe) are noted below.

Twice-Baked Cheddar-Green Onion Soufflés   Fills 6 to 8 individual ramekins (3/4 cup capacity)
6 tablespoons butter

1/3 cup seasoned dry bread crumbs 
(I just added salt, pepper & paprika to plain crumbs)
½ cup finely chopped green onions (both white and green parts)

3 tablespoons all-purpose flour

1½ cups whole milk

½ teaspoon kosher salt

Dash cayenne pepper

5 eggs, separated

1¾ cups shredded Cheddar cheese 

¼ teaspoon cream of tartar


1.  Preheat oven to 350°F.
2.  Place 6 to  8 (8- to 10-oz.) ramekins or custard cups in shallow roasting or broiler pan.
3.  Melt butter in medium saucepan over medium-low heat. Brush ramekins with enough melted butter to coat (1 to 2 tablespoons); sprinkle with bread crumbs.


Ramekins, arranged in a baking dish,  are  brushed with melted butter. 
Seasoned bread crumbs are added to the ramekins --
they add flavor and aid in the easy release of the soufflés.
4.  Add chopped green onions to remaining melted butter in saucepan. Reduce heat to low; cook 2 minutes, stirring constantly.
Green onions are sautéed in butter for about 2 minutes.
5.  Whisk in flour; cook 2 minutes, whisking constantly. Gradually whisk in milk. Increase heat to medium; cook 5 minutes or until sauce comes to a boil and thickens, whisking constantly and adjusting heat if necessary. Whisk in salt and cayenne pepper. Let cool slightly.
When properly thickened, the white sauce should to coat a spoon.
6.  Whisk egg yolks in large bowl until combined; add cheese. Gradually stir in hot mixture until blended.
Whisk yolks until they are combined.
I added the cheese to the yolks and then a bit of the slightly cooled white sauce (step 5) -- this slowly introduces heat to the yolks (referred to as "tempering") and helps avoid scrambling them.

Once the yolks have been tempered, the rest of the white sauce is added and the mixture is thoroughly combined.
7.  Beat egg whites and cream of tartar in large bowl at low speed until foamy. Increase speed to medium; beat until slightly firm but not until stiff peaks form, about 4 minutes. 


When working with egg whites, make sure that the bowl and beaters are grease free and that there are no yolks in with the whites; otherwise it will be impossible to create an egg white foam.
8.  Fold one-third of the egg whites into cheese sauce until almost blended. Gently fold in additional one-third. Fold in remaining egg whites.


Fold the first third of the egg foam into the yolk mixture being careful not to deflate the mixture
All of the foam has been folded into the yolk mixture.
The volume has increased, almost completely filling a 2-quart (8 cup) mixing bowl.
9.  Spoon mixture into ramekins (mixture will come almost to top). Run tip of small knife through soufflé mixture ½” from edge to help soufflés rise straight.
Knife is run 1/2" from the edge of ramekin to help soufflé rise straight.
10. Add enough boiling water to roasting pan to come almost halfway up sides of ramekins.
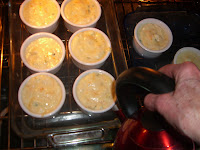
I prefer to place baking dish on the oven rack (located in middle of oven)
and then pour in the boiling water until it comes almost halfway up sides of ramekins.
11. Bake 25 to 30 minutes or until soufflés are puffed and browned.* Let ramekins stand in water bath 10 minutes after baking; remove from water bath. Place on wire rack; let stand 30 minutes or until cool enough to handle.


Soufflés straight out of the oven. They could be served now!
But if you want to serve them the next day, follow the remaining steps.
After setting in the water bath for 10 minutes,  soufflés are removed
to a cooling racking. Yes, they do deflate at this point!
12. Meanwhile, lightly spray small rimmed baking sheet with cooking spray. Run tip of small knife or thin spatula around edge of ramekins; gently turn out soufflés. Place top-side up on baking sheet.
After running a small knife around the edge of the ramekin,
I turned it upside down onto a sprayed baking dish. Then,
I used a metal spatula to turn it top-side up.
13. Cover and refrigerate overnight or until ready to reheat. Soufflés can be made to this point 1 day ahead.  
14. Bake at 400°F. for 10 minutes or until soufflés are slightly puffed and hot; serve immediately.


The next morning I placed the soufflés in the oven for 10 minutes --
they puffed and browned during this time.
*Soufflés can be served immediately in ramekins, if desired. 
 

Since this is a somewhat complicated recipe, I've included lots of photos with captions. However, those extras sometimes get in the way of the basis instructions so I've included the recipes (without photos) below . . .

Twice-Baked Cheddar-Green Onion Soufflés   Fills 8 individual ramekins (3/4 cup capacity)
6 tablespoons butter

1/3 cup seasoned dry bread crumbs
(I just add salt, pepper & paprika to plain crumbs)
½ cup finely chopped green onions (both white and green parts)

3 tablespoons all-purpose flour

1½ cups whole milk

½ teaspoon kosher salt

Dash cayenne pepper

5 eggs, separated

1¾  cups shredded Cheddar cheese 

¼  teaspoon cream of tartar


1.  Preheat oven to 350°F.
2.  Place 8 (8- to 10-oz.) ramekins or custard cups in shallow roasting or broiler pan.
3.  Melt butter in medium saucepan over medium-low heat. Brush ramekins with enough melted butter to coat (1 to 2 tablespoons); sprinkle with bread crumbs.


4.  Add chopped green onions to remaining melted butter in saucepan. Reduce heat to low; cook 2 minutes, stirring constantly.
5.  Whisk in flour; cook 2 minutes, whisking constantly. Gradually whisk in milk. Increase heat to medium; cook 5 minutes or until sauce comes to a boil and thickens, whisking constantly and adjusting heat if necessary. Whisk in salt and cayenne pepper. Let cool slightly.
6.  Whisk egg yolks in large bowl until combined; add cheese. Gradually stir in hot mixture until blended.
7.  Beat egg whites and cream of tartar in large bowl at low speed until foamy. Increase speed to medium; beat until slightly firm but not stiff peaks form, about 4 minutes. 


8.  Fold one-third of the egg whites into cheese sauce until almost blended. Gently fold in additional one-third. Fold in remaining egg whites.


9.  Spoon mixture into ramekins (mixture will come almost to top). Run tip of small knife through soufflé mixture ½” from edge to help soufflés rise straight.
10. Add enough boiling water to roasting pan to come almost halfway up sides of ramekins.
11. Bake 25 to 30 minutes or until soufflés are puffed and browned.* Let ramekins stand in water bath 10 minutes after baking; remove from water bath. Place on wire rack; let stand 30 minutes or until cool enough to handle.


12. Meanwhile, lightly spray small rimmed baking sheet with cooking spray. Run tip of small knife or thin spatula around edge of ramekins; gently turn out soufflés. Place top-side up on baking sheet.
13. Cover and refrigerate overnight or until ready to reheat. Soufflés can be made to this point 1 day ahead.  
14. Bake at 400°F. for 10 minutes or until soufflés are slightly puffed and hot; serve immediately.


*Soufflés can be served immediately in ramekins, if desired. 


RECIPE ADJUSTMENT -- making the soufflé gluten and dairy free!

Gayle Pruitt, a member of LinkedIn, saw my post in a discussion group at that site. She experimented with the recipe making it gluten and dairy free. Here’s what she did:
  • Substituted 6 tablespoons olive oil for 6 tablespoons of butter.
  • For the bread crumbs, she used gluten free bread toasted Udi's® Millet Chia bread).
  • Used gluten-free all purpose flour rather than the usual flour.
  • Instead of 1½ cups whole milk she used 1 cup of carrot juice (she purchases it in a glass jar) + 1 teaspoon of olive oil. Also omitted the cheese.
     She also explained, “
This was wonderful. I invited my neighbor over just to see what she thought; she loved it and could not believe l that I didn't use cheese. Because I had a lot of broccoli, I sautéed 1 cup of chopped broccoli and 1/2 cup of chopped asparagus along with the 1/2 cup of green onions. Light and delicious.”
     Presently Gayle is working on a new cookbook and plans to include the adjusted recipe in that book.
Gayle's Gluten & Dairy Free Veggie Soufflés
Gayle's first cookbook is titled Dog-Gone Good Cookbook for Humans and their Canine Kids (St. Martin's Press). Her second book (the one she's working on now) will be titled Dog-Gone Good Cookbook for When You or Your Canine Kids gets Sick; it will feature meals for specific illnesses like heart disease, diabetes, kidney stones, cancer, and so forth.
Update on 2/24/14 -- Gayle's book is NOW available. Check out her book review @ NYDailyNews.com / Food.  In a recent email she wrote, "I promised I would mention you in my book that you were the inspiration for the Twice-Baked Souffles. You are on page 103."