Stollen was my challenge . . . after binge watching The British Baking Show, I decided I needed to try something new. This was my first time to make Stollen and the first time to make marzipan. Actually the first time to taste Stollen and I think it is incredible . . . just to be sure I polished off four slices right after it cooled enough to eat.
The authentic German recipe came from The Daring Gourmet. I did play around with the flavors—added cranberries and using less candied citrus, relying on just candied orange.
It was a lot of work and I was a bit worried when the internal temperature was only 160° at the end of the baking time; the bottom of the loaves were also soft. So, I covered it with foil and put it back in the oven. It baked at least 15 more minutes in order to brown on the bottom. I also realized that I had to be careful to place the temperature probe so that it was not positioned in the log of marzipan in the middle of the loaf.
Stollen (German Christmas Bread) Makes 2 large or 3 medium Stollen.
Fruits & Nuts:
2 cups raisins & raisins
3/4 cups lightly packed candied orange peel (about 3 ozs., finely diced (homemade recipe follows)
3/4 blanched slivered or sliced almonds , finely chopped
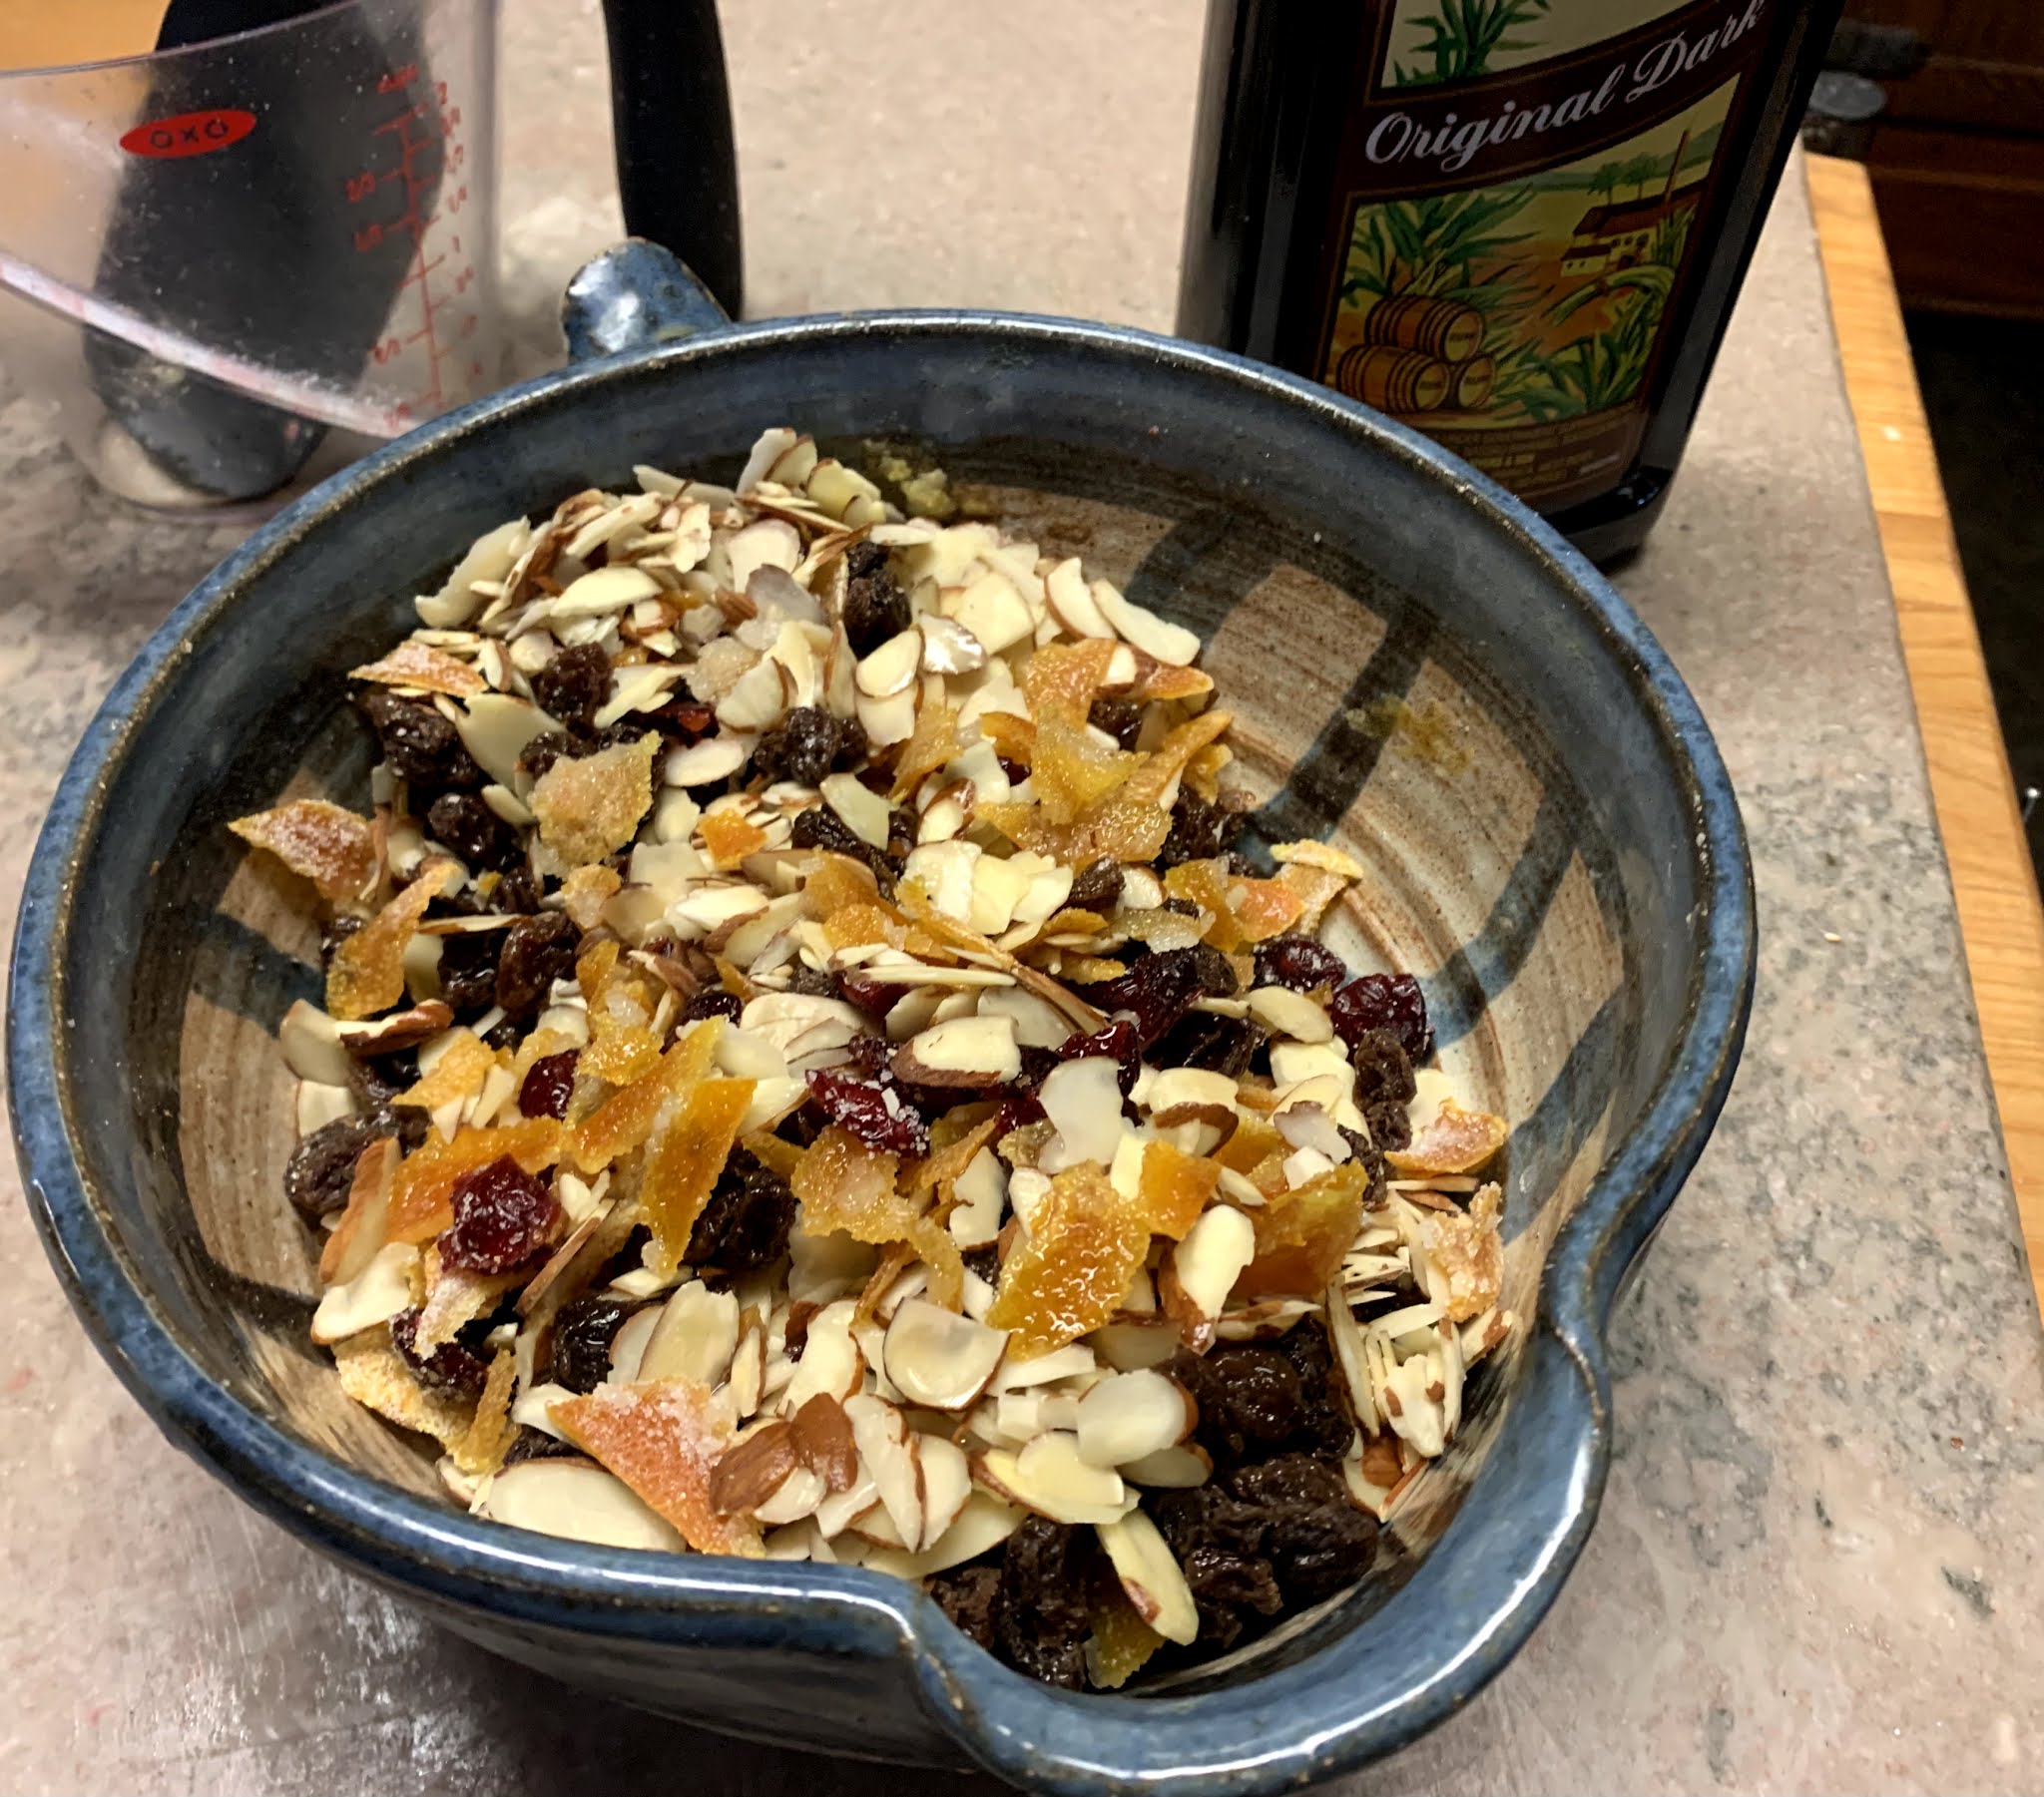
1/3 cup quality dark rum (or could substitute orange juice)
Dough:
1 cup lukewarm whole milk (110 – 115°)
1 tablespoon active dry yeast
1/2 cup granulated sugar
About 4 cups all-purpose flour
1 large egg
2 large egg yolks
3/4 cup softened butter (1 1/2 sticks)
2 teaspoons vanilla
1 teaspoon salt
3/4 teaspoon ground cardamom
3/4 teaspoon ground nutmeg
1/2 teaspoon ground cinnamon
8 ounces Marzipan/Almond Paste (homemade recipe follows), divided in half
Glaze & Dusting:
1/2 to 1 stick butter, melted (original recipe called for 1 cup but both loaves were saturated with butter)
Lots of powdered sugar for generous dusting
- Place the raisins, craisins, candied citrus peel and almonds in a medium bowl. |Pour the rum over them and stir to combine. Set aside and let the fruit mixture soak in the rum while the dough rises.
- Stir the yeast and 2 tablespoons of the sugar into the lukewarm milk and let sit in a warm place for 10 to 15 minutes until very frothy.
- Place 3 cups of flour, remaining sugar, egg, egg yolks, butter, vanilla extract, lemon zest, salt, cardamom, mace and cinnamon in the bowl of a stand mixer fitted with a dough hook. Add the yeast/milk mixture. Use a spoon to stir the mixture until it comes together.
- Knead the dough for 7 to 8 minutes.
- Remove the dough ball, lightly spray the bowl with a little oil, return the dough ball, cover loosely with plastic wrap and place it in a warm place or lightly warmed oven (just barely warm), to rise until nearly doubled in size, at least 1 hour.
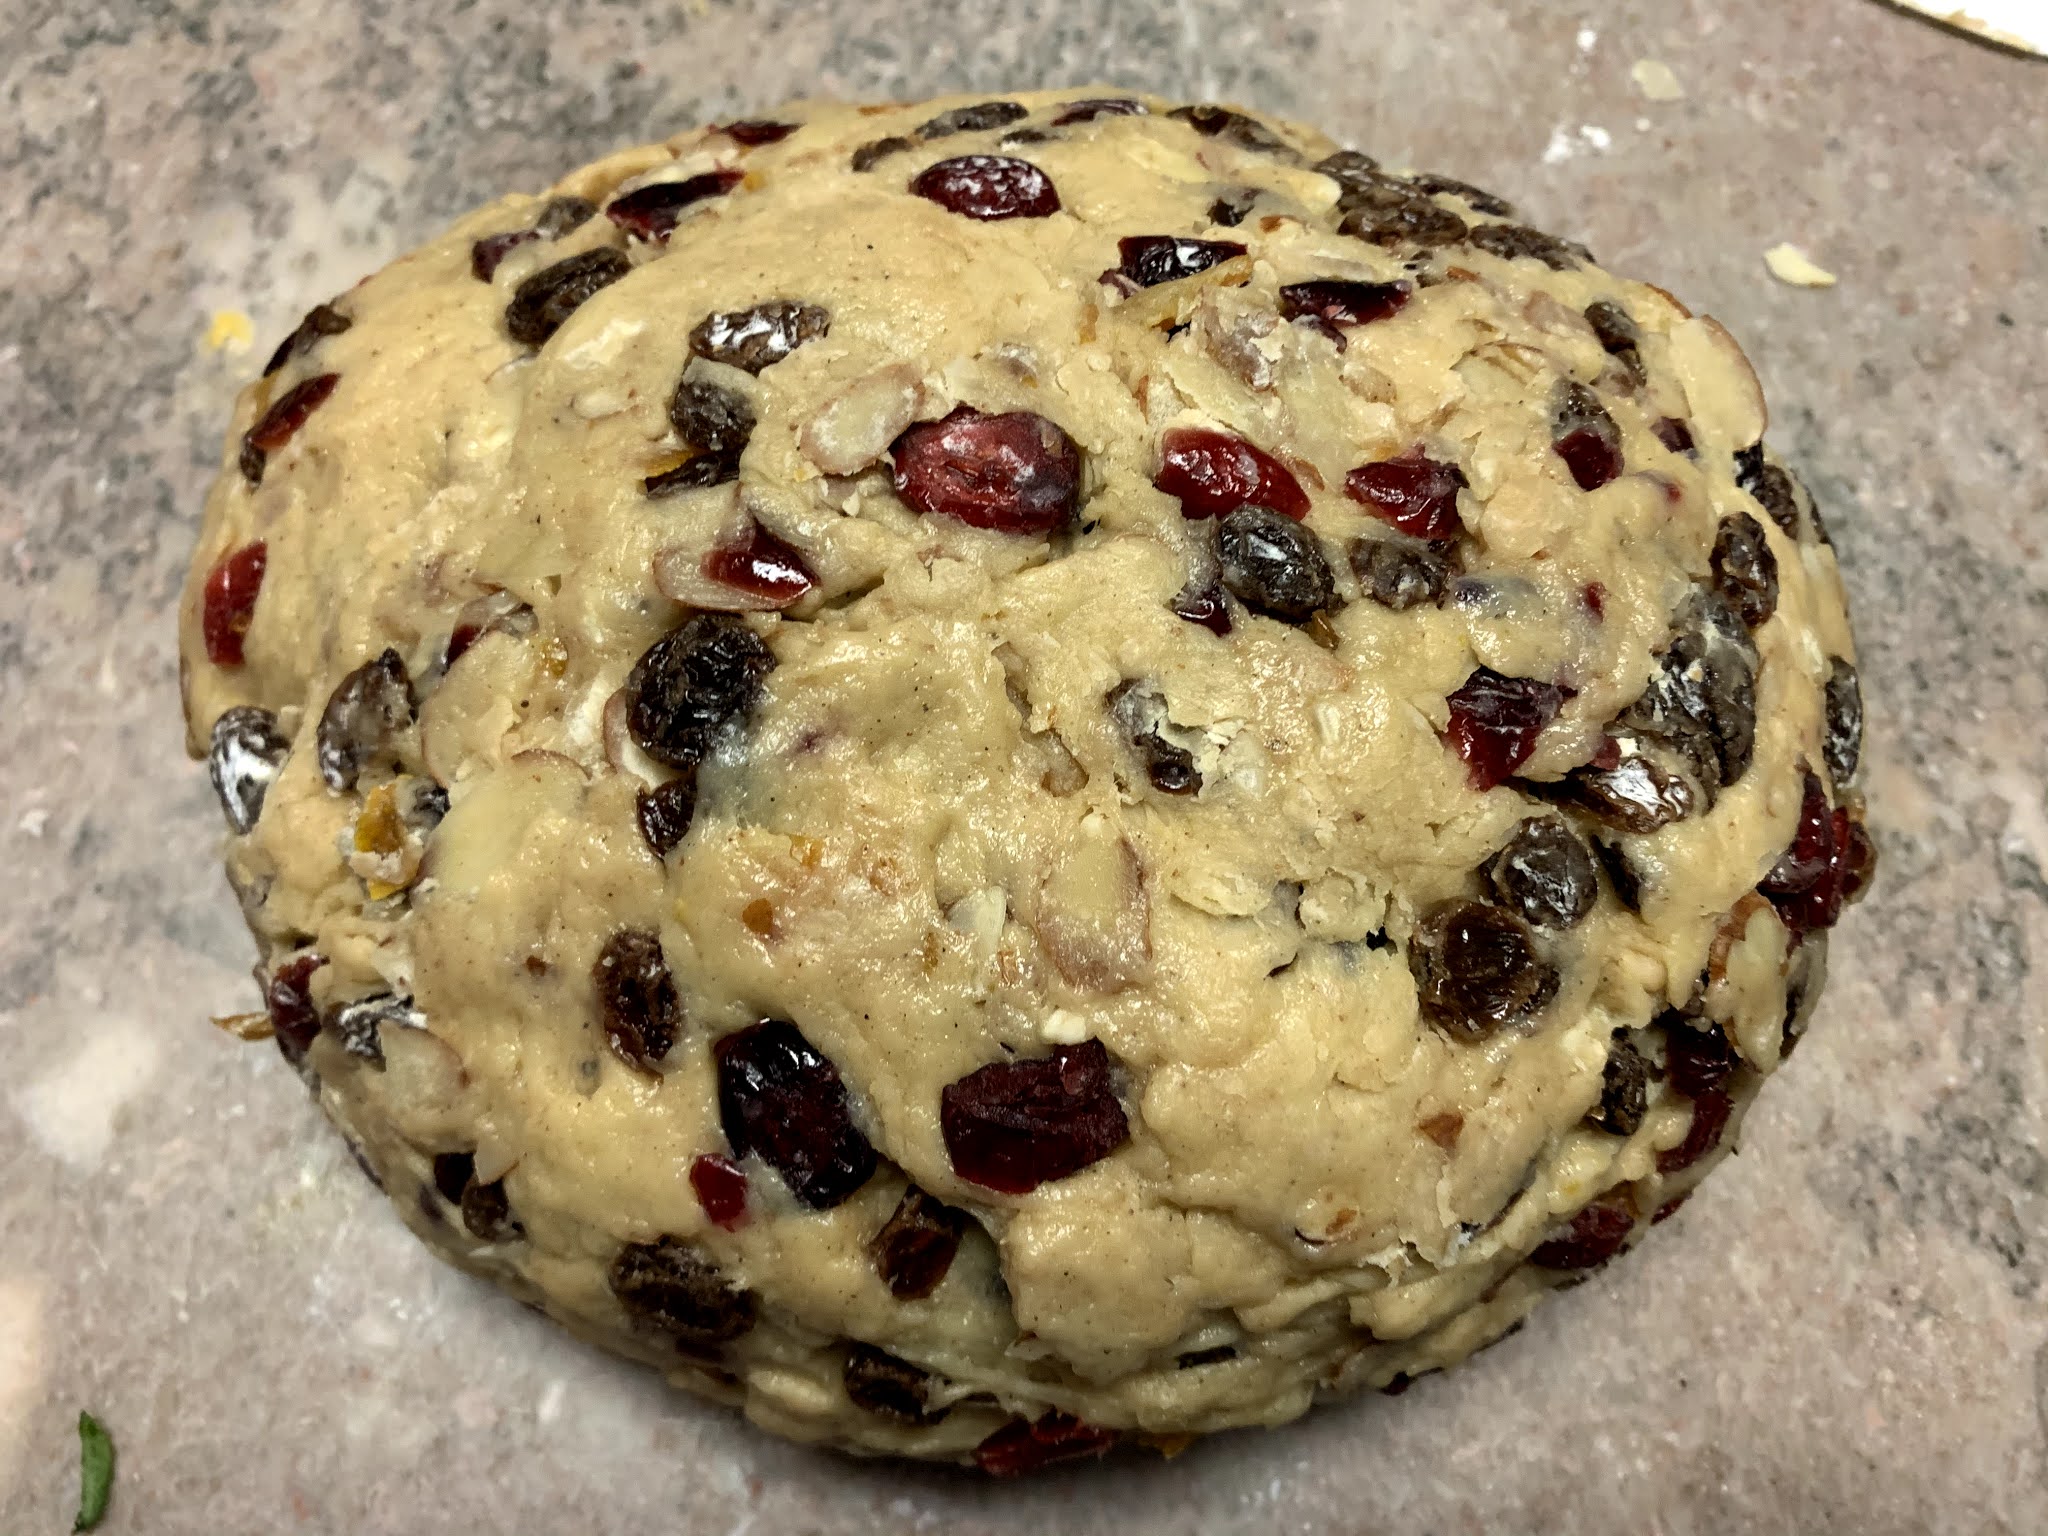
- Punch down the dough and add the soaked fruit/nut mixture to the dough (it should have absorbed all the rum by now but if there is excess liquid, pour it out before adding the mixture to the dough). Using the dough hook, knead the fruit/nut mixture into the dough until combined. If the dough is too wet to handle, add a little bit of flour until the dough pulls away from the sides of the bowl.
- Turn the dough out onto a floured work surface and cut it in two equal halves. Press or roll each piece into an oval to about 1 inch thickness.
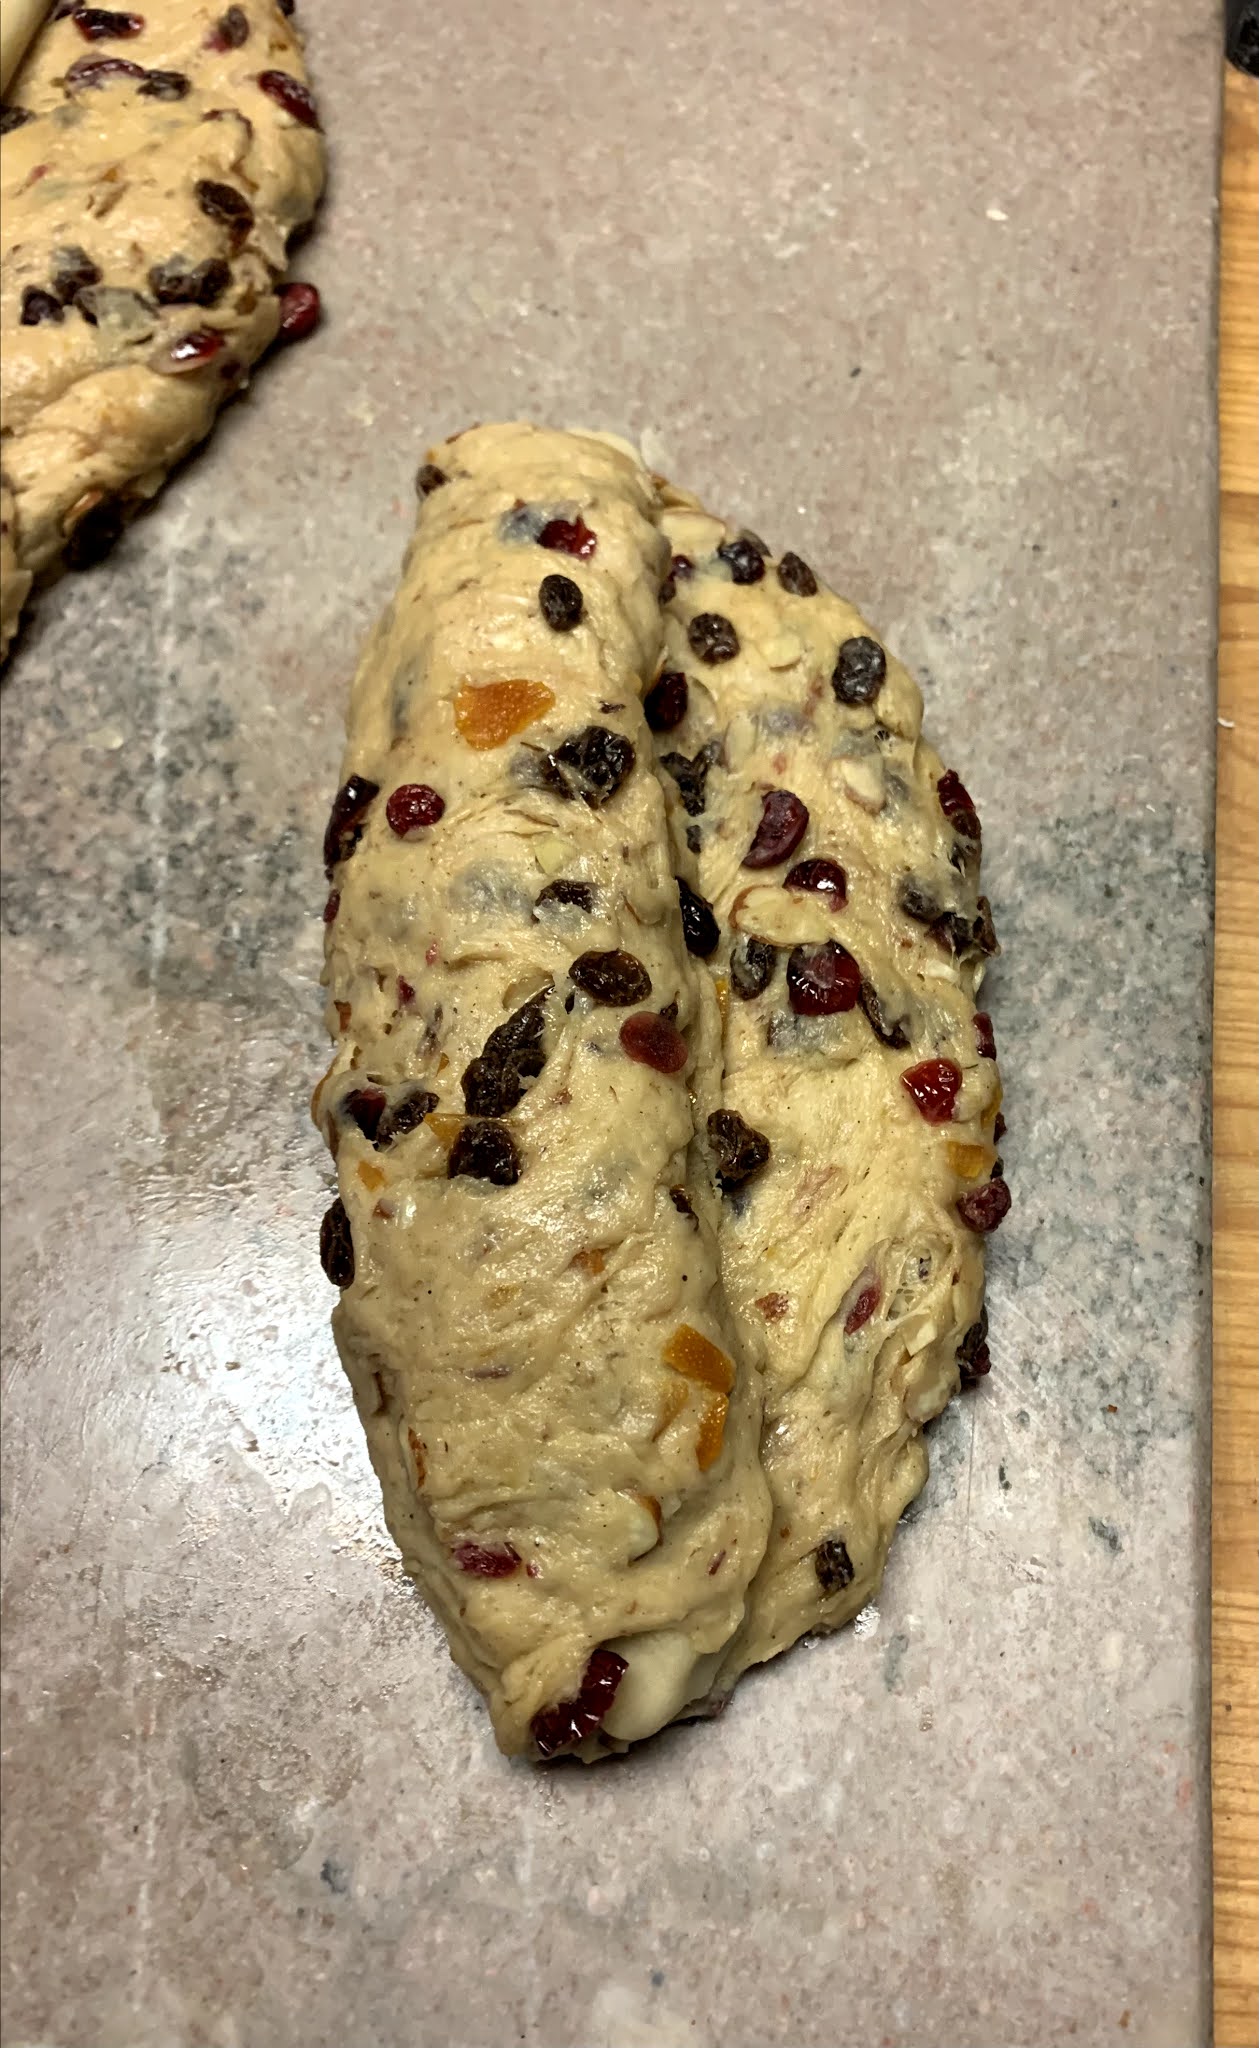
- Roll each piece of marzipan into a log the length of the oval. Press the marzipan gently into the middle of the dough.
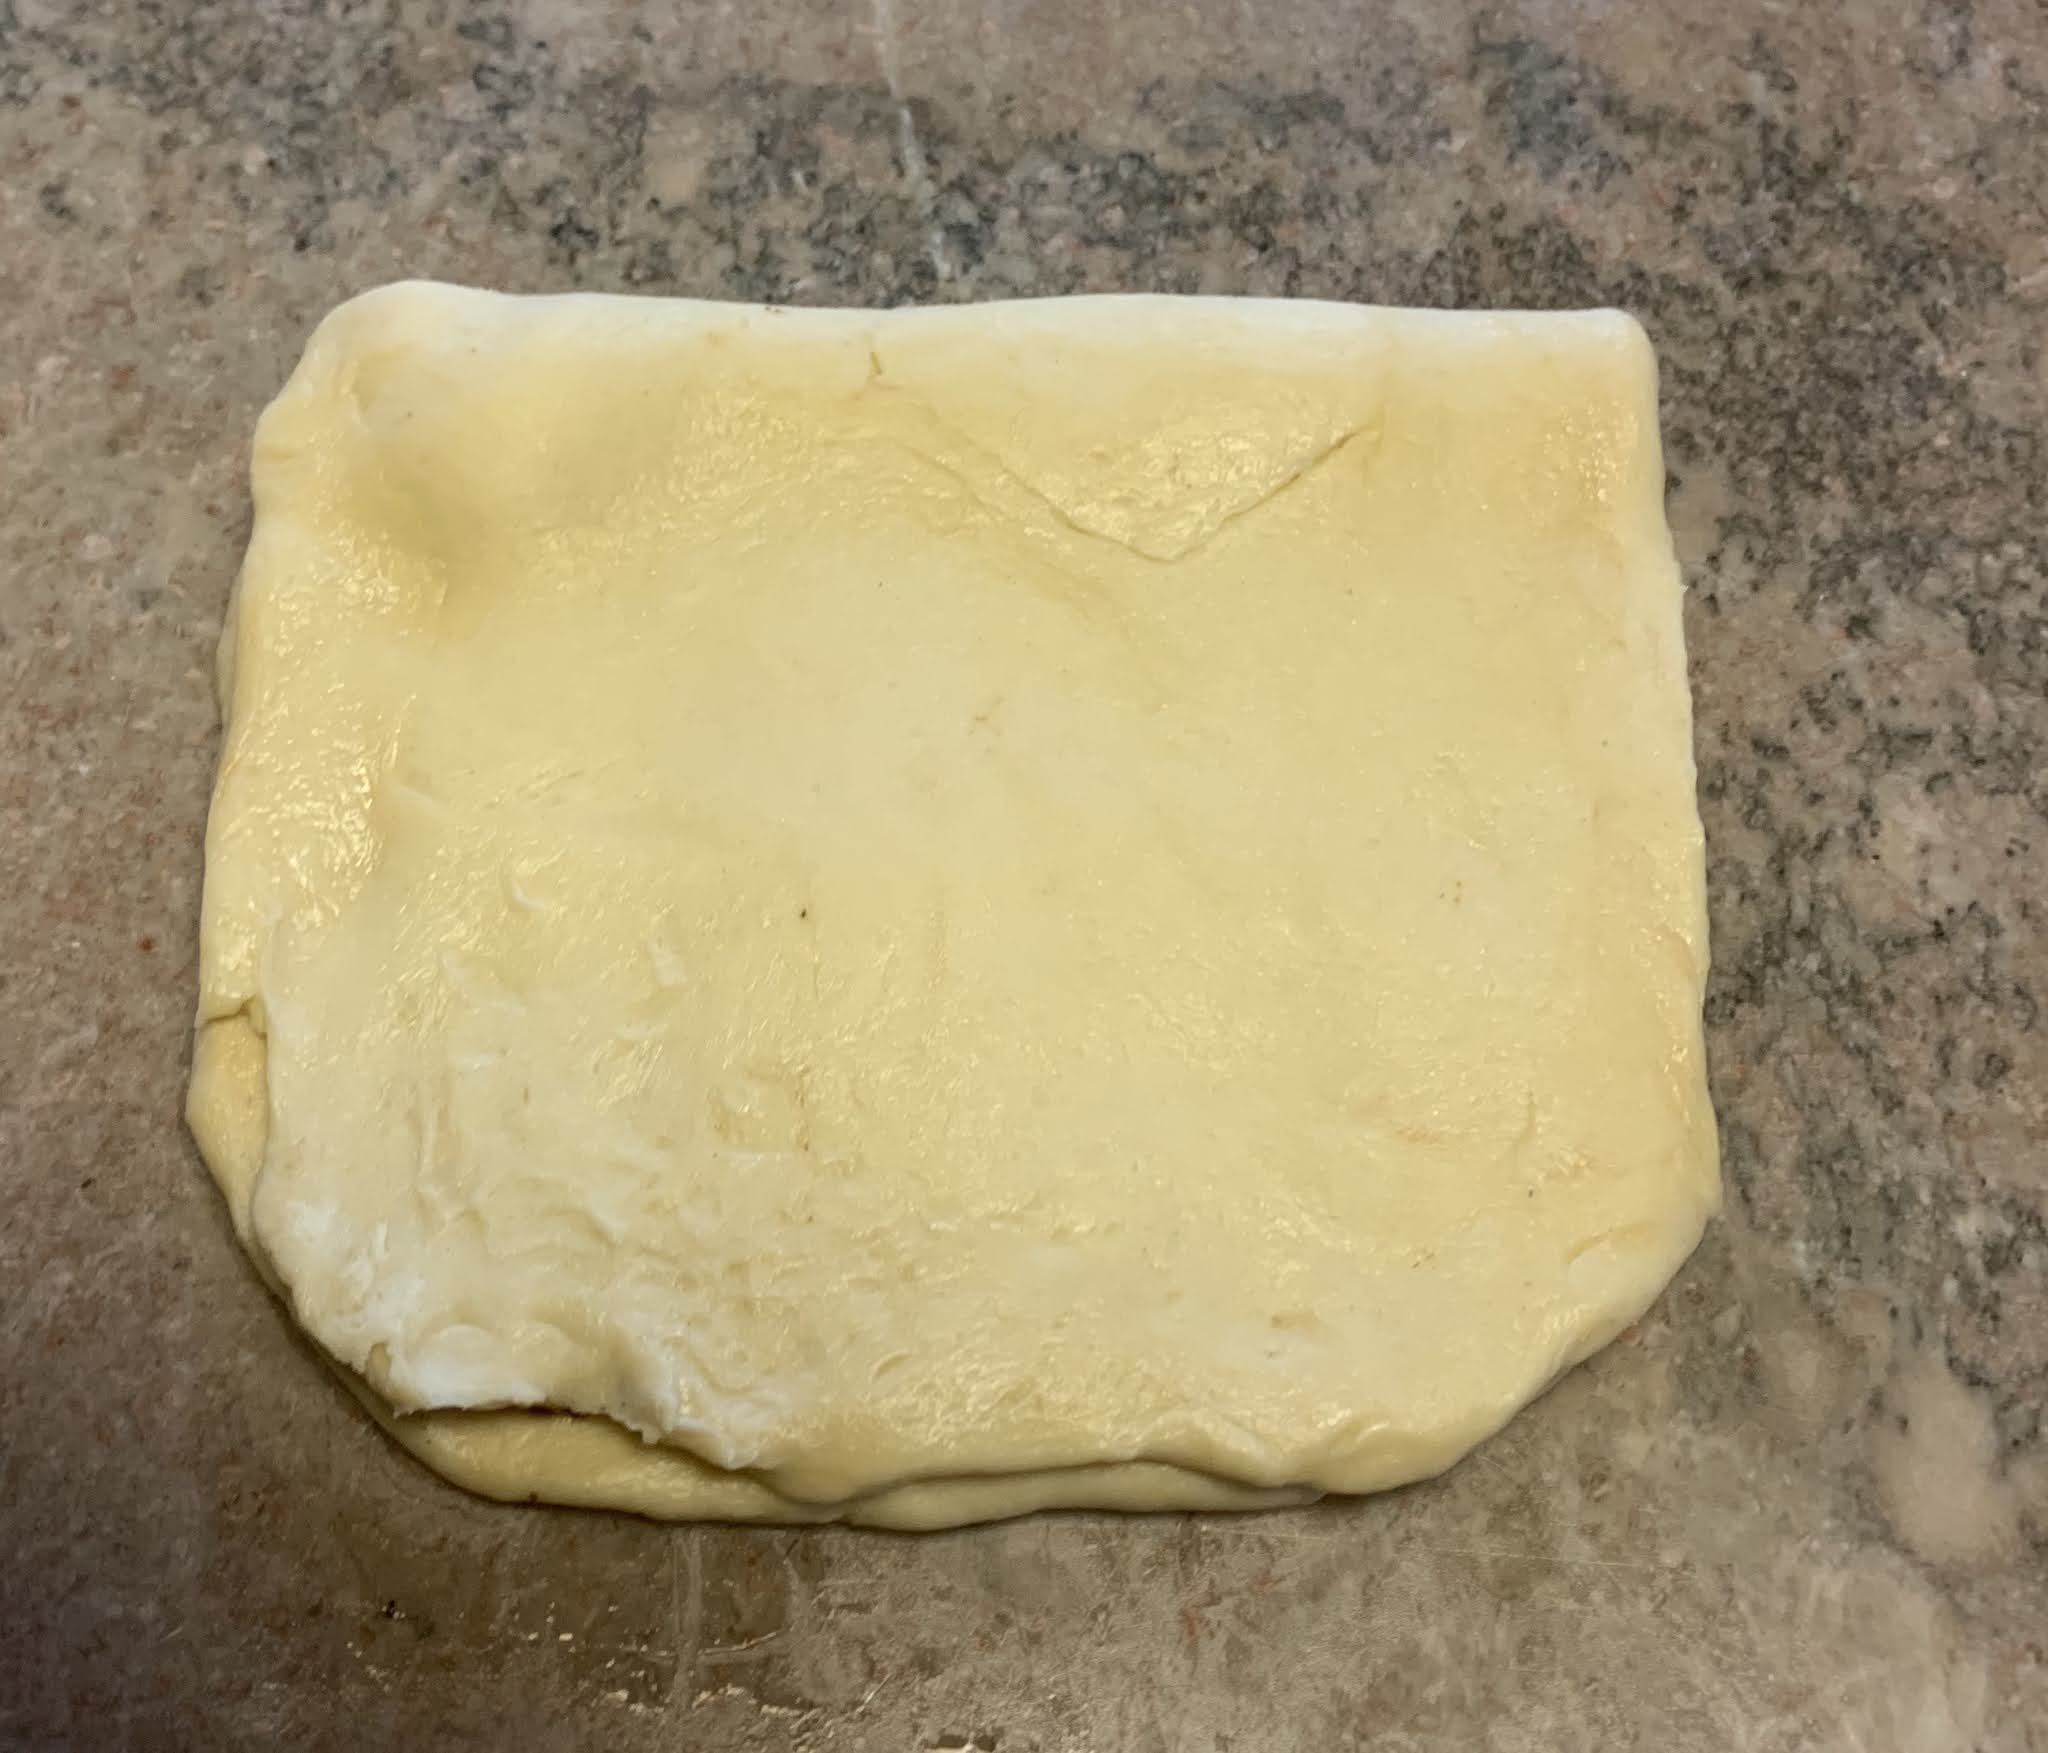
- Fold the left side of the dough over to cover the marzipan, then fold right side over on top of the left side so that the edge of it sits just left of the middle of the stolen. In other words, don't fold the right side all the way over to the left edge of the stollen. Pinch and tuck the top and bottom ends of the stollen to cover the marzipan.
- Use the bottom edge of your hand to press down along the length of the stollen towards the right of the center to create a divot and characteristic hump.
- Place the stollen on a silicon lined baking sheet (or use sprayed parchement). Cover the stollen loosely with plastic wrap and let them rest in a warm place or lightly warmed oven for 40 to 60 minutes until puffy. At that point you can pick off any raisins that are sticking out of the dough (they will burn during baking).
- Towards the end of the last rise, preheat the oven to 350° and bake the stollen for 30 to 40 minutes or until an instant read thermometer registers at 190°— the bread should be golden on top and should yield a hollow sound when tapped on the bottom. (It took mine an additional 15 minutes to bake. Note: Be sure to place the thermometer in the bread and not in the log of marzipan in the center of the loaf.)
- Let the bread sit for 5 minutes, then use a toothpick to poke holes all over the stollen (this will allow the butter to seep in), then generously brush the stollen with the melted butter while the stollen are still warm.
- Immediately sprinkle with a generous amount of powdered sugar, rubbing it into the creases and down the sides. Let the stollen cool completely. Dust again with powdered sugar once loaves have cooled.
- The stollen can be sliced and eaten now or wrapped tightly (wrap in plastic wrap then foil) and left to "ripen" in a cool place for 2 weeks. The liquid from the dried fruits will further penetrate the dough for more flavor and moisture. Stollen can also be frozen for longer storage.
Homemade Marzipan or Almond Paste Yield: 12 to 13 ounces
1 1/2 cups very finely ground blanched almond flour/meal or blanch, grind and dry your own almonds - I recommend the bought almond meal to ensure it's finely ground and sufficiently dry
1 1/2 cups powdered sugar
2 teaspoons quality pure almond extract
1 teaspoon quality food grade rose water (use vanilla if rose water is not available)
1 egg white (vegan: use egg substitute 3+ tablespoons corn syrup)
- Place the almond flour and powdered sugar in a food processor and pulse until combined and any lumps are broken up. Add the almond extract and rose water and pulse to combine. Add the egg white and process until a thick dough is formed. If the mass is still too wet and sticky, add more powdered sugar and ground almonds. Keep in mind that it will become firmer after it's been refrigerated.
- Turn the almond marzipan out onto a work surface and knead it a few times. Form it into a log, wrap it up in plastic wrap and refrigerate.
- Will keep for at least a month in the refrigerator or up to 6 months in the freezer. Bring to room temperature before using in any recipe.
NOTES: If concerned about raw egg, use pasteurized egg whites in the carton instead.
DIFFERENCE between Marzipan vs. Almond Paste: Almond paste is softer and is used in baked goods. Marzipan is firmer and is used in making candies/chocolates or as fondant for cakes. Marzipan also uses rose water. To adjust this recipe according to what you're using it for, follow this recipe as instructed for almond paste (I still include the rose water because it tastes amazing), or add an extra 1/4 cup or more of almond flour/meal until you reach a firmer consistency (one that you can roll out with a rolling pin without it sticking) for marzipan.
Candied Citrus Peel Yield: approximately 8 ounces
Candied citrus peel is easy to make yourself, contains no chemicals or additives, and tastes MUCH better than store-bought!
3 Valencia or Naval oranges and 4 lemons (can also use 4 lemons or the equivalent of grapefruits, Meyer lemons and limes, or any citrus of your choice) thoroughly washed and scrubbed
2 cups granulated sugar
1 cup water
Fine granulated sugar for coating (granulated sugar can be whirled in blender to make it finer)
- Slice both ends of the citrus fruits. Cut the peel on each into 4 or more vertical segments, depending on the size of the fruit. Peel off each segment of rind. (You can remove a little of the white pith, though not necessary. The pith is bitter but the blanching process below will help reduce the bitterness. Note that if you remove the white pith, the thinner the peels are the harder and more leathery they will be when they’re candied.)
- Slice the peels into 1/4 inch wide strips. (Keep the peeled citrus for eating, cooking, juicing, etc.)
- Boil the peels in a pot of water for 15 minutes. Drain the peels in a colander, rinse and then drain again. Discard the water from the pot.
Repeat this process one or two more times to reduce the bitter flavor.
- Add the 1 cup of fresh water and the sugar to the pot and bring it to a boil. Boil it for a couple of minutes until the sugar is dissolved. Add the citrus peels, reduce the heat to low and simmer for 45 to 60 minutes, stirring occasionally, until the peels become translucent and the syrup becomes lightly syrupy (on a candy thermometer this will be be approximately soft ball stage).
- Use a slotted spoon to remove a few of the peels at a time and let the excess syrup drip off for a few seconds. Place the hot, wet peels in a bowl of sugar or a ziplock bag with sugar in it and toss/shake to coat.
- Spread the candied citrus peels out on a wire rack to cool and dry completely— 1 to 2 days.
- Stored in an airtight container in a cool, dry place, the candied citrus peel will keep for at least a month. They'll keep even longer in the fridge and for a few months frozen.
NOTES: If candied citrus peel gets hard after a while don't worry - they will soften up as they bake.
To keep the candied peels softer, you can limit the drying time, skip the final sugar coating step and put the peels in a ziplock bag and either refrigerate or freeze them.
Recipe without photos . . .
Stollen (German Christmas Bread) Makes 2 large or 3 medium Stollen.
Fruits & Nuts:
2 cups raisins & raisins
3/4 cups lightly packed candied orange peel (about 3 ozs., finely diced (homemade recipe above)
3/4 blanched slivered or sliced almonds , finely chopped
1/3 cup quality dark rum (or could substitute orange juice)
Dough:
1 cup lukewarm whole milk (110 – 115°)
1 tablespoon active dry yeast
1/2 cup granulated sugar
About 4 cups all-purpose flour
1 large egg
2 large egg yolks
3/4 cup softened butter (1 1/2 sticks)
2 teaspoons vanilla
1 teaspoon salt
3/4 teaspoon ground cardamom
3/4 teaspoon ground nutmeg
1/2 teaspoon ground cinnamon
8 ounces Marzipan/Almond Paste (homemade recipe above), divided in half
Glaze & Dusting:
1/2 to 1 stick butter, melted (original recipe called for 1 cup but both loaves were saturated with butter)
Lots of powdered sugar for generous dusting
- Place the raisins, craisins, candied citrus peel and almonds in a medium bowl. |Pour the rum over them and stir to combine. Set aside and let the fruit mixture soak in the rum while the dough rises.
- Stir the yeast and 2 tablespoons of the sugar into the lukewarm milk and let sit in a warm place for 10 to 15 minutes until very frothy.
- Place 3 cups of flour, remaining sugar, egg, egg yolks, butter, vanilla extract, lemon zest, salt, cardamom, mace and cinnamon in the bowl of a stand mixer fitted with a dough hook. Add the yeast/milk mixture. Use a spoon to stir the mixture until it comes together.
- Knead the dough for 7 to 8 minutes.
- Remove the dough ball, lightly spray the bowl with a little oil, return the dough ball, cover loosely with plastic wrap and place it in a warm place or lightly warmed oven (just barely warm), to rise until nearly doubled in size, at least 1 hour.
- Punch down the dough and add the soaked fruit/nut mixture to the dough (it should have absorbed all the rum by now but if there is excess liquid, pour it out before adding the mixture to the dough). Using the dough hook, knead the fruit/nut mixture into the dough until combined. If the dough is too wet to handle, add a little bit of flour until the dough pulls away from the sides of the bowl.
- Turn the dough out onto a floured work surface and cut it in two equal halves. Press or roll each piece into an oval to about 1 inch thickness.
- Roll each piece of marzipan into a log the length of the oval. Press the marzipan gently into the middle of the dough.
- Fold the left side of the dough over to cover the marzipan, then fold right side over on top of the left side so that the edge of it sits just left of the middle of the stolen. In other words, don't fold the right side all the way over to the left edge of the stollen. Pinch and tuck the top and bottom ends of the stollen to cover the marzipan.
- Use the bottom edge of your hand to press down along the length of the stollen towards the right of the center to create a divot and characteristic hump.
- Place the stollen on a silicon lined baking sheet (or use sprayed parchement). Cover the stollen loosely with plastic wrap and let them rest in a warm place or lightly warmed oven for 40 to 60 minutes until puffy. At that point you can pick off any raisins that are sticking out of the dough (they will burn during baking).
- Towards the end of the last rise, preheat the oven to 350° and bake the stollen for 30 to 40 minutes or until an instant read thermometer registers at 190°— the bread should be golden on top and should yield a hollow sound when tapped on the bottom. (It took mine an additional 15 minutes to bake. Note: Be sure to place the thermometer in the bread and not in the log of marzipan in the center of the loaf.)
- Let the bread sit for 5 minutes, then use a toothpick to poke holes all over the stollen (this will allow the butter to seep in), then generously brush the stollen with the melted butter while the stollen are still warm.
- Immediately sprinkle with a generous amount of powdered sugar, rubbing it into the creases and down the sides. Let the stollen cool completely. Dust again with powdered sugar once loaves have cooled.
- The stollen can be sliced and eaten now or wrapped tightly (wrap in plastic wrap then foil) and left to "ripen" in a cool place for 2 weeks. The liquid from the dried fruits will further penetrate the dough for more flavor and moisture. Stollen can also be frozen for longer storage.