Showing posts with label Egg Yolks. Show all posts

Grandma Richardson’s German Chocolate Cake recipe & style

This was one of Grandma Richardson’s signature cakes that often took center stage on her cherry wood buffet overlooking the matching dining room table. It was a celebratory cake that signaled a special occasion . . .  a birthday or a family gathering.              Although the cake recipe is fairly standard, the style for German chocolate cakes seems to vary. Some divide the coconut pecan filling over the three layers foregoing the chocolate frosting. Grandma always sandwiched the filling between two layer and then coated the entire cake is luscious chocolate frosting, creating a decadently delicious cake

I made Grandma's celebratory cake for a friend's birthday celebration.


Grandma Richardson’s German Chocolate Cake    Yield: one 3-layer cake (9-inch cake rounds)

1/4 cup baking cocoa                                                                           

1/2 c. boiling water                                                                  

1 cup (2 sticks) + 3 tablespoons butter, softened                              

2 1/4 cups granulated sugar                                                                 

1 teaspoon vanilla extract                                                                      

4 eggs

2 cups all-purpose flour

1 teaspoon baking soda

1 cup buttermilk (or use sour milk prepared by combining 1 tablespoon white vinegar plus milk to equal l cup)

  1. Grease and flour three 9" round baking pans. Preheat oven to 350°F. 
  2. In small bowl, stir together cocoa and water until smooth. Set aside.

  3. In large mixing bowl, beat butter, sugar & vanilla until light and fluffy.  

  4. Add eggs, one at a time, beating well. 

  5. Add cocoa mixture. 
  6. Stir together flour, baking soda & salt; add to butter mixture and buttermilk, beating just enough to blend.  

  7. Pour batter into prepared pans. 

  8. Bake 20 to 26 minutes or until top springs back when touched lightly (instant read thermometer should register at 205-210°F).  
  9. Cool 5 minutes remove from pans to wire racks and let layers cool completely.
  10. To assemble cooled layers: place a layer of cake plate and then spread with half the coconut pecan filling. Add second layer and spread with remaining coconut pecan filling. Add third layer and frost top and sides with chocolate frosting. 

Coconut Pecan Filling                                                                                                        

1 can (14 oz.) sweetened condensed milk       

3 egg yolks, slightly beaten                             

1/2 cup (1 stick) butter                                               

1 teaspoon vanilla extract

1 1/3 cups sweetened coconut flakes

1 cup chopped pecans 

  1. In medium saucepan, stir together milk, egg yolks and butter.  Cook over low heat, stirring constantly, until moisture is thickened and bubbly. 

  2.  Remove from heat; stir in vanilla, coconut and pecans.  

  3. Cool to room temperature. 
  4. Spread between layers. 

Chocolate Frosting     Yield: About 2 1/4 c. frosting.

1/2 cup butter                                                                                                        

1 teaspoon vanilla

1 lb. (3 1/4 cups unsifted) confectioners (powdered) sugar

1/2 cup minus 1 tablespoon milk

1/2 cup baking cocoa   

  1. Melt butter over low heat in small saucepan.  
  2. Add cocoa; heat, stirring constantly, just until mixture begins to boil. Remove from heat.and pour into mixing bowl.
  3. Add confectioner sugar alternately with milk.  Beat to spreading consistency; blend in vanilla.  
  4. Spread frosting while warm. 
Recipe without photos . . . Grandma Richardson’s German Chocolate Cake    Yield: one 3-layer cake (9-inch cake rounds)

1/4 cup baking cocoa                                                                           

1/2 c. boiling water                                                                  

1 cup (2 sticks) + 3 tablespoons butter, softened                              

2 1/4 cups granulated sugar                                                                 

1 teaspoon vanilla extract                                                                      

4 eggs

2 cups all-purpose flour

1 teaspoon baking soda

1 cup buttermilk (or use sour milk prepared by combining 1 tablespoon white vinegar plus milk to equal l cup)

  1. Grease and flour three 9" round baking pans. Preheat oven to 350°F. 
  2. In small bowl, stir together cocoa and water until smooth. Set aside.
  3. In large mixing bowl, beat butter, sugar & vanilla until light and fluffy.  
  4. Add eggs, one at a time, beating well. 
  5. Add cocoa mixture. 
  6. Stir together flour, baking soda & salt; add to butter mixture and buttermilk, beating just enough to blend.  
  7. Pour batter into prepared pans. 
  8. Bake 20 to 26 minutes or until top springs back when touched lightly (instant read thermometer should register at 205-210°F).  
  9. Cool 5 minutes remove from pans to wire racks and let layers cool completely.
  10. To assemble cooled layers: place a layer of cake plate and then spread with half the coconut pecan filling. Add second layer and spread with remaining coconut pecan filling. Add third layer and frost top and sides with chocolate frosting.

Coconut Pecan Filling                                                                                                        

1 can (14 oz.) sweetened condensed milk       

3 egg yolks, slightly beaten                             

1/2 cup (1 stick) butter                                               

1 teaspoon vanilla extract

1 1/3 cups sweetened coconut flakes

1 cup chopped pecans 

  1. In medium saucepan, stir together milk, egg yolks and butter.  Cook over low heat, stirring constantly, until moisture is thickened and bubbly. 
  2.  Remove from heat; stir in vanilla, coconut and pecans.  
  3. Cool to room temperature. 
  4. Spread between layers. 

Chocolate Frosting     Yield: About 2 1/4 c. frosting.

1/2 cup butter                                                                                                        

1 teaspoon vanilla

1 lb. (3 1/4 cups unsifted) confectioners (powdered) sugar

1/2 cup minus 1 tablespoon milk

1/2 cup baking cocoa   

  1. Melt butter over low heat in small saucepan.  
  2. Add cocoa; heat, stirring constantly, just until mixture begins to boil. Remove from heat.and pour into mixing bowl.
  3. Add confectioner sugar alternately with milk.  Beat to spreading consistency; blend in vanilla.  
  4. Spread frosting while warm. 


Mamie Eisenhower's Sugar Cookies

Living in the town where President Dwight David Eisenhower grew up and catering at the Eisenhower Center for several years, I've made Mamie's sugar cookie recipe more than once. This time it was for a special Abilene reception for Women of Excellence, an event planned by the Dickinson County Democratic Party. I used pink colored sprinkles as that was Mamie's favorite color.

Mamie's pink sugar cookies are display on the 3-tier stand.

Mamie Eisenhower's Sugar Cookies  Yield: About 2 1/2 – 3 dozen depending on size of cutter
1/2 cup (1 stick) butter, softened
1 cup granulated sugar
2 egg yolks
1 teaspoon vanilla 
1 1/2 cup all-purpose flour
1/2 teaspoon salt
1 teaspoon baking powder
1 tablespoon milk or cream

Colored sugar for sprinkling

  1. Combine the butter and sugar in a mixing bowl. Beat on medium speed with an electric mixer until fluffy. With the mixer running, add the egg yolks and vanilla. 
  2. Sift the flour, salt, and baking powder into a bowl. With the mixer running, slowly add the flour mixture and the cream to the butter mixture. 
  3. Cover the bowl and place in the refrigerator to chill for one hour. 
  4. Preheat the oven to 375 degrees F. 
  5. Turn the cookie dough out onto a lightly floured surface. Roll out the dough and then cut as desired with cookie cutters. Place the cookies on a baking sheet. Sprinkle with colored sugar. 
  6. Place the baking sheet in the oven and bake at 375° F for 10 to 12 minutes. Remove from the oven and let cool on the baking sheet for 5 minutes then transfer the cookies to a wire rack. Let cool completely then store in an airtight container. 
  7. Variation: instead of the colored sugar, bake the cookies plain and then when cool spread with frosting or a powdered sugar glaze as desired.

Red Velvet Crinkle Cookies

Ho, ho, ho . . . these are definitely the cookies that would entice Santa and Mrs. Clause and any of their many helpers. I found these festive cookies at Live Well Bake Often blog along with a useful tip for coating them with powdered sugar + suggestions for making them ahead and freezing. 


Red Velvet Crinkles Cookies     Makes approximately 2 dozen 

1 ¾ cups all-purpose flour  (220 grams)

3 tablespoons natural unsweetened or Dutch process cocoa powder (16 grams)

1 ½ teaspoons baking powder

¼ teaspoon salt

½ cup unsalted butter softened (115 grams)

¾ cup packed light brown sugar (150 grams)

¼ cup granulated sugar (50 grams)

1 large egg at room temperature

1 large egg yolk at room temperature

1 teaspoon pure vanilla extract

1 tablespoon liquid red food coloring (15 ml)

Coating:

¼ cup granulated sugar (50 grams)

½ cup powdered sugar (60 grams)

  1. Preheat the oven to 350°F (180°C). Line two large baking sheets with parchment paper or silicone baking mats and set aside.
  2. In a large mixing bowl, sift the flour and cocoa powder together, then whisk in the baking powder and salt until well combined.
  3. In the bowl of a stand mixer fitted with the paddle attachment, or in a large mixing bowl using a handheld mixer, beat the butter until smooth. 
  4. Mix in the brown sugar and granulated sugar for 1 to 2 minutes or until well combined.
  5. Mix in the egg, egg yolk, vanilla extract, and red food coloring, making sure to stop and scrape down the sides of the bowl as needed.
  6. Mix in the dry ingredients until just combined.
  7. Using a 1 tablespoon cookie scoop, scoop the cookie dough onto the prepared baking sheets.
  8. Roll each ball of cookie dough in the granulated sugar (this will help the powdered sugar stick to the cookies better), then generously coat in the powdered sugar.
  9. Return to the prepared baking sheets, making sure to leave 2-inches between each ball of cookie dough.
  10. Bake for 10 to 12 minutes or until the tops of the cookies are set. Remove from the oven and allow the cookies to cool on the baking sheets for 5 to 10 minutes, then carefully transfer the cookies to a wire rack to cool completely.
  11. Store cookies in an airtight container at room temperature for up to five days.

Freezing Instructions: Scoop the cookie dough onto a parchment-lined baking sheet and freeze for 1 to 2 hours. Once frozen, transfer the cookie dough to a large freezer bag and freeze for up to 3 months. Thaw the cookie dough balls overnight in the refrigerator, coat in the granulated sugar and powdered sugar, and bake as directed.

Baked cookies will also freeze well for up to 3 months, thaw to room temperature before serving.


Recipe without photos . . . Red Velvet Crinkle Cookies     Makes approximately 2 dozen 

1 ¾ cups all-purpose flour  (220 grams)

3 tablespoons natural unsweetened or Dutch process cocoa powder (16 grams)

1 ½ teaspoons baking powder

¼ teaspoon salt

½ cup unsalted butter softened (115 grams)

¾ cup packed light brown sugar (150 grams)

¼ cup granulated sugar (50 grams)

1 large egg at room temperature

1 large egg yolk at room temperature

1 teaspoon pure vanilla extract

1 tablespoon liquid red food coloring (15 ml)

Coating:

¼ cup granulated sugar (50 grams)

½ cup powdered sugar (60 grams)

  1. Preheat the oven to 350°F (180°C). Line two large baking sheets with parchment paper or silicone baking mats and set aside.
  2. In a  mixing bowl, sift the flour and cocoa powder together, then whisk in the baking powder and salt until well combined.

  3. In the bowl of a stand mixer fitted with the paddle attachment, or in a large mixing bowl using a handheld mixer, beat the butter until smooth. 
  4. Mix in the brown sugar and granulated sugar for 1 to 2 minutes or until well combined.
  5. Mix in the egg, egg yolk, vanilla extract, and red food coloring, making sure to stop and scrape down the sides of the bowl as needed.
  6. Mix in the dry ingredients until just combined.
  7. Using a 1 tablespoon cookie scoop, scoop the cookie dough onto the prepared baking sheets.
  8. Roll each ball of cookie dough in the granulated sugar (this will help the powdered sugar stick to the cookies better), then generously coat in the powdered sugar.
  9. Return to the prepared baking sheets, making sure to leave 2-inches between each ball of cookie dough.
  10. Bake for 10 to 12 minutes or until the tops of the cookies are set. Remove from the oven and allow the cookies to cool on the baking sheets for 5 to 10 minutes, then carefully transfer the cookies to a wire rack to cool completely.
  11. Store cookies in an airtight container at room temperature for up to five days.

Freezing Instructions: Scoop the cookie dough onto a parchment-lined baking sheet and freeze for 1 to 2 hours. Once frozen, transfer the cookie dough to a large freezer bag and freeze for up to 3 months. Thaw the cookie dough balls overnight in the refrigerator, coat in the granulated sugar and powdered sugar, and bake as directed.

Baked cookies will also freeze well for up to 3 months, thaw to room temperature before serving.

Banilla Cream Pudding

No, it's not a typo — It's my name for homemade Brown Sugar Vanilla Pudding . . . essentially vanilla pudding made with brown sugar versus white sugar for a flavor boost. 

I gave our Banilla Cream Pudding an additional flavor boost by topping it with fresh Colorado peaches, walnuts and whipped cream.

Banilla Cream Pudding   4 or 5 servings 

1/2 cup packed brown sugar

3 tablespoons cornstarch

1/2 teaspoon salt

2 cups whole milk

2 egg yolks, lightly beaten in a medium size bowl

1 tablespoon butter

1 teaspoon vanilla 

  1. Add brown sugar, cornstarch and salt to saucepan; thoroughly combine in order to avoid cornstarch lumps while cooking.
  2. Gradually add milk, whisking mixture to combine.
  3. Cook over medium heat, stirring constantly. Once mixtures comes to a full boil, continue to boil and stir for 1 minute. 
  4. Remove from heat.
  5. Gradually stir a third to half of the pudding into the lightly beaten egg yolk, whisking the mixture during the process. This will gradually temper the eggs so that they are not scrambled!
  6. Add tempered egg mixture back to the sauce pan and heat over medium another 2 minutes, stirring constantly.
  7. Remove from heat. Stir in butter and vanilla.  Mixture will still be somewhat runny at this point but will thicken as it cools.
  8. Pour mixture into a bowl and refrigerate to thicken. (Add a piece of plastic wrap to the top to prevent the formation of a thin skin.)
Recipe without photos . . . Banilla Cream Pudding   4 or 5 servings 

1/2 cup packed brown sugar

3 tablespoons cornstarch

1/2 teaspoon salt

2 cups whole milk

2 egg yolks, lightly beaten in a medium size bowl

1 tablespoon butter

1 teaspoon vanilla 

  1. Add brown sugar, cornstarch and salt to saucepan; thoroughly combine in order to avoid cornstarch lumps while cooking.
  2. Gradually add milk, whisking mixture to combine.
  3. Cook over medium heat, stirring constantly. Once mixtures comes to a full boil, continue to boil and stir for 1 minute. 
  4. Remove from heat.
  5. Gradually stir a third to half of the pudding into the lightly beaten egg yolk, whisking the mixture during the process. This will gradually temper the eggs so that they are not scrambled!
  6. Add tempered egg mixture back to the sauce pan and heat over medium another 2 minutes, stirring constantly.
  7. Remove from heat. Stir in butter and vanilla.  Mixture will still be somewhat runny at this point but will thicken as it cools.
  8. Pour mixture into a bowl and refrigerate to thicken. (Add a piece of plastic wrap to the top to prevent the formation of a thin skin.)

Strawberry Cake Roll

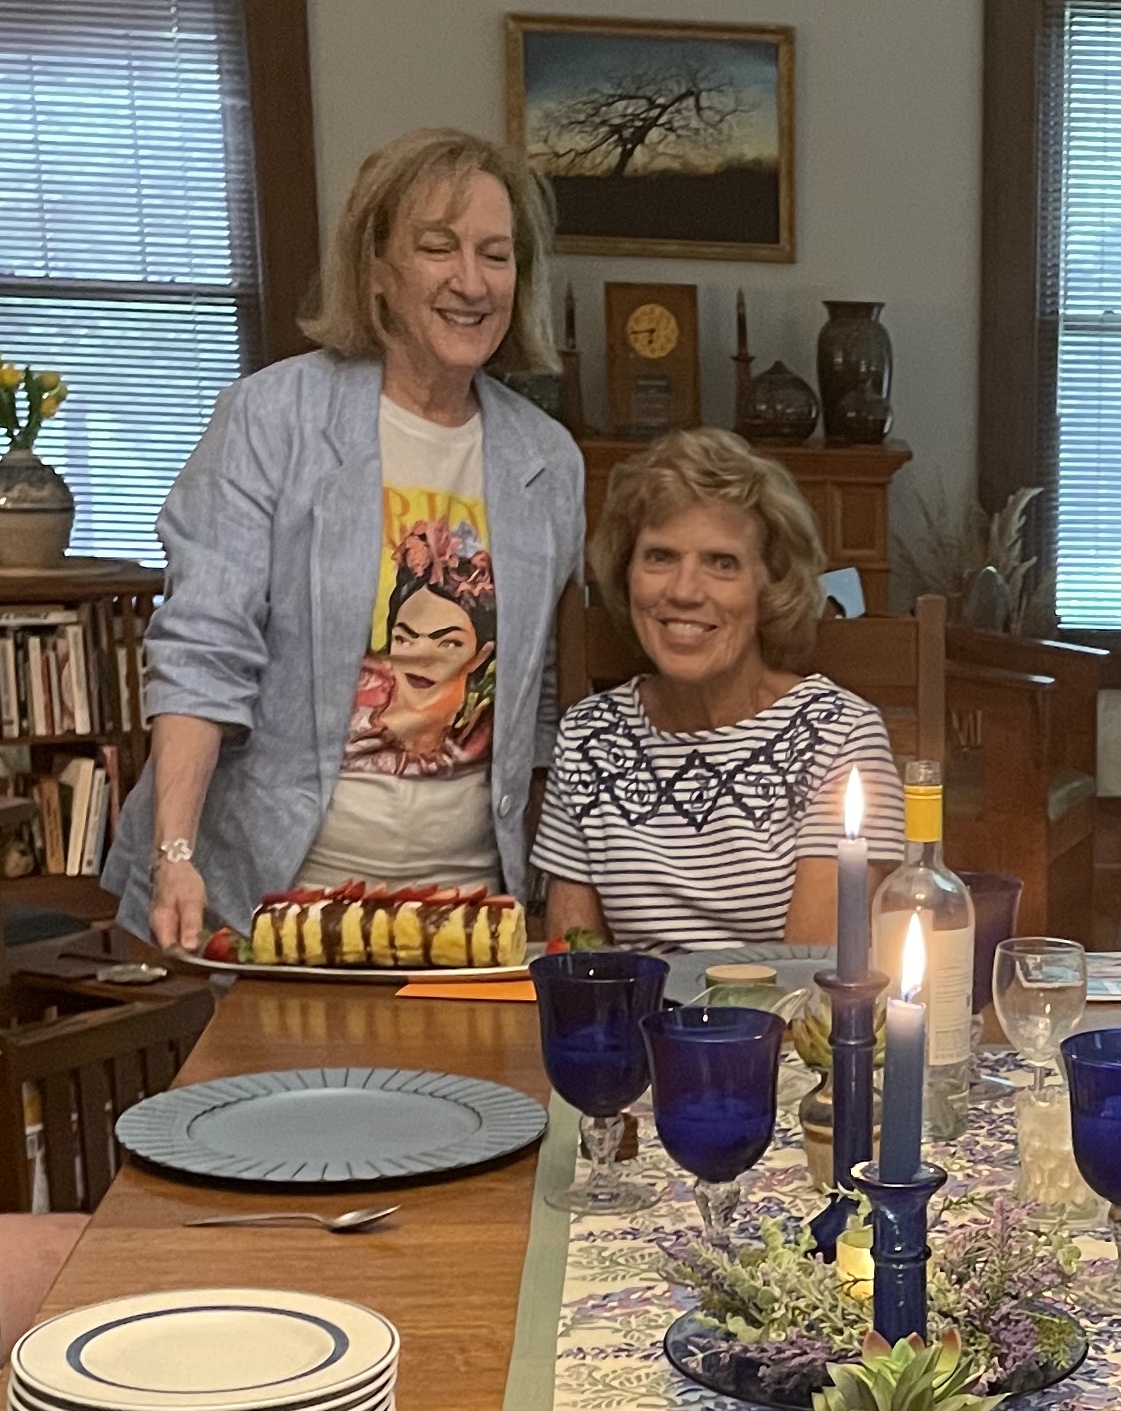
The summertime cake is light, laden with strawberries and a great way to celebrate a birthday! 


Strawberry Cake Roll

Cake

5 egg yolks room temperature

2 tablespoons vegetable oil

3 tablespoons milk

1 teaspoon vanill

1 cup granulated sugar divided

1 tablespoons lemon zest

¾ cup all purpose flour

2 tablespoons cornstarch

1 teaspoon baking powder

¼ teaspoon salt

4 egg whites room temperature


Filling

1 (8 oz. pkg.) cream cheese, softened

4 tablespoons butter, softened

1 cup powdered sugar

2 teaspoons maple syrup

1 teaspoon vanilla 

!/2 cup finely diced  strawberries


Garnishing &/or Serving

Additional Strawberries (could also include blueberries, etc. 

Fresh Mint 

Ice Cream or Sweetened whipped Cream

  1. Preheat oven to 350°F
  2. Cake: Spray a 12x17-inch rimmed baking sheet and line with parchment paper. Grease the parchment paper with butter. Set aside.
  3. In a medium bowl, whisk together the egg yolks, oil, milk, vanilla extract, two-thirds cup of sugar, and lemon zest if using.
  4. In a small bowl, whisk together the flour, cornstarch, baking powder and salt.
  5. Stir dry ingredients into the wet just until combined.
  6. In a medium bowl, beat egg whites on med-high until soft peaks form (1 to 2 minutes). Add the remaining one-third cup of sugar and continue beating on med-high speed until stiff peaks form (another 1 to 2 minutes).
  7. Fold egg whites into the batter until fully incorporated.
  8. Pour batter onto prepared baking sheet and bake for 15 minutes or until the top of the cake is light brown. Let cool completely.
    Cake batter ready to go into the oven. 

  9. Filling: Using an electric mixer, beat the cream cheese, powdered sugar, maple syrup and butter. until light and fluffy. 
  10. Spread filling over cooled cake evenly, leaving about 1/2 inch on the border. Sprinkle with strawberries.
  11. Carefully, roll the cake, starting from the short end. Peel away or remove the parchment paper as you roll.
  12. Once rolled, position the seam so it is on the bottom; sprinkle with a little extra powdered sugar and then wrap the cake with plastic wrap and chill in refrigerator for about 1 hour. Or, cover and freeze if preferred. 
  13. Once chilled, unwrap the roll. Cut ends with a sharp knife. Dust with confectioner's sugar and top with strawberries and fresh mint. Serve with ice cream or sweetened whipped cream.


Recipe without photos . . .Strawberry Cake Roll

Cake

5 egg yolks room temperature

2 tablespoons vegetable oil

3 tablespoons milk

1 teaspoon vanilla

1 cup granulated sugar divided

1 tablespoons lemon zest

¾ cup all purpose flour

2 tablespoons cornstarch

1 teaspoon baking powder

¼ teaspoon salt

4 egg whites room temperature


Filling

1 (8 oz. pkg.) cream cheese, softened

4 tablespoons butter, softened

1 cup powdered sugar

2 teaspoons maple syrup

1 teaspoon vanilla 

!/2 cup finely diced  strawberries


Garnishing &/or Serving

Additional Strawberries (could also include blueberries, etc. 

Fresh Mint 

Ice Cream or Sweetened whipped Cream

  1. Preheat oven to 350°F
  2. Cake: Spray a 12x17-inch rimmed baking sheet and line with parchment paper. Grease the parchment paper with butter. Set aside.
  3. In a medium bowl, whisk together the egg yolks, oil, milk, vanilla extract, two-thirds cup of sugar, and lemon zest if using.
  4. In a small bowl, whisk together the flour, cornstarch, baking powder and salt.
  5. Stir dry ingredients into the wet just until combined.
  6. In a medium bowl, beat egg whites on med-high until soft peaks form (1 to 2 minutes). Add the remaining one-third cup of sugar and continue beating on med-high speed until stiff peaks form (another 1 to 2 minutes).
  7. Fold egg whites into the batter until fully incorporated.
  8. Pour batter onto prepared baking sheet and bake for 15 minutes or until the top of the cake is light brown. Let cool completely.
  9. Filling: Using an electric mixer, beat the cream cheese, powdered sugar, maple syrup and butter. until light and fluffy. 
  10. Spread filling over cooled cake evenly, leaving about 1/2 inch on the border. Sprinkle with strawberries.
  11. Carefully, roll the cake, starting from the short end. Peel away or remove the parchment paper as you roll.
  12. Once rolled, position the seam so it is on the bottom; sprinkle with a little extra powdered sugar and then wrap the cake with plastic wrap and chill in refrigerator for about 1 hour. Or, cover and freeze if preferred. 
  13. Once chilled, unwrap the roll. Cut ends with a sharp knife. Dust with confectioner's sugar and top with strawberries and fresh mint. Serve with ice cream or sweetened whipped cream.


“Pies by Pro” featuring recipes from a NY pie shop: Petra's Coffee Cream Pie & Pie Crust

 “Pies by Pro” is the title assigned to the article I wrote about Vivenne Pro for the Lawreance magazine. While it is so fitting, it also lays claim to an amazing accomplishment by 13-year-old Viv. The magazine article tells her story and her connection to a famous New York pie shop. A digital edition  of the magazine is available at https://issuu.com/sunflower_publishing/docs/lm23sp; Viv’s story is on pages 20-23.

Although recipes were not included in the magazine article, I did receive permission to use them from  Petra “Petee” Paredez, owner of Petee’s Pie Shop and author of “Pie For Everyone.  Petra’s book was published in 2022 by Abrams, The Art of Books, New York. 

Viv's Coffee Cream Pie.
Professional photographer taking photos for the article layout. 
Page from the magazine.


Petra's Pastry Dough   Makes two 9-inch (23-cm) pie crusts

Viv substitutes all-purpose flour for the whole wheat but otherwise follows Petra’s descriptive and detailed directions as written. 


INGREDIENTS

1 tablespoon sugar

1 1/4 teaspoons salt

1/4 cup (60 ml) boiling water

2 1/4 loosely filled cups (280 g) whole-wheat or graham flour (Viv uses all-purpose)

1 cup (2 sticks / 225 g) cold unsalted butter, cut into 1/2-inch (12-mm) pieces

Extra flour, for rolling 


INSTRUCTIONS

1.   Stir the sugar, salt, and water together in a small bowl until the sugar and salt are fully dissolved. Place the bowl in the freezer—the liquid needs to be ice cold before it is added to the dough. 

2.   Put the flour in a large bowl and dump the butter into the flour. Toss to coat the pieces of fat in the flour. Working quickly, use your thumbs and index fingers to squeeze each chunk of fat into a thin sheet, between1/8 and 1/4 inch (3 and 6 mm) thick. Shake the contents of the bowl to ensure the sheets are well coated with flour. 

3.   Sprinkle the ice-cold sugar-salt solution over the fat and flour.

4.   Use your fingers to lightly toss the contents of the bowl around to disperse the liquid.

5.     Squeeze the shaggy mess with your fists, repeatedly and quickly, until the chunks get bigger and more cohesive. At first it will be crumbly and seem as if it won’t come together but with continued compression, you can begin to make two mounds of dough of roughly equal size.

6.     Flatten your mounds into 1-inch (2.5 cm-) thick disks. 

7.     Prepare a clean, dry nonporous surface by sprinkling it with flour. Place a disk of dough on top of the floured surface and sprinkle it with a little more flour. Place your rolling pin in the center of the dough and roll away from yourself with firm, even pressure, but not enough force to squish the dough. As you approach the edge of the dough, use a little less pressure so that it doesn't become too thin on the edges.

8.   Rotate the dough about 45 degrees. Place the rolling pin at the center of the disk and roll away from yourself once again.

9.   Continue to rotate and roll, adding more flour as needed to prevent the dough from sticking to the surface and/or the rolling pin, until you’ve rolled the dough to approximately 1/8 inch (3 mm) thick. If the dough start to split on the edges, you can gently press it back together before continuing to roll it our. The finished sheet of dough should be roughly 12 inches (30.5 cm) in diameter. 

10. Transfer the sheet of dough into a pie pan, centering it so that you have at least 1 inch (2.5 cm) of extra dough all the way around the edges of the pan. While transferring, support the dough with your fingers spread out, in order to distribute the weight and prevent breakage. 

11. Once the sheet of dough is in the pan, ease it into the corner where the base of the pan meets the sides. In order to do this without stretching or breaking the dough, lift the edge of the dough with one hand to allow it to fall into place while gently pressing it into the corner with the other.

12. Either keep a simple edge or crimp the crust.

Since this pie crust is being used for a cream pie, Viv uses Peta’s pie weight method to blind bake the crust: 

To Blind Bake Crust

13. Preheat the oven to 375°F (190°C).

14. Line the pie shell with a circle of parchment paper. Add dry beans, uncooked rice, or pie weights to reach about two-thirds of the way up the sides of the crust.

15. Bake the shell for 20 minutes, then carefully remove the pie weights and parchment paper. If you made a crimped edge, gently cover it with a strip of aluminum foil or a pie crust protector. Put the shell bake in the oven and bake for 15 minutes more to fully bake the bottom of the crust.


Petra's Coffee Cream Pie   Makes one 9-inch (23-cm) pie 

In her book Petra explains the origin of this filling, “I set out to re-create the flavor of coffee ice cream in the form of a pie.” Viv and her family agree that she succeeded. 


INGREDIENTS

For the coffee pudding and assembly:

2/3 cup (135 g) sugar 

2 tablespoons cornstarch

3/4 teaspoon instant espresso powder

1/8 teaspoon salt

1 egg

2 egg yolks

2/3 cup (165 ml) heavy cram

2/3 cup (165 ml) whole milk

1 teaspoon vanilla

1 bottom crust, blind-baked


For the coffee whipped cream:

1/3 cup (40 g) confectioners’ sugar

3/4 teaspoon instant espresso powder

Pinch of salt

1 1/2 cups (360 ml) heavy cream

1/2 teaspoon vanilla

Ground cinnamon, for sprinkling


INSTRUCTIONS

Make the coffee pudding and assemble the pie:

1.   In a medium saucepan, whisk together the sugar, cornstarch, espresso powder, and  salt. Whisk in the egg and egg yolks to form a paste. Gradually whisk in the cream, then whisk in the milk.

2.   Cook over medium heat, whisking constantly, until you feel the pudding start to thicken on the bottom of the pan, about 10 minutes. Reduce the heat to low and trade your whisk for a rubber spatula. Continue stirring with the spatula, scraping the sides and bottom of the pan to prevent burning. Cook for 10 to 15 minutes more, or until the pudding has bubbled for about 2 minutes and has thickened. Remove from heat and add the vanilla, stirring until smooth.

3.   Pour the hot pudding into the blind-baked crust, making sure to scrape the entire contents from the sides of the pan into the pie. Use the spatula to ease the pudding up the sides of the shell, leaving about 1/2 inch (12 mm) of the crust exposed on the outer edge.

4.   Place in the fridge and chill the pie for at least 1 hour, or until the surface of the pudding is cool to the touch.

Make the coffee whipped cream:

5.   Sift the confectioners’ sugar into the bowl of a stand mixer or a large bowl, then whisk in the espresso powder and salt. Pour in the heavy cream and vanilla. Using the whisk attachment or a hand-held mixer, beat on high until the cream is voluminous and can still hold its shape but is smooth. 

6.   Transfer the coffee whipped cream to a pastry bag with a round tip and pipe dollops onto the pudding, starting at the outer edge and working your way to the center. (Viv uses a simplified method: “I use a spatula to plop the whipped cream on the pie and  then smooth it over the filling.”)

7.   Put the pie in the fridge for another 3 hours to cool completely before serving.

8.    prinkle very lightly with cinnamon just before serving. 

The pie is best eaten the same day but it will keep for up to 3 days, covered, in the fridge.