Showing posts with label Cloves. Show all posts

Small BATCH Applesauce Bundt Cake. . . moist & flavorful

One year Kay Emel-Powell organized a Chi Omega cookie/dessert exchange among those of us who had lived in the house during the late 1960s. She shared her fabulous and fun Hoot Owl Cookies (owls are a big deal among XOs). I ran across that handout as I was sorting and organizing a lifetime of memories that included this recipe provided by Nancy Evans Baumgarten. All this cleaning, organizing and purging has made me realize that I don’t need another thing . . . certainly not another kitchen item. But, then I saw this cute bundt pan at Aldi’s and my resolution was quickly forgotten! It was the perfect size for a small dinner party allowing for a sweet ending without leftovers, or even a cake for two with a reasonable amount of leftovers. Consequently I adapted Nancy's recipe that was originally for cupcakes and made a moist and flavorful small bundt cake.


Small batch Applesauce Bundt Cake      Serves 6 to 8 

1 small bundt pan + a few extra cup cakes (the small bundt pan filled about ¾ to 7/8 full holds a little over 2 ½ cups of batter) or use batter to make 48 mini cupcakes


1 ½ cup applesauce (I used homemade Chai Applesauce that was lightly sweetened with honey and spiced but plain boughten applesauce works, too)

½ cup (1 stick) butter

1 cup granulated sugar

1 egg, slightly beaten

1 ¾ cups all-purpose flour

1 teaspoon baking soda

¼ teaspoon salt

1 teaspoon ground cinnamon

½ teaspoon ground cloves

¼ teaspoon ground nutmeg

½ cup nuts (such as pecans or walnuts)

½ cup raisins, optional

  1. Heat applesauce in a medium size pan over medium heat. Add butter and sugar. Set aside to cool.

  2. Stir in remaining ingredients.

  3. Grease or spray  a small bundt pan and fill about 3/4 to 7/8 full. I had enough batter left to make 3 cupcakes. Or, for  48 mini cupcakes — spray small muffin tins and distribute batter among them — fill 1/2 full.

  4. In a preheated 350°F oven, bake small bundt cake for about 30 - 35 minutes or until a toothpick inserted near center comes out clean of a internal temperature probe registers about 210°F'; bake  cupcakes about 15 minutes.. 

  5. Frost cooled cake with cream cheese frosting or icing of your choice. (I used ½ batch of a cream cheese-buttercream frosting and dusted the frosting with nutmeg.)
Recipe without photos . . .

Small batch Applesauce Bundt Cake 

1 small bundt pan + a few extra cup cakes (the small bundt pan filled about ¾ to 7/8 full holds a little over 2 ½ cups of batter) or use batter to make 48 mini cupcakes


1 ½ cup applesauce (I used homemade Chai Applesauce that was lightly sweetened with honey and spiced but plain boughten applesauce works, too)

½ cup (1 stick) butter

1 cup granulated sugar

1 egg, slightly beaten

1 ¾ cups all-purpose flour

1 teaspoon baking soda

¼ teaspoon salt

1 teaspoon ground cinnamon

½ teaspoon ground cloves

¼ teaspoon ground nutmeg

½ cup nuts (such as pecans or walnuts)

½ cup raisins, optional

  1. Heat applesauce in a medium size pan over medium heat. Add butter and sugar. Set aside to cool.
  2. Stir in remaining ingredients.
  3. Grease or spray  a small bundt pan and fill about 3/4 to 7/8 full. I had enough batter left to make 3 cupcakes. Or, for  48 mini cupcakes — spray small muffin tins and distribute batter among them — fill 1/2 full.
  4. In a preheated 350°F oven, bake small bundt cake for about 30 - 35 minutes or until a toothpick inserted near center comes out clean of a internal temperature probe registers about 210°F'; bake  cupcakes about 15 minutes.
  5. Frost cooled cake with cream cheese frosting or icing of your choice. (I used ½ batch of a cream cheese-buttercream frosting and dusted the frosting with nutmeg.)

Spicy Molasses Cookies

As the temperatures turn cool and crisp and the leaves are begin to turn, my taste buds are craving fall flavors. Seasonal foods such as  chili, bierocks, apple desserts such as Caramel Apple Pie, baked pumpkin donuts, and molasses cookies. This year I tried Marcia Wilson’s version—Spicy Molasses Cookies that she posted on Facebook (they are a Ree Drummond approved recipe). Warm spices and fragrent molasses combine to create a fantastic fall cookie. 


Spicy Molasses Cookies    Yield: 3 1/2 dozen cookies

1 cup granulated sugar

3/4 cup Crisco vegetable shortening

1/4 cup molasses

1 large egg

2 cups all-purpose flour

2  1/2  teaspoons baking soda

1 teaspoon ground cinnamon

1 teaspoon ground ginger

1/2 teaspoon ground cloves

1/4 teaspoon ground cardamom (Marcia said she used allspice, but I stuck with cardamom

1/4 teaspoon salt

----

Extra granulated sugar for rolling 

  1. Preheat oven to 350°.
  2. Mix sugar, shortening, molasses and egg together until well combined. 

  3. Lightly stir dry ingredients together and dump into wet. Mix together until dough is well combined.

  4. Using your hands or a small cookie dipper, shape/roll dough into walnut-sized balls, Then generously coat each ball with extra sugar.

  5. Place balls on a baking sheet (I flattened mine just slightly) and bake for 9 to 11 minutes, allowing to bake for about a minute after cookies begin to crack.

  6. Remove cookies from baking sheet and allow to cool, or eat warm. (I sprinkled with a little more sugar while they were warm.)

Recipe without photos . . . Spicy Molasses Cookies    Yield: 3 1/2 dozen cookies

1 cup granulated sugar

3/4 cup Crisco vegetable shortening

1/4 cup molasses

1 large egg

2 cups all-purpose flour

2  1/2  teaspoons baking soda

1 teaspoon ground cinnamon

1 teaspoon ground ginger

1/2 teaspoon ground cloves

1/4 teaspoon ground cardamom (Marcia said she used allspice, but I stuck with cardamom

1/4 teaspoon salt

----

Extra granulated sugar for rolling 

  1. Preheat oven to 350°.
  2. Mix sugar, shortening, molasses and egg together until well combined. 
  3. Lightly stir dry ingredients together and dump into wet. Mix together until dough is well combined.
  4. Using your hands or a small cookie dipper, shape/roll dough into walnut-sized balls, Then generously coat each ball with extra sugar.
  5. Place balls on a baking sheet (I flattened mine just slightly) and bake for 9 to 11 minutes, allowing to bake for about a minute after cookies begin to crack.
  6. Remove cookies from baking sheet and allow to cool, or eat warm. (I sprinkled with a little more sugar while they were warm.)

Chai Applesauce

 It’s apple time in Kansas and since I was gifted lots of already picked apples, I’ve been making applesauce. After a couple of batches of Rosy Cinnamon Red Hot Applesauce, I decided to try a recipe in the latest issue (Aug./Sept. 2024) of Food Network Magazine. Of course, I made a few adjustments: unpeeled apples versus peeled (not only easier but the peels add a layer of flavor and some extra nutrition) + I doubled the amount of cardamom and added some honey. The apples simmered in a slow cooker and then I processed them in the food processor to chop up the skins. (The original recipe used peeled apples that were cooked in a covered sauce pot for 30 minutes so no processing was needed.

Combine the flavors of spiced chai (tea) and apples to create flavorful Chai Applesauce. 

Chai Applesauce

3 1/2 pounds chopped cored and chopped apples

1 cup water

4 slices fresh ginger 

3 cinnamon sticks

1/4 teaspoon ground cloves

1/2 teaspoon cardamom

Pinch of salt

1/4 cup honey 

  1. Add all ingredients to a slow cooker and cook on high for 3 to 4 hours until apples are tender (or cook on slow for 6 to 8 hours).
    Apples after being cooked for 3 to 4 hours. Note: The cooker with full to the brim at the beginning of the cooking time.

  2. Allow to partially cool, remove cinnamon sticks, and then blend in a food processor until peels are processed. Processing creates a smoother applesauce. 

Recipe without photos . . .Chai Applesauce

3 1/2 pounds chopped cored and chopped apples

1 cup water

4 slices fresh ginger 

3 cinnamon sticks

1/4 teaspoon ground cloves

1/2 teaspoon cardamom

Pinch of salt

1/4 cup honey 

  1. Add all ingredients to a slow cooker and cook on high for 3 to 4 hours until apples are tender (or cook on slow for 6 to 8 hours).
  2. Allow to partially cool, remove cinnamon sticks, and then blend in a food processor until peels are processed. Processing creates a smoother applesauce.

Butternut Squash Risotto made with orzo

Risotto is defined as an Italian dish of rice (traditionally arborio) cooked in stock with other ingredients such as meat and vegetables. However, we prefer to use orzo pasta in place of the rice. I personally think it is the ultimate mac and cheese the starch minus the usual cheddar or processed cheese. As the pasta cooks, the starch is slowly released resulting in a dish with a super creamy creamy texture. 

Last night I paired it with butternut squash – some of the last of last summer’s garden produce that has been in cool storage. Although this could certainly stand alone as an entreĆ©, we served it alongside roasted chicken. 


Butternut Squash Risotto made with orzo   4 servings 


1 tablespoon olive oil 

1 medium yellow onion, chopped

1/2 teaspoon kosher salt, plus more to taste

Freshly ground black pepper

2 cups cubed butternut squash, 1/4-inch cubes

2 garlic cloves, minced

1 teaspoon chopped sage leaves

1 cup uncooked orzo

1/2 cup dry white wine

4 cups warmed broth (I used chicken beef or vegetable works, too)

Small sage leaves or Chopped parsley or, optional, for garnish

1/2 cup grated Parmesan cheese, optional, for serving

  1. In a medium to large stock pot, heat the oil over medium heat. Add the onion, salt and several grinds of pepper, and cook for 2 to 3 minutes. Add the butternut squash and cook for 6 to 8 minutes. 
  2. Add the garlic, sage, and rice. Stir and let cook for about 1 minute.
  3. Then add the wine. Stir and cook for 1 to 3 minutes, or until the wine cooks down.

  4. Add the broth, 3/4 cup at a time, and stir continuously to allow each addition of broth to be absorbed before adding the next. Cook until the butternut squash is tender, and the risotto is soft and creamy. Season to taste. 

  5. Garnish with sage leaves or parsley and serve with grated cheese, if desired.
Recipe without photos . . . Butternut Squash Risotto made with orzo   4 servings 


1 tablespoon olive oil 

1 medium yellow onion, chopped

1/2 teaspoon kosher salt, plus more to taste

Freshly ground black pepper

2 cups cubed butternut squash, 1/4-inch cubes

2 garlic cloves, minced

1 teaspoon chopped sage leaves

1 cup uncooked orzo

1/2 cup dry white wine

4 cups warmed broth (I used chicken beef or vegetable works, too)

Small sage leaves or Chopped parsley or, optional, for garnish

1/2 cup grated Parmesan cheese, optional, for serving

  1. In a medium to large stock pot, heat the oil over medium heat. Add the onion, salt and several grinds of pepper, and cook for 2 to 3 minutes. Add the butternut squash and cook for 6 to 8 minutes. 
  2. Add the garlic, sage, and rice. Stir and let cook for about 1 minute.
  3. Then add the wine. Stir and cook for 1 to 3 minutes, or until the wine cooks down.

  4. Add the broth, 3/4 cup at a time, and stir continuously to allow each addition of broth to be absorbed before adding the next. Cook until the butternut squash is tender, and the risotto is soft and creamy. Season to taste. 

  5. Garnish with sage leaves or parsley and serve with grated cheese, if desired.

Molasses Refrigerator Cookies

Referred to as slice-and-bake, icebox or refrigerator cookies, recipes such as these are convenient as they can be made ahead, even frozen. Then, just slice-and-bake as needed. Full of warm spices, these sweet treats are a great way to welcome the cooler fall season. 


Molasses Refrigerator Cookies

1 3/4 cups all-purpose flour

1 tseaspoon baking soda

1 teaspoon ground cinnamon

1 teaspoon ground ginger

1/2 teaspoon ground allspice

1/2 teaspoon kosher salt

1/4 teaspoon ground cloves

1/4 teaspoon ground nutmeg

3/4  cup packed brown sugar

1 stick salted butter, softened

1/4 cup molasses

1 large egg

1 1/2 teaspoon maple extract

Sanding sugar, for sprinkling (or just use granulated sugar)

  1. Whisk the flour, baking soda, cinnamon, ground ginger, allspice, salt, cloves and nutmeg in a medium bowl. 
  2. In a large bowl, combine the brown sugar and butter and beat with a mixer until fluffy, about 1 minute. 
  3. Drizzle in the molasses, beating well and scraping down the bowl halfway through, if necessary. 
  4. Beat in the egg until combined, then beat in the maple extract.
  5. Add the flour mixture to the butter mixture in two or three batches, beating until just combined after each addition.
  6. Lay dough out a sheet of  wax paper or plastic wrap. Divide dough in half. 
  7. Place half on a piece of wax paper or plastic wrap and shape into a firm log, about 1” thick. Wrap the log in the wax paper or plastic. Repeat with the remaining dough to make another log. 
  8. Chill logs until firm, at least 3 hours in the refrigerator or 1 1⁄2 hours in the freezer. (The dough will keep in the freezer for up to 3 months.)
  9. To Bake: Preheat the oven to 350 ̊. Line baking sheet(s)with parchment paper. 
  10. Slice the dough logs into 1⁄4-inch-thick rounds and place 1” apart on the baking sheets and sprinkle each cookie with sanding sugar. 
  11. Bake about 12 minutes. 
  12. Transfer to a cooling rack and let cookies cool for 10 minutes on the baking sheets, then remove the cookies to the racks to cool completely.  Cookies will crisp as they cool.

Recipe without photos . . . Molasses Refrigerator Cookies

1 3/4 cups all-purpose flour

1 tseaspoon baking soda

1 teaspoon ground cinnamon

1 teaspoon ground ginger

1/2 teaspoon ground allspice

1/2 teaspoon kosher salt

1/4 teaspoon ground cloves

1/4 teaspoon ground nutmeg

3/4  cup packed brown sugar

1 stick salted butter, softened

1/4 cup molasses

1 large egg

1 1/2 teaspoon maple extract

Sanding sugar, for sprinkling (or just use granulated sugar)

  1. Whisk the flour, baking soda, cinnamon, ground ginger, allspice, salt, cloves and nutmeg in a medium bowl. 
  2. In a large bowl, combine the brown sugar and butter and beat with a mixer until fluffy, about 1 minute. 
  3. Drizzle in the molasses, beating well and scraping down the bowl halfway through, if necessary. 
  4. Beat in the egg until combined, then beat in the maple extract. 
  5. Add the flour mixture to the butter mixture in two or three batches, beating until just combined after each addition.
  6. Lay dough out a sheet of  wax paper or plastic wrap. Divide dough in half. 
  7. Place half on a piece of wax paper or plastic wrap and shape into a firm log, about 1” thick. Wrap the log in the wax paper or plastic. Repeat with the remaining dough to make another log. 
  8. Chill logs until firm, at least 3 hours in the refrigerator or 1 1⁄2 hours in the freezer. (The dough will keep in the freezer for up to 3 months.)
  9. To Bake: Preheat the oven to 350 ̊. Line baking sheet(s)with parchment paper. 
  10. Slice the dough logs into 1⁄4-inch-thick rounds and place 1” apart on the baking sheets and sprinkle each cookie with sanding sugar. 
  11. Bake about 12 minutes. 
  12. Transfer to a cooling rack and let cookies cool for 10 minutes on the baking sheets, then remove the cookies to the racks to cool completely.  Cookies will crisp as they cool.

Browned Butter Chocolate Chip and Pumpkin Cookies

Theses new Fall cookies were a hit at the latest K-State tailgate. Nutty flavors from the brown butter, an abundance of warm pumpkin pie spices mixed with chocolate chips create an upscale “chocolate chip cookie”. Add to that a scoop of pumpkin and you have a tender but somewhat chewy treat. Although I made them, Barry picked out the recipe. I showed him two – one soft and puffy and this one. He made a GOOD choice. Recipe from Blonde Butter Blondie blog


Browned Butter Chocolate Chip and Pumpkin Cookies   Makes 2 dozen

1/2 cup butter (browned and slightly cooled

1/2 cup  packed light brown sugar

1/2 cup granulated sugar

1 large egg white, room temperature

1/4 cup pumpkin puree, blotted to remove moisture – home prepared or purchase (without added spices)

1 1/2 cups all-purpose flour, spooned and leveled 

1/2 teaspoon baking soda

1/2 teaspoon salt

1 teaspoon ground cinnamon

1/4 teaspoon ground ginger

1/8 teaspoon ground allspice

1/8 teaspoon freshly grated nutmeg

Pinch of clove

 1 to 1 1/2 cups semi-sweet chocolate chips (the original recipe calls for 1 1/2 cups but I though 1 cup was plenty; I also used dark chocolate chips)       


  1. Preheat oven to 350˚ F. Line two baking sheets with silicon liners or parchment paper. Set aside.
  2. In a medium saucepan over medium to medium-high heat, melt the butter, watching carefully Once melted, continue to stir as the butter begins to crackle and foam. After about 5 minutes, milk solids will begin to form on the bottom of the pan. Continue stirring occasionally and keep a close eye on the pan. The butter will begin to turn an amber brown and will become aromatic. Remove the pan from the heat and carefully pour the butter into a large heat-safe bowl. Use a spatula to scrape down the bottom of the pan to get all the brown butter bits. Set the butter aside to cool for about 30 minutes. 
  3. Meanwhile, in a medium bowl, whisk together the flour, baking soda, salt, cinnamon, ginger, allspice, nutmeg and cloves. Set aside.
  4. To the butter, add both sugars, egg white, vanilla and pumpkin puree. Whisk or mix until smooth.
  5. Add the dry ingredients to the wet and mix until just combined.
  6. Fold in the chocolate chips. Do not overmix. 
  7. Scoop the dough into 1 ounce portions and place about 2 inches apart on the prepared
    cookie sheets. 
  8. Bake for 9 to 10 minutes or until the edges are set and golden brown but the center is still slightly underbaked (I baked them for about 15 to 18 minutes as they were way to soft at 9 to 10 minutes.)
  9.  Remove the cookie sheet from the oven let cool for 15 minutes before transferring to a wire rack to cool completely.
Recipe without photos . . . Browned Butter Chocolate Chip and Pumpkin Cookies   Makes 2 dozen

1/2 cup butter (browned and slightly cooled

1/2 cup  packed light brown sugar

1/2 cup granulated sugar

1 large egg white, room temperature

1/4 cup pumpkin puree blotted to remove moisture – home prepared or purchase (without added spices)

1 1/2 cups all-purpose flour, spooned and leveled 

1/2 teaspoon baking soda

1/2 teaspoon salt

1 teaspoon ground cinnamon

1/4 teaspoon ground ginger

1/8 teaspoon ground allspice

1/8 teaspoon freshly grated nutmeg

Pinch of clove

 1 to 1 1/2 cups semi-sweet chocolate chips (the original recipe calls for 1 1/2 cups but I though 1 cup was plenty; I also used dark chocolate chips)       


  1. Preheat oven to 350˚ F. Line two baking sheets with silicon liners or parchment paper. Set aside.
  2. In a medium saucepan over medium to medium-high heat, melt the butter, watching carefully Once melted, continue to stir as the butter begins to crackle and foam. After about 5 minutes, milk solids will begin to form on the bottom of the pan. Continue stirring occasionally and keep a close eye on the pan. The butter will begin to turn an amber brown and will become aromatic. Remove the pan from the heat and carefully pour the butter into a large heat-safe bowl. Use a spatula to scrape down the bottom of the pan to get all the brown butter bits. Set the butter aside to cool for about 30 minutes. 
  3. Meanwhile, in a medium bowl, whisk together the flour, baking soda, salt, cinnamon, ginger, allspice, nutmeg and cloves. Set aside.
  4. To the butter, add both sugars, egg white, vanilla and pumpkin puree. Whisk or mix until smooth.
  5. Add the dry ingredients to the wet and mix until just combined.
  6. Fold in the chocolate chips. Do not overmix. 
  7. Scoop the dough into 1 ounce portions and place about 2 inches apart on the prepared cookie sheets. 
  8. Bake for 9 to 10 minutes or until the edges are set and golden brown but the center is still slightly underbaked (I baked them for about 15 to 18 minutes as they were way to soft at 9 to 10 minutes.)
  9.  Remove the cookie sheet from the oven let cool for 15 minutes before transferring to a wire rack to cool completely.

Pumpkin Cinnamon Sugar Donuts, baked not fried

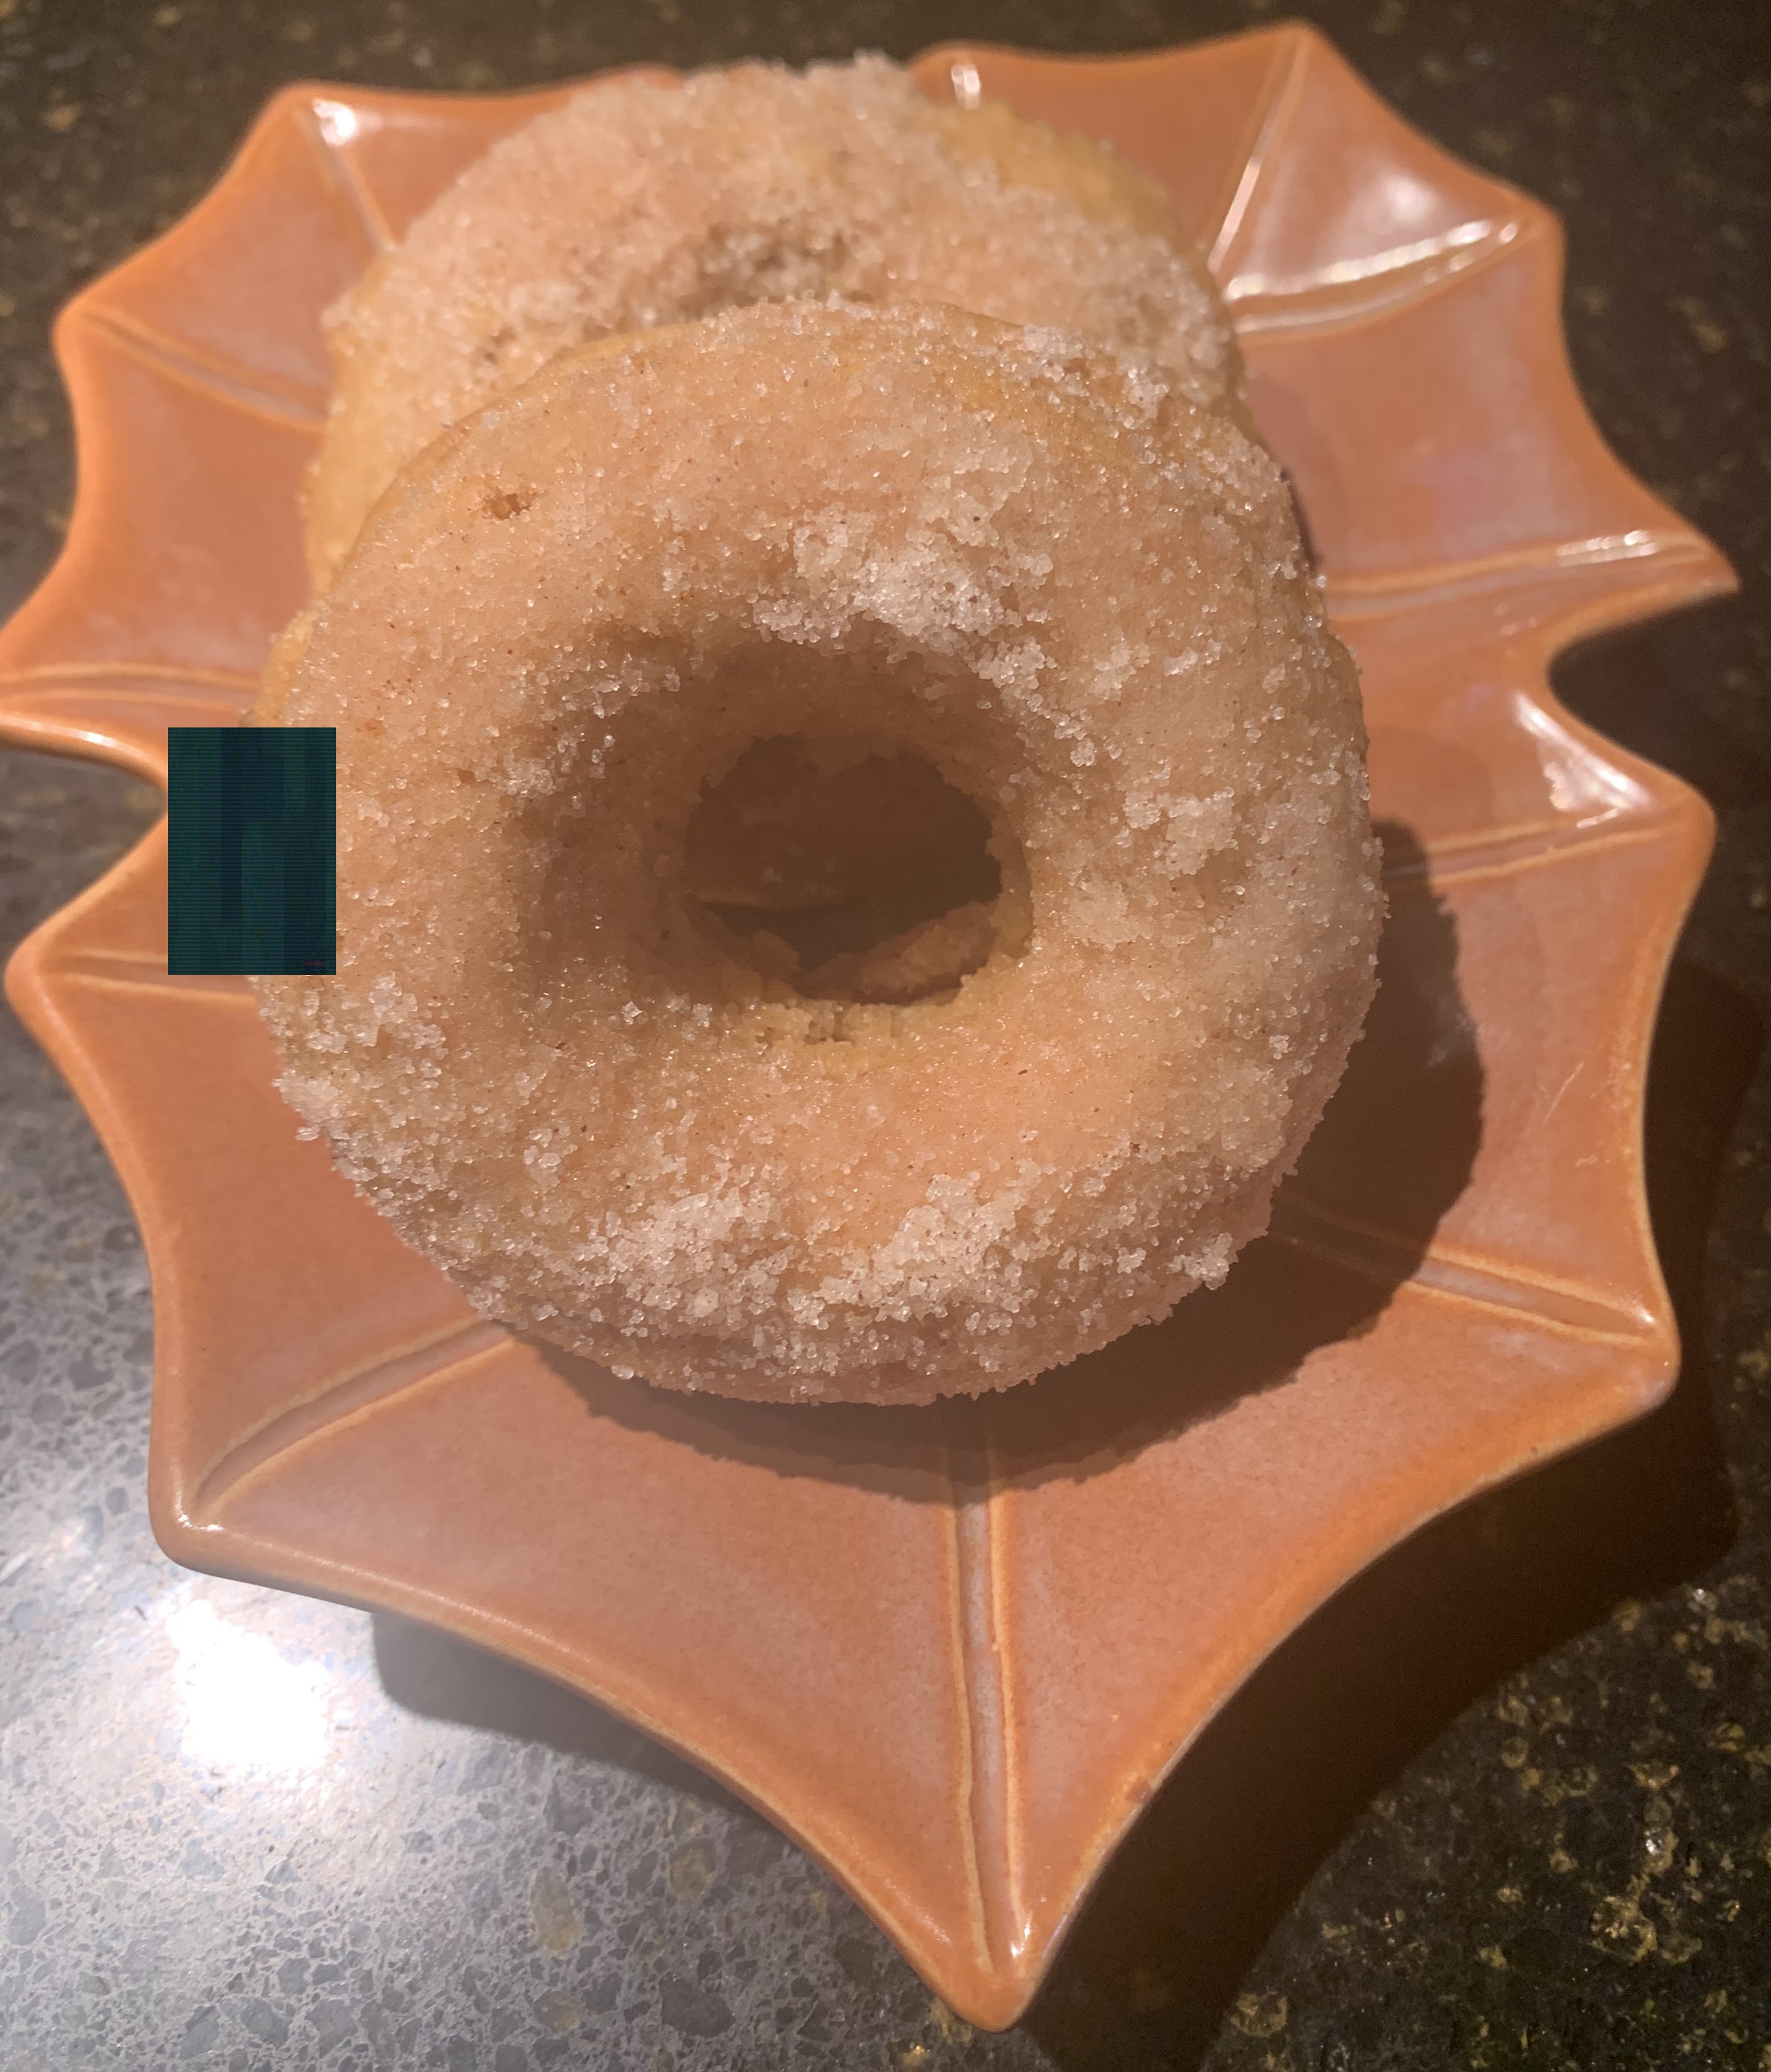
Finally. Pumpkin season is here again! Knowing of my obsession with pumpkins, my sister,  Marla Payne, shared a recipe she found on the internet. She was back in Kansas this past weekend and I made a batch of Pumpkin Cinnamon Sugar Donuts; the spicy and filling morsels received rave reviews.  Marla found this small batch recipe on the Back to Nature Blog . . . they also have a vegan variation at this site. 


We also recommend our Glazed Pumpkin-Pecan Cake Donuts that are also baked,  not fried. Use the search box on the upper left hand of our blog to search for other pumpkin recipes. Or, on the right hand side, check out the Holidays / Special Events & Occasions — Fall — for other pumpkin favorites. https://cookingwithbarryandmeta.blogspot.com/p/mixes-more.html


Pumpkin Cinnamon Sugar Donuts, baked not fried    Yield: 6 donuts 

Donuts:

1 cup + 1/4 cups all-purpose flour

1/2 cup light brown sugar, packed

1/2 teaspoon salt

1 teaspoon baking powder

3/4 teaspoon pumpkin pie spice (a homemade version can be found in the Mixes and More section on our blog)

1/4 cup pumpkin pie puree (if using homemade puree or commercial pumpkin pie pie puree,  add 1/2 teaspoon ground cinnamon, 1/4 teaspoon ground ginger, 1/4 teaspoon ground nutmeg, and a pinch of cloves to the dry ingredients) 

2 1/2 tablespoons unsalted butter, melted

1/2 cup milk

Cinnamon Sugar Coating:

3 tablespoons unsalted butter, melted

1 cup granulated sugar

1 1/2 tablespoons ground cinnamon

  1. Preheat oven to 350° F.  
  2. Generously grease a doughnut pan; set aside.
  3. Donuts: In a large bowl whisk together the dry ingredients. 
  4. In a separate bowl whisk together the pumpkin puree, melted butter, and milk. Gently fold the wet mixture into the dry mixture - don't over mix!
  5. Spoon mixture into prepared doughnut pan. 
  6. Bake for 10 to11 minutes, or until the donuts spring back when lightly pressed. 
  7. Allow doughnuts to cool a few minutes in the pan before transferring to a wire wrack to cool for a few more minutes.
  8. Cinnamon Sugar Coating: In the meantime, melt the butter for the cinnamon sugar coating; set aside. Mix the sugar and cinnamon together in a medium-sized bowl; set aside.
  9. Once the donuts are cool enough to handle, dip them in the melted butter, then roll them in the cinnamon sugar mixture; repeat until all donuts have been covered.

Note: Although these donuts are best eaten the day they are made, they can be frozen and warmed up in the microwave. 


Recipe without photos . . . Pumpkin Cinnamon Sugar Donuts, baked not fried    Yield: 6 donuts 

Donuts:

1 cup + 1/4 cups all-purpose flour

1/2 cup light brown sugar, packed

1/2 teaspoon salt

1 teaspoon baking powder

3/4 teaspoon pumpkin pie spice (a homemade version can be found in the Mixes and More section on our blog)

1/4 cup pumpkin pie puree (if using homemade puree  e or commercial pumpkin pie pie puree,  add 1/2 teaspoon ground cinnamon, 1/4 teaspoon ground ginger, 1/4 teaspoon ground nutmeg, and a pinch of cloves to the dry ingredients) 

2 1/2 tablespoons unsalted butter, melted

1/2 cup milk

Cinnamon Sugar Coating:

3 tablespoons unsalted butter, melted

1 cup granulated sugar

1 1/2 tablespoons ground cinnamon

  1. Preheat oven to 350° F.  
  2. Generously grease a doughnut pan; set aside.
  3. Donuts: In a large bowl whisk together the dry ingredients. 
  4. In a separate bowl whisk together the pumpkin puree, melted butter, and milk. Gently fold the wet mixture into the dry mixture - don't over mix!
  5. Spoon mixture into prepared doughnut pan. 
  6. Bake for 10 to11 minutes, or until the donuts spring back when lightly pressed. 
  7. Allow doughnuts to cool a few minutes in the pan before transferring to a wire wrack to cool for a few more minutes.
  8. Cinnamon Sugar Coating: In the meantime, melt the butter for the cinnamon sugar coating; set aside. Mix the sugar and cinnamon together in a medium-sized bowl; set aside.
  9. Once the donuts are cool enough to handle, dip them in the melted butter, then roll them in the cinnamon sugar mixture; repeat until all donuts have been covered.

Note: Although these donuts are best eaten the day they are made, they can be frozen and warmed up in the microwave. 

Kamila Dandu's Spicy Basil Pesto as featured in KANSAS! Magazine, Spring 2022

Kamila Dandue is an amazing gardener, cook and person!  Her gardening/cooking story appears in the Taste section of the latest KANSAS! Magazine (2022, Vol. 78, Issue 3). In the article Kamila sh shares gardening tips that have turned her backyard space into an oasis, full of both everyday and exotic vegetables and flowers. She also provides recipes for this spicy version of basil pesto and Roasted Eggplant in Spicy Yogurt.

She has also mastered the art of photography. All of the eye-popping photos included in this post are courtesy of Kamila.

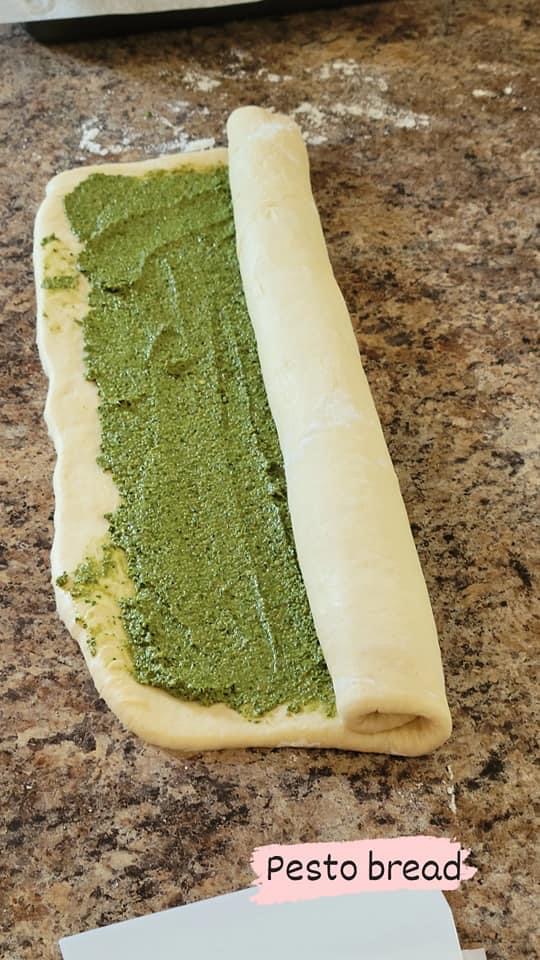
Kamila's Spicy Basil Pesto and loaves of her savory babka-style twisted bread that's filled with the pesto.

Kamila’s “Dandu culinary fusion” is evident is her unique version of spiced pesto. She uses it on pizza, bruschetta, pasta, as a marinade, and spread on grilled cheese sandwiches. It’s also an essential ingredient in her savory bakka-style twisted bread, a feast for the eyes as well as the palate

Spicy Basil Pesto 

Yield: About 1 cup

INGREDIENTS:

3 to 4 garlic cloves

1/4 cup pine nuts, toasted (almonds or walnuts may be substituted)

4 green chilies (less or more)

2 cups packed basil

Salt, black pepper to taste 

1/2 to 3/4 cup olive oil + extra for covering finished pesto

2 tablespoon lemon juice or to taste

1/4 to 1/2 cup Pecorino Romano or Parmegiano (Parmesan) cheese

INSTRUCTIONS: 

1.    Pulse garlic, toasted nuts and green chilies in food processor until coarsely chopped.

2.    Add basil, salt and black pepper

3.    Gradually add olive oil and lemon juice, process until fully incorporated and smooth. (Begin with lesser amounts and add more to achieve desired consistency.) 

4.    Add cheese and pulse lightly to incorporate. Check for seasonings.

5.    Place in a jar or covered container. Cover top of pesto with a layer of olive oil to protect from darkening. Keeps in refrigerator for several weeks.  

    Kamila has a flair for flavor and her food is always picture-perfect as illustrated here . . .