Sourdough Waffles

It’s back to basics in the West kitchen this morning with sourdough waffles made from Farmer Direct Foods flour in rural New Cambria. The recipe uses a Quick Overnight Sourdough Starter. This recipe links includes not only the recipe but how to maintain, store and even freezer the starter + I’ve included a few links to sourdough bread recipes on our blog. 
 Note: Start this recipe the night before as you use the first three ingredients to make a “sponge” that is the basis for the waffle batter.

Sourdough Waffles   Make about 10 waffles, depending on size of waffle maker 
I actually make a half batch. To reduce an egg to half, break into a bowl, mix with a fork until blended and then pour out about half. 
Wrap and freeze or refrigerate extra waffles, then pop in the toaster for waffles on demand! 
Recipe from Rita Davenport’s Sourdough Cookery. cookbook,
2 cups all-purpose flour (or use part whole wheat flour)
2 cups lukewarm water 
2 level tablespoons granulated sugar
1 teaspoon salt
1/2 teaspoons baking powder 
5 tablespoons vegetable oil
3 eggs
1/2 teaspoon baking soda dissolved in 1 tablespoon water
  1. THE NIGHT BEFORE: Add flour and water to sourdough starter. Beat until smooth, cover with towel or plastic wrap and let stand in a warm place overnight.
  2. NEXT MORNING: To the batter, add sugar, salt, baking powder and oil. 
  3. Beat in eggs.

  4. Gently fold in dissolved baking soda Do not stir after baking soda has been added. 
  5. Pour and spread batter on a lightly greased, preheated waffle grids. Cook for 6 to 8 minutes. Repeat.
  6. Keep waffles warm in an oven set on low. 
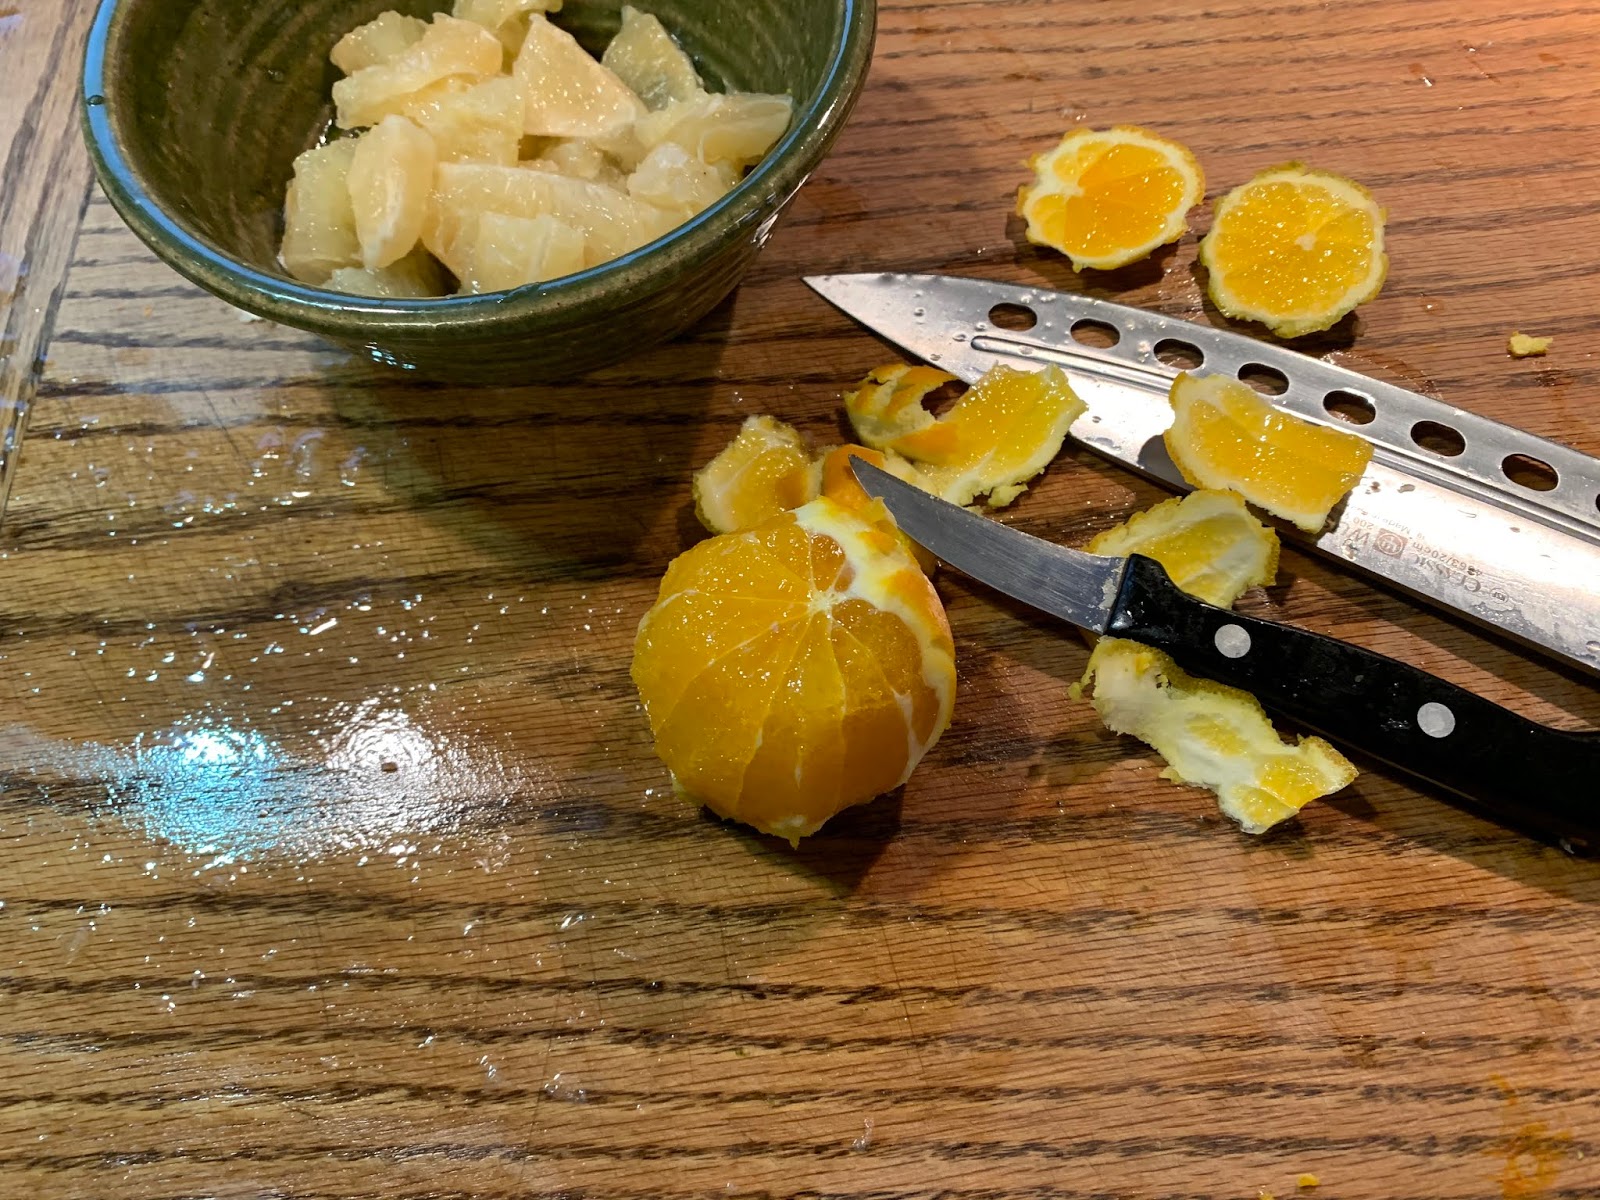
    We served our waffles with Zey's store-made sausage and Vermont Orange Ambrosia

Recipe without photos . . .
Sourdough Waffles   Make about 10 waffles, depending on size of waffle maker 
I actually make a half batch. To reduce an egg to half, break into a bowl, mix with a fork until blended and then pour out about half. 
Wrap and freeze or refrigerate extra waffles, then pop in the toaster for waffles on demand! 
Recipe from Rita Davenport’s Sourdough Cookery. cookbook,
2 cups all-purpose flour (or use part whole wheat flour)
2 cups lukewarm water 
2 level tablespoons granulated sugar
1 teaspoon salt
1/2 teaspoons baking powder 
5 tablespoons vegetable oil
3 eggs
1/2 teaspoon baking soda dissolved in 1 tablespoon water
  1. THE NIGHT BEFORE: Add flour and water to sourdough starter. Beat until smooth, cover with towel or plastic wrap and let stand in a warm place overnight.
  2. NEXT MORNING: To the batter, add sugar, salt, baking powder and oil. 
  3. Beat in eggs.
  4. Gently fold in dissolved baking soda Do not stir after baking soda has been added. 
  5. Pour and spread batter on a lightly greased, preheated waffle grids. Cook for 6 to 8 minutes. Repeat.
  6. Keep waffles warm in an oven set on low. 

Quick Overnight Sourdough Starter

Back to the Basics (in our kitchen) include baking with sourdough. It can be somewhat intimidating so I'm sharing the explanations and tips that have guided me since 1978. That's when I purchased  a sourdough cookbook (Rita Davenport’s Sourdough Cookery). Although I was intrigued, I was also a bit overwhelmed with all the terminology and techniques so I wrote a letter to the author. She responded (adding her answers to my many questions directly on the letter I had written) and clarified many things. I’ve been  making sourdough breads ever since.using her Quick Overnight Sourdough Starter. 

About Sourdough Starters in General
Before the advent of commercial yeast all bread was made from sourdough starters. Sourdough starters are basically combinations of flour and water that are used as a nutrient-rich medium to grow and maintain colonies of wild yeast. Wild strains of yeast are present in many milled grains, and abound in the air around us. These yeasts find a home in the starter mixture and grow. Each sourdough starter has its own unique flavor and characteristics. Most homemade sourdough starters are given a 'jump start' by adding 'domesticated' dried yeast to the starter mixture. Sourdough starters, if properly taken care of, can live for years and years and years. They help to produce loaves of bread that have complex and full-bodied flavors.  

Quick Overnight Sourdough Starter
To prepare:
2 scant tablespoons active dry yeast  or 2 (1/4 -ounce) packages
4 cups lukewarm water  (105 to 115 °)
4 cups all-purpose flour (Pride of the Prairie flour from Farmer Direct Foods, New Cambria, KS)
  1. In a measuring cup or small bowl, dissolve yeast in a small amount of lukewarm water.  In another bowl, stir flour into remaining water and add bubbling yeast mixture.  Mix well and cover.  
  2. Let mixture stand in a draft free area that is near 85° for at least 6 hour or overnight.  Starter is now ready to use.  
  3. Store in refrigerator in a stoneware or plastic container, or in a quart canning jar..  Make a hole in to top of the plastic container or canning jar lid to allow accumulated gas to escape; place a loose fitting lid on stoneware.  
Note:  This recipe makes a sizable amount and can easily be cut in half. 
---Rita Davenport’s Sourdough Cookery, HP Books, 1977, p 15.

To use: The sourdough starter may be removed from refrigerator and used as needed.  Always save at least 1/2 cup  and then add equal amounts of flour and water to replenish (ex. 1/2 cup water & 1/2 cup flour). Don’t worry about lumps in mixture, fermentation will dissolve them. Mix and let set at room temperature until bubbly; then refrigerate until next use.  Or, if the recipe calls for a large amount of sourdough starter, I have added equal amounts flour and water  to the starter and used within several minutes.  However, the longer it stands at room temperature, the more pronounced the sourdough flavor.

If you do not use weekly: Add a small amount of water and flour (equal amounts) and set out for 20 to 30 minutes before returning to refrigerator  (actually I’ve left mine for 2 weeks without doing a thing to it & it’s fine)

To freeze: I place plastic container in a freezer bag and place in freezer if I do not plan to make bread for awhile.  Thaw and use. (Can be frozen up to 3 months.)

Additional Notes about Starters:  Fermented, fully developed sourdough will appear bubbly and may have a very strong odor (actually quite smelly and even a bit unpleasant!!!!).  Sourdough that has been sitting in the refrigerator will often form a yellow or clear liquid on top. This is alcohol which Alaskan Indians called hooch. When it forms, just stir it back into the mixture. 
If starter does not seem as bubbly after continued use, sprinkle with small amount of dry yeast and mix well. This is also recommended if thawed frozen starter does not resume its former bubbly appearance.
If the sourdough starter turns pink, discard and begin again.  

Our sourdough recipes include:  I'll be adding more in the near future)
Sourdough Sweet N' Spicy Bread
Old Milwaukee Rye Bread (this recipe refers to the starter as a sponge; a sponge is made of flour, water and yeast, allowed to set at room temp overnight — same as starter but a sponge is then used in its entirety rather and saving back a portion for the next batch of bread)

Vermont Orange Ambrosia

In the early 2000s when I was still writing monthly cooking columns for the Abilene Reflector Chronicle, I received a note from a lady in Junction City. She included a recipe for Vermont Orange Ambrosia.
When I think of ambrosia, I envision fruit, marshmallows and coconut that have been folded together with whipped cream or Cool Whip. This recipe is obviously different so I looked up the defintion of ambrosia . . . “In Greek mythology, ambrosia was the food of the gods. At a picnic, ambrosia is a dessert made with oranges and shredded coconut.” The picnic version of ambrosia coincides with a breakfast treat my mom used to make — sliced orange sprinkled with coconut and powdered sugar. Grace Olson’s version omits the coconut but adds some other interesting ingredients. Her recipe, as she provided it is listed directly below. This is definitely an adult ambrosia. However, we prefer it without the run and I've include a note at the end of the recipe.

Vermont Orange Ambrosia     Make 4 to 6 servings
Recipe provided by Gladys L. Olson, Junction City
4 large oranges, peeled, pith removed (I zested oranges                                                                    before peeling and added some of the zest.)
1/3 cup maple syrup
1/4 cup dark rum
1/4 teaspoon ground cinnamon
3/4 cup large walnut pieces (I used about 1/2 cup instead of 3/4 cup)
  1. Halve the oranges lengthwise; slice into 1/4" thick rounds.  
  2. Place in a serving bowl. 
  3.  Put the maple syrup, rum if using and cinnamon in a small bowl, stirring until well blended. 
  4. Pour over oranges, tossing gently to coat. Cover and refrigerate for several hours or overnight.
  5. Preheat oven to 350°. Put the walnut pieces in a small, shallow pan and toast for 15 minutes, or until lightly browned, shaking pan occasionally. Cool. 
  6. To serve, toss toasted nuts with oranges. I also added a sprig of fresh garden mint.
Per serving:  calories: 258; fat: 11 g; no cholesterol; sodium: 4 mg; percent calories from fat:  37%.
Note: Grace's boozy version is great for adults who want a bit of a kick but we prefer the more subtle taste of her recipe without the run. If you need extra moisture, squeeze a tablespoon or so of fresh orange juice over the oranges.

Recipe without photos . . .
Vermont Orange Ambrosia     Make 4 to 6 servings
Recipe provided by Gladys L. Olson, Junction City
4 large oranges, peeled, pith removed (I zested oranges before peeling and added some of the zest.)
1/3 cup maple syrup
1/4 cup dark rum
1/4 teaspoon ground cinnamon
3/4 cup large walnut pieces (I used about 1/2 cup instead of 3/4 cup)
  1. Halve the oranges lengthwise; slice into 1/4" thick rounds.  
  2. Place in a serving bowl. 
  3.  Put the maple syrup, rum if using and cinnamon in a small bowl, stirring until well blended. 
  4. Pour over oranges, tossing gently to coat. Cover and refrigerate for several hours or overnight.
  5. Preheat oven to 350°. Put the walnut pieces in a small, shallow pan and toast for 15 minutes, or until lightly browned, shaking pan occasionally. Cool. 
  6. To serve, toss toasted nuts with oranges. I also added a sprig of fresh garden mint.
Per serving:  calories: 258; fat: 11 g; no cholesterol; sodium: 4 mg; percent calories from fat:  37%.
Note: Grace's boozy version is great for adults who want a bit of a kick but we prefer the more subtle taste of her recipe without the run. If you need extra moisture, squeeze a tablespoon or so of fresh orange juice over the oranges.

Pistachio-Crusted Fish . . . with Citrus Salsa


This is another recipe inspired by Food Network’s The Kitchen. Katie Lee prepared it during a show featuring citrus. 
The technique used with the fish is similar to one I frequently use with “Magic” Chicken. I’ve used both mustard and mayo in the chicken recipe and think that mayo could easily be substituted for the mustard in this recipe. I’ve also coated the chicken in chopped pecans and think that would be an idea for the fish as well. 
Of course, the Citrus Salsa could be omitted but added a bright zest to the fish. 

Pistachio-Crusted Fish . . . with Citrus Salsa   4 serving (easy to cut in half or multiple servings to fit family size)
Citrus Salsa 
1 grapefruit
1 or 2 regular or blood red orange
Olive oil, for drizzling 
Kosher salt and freshly ground black pepper 
Fish
1/2 cup roasted, salted and shelled pistachios
1/2 teaspoon garlic salt 
Four 4- to 6-ounce skinless white fish fillets (you can also use tilapia, cod halibut, sole or any white fish)
2 tablespoons Dijon mustard 
  1. Preheat the oven to 400°. Line a baking sheet with parchment paper. (I also added a cooking rack (sprayed with Pam) to allow for air circulation as the fish cooked.)
  2. Citrus Salsa: Using a small knife, remove the peel, pith and outer membrane of the grapefruit, tangerine and orange. Working over a bowl, slice each into segments; remove the seeds. Drizzle with olive oil and season with salt and pepper. Cover and refrigerate until ready to serve.

  3. Fish: In a food processor, pulse the pistachios and garlic salt until the mixture resembles small pebbles. Transfer to a shallow dish.
  4. Place fish of the prepared rack and season both sides of the fish fillets with salt and pepper. 
  5. Use a pastry brush to coat the top side of each piece of fish with the Dijon mustard. Gently press the mustard-coated side with the pistachio mixture. 
  6. Bake until the fish is opaque and flakes easily with a fork, 10 to 12 minutes, depending on the thickness of the fillets. 
  7. Transfer to a serving plate and top with the citrus salsa. 
  8. Drizzle with olive oil and season with more salt and pepper before serving.
Recipe without photos . . .
Pistachio-Crusted Fish . . . with Citrus Salsa   4 serving (easy to cut in half or multiple servings to fit family size)
Citrus Salsa 
1 grapefruit
1 or 2 regular or blood red orange
Olive oil, for drizzling 
Kosher salt and freshly ground black pepper 
Fish
1/2 cup roasted, salted and shelled pistachios
1/2 teaspoon garlic salt 
Four 4- to 6-ounce skinless white fish fillets (you can also use tilapia, cod halibut, sole or any white fish)
2 tablespoons Dijon mustard 
  1. Preheat the oven to 400°. Line a baking sheet with parchment paper. (I also added a cooking rack (sprayed with Pam) to allow for air circulation as the fish cooked.)
  2. Citrus Salsa: Using a small knife, remove the peel, pith and outer membrane of the grapefruit, tangerine and orange. Working over a bowl, slice each into segments; remove the seeds. Drizzle with olive oil and season with salt and pepper. Cover and refrigerate until ready to serve.
  3. Fish: In a food processor, pulse the pistachios and garlic salt until the mixture resembles small pebbles. Transfer to a shallow dish.
  4. Place fish of the prepared rack and season both sides of the fish fillets with salt and pepper. 
  5. Use a pastry brush to coat the top side of each piece of fish with the Dijon mustard. Gently press the mustard-coated side with the pistachio mixture. 
  6. Bake until the fish is opaque and flakes easily with a fork, 10 to 12 minutes, depending on the thickness of the fillets. 
  7. Transfer to a serving plate and top with the citrus salsa. 
  8. Drizzle with olive oil and season with more salt and pepper before serving.

Slow Cooker Charro Beans

Charro Beans are on the menu in the Mexican restaurants we frequented in South Texas this past February.  As we cope with lots of stay-at-home time during the COVID-10 virus, I decided to give them a try.
I relied on several recipes from the internet but did make a few adjustments as I’m trying to rely on ingredients we have on hand. For example many recipes called for a can of Rotel tomatoes, but I used a bag of our blanched and frozen garden tomatoes; consequently I added them at the beginning of the cooking period and then put in a small can of green chilies near the end. It was also a chance to use some of our frozen jalapeño peppers, again from the garden. Also, had no fresh cilantro so used dry instead.  I omitted the bacon (the beans were full of flavor even without it) and cut this basic recipe in half for just the two of us. Even then, it was a lot so I’ll use them in Cornbread Salad tomorrow.
Despite those changes, the recipe included below is written without my personal adjustments. 

By the way —
The recipe is named after the traditional Mexican cowboy horsemen, or charros.

Bowls of Charro Beans were added to our assemble-your-own taco bar. 
Slow Cooker Charro Beans  Servings 8 to 10 servings
1 pound dried pinto beans
4 to 6 pieces of bacon, chopped
4 cups water
2 cups beef broth (could use all water or even vegetable or chicken broth)
6 cloves garlic minced
Fresh jalapeño diced 
1 tablespoon cumin
1 teaspoon garlic powder
1 teaspoon chili powder
1 (10-ounce) can Rotel (diced tomatoes & green chiles)
1 cup fresh cilantro leaves chopped
Salt & freshly ground black pepper
  1. Place the beans in a colander, rinse well, and remove any stones or shriveled beans. Cover with water and soak overnight.
  2. Drain beans and place in the slow cooker. Cover with water and beef broth. 
  3. Add chopped bacon, garlic, jalapeño, cumin, garlic powder, and chili powder. 

  4. Cover and cook on low for 7 to 9 hours or until almost done. 
  5. Stir in the Rotel and chopped cilantro; cover and cook for an additional hour or until tender (the total cooking time will likely be between 8 to 10 hours.  
  6. When the beans are tender, season with salt and freshly ground pepper to taste (stir in about  1/2 teaspoon of salt at a time to avoid over salting). Note: Salt is added after beans are tender as it can interfere with the beans ability to soften if added in the early stages. 
Recipe without photos . . .
Slow Cooker Charro Beans  Servings 8 to 10 servings
1 pound dried pinto beans
4 to 6 pieces of bacon, chopped
4 cups water
2 cups beef broth (could use all water or even vegetable or chicken broth)
6 cloves garlic minced
Fresh jalapeño diced 
1 tablespoon cumin
1 teaspoon garlic powder
1 teaspoon chili powder
1 (10-ounce) can Rotel (diced tomatoes & green chiles)
1 cup fresh cilantro leaves chopped
Salt & freshly ground black pepper
  1. Place the beans in a colander, rinse well, and remove any stones or shriveled beans. Cover with water and soak overnight.
  2. Drain beans and place in the slow cooker. Cover with water and beef broth. 
  3. Add chopped bacon, garlic, jalapeño,cumin, garlic powder, and chili powder. 
  4. Cover and cook on low for 7 to 9 hours or until almost done. 
  5. Stir in the Rotel and chopped cilantro; cover and cook for an additional hour or until tender (the total cooking time will likely be between 8 to 10 hours, depending on how hot your particular slow cooker runs). 
  6. When the beans are tender, season with salt and freshly ground pepper, to taste (stir in about a 1/2 teaspoon of salt at a time to avoid over salting). Note: Salt is added after beans are tender as it can interfere with the beans ability to soften if added in the early stages.

Creamy Spinach Mushroom Tortellini

Barry gave this vegetarian entrée a thumbs up. He actually mentioned how good it was three times during the meal. I agreed wholeheartedly! I will make it again! 
The crinimi mushrooms add a meaty texture and taste but button mushroom could be used. Add extra spinach or sauté some red peppers along with the onions. Even use sour cream in place of heavy cream. 

Creamy Spinach Mushroom Tortellini
2 tablespoons+ olive oil
2  medium yellow onions, thinly sliced
1 tablespoon olive oil
8 ounces crimini mushrooms 
1/4 teaspoon salt
8 ounces spinach
1 cup heavy cream (or use 1 cup half-n-half but then add about 1/4 to 1/3 cup Parmesan cheese to mixture)
1/4 teaspoon salt
18-19 ounces frozen cheese tortellini, cooked according to package directions
1/4 teaspoon black pepper 
1/4 teaspoon ground nutmeg
  1. Heat 2 tablespoons olive oil on medium-high heat in a large skillet. Add sliced onions and cook on high heat for about 10+ minutes, constantly stirring with the spatula; continue to cook until they are lightly browned; add more olive oil if needed. 
  2. Heat 1 tablespoon olive oil and then add sliced mushrooms. Sprinkle with 1/4 teaspoon salt. Cook mushrooms for about 5 minutes, occasionally stirring, until mushrooms are soft.

  3. Add fresh spinach to the skillet and stir on low heat just until spinach starts to wilt.

  4. Add 1 cup of heavy cream, 1/4 teaspoon salt, 1/4 teaspoon black pepper and 1/4 teaspoon ground nutmeg to the mushroom and spinach mixture and bring to a quick boil. Immediately reduce to simmer.  Keep stirring while the sauce simmers for a couple of minutes. 

  5. Add cooked and drained tortellini to the creamy sauce. Stir on low heat for a couple of minutes to reheat or longer if cream needs to reduce slightly. 
Recipe without photos . . .
Creamy Spinach Mushroom Tortellini
2 tablespoons+ olive oil
2  medium yellow onions, thinly sliced
1 tablespoon olive oil
8 ounces crimini mushrooms 
1/4 teaspoon salt
8 ounces spinach
1 cup heavy cream (or use 1 cup half-n-half but then add about 1/4 to 1/3 cup Parmesan cheese to mixture)
1/4 teaspoon salt
18-19 ounces frozen cheese tortellini, cooked according to package directions 
1/4 teaspoon black pepper 
1/4 teaspoon ground nutmeg
  1. Heat 2 tablespoons olive oil on medium-high heat in a large skillet. Add sliced onions and cook on high heat for about 10+ minutes, constantly stirring with the spatula; continue to cook until they are lightly browned; add more olive oil if needed. 
  2. Heat 1 tablespoon olive oil and then add sliced mushrooms. Sprinkle with 1/4 teaspoon salt. Cook mushrooms for about 5 minutes, occasionally stirring, until mushrooms are soft.

  3. Add fresh spinach to the skillet and stir on low heat just until spinach starts to wilt.

  4. Add 1 cup of heavy cream, 1/4 teaspoon salt, 1/4 teaspoon black pepper and 1/4 teaspoon ground nutmeg to the mushroom and spinach mixture and bring to a quick boil. Immediately reduce to simmer.  Keep stirring while the sauce simmers for a couple of minutes. 

  5. Add cooked and drained tortellini to the creamy sauce. Stir on low heat for a couple of minutes to reheat or longer if cream needs to reduce slightly. 

Mimosa Salad w/ Sunflower Oil Dressing

We happened upon Rory O’Connell’s cooking show on PBS while he was making this salad.
I’ve made it twice since. So refreshing and the dressing adds the perfect finishing touch. Dressing is so good that I’ll definitely try it with other salad. This is also a salad that could be modified. For example, I added chopped tomatoes to ours. 
Russian in origin, Mimosa salad got its name because of its reminiscence of mimosa spring flowers scattered on the snow. The similarity is achieved by crumbling and scattering boiled egg yolk on the surface. The salad's popularity in the  USSR has led to the emergence of a wide variety of recipes. So obviously, the name refers to a flower and not the champagne drink!
Wright Farms Sunflower Oil is available in Abilene at C’est La Vie, Things to fall in love with.

Mimosa Salad with Sunflower Oil Dressing 4 servings
4 hand-fulls of organic mixed leaves: watercress, wild garlic, butterhead, chicory leaves, chervil sprigs, coarsely chopped spring chives, etc.
2 eggs 
16 fat Kalamata olives (or black olives if that’s all you have
1 tomato, diced (this was my addition)
12 thin Parmesan shavings or pieces
Sunflower Oil Dressing:
2 tablespoons olive oil
2 tablespoons sunflower oil (Wright Farms Sunflower Oil)
1 tablespoon balsamic vinegar (I used a light colored version)
1 small garlic clove, peeled & finely crushed
Pinch salt & pepper
  1. Egg Prep: Hard boil the eggs. Remove from the saucepan immediately and cool under a cold running tap. Remove the shell and cut the hard boiled eggs in half.
  2. Chop the white finely.
  3. Pass the yolk through a sieve, using the back of a soup spoon to push the egg through to achieve a mimosa type effect. Keep the chopped white and sieved yolk separate.                  
  4. Olive Prep: Stone the olives by gently squashing them on a chopping board with the back of a chopping knife and removing the stones.  
  5. Chop the olive flesh finely and reserve.
  6. Sunflower Oil Dressing: Mix the ingredients for the dressing together, taste and correct seasoning.
  7. Salad Assembly: Place the leaves in a large bowl and dress with just enough dressing to make the leaves glisten.
  8. On either a large platter or four large plates, first place a wide broken circle of the chopped olive on plate(s).
  9. Divide and spread the egg white in the center of the circles of olive.
  10. Top with chopped tomatoes.
  11. Place the leaves in a light pile on top of the egg white.
  12. Sprinkle the egg yolk "mimosa" on each salad.
  13. Gently, place 3 Parmesan shavings or pieces on each salad. Serve immediately. 
Recipe without photos . . .
Mimosa Salad with Sunflower Oil Dressing   4 servings
4 hand-fulls of organic mixed leaves: watercress, wild garlic, butterhead, chicory leaves, chervil sprigs, coarsely chopped spring chives, etc.
2 eggs 
16 fat Kalamata olives (or black olives if that’s all you have
1 tomato, diced (this was my addition)
12 thin Parmesan shavings or pieces
Sunflower Oil Dressing:
2 tablespoons olive oil
2 tablespoons sunflower oil (Wright Farms Sunflower Oil)
1 tablespoon balsamic vinegar (I used a light colored version)
1 small garlic clove, peeled & finely crushed
Pinch salt & pepper
  1. Egg Prep: Hard boil the eggs. Remove from the saucepan immediately and cool under a cold running tap. Remove the shell and cut the hard boiled eggs in half.
  2. Chop the white finely.
  3. Pass the yolk through a sieve, using the back of a soup spoon to push the egg through to achieve a mimosa type effect. Keep the chopped white and sieved yolk separate.                  
  4. Olive Prep: Stone the olives by gently squashing them on a chopping board with the back of a chopping knife and removing the stones.  
  5. Chop the olive flesh finely and reserve.
  6. Sunflower Oil Dressing: Mix the ingredients for the dressing together, taste and correct seasoning.
  7. Salad Assembly: Place the leaves in a large bowl and dress with just enough dressing to make the leaves glisten.
  8. On either a large platter or four large plates, first place a wide broken circle of the chopped olive on plate(s).
  9. Divide and spread the egg white in the center of the circles of olive.
  10. Top with chopped tomatoes.
  11. Place the leaves in a light pile on top of the egg white.
  12. Sprinkle the egg yolk "mimosa" on each salad.
  13. Gently, place 3 Parmesan shavings or pieces on each salad. Serve immediately. 

Pineapple Upside Down Cake

Kathy Coup's Peach Upside Down Cake receives yet another make over! Last fall I used her basic cake and brown sugar mixture but used slices of peeled apples instead of peaches. We used it for a cooking class and received rave reviews. The cake is tender and moist—the perfect base for the brown sugar glazed fruit.
Today I used canned pineapple, added walnuts to the cake batter and a little cinnamon to the brown sugar 

NOTE: This cake makes a great sweet treat for the current lock down we are now experiencing due to the COVID-19 crisis. As long as you have the basic staples and a can of fruit, you are set. And, yes, margarine can used in place of butter. Canned milk or even reconstituted dry milk can replace the whole milk I typically use.  And, a 9 or 10" cake pan could be used in place of a cast iron skillet. 

Check out the Make-Ahead tip listed at the end of the recipe. 

Pineapple Upside Down Cake    Make one 10" round cake
Dinette Cake
1 1/2 cups all-purpose flour
1 cup granulated sugar
2 teaspoons baking powder
1/4 teaspoon salt
1/3 cup shortening (Crisco)
About 1 teaspoon vanilla or other flavoring
2/3 cup milk
1 egg or 2 whites
1/2 to 3/4 cup coarsely chopped walnuts

Fruit Topping
1 stick butter
About 1 1/2 cups brown sugar 
1/2 teaspoon ground cinnamon
6 slices or rounds of canned pineapple, drained (pineapple chunks or even crushed pineapple could be used)
6 whole walnuts
  1. CAKE: Mix flour, sugar, baking powder, salt and shortening together in a bowl and mix until well blended. 
  2. Add vanilla, milk and egg (or whites) to dry ingredients. Mix and then fold in chopped walnuts, Set aside so it’s ready to spread over pineapple mixture. 
  3. TOPPING: Melt butter in a 10” cast iron skillet. 
  4. Mix brown sugar with cinnamon. Add enough brown sugar mixture, about 1 1/2 cups, to absorb butter.
  5. Arrange drained pineapple over the brown sugar mixture; place a walnut half in the center of each pineapple slice.
  6. Top with dollops of Dinette Cake batter; carefully spread batter to cover top of cake.
  7. Bake in a preheated 350° oven about 35 to 40 minutes or until golden brown on top and a  toothpick inserted in the middle of the cake comes out clean.
  8. Cool for a few minutes and then invert onto a serving plate.
MAKE AHEAD TIP: Follow step #1 above and then bag the "cake mix", label and date. It's ready to proceed to remaining steps whenever you need a quick dessert! 

Recipe without photos . . .
Pineapple Upside Down Cake    Make one 10" round cake
Dinette Cake
1 1/2 cups all-purpose flour
1 cup granulated sugar
2 teaspoons baking powder
1/4 teaspoon salt
1/3 cup shortening (Crisco)
About 1 teaspoon vanilla or other flavoring
2/3 cup milk
1 egg or 2 whites
1/2 to 3/4 cup coarsely chopped walnuts

Fruit Topping
1 stick butter
About 1 1/2 cups brown sugar 
1/2 teaspoon ground cinnamon
6 slices or rounds of canned pineapple, drained (pineapple chunks or even crushed pineapple could be used)
6 whole walnuts
  1. CAKE: Mix flour, sugar, baking powder, salt and shortening together in a bowl and mix until well blended. 
  2. Add vanilla, milk and egg (or whites) to dry ingredients. Mix and then fold in chopped walnuts, Set aside so it’s ready to spread over pineapple mixture. 
  3. TOPPING: Melt butter in a 10” cast iron skillet. 
  4. Mix brown sugar with cinnamon. Add enough brown sugar mixture, about 1 1/2 cups, to absorb butter.
  5. Arrange drained pineapple over the brown sugar mixture; place a walnut half in the center of each pineapple slice.
  6. Top with dollops of Dinette Cake batter; carefully spread batter to cover top of cake.
  7. Bake in a preheated 350° oven about 35 to 40 minutes or until golden brown on top and a  toothpick inserted in the middle of the cake comes out clean.
  8. Cool for a few minutes and then invert onto a serving plate.