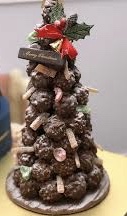
Showing posts with label Corn Syrup. Show all posts

Microwave Cashew Brittle

My mom’s peanut brittle was SO good! She made multiple batches for friends, neighbors and family and during her later years always made it in the microwave. Everyone once in awhile she’d also make cashew brittle 


Microwave Cashew Brittle 

1 cup granulated sugar

1/2 cup light corn syrup

1 cup cashews chopped

1 tablespoon butter

1 teaspoon vanilla

1 teaspoon baking soda

  1. Line a cookie sheet with a silicon sheet or generously butter it; set aside.
  2. In a large microwave safe bowl add the sugar and corn syrup;  mix. 
  3. Put in the microwave and cook for 3 minutes. Stir. 
  4. Put back into the microwave and cook for an additional 3 minutes – the mixture should be light amber in color.
  5. Stir in the cashews. Cook for an additional 3 to 5 minutes — stop at the end of each minute and when it turns golden brown in color, it is finished. (If cooked too long it will burn.).
  6. Remove from the microwave and stir in the butter and vanilla. Continue cooking for an additional minute. Remove and stir in the baking soda—it will start to foam and become thick.
  7. Spread the mixture on the buttered baking sheet and allow to completely cool. I like to wait until cool enough to touch and then stretch it so it is not so thick. 
    Above - brittle after being poured onto the silicon sheet.
    Below = brittle after being stretched. 
  8. Break into pieces.
Recipe without photos . . .Microwave Cashew Brittle 

1 cup granulated sugar

1/2 cup light corn syrup

1 cup cashews chopped

1 tablespoon butter

1 teaspoon vanilla

1 teaspoon baking soda

  1. Line a cookie sheet with a silicon sheet or generously butter it; set aside.
  2. In a large microwave safe bowl add the sugar and corn syrup;  mix. 
  3. Put in the microwave and cook for 3 minutes. Stir. 
  4. Put back into the microwave and cook for an additional 3 minutes – the mixture should be light amber in color.
  5. Stir in the cashews. Cook for an additional 3 to 5 minutes — stop at the end of each minute and when it turns golden brown in color, it is finished. (If cooked too long it will burn.).
  6. Remove from the microwave and stir in the butter and vanilla. Continue cooking for an additional minute. Remove and stir in the baking soda—it will start to foam and become thick.
  7. Spread the mixture on the buttered baking sheet and allow to completely cool. 
  8. I like to wait until cool enough to touch and then stretch it so it is not so thick. 
  9. Break into pieces.
  10. . 
  11. Break into pieces.


Millionaire Bars

These cookies as SO RICH that they are called Millionaire Bars. They also contain somewhere between a million to a billion calories! After seeing these bars on Food Network’s The Kitchen, I knew I had to try them despite all the calories and sugar! I did cut down on a bit of sugar as reflected in the recipe that follows. Also added a few cautions concerning the cooking of the caramel as it can be a bit tricky. We cut them into small squares due to their richness. These are so good but definitely a “not too often” sweet treat.


Three distinct layers of goodness!


Millionaire Bars     Makes an 8x8-inch pan

Crust:

1 1/2 sticks (12 tablespoons) butter, melted

1/4 cup granulated sugar

1 1/2 teaspoons vanilla extract

1 1/2 cups all-purpose flour

1/4 teaspoon kosher salt

Caramel Layer:

1 stick (8 tablespoons) butter

1/4 cup lightly packed light brown sugar

1 tablespoon light corn syrup

1/2 teaspoon kosher salt

1 (14-ounce)can sweetened condensed milk

1/2 teaspoon vanilla extract

Chocolate Ganache Layer:

1 1/2 cups dark chocolate chips

1/3 cup heavy cream

1 tablespoon light corn syrup

  1. Crust: Preheat the oven to 325° F. Line an 8-by-8 baking pan with parchment that hangs slightly over the edges and set aside.
  2. In a medium microwave-safe bowl, melt the butter. Add granulated sugar and vanilla. Add the flour and kosher salt and stir just until combined, being careful not to overmix.
  3. Press the dough firmly and evenly into the prepared baking dish. 
  4. Bake until the edges are just slightly golden brown, 25 to 30 minutes. Set aside to completely cool as you make the caramel layer. 
  5. Caramel Layer: In order to avoid a split sauce it is essential that the mixture is stirred/whisked constantly (I used a whisk). If the caramel does start to separate, remove from heat and whisk vigorously. Avoid a too small pan—the recipe specifies a medium pan and you need that surface area to create the caramel. Finally, watch closely and reduce the heat as necessary to prevent the bottom from burning.  Combine the butter, brown sugar, corn syrup, kosher salt and condensed milk in a medium saucepan. Heat over medium heat, stirring constantly, until the color changes from pale to golden (much like butterscotch). This will take about  15 to 20 minutes. Watch closely and reduce the heat as necessary to prevent the bottom from burning.
    Combined ingredients at the beginning of the caramelization process. 

  6. Once a caramel color is achieved, add the vanilla and stir to incorporate. 


  7. Immediately pour the caramel mixture over the cooled shortbread crust and spread evenly. Set aside to cool while you prepare the chocolate layer.
  8. Chocolate Ganache Layer: Place the chocolate chips into a medium bowl. 
  9. In a small saucepan, heat the heavy cream to just simmering. Immediately pour the warm heavy cream over the chocolate chips. Allow to sit for 3 minutes, then gently whisk to form a homogenous mixture. 
  10. Stir in the corn syrup until incorporated.
  11. Pour the chocolate ganache over the cooled caramel and spread evenly. 
  12. Refrigerate until set, about 30 minutes.
  13. Cut into small squares or bars. 

Recipe without photos . . . Millionaire Bars     Makes an 8x8-inch pan

Crust:

1 1/2 sticks (12 tablespoons) butter, melted

1/4 cup granulated sugar

1 1/2 teaspoons vanilla extract

1 1/2 cups all-purpose flour

1/4 teaspoon kosher salt

Caramel Layer:

1 stick (8 tablespoons) butter

1/4 cup lightly packed light brown sugar

1 tablespoon light corn syrup

1/2 teaspoon kosher salt

1 (14-ounce)can sweetened condensed milk

1/2 teaspoon vanilla extract

Chocolate Ganache Layer:

1 1/2 cups dark chocolate chips

1/3 cup heavy cream

1 tablespoon light corn syrup

  1. Crust: Preheat the oven to 325° F. Line an 8-by-8 baking pan with parchment that hangs slightly over the edges and set aside.
  2. In a medium microwave-safe bowl, melt the butter. Add granulated sugar and vanilla. Add the flour and kosher salt and stir just until combined, being careful not to overmix.
  3. Press the dough firmly and evenly into the prepared baking dish. 
  4. Bake until the edges are just slightly golden brown, 25 to 30 minutes. Set aside to completely cool as you make the caramel layer. 
  5. Caramel Layer: In order to avoid a split sauce it is essential that the mixture is stirred/whisked constantly (I used a whisk). If the caramel does start to separate, remove from heat and whisk vigorously. Avoid a too small pan—the recipe specifies a medium pan and you need that surface area to create the caramel. Finally, watch closely and reduce the heat as necessary to prevent the bottom from burning.  Combine the butter, brown sugar, corn syrup, kosher salt and condensed milk in a medium saucepan. Heat over medium heat, stirring constantly, until the color changes from pale to golden (much like butterscotch). This will take about  15 to 20 minutes. Watch closely and reduce the heat as necessary to prevent the bottom from burning.
  6. Once a caramel color is achieved, add the vanilla and stir to incorporate. 
  7. Immediately pour the caramel mixture over the cooled shortbread crust and spread evenly. Set aside to cool while you prepare the chocolate layer.
  8. Chocolate Ganache Layer: Place the chocolate chips into a medium bowl. 
  9. In a small saucepan, heat the heavy cream to just simmering. Immediately pour the warm heavy cream over the chocolate chips. Allow to sit for 3 minutes, then gently whisk to form a homogenous mixture. 
  10. Stir in the corn syrup until incorporated.
  11. Pour the chocolate ganache over the cooled caramel and spread evenly. 
  12. Refrigerate until set, about 30 minutes.
  13. Cut into small squares or bars. 

Chocolate Peanut Butter Balls

A little behind on posts as you can see! We hosted a Christmas gift-giving party for a group—everyone made a sampling of gifts from the kitchen. Here's one of those recipes . . .

Chocolate Peanut Butter Balls Yield:  about thirty-eight 3/4" balls          
1 cup chunky peanut butter
1/2 cup corn syrup
2 cups Rice Krispie type cereal
8 ounces milk or semi-sweet chocolate chips
1/4 cup chopped peanuts
1.  Beat together the peanut butter and corn syrup in a medium size bowl until well blended.  
2.  Stir in rice cereal until well mixed. Using rounded teaspoonfuls, shape mixture into ball shapes.  


3.  Place on large, foil or wax paper-lined baking sheet. Chill for several hours (about 2) or until firm. Melt chocolate in a double boiler (or microwave); stir well to blend. 
4.  Using a toothpick or wooden skewer, spear peanut butter rounds; dip into chocolate, turning to coat completely; shake off excess chocolate by gently tapping fork on edge of bowl. Return to the baking sheet. (If chocolate thickens too much, reheat, or microwave at HALF power, until soft enough to dip.) Sprinkle with chopped peanuts. 
5.   Let stand until hardened.

GIFT GIVING IDEA:
Add each ball to a paper liner, place on a Christmas plate 
and cover with plastic wrap or cellophane. Or, wrap a styrofoam cone in cellophane, add toothpicks to the chocolate balls and create a Chocolate Ball Tree . . .

Other easy holiday gift giving recipes include:
Tortilla Snowflakes
Pretzel Turtles
Cran-Almond Snowballs

Recipe without photos . . .
Chocolate Peanut Butter Balls Yield:  about thirty-eight 3/4" balls          
1 cup chunky peanut butter
1/2 cup corn syrup
2 cups Rice Krispie type cereal
8 ounces milk or semi-sweet chocolate chips
1/4 cup chopped peanuts
1.  Beat together the peanut butter and corn syrup in a medium size bowl until well blended.  
2.  Stir in rice cereal until well mixed. Using rounded teaspoonfuls, shape mixture into ball shapes.  
3.  Place on large, foil or wax-paper-lined baking sheet. Chill for several hours (about 2) or until firm. Melt chocolate in a double boiler (or microwave); stir well to blend. 
4.  Using a toothpick or wooden skewer, spear peanut butter rounds; dip into chocolate, turning to coat completely; shake off excess chocolate by gently tapping fork on edge of bowl. Return to the baking sheet. (If chocolate thickens too much, reheat, or microwave at HALF power, until soft enough to dip.) Sprinkle with chopped peanuts.
5.    Let stand until hardened.

Caramel Corn Husk Popcorn Treats

In the past I made Candy Indian Corn "in the husk" but thought I'd change it up a bit . . . using my mom's recipe for microwave popcorn and instead of brown paper husks, I used sheets of legal sized green paper. Since I made small "ears of corn," regular sized paper would have also worked. Green or brown tissue paper would be another alternative.

Caramel Corn Husk Popcorn Treats 
1 recipe Caramel Popcorn -- make through step #3 but pour syrup over popcorn placed in a large bowl and omit the additional microwaving as you do not want to dry out the coated corn for this project
Green paper -- legal sized or regular or tissue paper
  1. With buttered or sprayed hands, form prepared caramel popcorn into small-sized corn-on-the-cob shapes.
  2. Wrap each in plastic wrap.
  3. Wrap each in paper husk, twisting the bottom section to secure husk.
  4. Arrange in a basket.

Paper Husks
This is just a guide that can be adjusted according to the size of your corn. I just played around until I liked the end results. Basically, this is what I did . . . hope it makes sense — maybe the photos will help . . .
  1. Fold the paper, accordion style (I used about a 2 to 2 ½” wide fold), back and forth, starting with the short side of the paper.
  2. Using scissors, begin cutting the folded strip two-thirds of the way from the top, angling to the center of the strip. Repeat on the other side. Open it up and it should resemble a picket fence.
  3. Now, lay a caramel "corn-on-the-cob" at one end of the “fence,” pointed top of the corn almost even with the pointed top of the “fence,” and roll.
  4. Twist the excess paper at the bottom to create a handle for your candy corn.
  5. Carefully pull down the points to expose Caramel Corn in the husk.
Recipe/Directions without photos . . .
Caramel Corn Husk Popcorn Treats 
1 recipe Caramel Popcorn -- make through step #3 but pour syrup over popcorn placed in a large bowl and omit the additional microwaving as you do not want to dry out the coated corn for this project
Green paper -- legal sized or regular or tissue paper

  1. With buttered or sprayed hands, form prepared caramel popcorn into small-sized corn-on-the-cob shapes.
  2. Wrap each in plastic wrap.
  3. Wrap each in paper husk, twisting the bottom section to secure husk.
  4. Arrange in a basket.
Paper Husks
This is just a guide that can be adjusted according to the size of your corn. I just played around until I liked the end results. Basically, this is what I did . . . hope it makes sense — maybe the photos will help . . .
  1. Fold the paper, accordion style (I used about a 2 to 2 ½” wide fold), back and forth, starting with the short side of the paper.
  2. Using scissors, begin cutting the folded strip two-thirds of the way from the top, angling to the center of the strip. Repeat on the other side. Open it up and it should resemble a picket fence.
  3. Now, lay a caramel "corn-on-the-cob" at one end of the “fence,” pointed top of the corn almost even with the pointed top of the “fence,” and roll.
  4. Twist the excess paper at the bottom to create a handle for your candy corn.
  5. Carefully pull down the points to expose Caramel Corn in the husk.

Gingerbread House Decorating Party

"Works of art: on display!
Last year (2016) I bought a gingerbread house cutter after much deliberation – it was in my hand, then I put it back on the shelf and left the store. Later, in another store I found it for half price and bought it. My idea was to have a gingerbread house decorating party. I make a batch of dough and constructed one house. That was enough! All party plans were off the table and I vowed never to make another.
However, by the time the 2017 holiday season rolled around a decorating party again seemed like a fun idea. This time around I found a sturdy dough recipe and instructions @ Genius Kitchen blog. This is what they said about it, “While edible, this gingerbread house dough recipe is ‘structural.’ It has no leaveners that would make it puff up and distort the shapes, and it's firm so it can support lots of decorations.”
I made the dough, baked it and all was well so I proceeded to invite several couples to an party.
Wednesday before the Sunday afternoon party was designated as the construction day.  Made the Royal Icing and began to build . . . and the sturdy sides immediately began to fall in! Decided if I’d support the first wall and let it set, then I could proceed; that seemed to be working. After the four walls were up and dry, then I attempted to add the roof (the sturdy dough is also relatively heavy) and kept sliding off . . . then the walls started imploding! By this time I’m ranting ###@@** and telling Barry that I was going to cancel the party! He said, “Just use a hot glue gun!” Still determined to do it the traditional way, I managed to get two houses together and I decided our decorating challenge would be to turn a shack into a mansion! But by then, it was time to leave for the GTP play and I only had two of the five constructed and no time left before Sunday to finish. That meant after the play out came the glue gun and I finished off the other houses in a relatively short period of time.
On Saturday afternoon I covered our dining room table with brown packaging paper and set out candies, cookies, crackers, cereal, etc. in anticipation.
Sunday the guests arrived and I have to say we had a blast! It was lots of work, but definitely worth the effort. I might even do it again next year.
Gingerbread House Cutter Kit
Gingerbread Dough  Sturdy Enough to Make a House
This recipe makes 2 gingerbread houses using this cut outs I purchased.To double or triple the recipe, see the Note below.

2 cups light corn syrup (or dark corn syrup for a darker house)
1 1/2 cups firmly packed light-brown sugar (or dark brown sugar for a darker house)
1 1/4 cups margarine
9 cups all-purpose flour
1/2 teaspoon salt
  1.  In a medium microwave-safe bowl, heat corn syrup, brown sugar and margarine until margarine has melted and sugar has dissolved completely. Stir until smooth.Meanwhile, in a large bowl, combine flour and salt. Add syrup-sugar-margarine mixture. Mix well.
  2. Wrap the dough in plastic and let it rest at least 30 minutes at room temperature.
  3. Heat the oven to 350°.
  4. Roll out the dough 1/4-inch thick onto a sheet of parchment (I used a silicon sheet) cut to fit your baking pan. (If dough was difficult to roll, microwave it for 20 to 30 seconds.)
  5. Lightly flour the cutters and place them on the rolled-out dough, leaving about a 1-inch space between pieces. Try to fit as many as you can without crowding. Remove and reserve excess dough. Reroll dough scraps for the remainder of the pieces.
  6. Grab the opposite edges of the parchment paper (silicon sheet) and transfer to the baking sheet.
  7. Bake 12 to 15 minutes or until pieces are firm and lightly browned around the edges. Cool completely before removing from pans. 

Note: This recipe can be easily be doubled or even tripled. Instead of measuring out the flour, for a double recipe, use 1 (5-pound) bag plus 1 cup flour. For a triple recipe, use 2 (5-pound) bags plus 2 cups flour.

Partial pictorial construction of a house . . .
I secured one wall with the peaked roof on a tray with Royal Icing and rested it against a mixing bowl until dry.
Coat edges on edges of sides and attach to tray.
Add 4th piece and as you noticed I tied the house so it wouldn't fall apart and then allowed the icing to harden.
Here's what it looked like on the inside. Roof additions were the problem until I resorted to gluing them in place with a hot glue gun.


Easy Royal Icing      Recipe from the Spruce blog
An icing that hardens as it sets so ideal for gingerbread house construction.
1 lb powdered sugar (about 4 cups or 450 grams)
4 egg whites (or 1/2 cup liquid egg whites)
1 teaspoon lemon juice
Optional: food coloring in desired colors

In the bowl of a stand mixer fitted with the whip attachment, beat the egg whites on high speed until foamy.
Switch to low speed and gradually sift the sugar into the egg whites until it's completely incorporated. Then add the lemon juice and beat on high speed until the icing is very thick and forms stiff peaks, about 5 to 10 minutes.
At this point, you can add the food coloring, if you're only going to need a full batch of one color. But if you need more than one color, separate whatever quantities of icing you need into individual bowls and just stir in the coloring you want.
Tips:
Although the icing can be thinned, keep it thick for gingerbread house construction. Add it to a piping bag or use a spatula to spread.

You should use the royal icing right away or store it in an airtight container because it will harden quickly when exposed to the air. You can store it for a few days in the fridge, as long as it's in an airtight container.


Photos of the party set up, construction and final "works of art" -- all were unique and creative. The party was a blast!


Recipes without photos . . .
Gingerbread Dough  Sturdy Enough to Make a House
This recipe makes 2 gingerbread houses using this cut outs I purchased.To double or triple the recipe, see the Note below.

2 cups light corn syrup (or dark corn syrup for a darker house)
1 1/2 cups firmly packed light-brown sugar (or dark brown sugar for a darker house)
1 1/4 cups margarine
9 cups all-purpose flour
1/2 teaspoon salt
  1.  In a medium microwave-safe bowl, heat corn syrup, brown sugar and margarine until margarine has melted and sugar has dissolved completely. Stir until smooth.Meanwhile, in a large bowl, combine flour and salt. Add syrup-sugar-margarine mixture. Mix well.
  2. Wrap the dough in plastic and let it rest at least 30 minutes at room temperature.
  3. Heat the oven to 350°.
  4. Roll out the dough 1/4-inch thick onto a sheet of parchment (I used a silicon sheet) cut to fit your baking pan. (If dough was difficult to roll, microwave it for 20 to 30 seconds.)
  5. Lightly flour the cutters and place them on the rolled-out dough, leaving about a 1-inch space between pieces. Try to fit as many as you can without crowding. Remove and reserve excess dough. Reroll dough scraps for the remainder of the pieces.
  6. Grab the opposite edges of the parchment paper (silicon sheet) and transfer to the baking sheet.
  7. Bake 12 to 15 minutes or until pieces are firm and lightly browned around the edges. Cool completely before removing from pans. 
Note: This recipe can be easily be doubled or even tripled. Instead of measuring out the flour, for a double recipe, use 1 (5-pound) bag plus 1 cup flour. For a triple recipe, use 2 (5-pound) bags plus 2 cups flour.

Easy Royal Icing      Recipe from the Spruce blog
An icing that hardens as it sets so ideal for gingerbread house construction. 
1 lb powdered sugar (about 4 cups or 450 grams)
4 egg whites (or 1/2 cup liquid egg whites)
1 teaspoon lemon juice
Optional: food coloring in desired colors

In the bowl of a stand mixer fitted with the whip attachment, beat the egg whites on high speed until foamy.
Switch to low speed and gradually sift the sugar into the egg whites until it's completely incorporated. Then add the lemon juice and beat on high speed until the icing is very thick and forms stiff peaks, about 5 to 10 minutes.
At this point, you can add the food coloring, if you're only going to need a full batch of one color. But if you need more than one color, separate whatever quantities of icing you need into individual bowls and just stir in the coloring you want.
Tips:
Although the icing can be thinned, keep it thick for gingerbread house construction. Add it to a piping bag or use a spatula to spread.

You should use the royal icing right away or store it in an airtight container because it will harden quickly when exposed to the air. You can store it for a few days in the fridge, as long as it's in an airtight container.)
SaveSave