Showing posts with label Garlic Salt. Show all posts

Mexican Eggplant


A friend (Deanna Whitehair) gave us the eggplant. Another friend (Gwyn Johnson) recommended the recipe. Mexican Eggplant appears on p. 267 of the Colorado Cache Cookbook that was compiled by The Junior League of Denver. I own a copy of third edition that was published in 1988. I made a few changes in the recipe so I'm including my version of Mexican Eggplant followed by the original recipe in Colorado Cache Cookbook. Since there are only two of us, I made 2 small casseroles—one went into the oven, the other into the freezer to be baked and enjoyed later. We served our Mexican Eggplant with chips and a side of Cucumber Salsa/Salad

A layer of baked eggplant serves as the base for this Mexican flavored casserole that we will definitely make again . . .

Mexican Eggplant, Meta's Version     Makes 2 small casserole, about 3 servings each

1 large eggplant

1/4 cup olive oil

About 1/2 lb. ground sausage (we recommend fresh ground pork sausage from Zey’s Market)

About 1/2 on a yellow onion, diced

4 or 5 sliced button mushrooms

1 pint tomato sauce w/ peppers, onions & garlic (click on homemade tomato sauce for our version)

1 (4 oz.) can chopped, mild green chiles

1/2 teaspoon ground cumin

1/2 teaspoon garlic salt 

1 cup (4 oz.) Cheddar cheese

Sour cream and parsley or cilantro for garnishing

  1.  Peel and slice eggplant—about 1/4" thick slices. Brush both sides of each slice with oil. Place in a single layer on a greased baking sheet and bake at 450° for 20 minutes. 
  2. Meanwhile, in a small Dutch oven, partially brown sausage  add then add onion and mushrooms and cook until vegetables are tender.
  3. Add tomato sauce, chiles, cumin and garlic salt to browned sausage. Simmer uncovered for 10 minutes.
  4. Grease, oil or spray 2 small casserole dishes and layer half of the ingredients in each dish in the following order: baked egg plant slices, meat and tomato sauce, cheese. 


  5. Bake uncovered at 350° for 20 minutes. Let stand for 5 to 10 minutes to set.
  6. Serve with dollop of sour cream and parsley or cilantro.


Mexican Eggplant, Original Recipe from Colorado Cache Cookbook

Makes a 9”x13” casserole; 6 servings

1 large eggplant

1/4 cup vegetable oil

1 (15 oz.) can tomato sauce 

1 (4 oz.) can chopped, mild green chiles

1/2 teaspoon ground cumin

1/2 teaspoon garlic salt 

1 cup (4 oz.) Cheddar cheese

1 cup (8 oz.) sour cream

8 ripe olives, sliced

  1. Peel and slice eggplant.Brush both sides of each slice with oil. Place in a single layer on a greased baking sheet and bake at 450° for 20 minutes. 
  2. Combine tomato sauce, chiles, green onions, cumin and garlic salt to browned sausage. Simmer uncovered for 10 minutes.
  3. In a greased 9”x13” casserole, layer eggplant, sauce and cheese. 
  4. Top with sour cream and olives.
  5. Bake uncovered at 350° for 20 minutes. 
Meta's version without photos . . . Mexican Eggplant, Meta's Version     Makes 2 small casserole, about 3 servings each

1 large eggplant

1/4 cup olive oil

About 1/2 lb. ground sausage (we recommend fresh ground pork sausage from Zey’s Market)

About 1/2 on a yellow onion, diced

4 or 5 sliced button mushrooms

1 pint tomato sauce w/ peppers, onions & garlic (click on homemade tomato sauce for our version)

1 (4 oz.) can chopped, mild green chiles

1/2 teaspoon ground cumin

1/2 teaspoon garlic salt 

1 cup (4 oz.) Cheddar cheese

Sour cream and parsley or cilantro for garnishing

  1.  Peel and slice eggplant—about 1/4" thick slices. Brush both sides of each slice with oil. Place in a single layer on a greased baking sheet and bake at 450° for 20 minutes. 
  2. Meanwhile, in a small Dutch oven, partially brown sausage  add then add onion and mushrooms and cook until vegetables are tender.
  3. Add tomato sauce, chiles, cumin and garlic salt to browned sausage. Simmer uncovered for 10 minutes.
  4. Grease, oil or spray 2 small casserole dishes and layer half of the ingredients in each dish in the following order: baked egg plant slices, meat and tomato sauce, cheese. 
  5. Bake uncovered at 350° for 20 minutes. Let stand for 5 to 10 minutes to set.
  6. Serve with dollop of sour cream and parsley or cilantro.

Pistachio-Crusted Fish . . . with Citrus Salsa


This is another recipe inspired by Food Network’s The Kitchen. Katie Lee prepared it during a show featuring citrus. 
The technique used with the fish is similar to one I frequently use with “Magic” Chicken. I’ve used both mustard and mayo in the chicken recipe and think that mayo could easily be substituted for the mustard in this recipe. I’ve also coated the chicken in chopped pecans and think that would be an idea for the fish as well. 
Of course, the Citrus Salsa could be omitted but added a bright zest to the fish. 

Pistachio-Crusted Fish . . . with Citrus Salsa   4 serving (easy to cut in half or multiple servings to fit family size)
Citrus Salsa 
1 grapefruit
1 or 2 regular or blood red orange
Olive oil, for drizzling 
Kosher salt and freshly ground black pepper 
Fish
1/2 cup roasted, salted and shelled pistachios
1/2 teaspoon garlic salt 
Four 4- to 6-ounce skinless white fish fillets (you can also use tilapia, cod halibut, sole or any white fish)
2 tablespoons Dijon mustard 
  1. Preheat the oven to 400°. Line a baking sheet with parchment paper. (I also added a cooking rack (sprayed with Pam) to allow for air circulation as the fish cooked.)
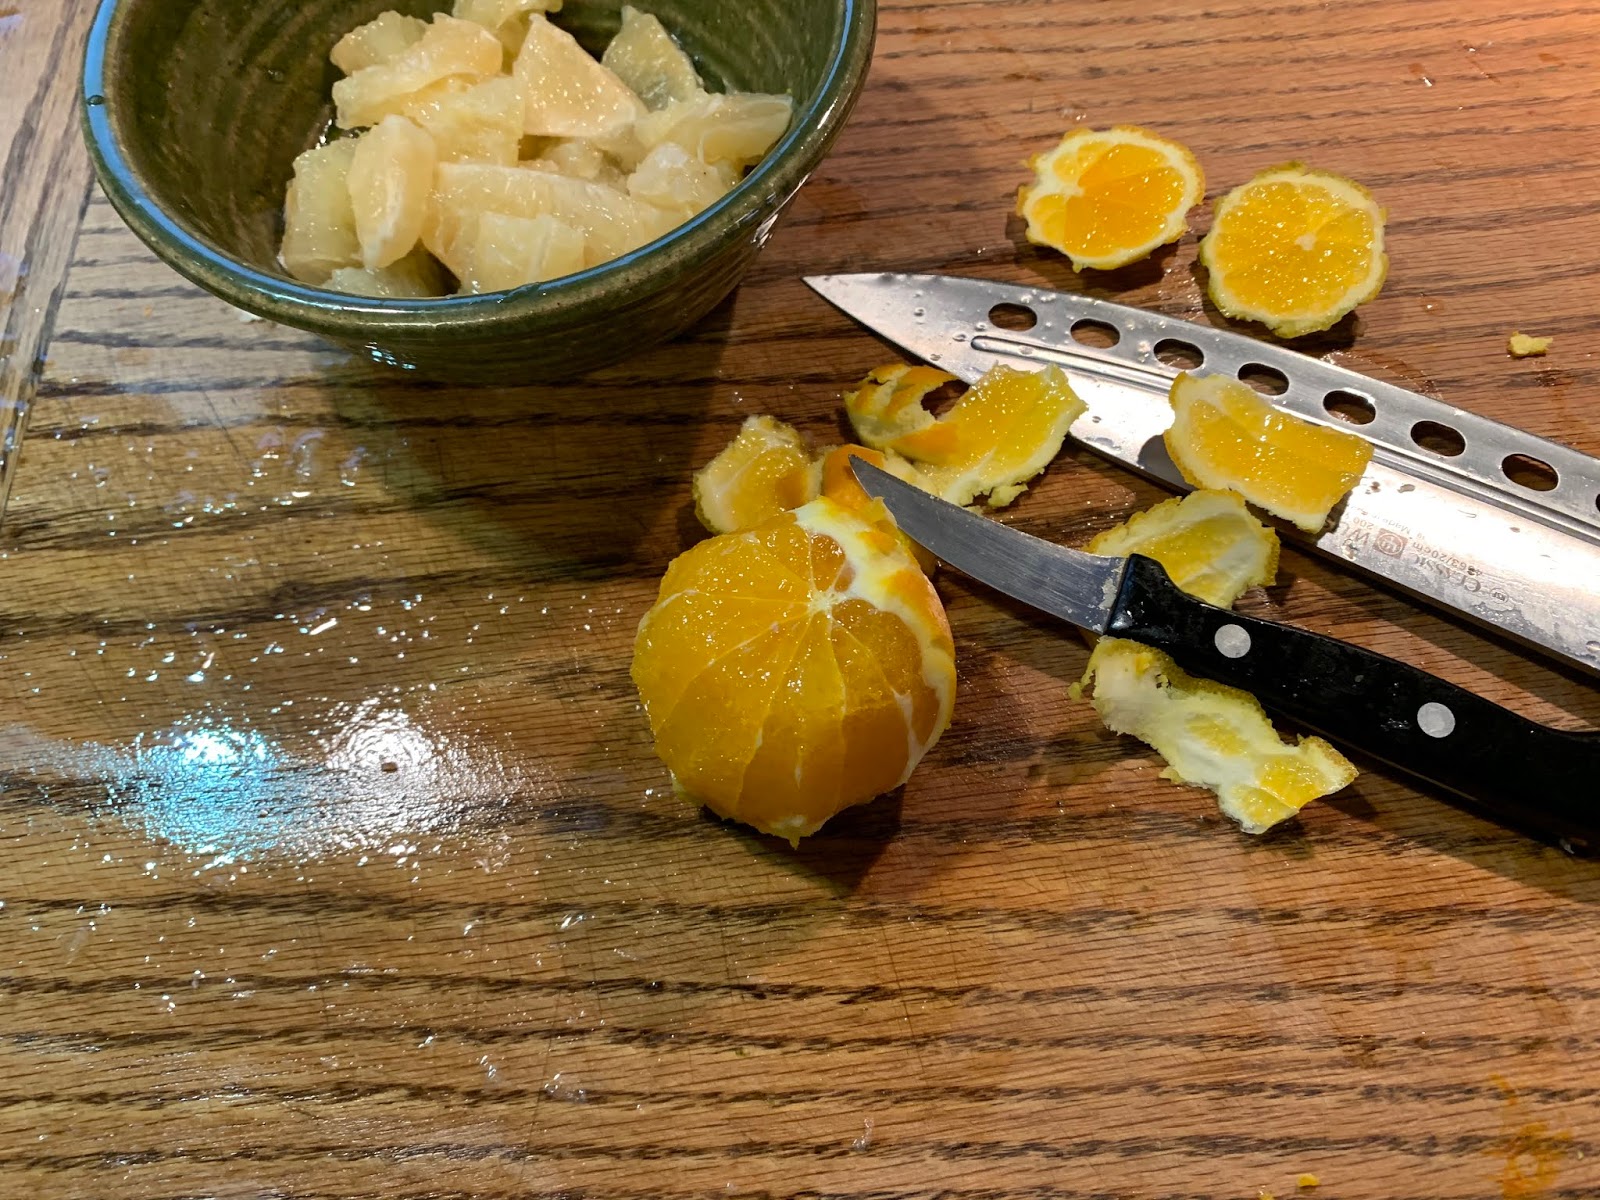
  2. Citrus Salsa: Using a small knife, remove the peel, pith and outer membrane of the grapefruit, tangerine and orange. Working over a bowl, slice each into segments; remove the seeds. Drizzle with olive oil and season with salt and pepper. Cover and refrigerate until ready to serve.

  3. Fish: In a food processor, pulse the pistachios and garlic salt until the mixture resembles small pebbles. Transfer to a shallow dish.
  4. Place fish of the prepared rack and season both sides of the fish fillets with salt and pepper. 
  5. Use a pastry brush to coat the top side of each piece of fish with the Dijon mustard. Gently press the mustard-coated side with the pistachio mixture. 
  6. Bake until the fish is opaque and flakes easily with a fork, 10 to 12 minutes, depending on the thickness of the fillets. 
  7. Transfer to a serving plate and top with the citrus salsa. 
  8. Drizzle with olive oil and season with more salt and pepper before serving.
Recipe without photos . . .
Pistachio-Crusted Fish . . . with Citrus Salsa   4 serving (easy to cut in half or multiple servings to fit family size)
Citrus Salsa 
1 grapefruit
1 or 2 regular or blood red orange
Olive oil, for drizzling 
Kosher salt and freshly ground black pepper 
Fish
1/2 cup roasted, salted and shelled pistachios
1/2 teaspoon garlic salt 
Four 4- to 6-ounce skinless white fish fillets (you can also use tilapia, cod halibut, sole or any white fish)
2 tablespoons Dijon mustard 
  1. Preheat the oven to 400°. Line a baking sheet with parchment paper. (I also added a cooking rack (sprayed with Pam) to allow for air circulation as the fish cooked.)
  2. Citrus Salsa: Using a small knife, remove the peel, pith and outer membrane of the grapefruit, tangerine and orange. Working over a bowl, slice each into segments; remove the seeds. Drizzle with olive oil and season with salt and pepper. Cover and refrigerate until ready to serve.
  3. Fish: In a food processor, pulse the pistachios and garlic salt until the mixture resembles small pebbles. Transfer to a shallow dish.
  4. Place fish of the prepared rack and season both sides of the fish fillets with salt and pepper. 
  5. Use a pastry brush to coat the top side of each piece of fish with the Dijon mustard. Gently press the mustard-coated side with the pistachio mixture. 
  6. Bake until the fish is opaque and flakes easily with a fork, 10 to 12 minutes, depending on the thickness of the fillets. 
  7. Transfer to a serving plate and top with the citrus salsa. 
  8. Drizzle with olive oil and season with more salt and pepper before serving.

Easy Sausage & Cheese Quiche

This was one of our contributions to last weekend's K-State football tailgate. I actually made it the night before and just warmed it up in the microwave before hitting the road. By the way, the CATS won!


Easy Sausage & Cheese Quiche    8 servings
1 (9”) unbaked deep frozen pie crust (I made a no-roll crust using the recipe on our site but omitted the powdered sugar)
8 oz. mild or spicy pork breakfast sausage
1/2 onion, diced
2 to 3 tablespoons fresh herbs or 1 tablespoon dried (parsley, thyme, chives)
1 1/2 to 2 cups shredded sharp cheddar cheese -  divided
6 large eggs
1/2 cup milk mixed with 1/2 cup sour cream
1 teaspoon garlic salt
1/2 teaspoon ground black pepper
1/2 teaspoon ground mustard
  1. Preheat oven to 350°F. Place pie shell on cookie sheet. Set aside.
  2. In a skillet over medium high heat, cook the sausage until no pink remains; add onions about halfway through cooking. Drain excess fat from pan if needed.
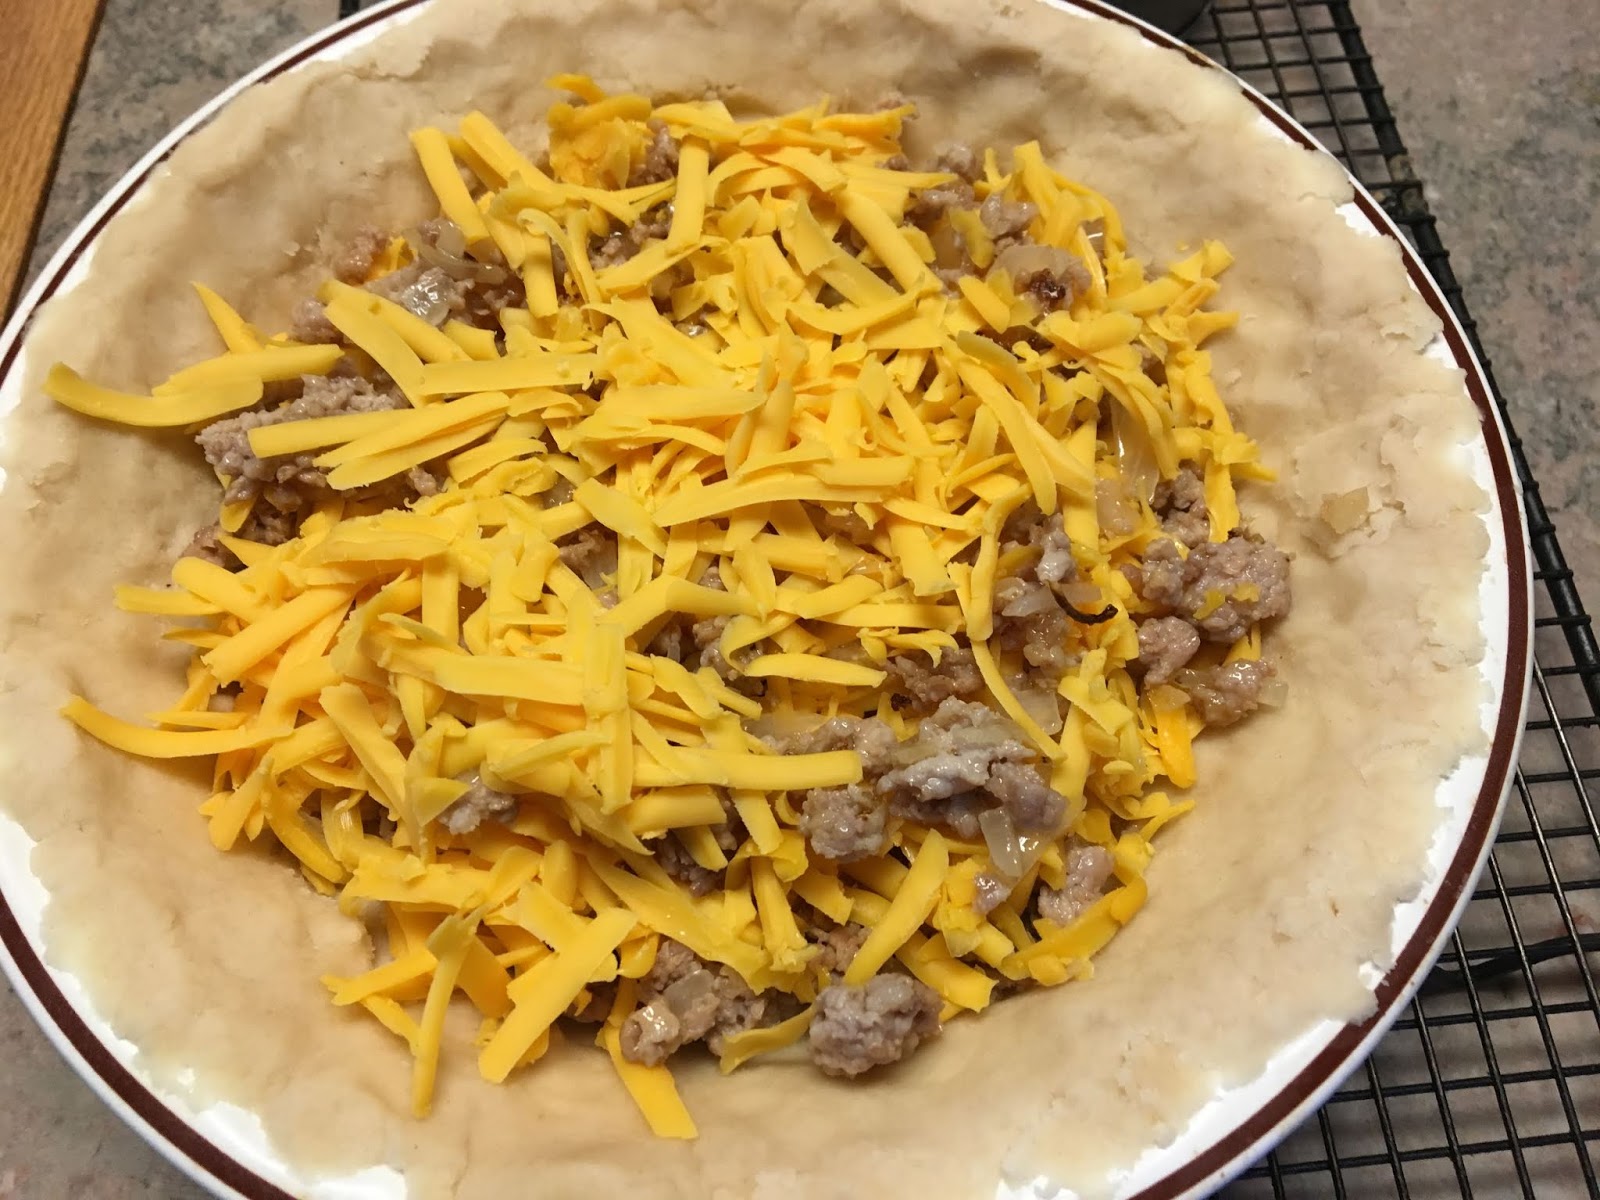
  3. Spread 1/2 sausage mixture in pie shell; sprinkle with 1/2 cheese. Add another layer of remaining sausage and most, but not all, of the cheese.
  4. In a medium size mixing bowl whisk together the milk & sour cream, eggs, salt, pepper, and mustard.  Pour evenly over sausage. 
  5. Sprinkle with remaining cheese. 
  6. Place into oven and bake for 45 to 50 minutes or until the center is set when gently shaken. Check at 30 minutes and lay a piece of aluminum foil on top to prevent over browning if needed.
  7. Allow to rest for 20 to 30 minutes. Serve warm or at room temperature.
Recipe without photos . . .
Easy Sausage & Cheese Quiche    8 servings
1 (9”) unbaked deep frozen pie crust (I made a no-roll crust using the recipe on our site but omitted the powdered sugar)
8 oz. mild or spicy pork breakfast sausage
1/2 onion, diced
2 to 3 tablespoons fresh herbs or 1 tablespoon dried (parsley, thyme, chives)
1 1/2 to 2 cups shredded sharp cheddar cheese -  divided
6 large eggs
1/2 cup milk mixed with 1/2 cup sour cream
1 teaspoon garlic salt
1/2 teaspoon ground black pepper
1/2 teaspoon ground mustard
  1. Preheat oven to 350°F. Place pie shell on cookie sheet. Set aside.
  2. In a skillet over medium high heat, cook the sausage until no pink remains; add onions about halfway through cooking. Drain excess fat from pan if needed.
  3. Spread 1/2 sausage mixture in pie shell; sprinkle with 1/2 cheese. Add another layer of remaining sausage and most, but not all, of the cheese.
  4. In a medium size mixing bowl whisk together the milk & sour cream, eggs, salt, pepper, and mustard.  Pour evenly over sausage. 
  5. Sprinkle with remaining cheese. 
  6. Place into oven and bake for 45 to 50 minutes or until the center is set when gently shaken. Check at 30 minutes and lay a piece of aluminum foil on top to prevent over browning if needed.
  7. Allow to rest for 20 to 30 minutes. Serve warm or at room temperature.

Christmas Tree Spinach Dip Breadsticks

Tree trimmed with fresh sage leaves. 
I just had to give this tree a try! Although it looks a bit complicated, it is actually easy and very tasty. Besides that it is impressive.
The recipe, complete with a step-by-step video is from itsalwaysauturn.com  -- such a clever idea!
Note: I assembled the tree about an hour and a half before guests arrived for a party, put it in the refrigerator and then popped it in the oven about 30 minutes before the party started.

Christmas Tree Spinach Dip Breadsticks
12 oz. frozen chopped spinach, thawed & squeezed dry
6 oz. cream cheese, softened (I used an 8 oz. pkg.)
2 garlic cloves, minced
1/2 teaspoon salt
1/2 teaspoon onion powder
1/4 teaspoon pepper
1/4 teaspoon chili powder
1 teaspoon Italian seasoning
1/2 cup grated Parmesan cheese
1 cup Cheddar or mozzarella cheese (I used a combo of both)
1 (11 oz.) tube refrigerated thin crust pizza
Brush tree with: 2 tablespoons melted butter mixed with 1/2 teaspoon each garlic salt & Italian seasoning (I actually never got around to doing this step!)
  1. Preheat oven to 400°.
  2. In a bowl, beat together the spinach and cream cheese. 
    I squeezed the spinach until it was dry in a piece of cheesecloth.

  3. Add garlic, salt, onion powder, pepper, chili powder, Italian seasoning;ng and beat to combine.
  4. Add Parmesan and 1/2 cup of Cheddar or mozzarella and continue to beat.
  5. To shape: roll pizza crust out on a work surface. (Shaping video available at itsalwaysauturn.com )
  6. Cut a tree shape out of center.
  7. Place outer pieces of tree on a silicon baking sheet (I also added a sheet of sprayed parchment paper on top of the silicon) and press together and stretch to create a base tree shape + push and shape dough to create a small trunk. 
  8. Spread spinach mixture over tree shape, spreading evenly to edges. (Mixture may be softened in microwave for 30 seconds to soften just slightly if it does not spread evenly).
  9. Sprinkle with remaining cheese.
  10. Place other tree shape on top and stretch to fit over the spinach mixture. 
  11. Before cutting the breadsticks, mark off the center of tree so the (visually or with a toothpick) so that there will be an inch of uncut surface right down the center of the tree. Then, using a pizza cutter or very sharp knife, begin cutting slits up and down each side of the tree, about 1" apart, being sure to keep the center section of the tree intact.
  12. Twist each  "breadstick" to further create a tree shape—base sections that are longer, twist 3 or 4 times; top sections need only 1 or even a half twist. 


  13. Transfer silicon sheet to baking tray. 
  14. Bake tree for 22 to 30 minutes until golden brown and cooked through on the bottom. It the edges begin to brown too fast, cover with strips of foil.
  15. Once baked, run a long spatula under all parts of the tree and transfer to a wooden board or serving platter by slipping off the silicon/parchment. 
  16. Melt butter, add garlic salt and Italian seasoning. (I never got around to this step!)
Recipe without photos . . .
Christmas Tree Spinach Dip Breadsticks
12 oz. frozen chopped spinach, thawed & squeezed dry
6 oz. cream cheese, softened (I used an 8 oz. pkg.)
2 garlic cloves, minced
1/2 teaspoon salt
1/2 teaspoon onion powder
1/4 teaspoon pepper
1/4 teaspoon chili powder
1 teaspoon Italian seasoning
1/2 cup grated Parmesan cheese
1 cup Cheddar or mozzarella cheese (I used a combo of both)
1 (11 oz.) tube refrigerated thin crust pizza
Brush tree with: 2 tablespoons melted butter mixed with 1/2 teaspoon each garlic salt & Italian seasoning (I actually never got around to doing this step!)
  1. Preheat oven to 400°.
  2. In a bowl, beat together the spinach and cream cheese. 
  3. Add garlic, salt, onion powder, pepper, chili powder, Italian seasoning;ng and beat to combine.
  4. Add Parmesan and 1/2 cup of Cheddar or mozzarella and continue to beat.
  5. To shape: roll pizza crust out on a work surface. (Shaping video available at itsalwaysauturn.com )
  6. Cut a tree shape out of center.
  7. Place outer pieces of tree on a silicon baking sheet (I also added a sheet of sprayed parchment paper on top of the silicon) and press together and stretch to create a base tree shape + push and shape dough to create a small trunk. 
  8. Spread spinach mixture over tree shape, spreading evenly to edges. (Mixture may be softened in microwave for 30 seconds to soften just slightly if it does not spread evenly). 
  9. Sprinkle with remaining cheese.
  10. Place other tree shape on top and stretch to fit over the spinach mixture. 
  11. Before cutting the breadsticks, mark off the center of tree so the (visually or with a toothpick) so that there will be an inch of uncut surface right down the center of the tree. Then, using a pizza cutter or very sharp knife, begin cutting slits up and down each side of the tree, about 1" apart, being sure to keep the center section of the tree intact.
  12. Twist each  "breadstick" to further create a tree shape—base sections that are longer, twist 3 or 4 times; top sections need only 1 or even a half twist. 
  13. Transfer silicon sheet to baking tray. 
  14. Bake tree for 22 to 30 minutes until golden brown and cooked through on the bottom. It the edges begin to brown too fast, cover with strips of foil.
  15. Once baked, run a long spatula under all parts of the tree and transfer to a wooden board or serving platter by slipping off the silicon/parchment. 
  16. Melt butter, add garlic salt and Italian seasoning. (I never got around to this step!)

Betty Krenger's Liverwurst Cheese Ball

Betty Krenger earns all the credit for this addictive cheese ball that was a favoirte of her husband Ed. It's always a hit at parties . . . even among those (like me) who avoid liver. 


Liverwurst Cheese Ball    Makes 1 cheese ball

8 -ounces liverwurst (ready-to-eat “liver sausage” made from at least 30% pork liver mixed with pork or other meat- John Mureller® Brunswager)
4 -ounces cream cheese
1 teaspoon Worstershire sauce
1 teaspoon onion salt 
1 tablespoon dry mustard

In a bowl, combine all ingredients and mix well. Form into a ball and frost with a the cream cheese topping that follows.   

Cream Cheese Topping:
2 tablespoons mayonnaise
4 -ounces cream cheese
Dash of garlic salt
---
Spanish-style peanute, chopped – for garnish.

Combine and mix all ingredients in a bawl. 
Frost ball with the cheese topping.
Garnish with chopped Spanish-style peanuts.


Potato Chip Heaven!


Golden brown, crisp and crunchy and they taste like potato chip heaven—homemade potato chips can’t be beat! They are certainly worth the effort.


Homemade Potato Chips    10 to 12 servings
5 pounds potatoes, unpeeled
Vegetable oil, for frying
Seasoned salt
  1. Scrub the potatoes under water until totally clean.
  2. Use a mandolin to slice the potatoes as thinly as possible. (1/8" is the thickness most recipe call for but Barry used a 1/16" cut). 
    Barry used an antique cabbage slicer to cut 1/16" potato slices.
  3. As you slice them, submerge them in cold water and set aside. Let sit for at least 30 minutes or up to 2 hours. Note: add white vinegar to water if desired (about 1/4 cup per 3 cups water). 
  4. In fryer or heavy Dutch oven, heat some vegetable oil to 375° (use a thermometer to check temp in Dutch oven).
  5. Add a few of the  sliced potatoes to the basket of a salad spinner and spin. (Or, lay the potatoes on a baking sheet lined with paper towels, and blot them with more paper towels to dry completely.)
    The salad spinner quickly dried the potatoes and got rid of the moisture.
  6. Lower batches of potatoes into the oil using a spatula (do not overload or the temperature will fall and chips will not be crisp). Fry for 3 to 4 minutes (more or less); remove with a slotted spoon when they're golden and crisp.
  7. Transfer to a cooling rack and immediately sprinkle on the salt or seasoned salt.
    We set the cooling rack down inside a pan.
  8. Repeat with the rest of the potatoes.  Note: chips will crisp more as they cool.
    Potato Chips are ready for my class reunion -- we did about 18 pounds of chips for 40 people. That's LOTS of chips.
Simple Seasoned Salt Mix
Mix together the following . . .
2 teaspoons garlic salt
2 teaspoons paprika
2 teaspoons black pepper 
¼  teaspoon kosher salt


Recipes without photos . . .
Homemade Potato Chips    10 to 12 servings
5 pounds potatoes, unpeeled
Vegetable oil, for frying
Seasoned salt
  1. Scrub the potatoes under water until totally clean.
  2. Use a mandolin to slice the potatoes as thinly as possible. (1/8" is the thickness most recipes call for but Barry used a 1/16" cut,) 
  3. As you slice them, submerge them in cold water and set aside. Let sit for at least 30 minutes or up to 2 hours. Note: add white vinegar to water if desired (about 1/4 cup per 3 cups water). 
  4. In fryer or heavy Dutch oven, heat some vegetable oil to 375° (use a thermometer to check temp in Dutch oven).
  5. Add a few of the  sliced potatoes to the basket of a salad spinner and spin. (Or, lay the potatoes on a baking sheet lined with paper towels, and blot them with more paper towels to dry completely.)
  6. Lower batches of potatoes into the oil using a spatula (do not overload or the temperature will fall and chips will not be crisp). Fry for 3 to 4 minutes (more or less); remove with a slotted spoon when they're golden and crisp.
  7. Transfer to a cooling rack and immediately sprinkle on the salt or seasoned salt.
  8. Repeat with the rest of the potatoes.  Note: chips will crisp more as they cool.
Simple Seasoned Salt Mix
Mix together the following . . .
2 teaspoons garlic salt
2 teaspoons paprika
2 teaspoons black pepper
¼  teaspoon kosher salt

Salad Bread . . . bursting with summertime flavors + tips on recipe modification

I've been making this bread ever since  Eddie Morris shared this recipe with me back in 2002.
Over time, I've made a few adjustments and recently used the adjusted recipe as the feature demonstration for Memorial Health System's Diabetic Support Group.
Eddie's original recipe + the revised recipe follows, along with explanations that make the revised recipe a little more diabetic friendly and heart healthy as well.
Great as an hors d’ oeuvre or as an accompaniment to a meal, “Salad Bread” is bursting with summertime flavors and, is a good way to use up excess garden produce. Or, add deli meat and create a sandwich packed with veggies.

Eddie Morris' recipe first appeared in an issue of the Abilene Reflector-Chronicle: 
Home-Cooking--Dickinson County Style

“ Capturing the Present and Remembering the Past”
                              by Meta Newell West,© November, 2002
It is also included in the 2nd edition of a Dickinson County Heritage Center cookbook (by the same title as listed above). Cookbooks are still available at the Heritage Center.
Barry and Cale chopping veggies for Salad Bread. 
Barry and Cale "chowing down" on Salad Bread.
Eddie's ORIGINAL RECIPE   Salad Bread    About 6 to 10 servings
1 narrow French baguette, split lengthwise
About 1/2 stick (2 –ounces or 1/4 cup, or 4 Tbsp.) softened margarine
About 1 teaspoon garlic salt
4 -ounces (1 cup) sharp Cheddar cheese, shredded – use more or less as desired
2 tomatoes, seeded & chopped
1/2 to 1 green pepper, chopped – or more if you prefer
1/4 cup chopped green onion tops

1.  Spread softened butter evenly over cut lengths of bread.
2.  Sprinkle with garlic powder; top with shredded cheese, then tomatoes, peppers and onions. 
3.  Wrap in foil and bake for 25 to 30 minutes at 350°.  
4.  Cut into 1 1/2-inch slices for serving. We like to cut the bread on a diagonal.


REVISED/MODIFIED RECIPE—lower fat, carb, sodium & calorie, + hearty healthier
Salad Bread    About 6 to 10 servings
1 narrow French baguette, split lengthwise (ideally whole wheat or sourdough loaf)
About 2 to 3 tablespoons softened butter, margarine or use olive oil
About 1 teaspoon garlic powder
2 to 4 -ounces (1/2 to 1 cup) sharp Cheddar cheese, shredded – use lesser amount to reduce fats and calories (lower-fat could be used but I prefer to use less 
2 tomatoes, seeded & chopped
1/2 to 1 green pepper, chopped (I like to use a variety of colored peppers)
1/4 cup chopped green onion (whites and tops, too)
Note: Use as many veggies as you choose, in whatever proportion you prefer.

1.  Spread softened butter evenly over cut lengths of bread, or brush lengths of bread with olive oil.
2.  Sprinkle with garlic powder; top with shredded cheese, then tomatoes, peppers and onions. 
3.  Wrap in foil and bake for 25 to 30 minutes at 350°.  
4.  Cut into 1 1/2-inch slices for serving. We like to cut the bread on a diagonal.

Information about the MHS Diabetic Support Group presentation can be found on 

My notes on the Revisions/Modifications made in the adjusted recipe :
  • Instead of a French baguette, use a whole wheat or sourdough baguette. Bread consumption can often hinder the control of blood glucose in diabetics. Many types of bread are laden with simple carbs & sugars that cause the blood glucose to rise. The ADA (Am. Diabetics Assoc.) recommends high fiber breads made from whole grains to keep blood glucose from spiking & to maintain optimal digestive health. What about sourdough? Although it’s a white bread option, white bread generally scores about 100 on the glycemic index (GI) while white sourdough breads score only about 54. Sourdough breads generally contain less sugar + the carbs go through a fermentation process that likely slows down starch absorption in the body.
  • Instead of a 1/2 stick of softened margarine, reduce the amount in half to cut both calories and fat. Personally, I prefer butter rather than margarine. It is a saturated fat (comes from an animal source,  is solid at room temp & contains cholestorol) so it does affect your cholesterol level +  raises both your good blood cholesterol— both (HDL) and bad (LDL). However, margarine, which starts as unsaturated fat (from a veg. source & generally liquid at room temp) is then altered (hydrogenated) to make it solid at room temp, creating a trans fat — these raise your bad (LDL) and lower your good (HDL) cholesterol level.What about reduced fat margarine on this bread? Due to its high water content, this type of margarine may make the bread a bit soggy. What about olive oil? This is a viable alternative—brushing on a thin layer probably means using less fat. Plus, olive oil is a monounsaturated fat (raises HDL, good cholesterol) & lowers LDL (bad). Both MUFAs (olive oil in this case) and polyunsaturated fats (PUFAs – corn, soy, & other veggie oils) may also benefit insulin levels & blood sugar control — very helpful for type 2 diabetics + help decrease heart disease. PUFAs lower LDL (bad) but also the good (HDL) cholesterol levels. Note: fats of all types (whether butter or olive oil) contain the same calorie count – 9 cal/g.
  • Instead of garlic salt, use garlic powder (or other salt-free sesasoning) to reduce sodium.
  • Reduce sharp Cheddar cheese by half (from 1 cup to 1/2 cup). I prefer less of full fat cheese but reduced fat cheese could be used— it still provides the mouth-feel associated with some fat content but reduces the overall fat and calories of a full fat product. The more pronounced taste of sharp Cheddar (vs. regular or mild) boosts the flavor of the salad bread.