Showing posts with label Mushrooms. Show all posts

Slow Cooker Beef Stroganoff

My sister, Marla Payne, tried this recipe and gave it rave reviews. We made it this week and agreed with her rating. It requires a bit of prep in the morning but them the slow cooker does the rest of the work creating a tender and flavorful entrée .


Slow Cooker Beef Stroganoff     6 servings\

1 tablespoon all-purpose flour 

2 ½ teaspoons kosher salt (divided)

Freshly ground black pepper

2 pounds beef chuck roast - well trimmed and cut into chunks, or use stew meat

Olive oil spray

1 teaspoon olive oil

1 medium onion, chopped

1 pound mushrooms, sliced

1 teaspoon sweet paprika

1 cup beef broth 

1 teaspoon Worcestershire sauce 

3/4 cup sour cream

1 pound egg noodles 

  1. Season the beef with 1 ½ teaspoons salt, black pepper and flour. Set aside.
  2. Heat a large skillet over medium heat. Add olive oil and onions to the skillet over medium heat and sauté until softened, 5 to 7 minutes. Transfer to the slow cooker and wipe clean.
  3. Increase the heat to medium-high and spray the skillet generously with oil. Brown the beef, about 2 to 3 minutes on each side.
  4.  Transfer beef to the slow cooker. Add the paprika, beef broth, remaining salt and Worcestershire sauce and mix well. (If it seems like there is not enough liquid don’t worry as both the mushrooms and beef release liquid.) 
  5. Add mushrooms.
  6. Gently stir the mushroom and beef and then  cover and cook on HIGH for 5 hours (or LOW for 8 to 10 hours), until beef is very tender.
  7. About 30 minutes before serving, stir in the sour cream until mixed. (Note: I ended up with a lot of liquid so before I added the sour cream I mixed 2-3 teaspoons of cornstarch with some of the liquid and added it back to the slow cooker – it thickened the juice; then I added the sour cream.)
  8. Cook egg noodles according to package directions. Serve stroganoff over noodles or fold them into the slow cooker just before serving.
Recipe without photos . . . Slow Cooker Beef Stroganoff     6 servings\

1 tablespoon all-purpose flour 

2 ½ teaspoons kosher salt (divided)

Freshly ground black pepper

2 pounds beef chuck roast - well trimmed and cut into chunks, or use stew meat

Olive oil spray

1 teaspoon olive oil

1 medium onion, chopped

1 pound mushrooms, sliced

1 teaspoon sweet paprika

1 cup beef broth 

1 teaspoon Worcestershire sauce 

3/4 cup sour cream

1 pound egg noodles 

  1. Season the beef with 1 ½ teaspoons salt, black pepper and flour. Set aside
  2. Heat a large skillet over medium heat. Add olive oil and onions to the skillet over medium heat and sauté until softened, 5 to 7 minutes. Transfer to the slow cooker and wipe clean.
  3. Increase the heat to medium-high and spray the skillet generously with oil. Brown the beef, about 2 to 3 minutes on each side.
  4.  Transfer beef to the slow cooker.’Add the paprika, beef broth, remaining salt and Worcestershire sauce and mix well. (If it seems like there is not enough liquid don’t worry as both the mushrooms and beef release liquid.) 
  5. Add mushrooms.
  6. Gently stir the mushroom and beef and then  cover and cook on HIGH for 5 hours (or LOW for 8 to 10 hours), until beef is very tender.
  7. About 30 minutes before serving, stir in the sour cream until mixed. (Note: I ended up with a lot of liquid so before I added the sour cream I mixed 2-3 teaspoons of cornstarch with some of the liquid and added it back to the slow cooker – it thickened the juice; then I added the sour cream.)
  8. Cook egg noodles according to package directions. Serve stroganoff over noodles or fold them into the slow cooker just before serving.


Mushroom Sandwiches . . . make ahead for appetizers or a cocktail party

So tasty and nice to have on hand for appetizers or cocktail parties . . . even though they are somewhat time consuming to prepare.  I made them as a appetizer for a French-inspired dinner party and called them “les sandwiches aux chamignons” — which may or may not translate to Mushroom Sandwiches. But, who doesn’t like fried bread?


Mushroom Sandwiches  40 sandwiches

20 slices white sanwich bread

2 tablespoons very finely chopped yellow onion

1/4 cup (1/2 stick) butter

3/4 lb. button mushrooms, finely chopped

2 tablespoons all-purpose flour

1/2 teaspoon Tabasco hot sauce

1 teaspoon kosher salt

1/8 teaspoon black pepper

1/2 cup half-and-half

Butter & olive oil for frying

  1. Cut each slice of bread with a biscuit cutter into four 1 3/4” rounds. (You should be able to cut 4 per slice.). Set aside.
  2. Saute onion in butter; add mushrooms. Saute until all moisture is cooked out of mushrooms. 

  3. Add flour; stir until thick. Add Tabasco, salt, pepper and half and half. Cook until thick.

  4. Chill for several hours or overnight until mixture is easy to spread.  
  5. Spread 1 teaspoon mushroom mixture on each bread round. Top with another bread round to make a sandwich. Repeat procedure until 40 sandwiches are made.  

  6. Fry sandwiches (in batches) in a thin layer of  equal portion butter and olive oil until brown and crisp, about 1 minute for each side. Continue frying, adding more butter and olive oil as needed.

  7. Drain thoroughly.  Keep warm, uncovered, in a 300°F oven.

MAKE AHEAD Note:  these sandwiches can be made, fried and frozen after fryng and draining. Simply take out of the freezer and put in a 300°F oven for about 15 minutes.


Recipe without photos . . . Mushroom Sandwiches  40 sandwiches

20 slices white sanwich bread

2 tablespoons very finely chopped yellow onion

1/4 cup (1/2 stick) butter

3/4 lb. button mushrooms, finely chopped

2 tablespoons all-purpose flour

1/2 teaspoon Tabasco hot sauce

1 teaspoon kosher salt

1/8 teaspoon black pepper

1/2 cup half-and-half

Butter & olive oil for frying

  1. Cut each slice of bread with a biscuit cutter into four 1 3/4” rounds. (You should be able to cut 4 per slice.). Set aside.
  2. Saute onion in butter; add mushrooms. Saute until all moisture is cooked out of mushrooms. 
  3. Add flour; stir until thick. Add Tabasco, salt, pepper and half and half.  Cook until thick.
  4. Chill for several hours or overnight until mixture is easy to spread.  
  5. Spread 1 teaspoon mushroom mixture on each bread round. Top with another bread round to make a sandwich. Repeat procedure until 40 sandwiches are made.  
  6. Fry sandwiches (in batches) in a thin layer of  equal portion butter and olive oil until brown and crisp, about 1 minute for each side. Continue frying, adding more butter and olive oil as needed.
  7. Drain thoroughly.  Keep warm, uncovered, in a 300°F oven.

MAKE AHEAD Note:  these sandwiches can be made, fried and frozen after fryng and draining. Simply take out of the freezer and put in a 300°F oven for about 15 minutes.

SABOR’S BEEF PICADILLO as featured in KANSAS! 2025, vol 81, issue 4

 One of our favorite eating places was featured in the Taste section of KANSAS! (vol 81, 2025, issue 4) and included this recipe. Beef Picadillo is not only one of Sabor’s specialties, it’s a Latin American favorite that varies by region. Sabor’s interpretation of this classic dish is flavored with their own labor-intensive mole sauce made with a base of chile peppers and tons of spices. Store-bought mole can be substituted when making this recipe that goes quickly from skillet to plate. . By the way—the name picadillo (pee-cah-DEE-yo) essentially means  “all chopped up” in Spanish and translates to ``hash'' in English.


Designed to be quick-to-make at the restaurant, it is also ideal for a quick fix recipe for home cooks It was done in record time when we tested it at home. Chef Garson Harody Saavedra's instructions were also easy to follow. I did serve the piccadilly over polenta rather than the mashed potatoes used at Sabor.


SABOR’S BEEF PICADILLO     

Yield: One generous serving 

INGREDIENTS 

3 tablespoons cooking oil

6 ounces beef tips, cut into bite-sized pieces 

1/2 medium red pepper, thinly sliced

1/4 medium yellow onion, thinly sliced

1 cup button mushrooms, cut into 1/4-inch slices 

1/2 cup frozen corn 

4 ounces (1/2 cup) mole sauce 

Garnishes: pepperoncini pepper & chopped cilantro


STEP-BY-STEP INSRUCTIONS 

1.   Heat oil in a skillet set over medium-high heat. 

2.   Once the skillet is hot, add beef tips and sauté, tossing and stirring occasionally, just until no longer pink on the outside. 


3.   Add onions, peppers and mushrooms; toss or stir occasionally for about another 3 minutes or until onions are translucent. 

4.   Add corn and mole; simmer for 3 minutes allowing flavors to meld.


5.   
Plate and garnish with a pepperoncini pepper and chopped cilantro.

To plate this dish the chefs at Sabor spoon chipotle mashed potatoes onto one side of the plate and then add a generous portion of Beef Picadillo. This meal pairs well with a glass of Sabor’s handcrafted red sangria. 

(For those with smaller appetites, this could very well make two home-style servings.) 


 Recipe without photos . . .SABOR’S BEEF PICADILLO     

Yield: One generous serving 

INGREDIENTS 

3 tablespoons cooking oil

6 ounces beef tips, cut into bite-sized pieces 

1/2 medium red pepper, thinly sliced

1/4 medium yellow onion, thinly sliced

1 cup button mushrooms, cut into 1/4-inch slices 

1/2 cup frozen corn 

4 ounces (1/2 cup) mole sauce 

Garnishes: pepperoncini pepper & chopped cilantro

STEP-BY-STEP INSRUCTIONS 

1.   Heat oil in a skillet set over medium-high heat. 

2.   Once the skillet is hot, add beef tips and sauté, tossing and stirring occasionally, just until no longer pink on the outside. 

3.   Add onions, peppers and mushrooms; toss or stir occasionally for about another 3 minutes or until onions are translucent. 

4.   Add corn and mole; simmer for 3 minutes allowing flavors to meld.

5.   Plate and garnish with a pepperoncini pepper and chopped cilantro.

To plate this dish the chefs at Sabor spoon chipotle mashed potatoes onto one side of the plate and then add a generous portion of Beef Picadillo. This meal pairs well with a glass of Sabor’s handcrafted red sangria. 

(For those with smaller appetites, this could very well make two home-style servings.) 

Individual Breakfast Casserole

Ideal for a “grab-and-go” breakfast or convenient for an everyday protein and veggie-packed breakfast or even lunch. This recipe make 12 to 18 individual breakfast casserole that can eaten immediately, stored in the refrigerator for 5 days or frozen and re-heated.

Individual Breakfast Casseroles    Yield: 12 to 18 depending on the depth of your muffin tins

About 1 to 2 tablespoons olive oil 

About 1 cup of mixed veggies (I used finely chopped onions, yellow & red peppers, button mushroom and spinach)

1 to 1 1/2 cups shredded cheese (I used Monterey Jack but will try Cheddar later)

12 eggs

1/2 cup half and half or  whole milk

A dash of Tabasco sauce & Worcestershire sauce 

  1. Preheat oven to 375˚F. Note: Use silicon muffin “tins” for easy release of the casseroles; if using regular muffin tins, brush with oil. 
  2. Heat oil in a skillet and sauté the vegetables just until softened. Cool veggies.
  3. In a mixing bowl, whisk together eggs, half and half and seasonings.
  4. Stir in cheese.
  5. Ladle mixture evenly among muffin tins. 
  6. Bake at 375˚F for 15 to 22 or 23 minutes (depending on depth of muffin tins) or until puffed and lightly browned and a toothpick inserted in the center comes out fairly clean. Cool a few minutes in the pan then serve. The casseroles may be stored in the refrigerator for 5 days; reheat in the microwave. Or, to freeze— cool individual casseroles completely, then wrap in plastic film, place in a freezer-safe bag for up to 3 months.

Recipe without photos . . . Individual Breakfast Casseroles    Yield: 12 to 16 depending on the depth of your muffin tins

About 1 to 2 tablespoons olive oil 

About 1 cup of mixed veggies (I used finely chopped onions, yellow & red peppers, button mushroom and spinach)

1 to 1 1/2 cups shredded cheese (I used Monterey Jack but will try Cheddar later)

12 eggs

1/2 cup half and half or use whole milk

A dash of Tabasco sauce & Worcestershire sauce 

  1. Preheat oven to 375˚F. Note: Use silicon muffin “tins” for easy release of the casseroles; if using regular muffin tins, brush with oil. 
  2. Heat oil in a skillet and sauté the vegetables just until softened. Cool veggies.
  3. In a mixing bowl, whisk together eggs, half and half and seasonings.
  4. Stir in cheese.
  5. Ladle mixture evenly among muffin tins. 
  6. Bake at 375˚F for 15 to 22 or 23 minutes (depending on depth of muffin tins) or until puffed and lightly browned and a toothpick inserted in the center comes out fairly clean. Cool a few minutes in the pan then serve. The casseroles may be stored in the refrigerator for 5 days; reheat in the microwave. Or, to freeze— cool individual casseroles completely, then wrap in plastic film, place in a freezer-safe bag for up to 3 months.

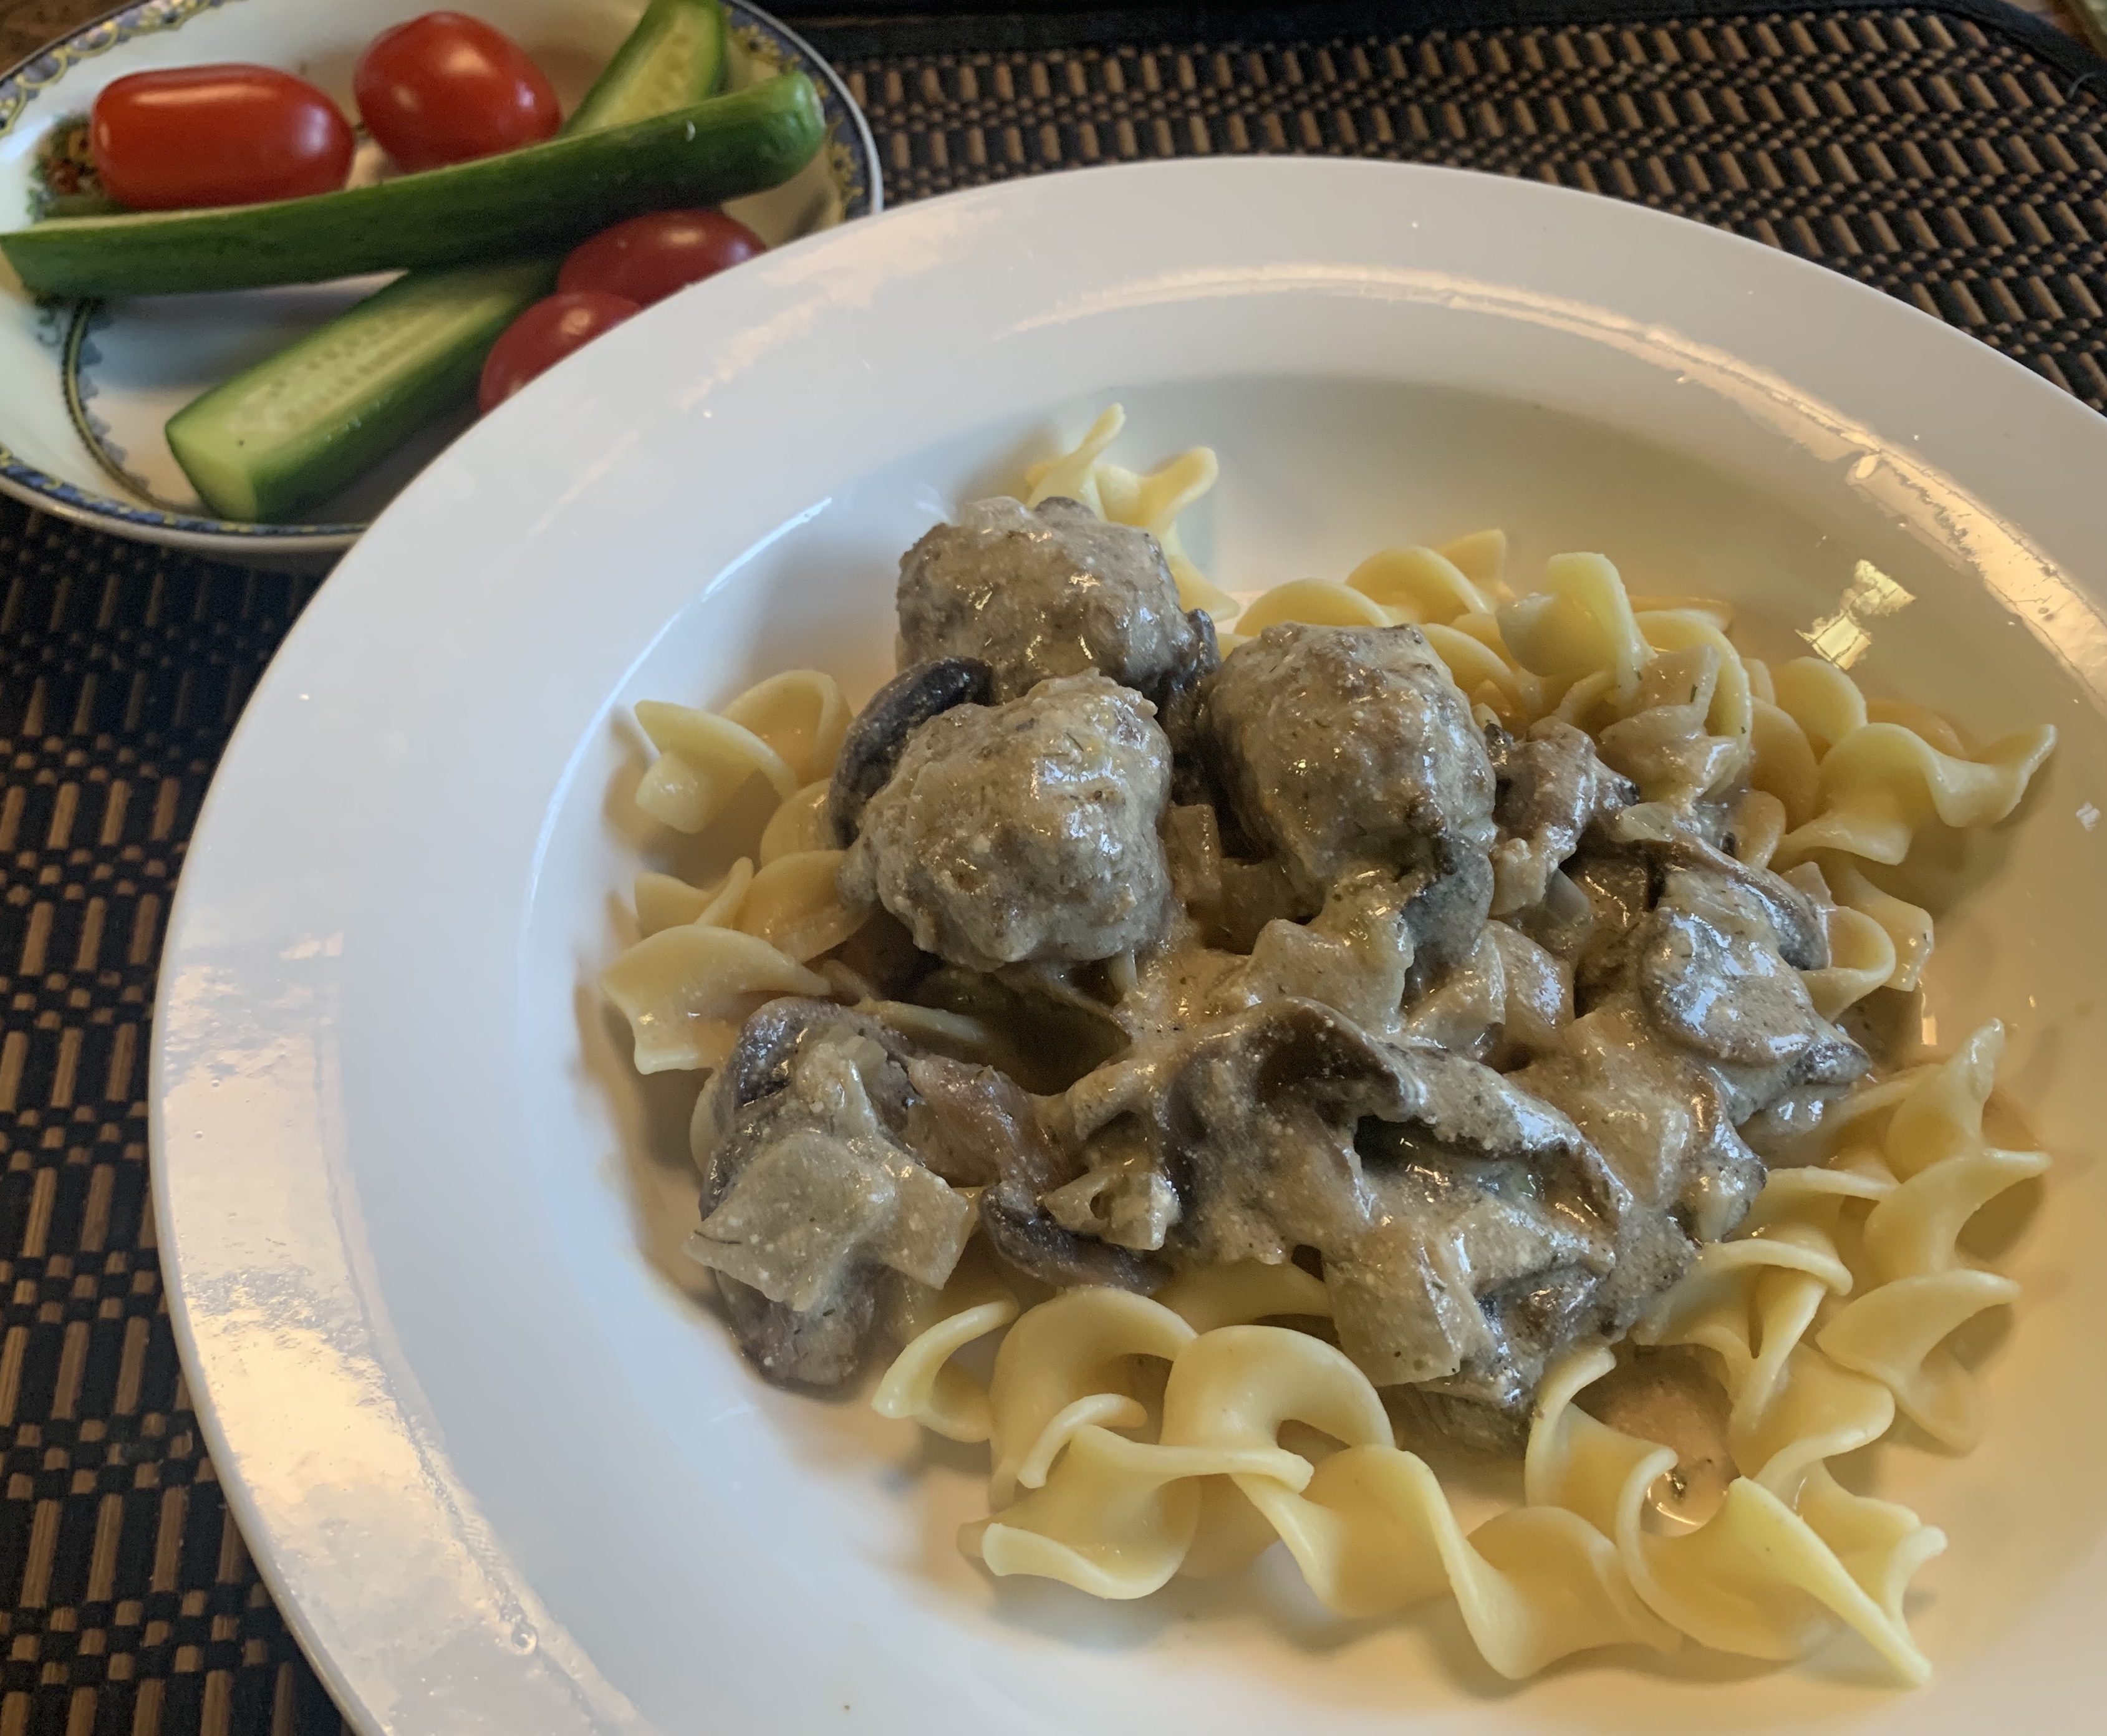
Meatball Stroganoff

A tasty comfort food meal that is relatively quick-and-easy when you rely on frozen meatballs.     


Meatball Stroganoff   Serves 4 to 6 

2 tablespoons  butter

1 yellow onion, diced

2 cloves of garlic, finely chopped

3 cups sliced button mushrooms 

2 tablespoons all-purpose flour

1 1/2 to 2 cups beef broth

1/2 teaspoon kosher salt

1/2 teaspoon black pepper

2 teaspoon Worcestershire sauce

2 tablespoons Dijon mustard

1/2 to 1 cup sour cream depending on preference (I used 1 cup)

2 teaspoons chopped fresh dill or 1/2 teaspoon dried dill

16 to 24 small, cooked meatballs 

For Serving: Cooked egg noodles, rice or mashed potatoes

  1. Melt the butter in a large low pan/skillet over medium heat. Add the onion, and cook for 5 to 6 minutes, or until soft.
  2. Add the garlic and mushrooms and cook for 5 to 6 minutes, or until most of the lquid cooks off.

  3. Sprinkle mixture with flour, stir to coat and cook 1 minute more

  4. Add 1 1/2 cups beef broth, bring to a simmer and cook the liquid begins to thicken. Add additional broth as/if needed during the cooking process.
  5. Add salt, pepper, Worcestershire, Dijon, sour cream and dill; still until evenly blended.

  6. Add the meatballs and simmer (do not boil) with lid on for 5 to 7 minutes or until meatball are heated through. Taste and adjust seasonings as needed.  

  7. Serve the meatball stroganoff with noodles, rice or mashed potatoes.

Recipe without photos . . . Meatball Stroganoff   Serves 4 to 6 

2 tablespoons  butter

1 yellow onion, diced

2 cloves of garlic, finely chopped

3 cups sliced button mushrooms 

2 tablespoons all-purpose flour

1 1/2 to 2 cups beef broth

1/2 teaspoon kosher salt

1/2 teaspoon black pepper

2 teaspoon Worcestershire sauce

2 tablespoons Dijon mustard

1/2 to 1 cup sour cream depending on preference (I used 1 cup)

2 teaspoons chopped fresh dill or 1/2 teaspoon dried dill

16 to 24 small, cooked meatballs 

For Serving: Cooked egg noodles, rice or mashed potatoes

  1. Melt the butter in a large low pan/skillet over medium heat. Add the onion, and cook for 5 to 6 minutes, or until soft.
  2. Add the garlic and mushrooms and cook for 5 to 6 minutes, or until most of the lquid cooks off.
  3. Sprinkle mixture with flour, stir to coat and cook 1 minute more
  4. Add 1 1/2 cups beef broth, bring to a simmer and cook the liquid begins to thicken. Add additional broth as/if needed during the cooking process.
  5. Add salt, pepper, Worcestershire, Dijon, sour cream and dill; still until evenly blended.
  6. Add the meatballs and simmer (do not boil) with lid on for 5 to 7 minutes or until meatball are heated through. Taste and adjust seasonings as needed.  
  7. Serve the meatball stroganoff with noodles, rice or mashed potatoes.

Not your usual Meat & Potato Skillet (sausage & potato gnocchi)

This unusual meat and potato dinner was inspired by one of the Skillet Dinners that Chef Alli demonstrated at the Shop Kansas Farms Expo in Lyons earlier this month. She had a recipe, but my idea of a skillet dinner is more "off the cuff" and based on what I have on hand.

Not your usual Meat & Potato Skillet

Here what I had on hand (adjust amounts to the size of the skillet and the number of people you’re serving)

Olive oil & Butter

Potato gnocchi 

Ground pork sausage

Onions & Garlic

Mushrooms

Italian seasoning 

Tomato sauce

Salt & pepper to taste 

Mozzarella cheese

  1. Heat skillet on medium heat and drizzle in olive oil and a little butter.
  2. Add a layer of potato gnocchi to hot skillet. Allow them to lightly brown without stirring; turn and brown on the other side. Remove and set asie. 
  3. Drizzle skillet with a little more olive oil if needed. Add sausage and use a potato masher to bread up. After a few minutes add chopped onions and minced garlic + sliced mushrooms Cook until vegetables are tender and sausage is cooked through and lightly browned.
  4. Re-add gnocchi, enough tomato sauce to bind together ingredients and gently mix all the ingredients together. Taste and add salt and pepper as needed. 
  5. Add a lid and let mixture simmer on low for 5 to 10 minutes, adding more tomato sauce if needed.
  6. Right before serving, add a layer of grated Mozzarella cheese to the top and let it melt. 

Recipe without photos  . . .   Not your usual Meat & Potato Skillet

Here what I had on hand (adjust amounts to the size of the skillet and the number of people you’re serving)

Olive oil & Butter

Potato gnocchi 

Ground pork sausage

Onions & Garlic

Mushrooms

Italian seasoning 

Tomato sauce

Salt & pepper to taste 

Mozzarella cheese

  1. Heat skillet on medium heat and drizzle in olive oil and a little butter.
  2. Add a layer of potato gnocchi to hot skillet. Allow them to lightly brown without stirring; turn and brown on the other side. Remove and set asie. 
  3. Drizzle skillet with a little more olive oil if needed. Add sausage and use a potato masher to bread up. After a few minutes add chopped onions and minced garlic + sliced mushrooms Cook until vegetables are tender and sausage is cooked through and lightly browned.
  4. Re-add gnocchi, enough tomato sauce to bind together ingredients and gently mix all the ingredients together. Taste and add salt and pepper as needed. 
  5. Add a lid and let mixture simmer on low for 5 to 10 minutes, adding more tomato sauce if needed.
  6. Right before serving, add a layer of grated Mozzarella cheese to the top and let it melt. 


Hot Chicken Salad Casserole

There are so many variations of this classic hot Southern chicken salad. All rely on chicken, mayonnaise sliced celery, onion and almonds. Extra additions vary from the ones I’ve used below (fresh mushroom, pimientos, water chestnuts) to the inclusion of ripe olives, canned mushrooms and double the amount of almonds. I even found a recipe that swapped out the potato chips for French fried onion rings. Some recipes use almost double the amount of mayo while others use a can of mushroom soup along with the mayo. I opted on a combo of mayo and sour cream. 


Hot Chicken Salad offers up a variety of flavors along with textures that range from tender, chunky chicken in a creamy base to the crunch of crisp potato chips, water chestnuts and sliced celery.          Great for a luncheon or supper-time!

Hot Chicken Salad Casserole    Yields a 13- x 9-inch casserole; approximately 12 servings

1/2 cup slivered almonds\

4 cups chopped cooked chicken* (1 chicken breast = about 1 cup)

2 cups sliced celery (the better part of a stalk of celery)

1/4 cup chopped yellow onion

1/4 cup chopped pimientos, drained

About 2 ounces sliced water chestnuts, drained & chopped

About 2 ounces fresh button mushrooms, chopped, optional

2 cups shredded Cheddar cheese, divided

1 cup mayonnaise

1/2 cup sour cream

3 tablespoons lemon juice

1/2 teaspoon salt

1/2 teaspoon pepper

1 cup potato chips, crushed

  1. Bake slivered almonds in a shallow pan at 350° for 5 to 6 minutes or until toasted – watch carefully to avoid burning.

  2. In a large bowl, stir together almonds, chicken, celery, onion, pimientos, water chestnuts,  and mushrooms.
  3. In a medium bowl, stir together 1 cup Cheddar cheese, mayonnaise, sour cream, lemon juice, salt and pepper until blended; stir into chicken mixture. 


  4. Spread into a greased/sprayed 13- x 9-inch baking dish; sprinkle with remaining 1 cup Cheddar cheese and crushed potato chip chips.
  5. Bake at 350° for 30 minutes or until thoroughly heated through, and it is  hot and bubbly!

*Cooked Chicken – I used the slow cooker method, adding the breasts to the crock pot along with seasonings (salt & pepper, garlic and onion powder + bay leaf; or use a combo of fresh herbs is available). Add about 1 cup of water (for 4 breasts) and cook on high for  

approximately 2 to 3 hours until the meat registers at least 165F on a digital thermometer (or on low for about double the time). Cool and then chop or shred.


Recipe without photos . . .

Hot Chicken Salad Casserole    Yields a 13- x 9-inch casserole; approximately 12 servings

1/2 cup slivered almonds

4 cups chopped cooked chicken* (1 chicken breast = about 1 cup)

2 cups sliced celery (the better part of a stalk of celery)

1/4 cup chopped yellow onion

1/4 cup chopped pimientos, drained

About 2 ounces sliced water chestnuts, drained & chopped

About 2 ounces fresh button mushrooms, chopped, optional

2 cups shredded Cheddar cheese, divided

1 cup mayonnaise

1/2 cup sour cream

3 tablespoons lemon juice

1/2 teaspoon salt

1/2 teaspoon pepper

1 cup potato chips, crushed

  1. Bake slivered almonds in a shallow pan at 350° for 5 to 6 minutes or until toasted – watch carefully to avoid burning.
  2. In a large bowl, stir together almonds, chicken, celery, onion, pimientos, water chestnuts,  and mushrooms.
  3. In a medium bowl, stir together 1 cup Cheddar cheese, mayonnaise, sour cream, lemon juice, salt and pepper until blended; stir into chicken mixture. 


  4. Spread into a greased/sprayed 13- x 9-inch baking dish; sprinkle with remaining 1 cup Cheddar cheese and crushed potato chip chips.
  5. Bake at 350° for 30 minutes or until thoroughly heated through, and it is  hot and bubbly!


Easy Baked Rice

So easy! I've added mushroom to the basic recipe below but substitute other vegetables or add toasted nuts, crasins or even frozen peas near the end. Or, use other broth flavors. A versatile and tasty side dish. Basmati rice is our preference. 

Chicken Piccata served over Easy Baked Rice.


Easy Baked Rice   2 to 6 servings    Total Time: 40 min. (Prep:10 min.; total prep 30 min.prep, cook & bake)

Ingredients

2

6

Olive oil or butter

1 Tbsp.+

3 Tbsp.+

Onions (yellow), chopped

3 to 4 Tbsp.

½ to ¾ cup

Button mushrooms, sliced

Little less than 3 oz.

8 oz.

Cloves of garlic, minced

1 or less

2-3 

White, long-grained rice

1/3 cup

1 cup

Kosher salt & coarsely ground black pepper

To taste

To taste

Chicken stock or broth

2/3 cup

2 cups

1.   Preheat the oven to 350° to 375°.

2.   Over moderately-high temperature, in an ovenproof saucepan, heat oil or melt butter. Add the onions and mushrooms; sauté until golden brown, 4 to 5 minutes. Add the garlic and stir until fragrant, about 1 minute. Add the rice and stir constantly until the rice is coated and lightly toasted. Season with salt and pepper. Add the chicken stock and bring up to a boil. 

Onions & mushrooms above; lightly toasted rice below


3.   Cover with a tight fitting lid (or transfer to a baking dish and cover with foil); bake on the middle rack in the oven until all the liquid is absorbed and the rice is tender, 17 to 20 minutes. 

4.   Remove from the oven and let stand, covered, 5 minutes. Fluff with a fork before serving.

Make Ahead Tip: Complete steps 1 and 2 above and finish the baking later.


ABOUT RICE 

Rice is commercially classified by size: long, medium or short grain. 

·     Long-grain rice is 4-5 times its width and is available in white and brown varieties, which are light, dry grains that separate easily when cooked. Basmati rice is a perfumy East Indian variety of long-grain rice. 

·     Short-grain rice has fat, almost round grains that have a higher starch content. When cooked, it tends to be quite moist and viscous, causing the grains to stick together. Also called pearl rice or glutinous rice (although it's gluten-free). Arborio (used in making risotto) is a variety of a  short-grain rice.

·     Medium-grain rice has a size and character in between the other two. 

Rice can be further divided into two other broad categories: brown and white. Brown rice is the entire grain with only the inedible outer husk removed. The nutritious, high-fiber bran coating gives it a light tan color, nutlike flavor and chewy texture. Brown rice takes slightly longer to cook. White rice has had the husk, bran and germ removed. Regular white rice is sometimes referred to as polished rice. Converted par-boiled white rice is boiled or steamed before it is processed, which forces some vitamins and minerals into the kernel from the bran so it is higher in nutrients than plain white rice; scientific advice varies as to whether the par-boiled shortens or lengthens the cooking time. Instant or quick white rice has been fully or partially cooked before being dehydrated and packaged. 


Recipe without photos . . .Easy Baked Rice   2 to 6 servings    Total Time: 40 min. (Prep:10 min.; total prep 30 min.prep, cook & bake)

Ingredients

2

6

Olive oil or butter

1 Tbsp.+

3 Tbsp.+

Onions (yellow), chopped

3 to 4 Tbsp.

½ to ¾ cup

Button mushrooms, sliced

Little less than 3 oz.

8 oz.

Cloves of garlic, minced

1 or less

2-3 

White, long-grained rice

1/3 cup

1 cup

Kosher salt & coarsely ground black pepper

To taste

To taste

Chicken stock or broth

2/3 cup

2 cups


1.   Preheat the oven to 350° to 375°.

2.   Over moderately-high temperature, in an ovenproof saucepan, heat oil or melt butter. Add the onions and mushrooms; saute´ until golden brown, 4 to 5 minutes. Add the garlic and stir until fragrant, about 1 minute. Add the rice and stir constantly until the rice is coated and lightly toasted. Season with salt and pepper. Add the chicken stock and bring up to a boil. 

3.   Cover with a tight fitting lid (or transfer to a baking dish and cover with foil); bake on the middle rack in the oven until all the liquid is absorbed and the rice is tender, 17 to 20 minutes. 

4.   Remove from the oven and let stand, covered, 5 minutes. Fluff with a fork before serving.

Make Ahead Tip: Complete steps 1 and 2 above and finish the baking later.