Showing posts with label Oil-Canola. Show all posts

Pork Egg Roll in a Bowl

This quick-fix meal is packed with protein, vitamins, and flavor. This meal-in-one is also colorful and crunchy. Another winning recipe my sister, Marla Payne, shared.It is SO GOOD that we had had to have a second helping! 


Our nephew Mason as he prepares what is basically a quick stir-fry meal . . . that was ABSOUTELY DELICIOUS! 

Pork Egg Roll in a Bowl   45 to 6 servings

1 pound ground pork

1 tablespoon canola oil

4 scallions (green onions), chopped, white and green parts separated

4 garlic cloves, minced

1 teaspoon minced fresh ginger

1 teaspoon garlic chili oil (or use sesame oil or more canola if this is not available)

1 (16-ounce) pkg. coleslaw mix or ½ of a large (3 lb.) cabbage, shredded

1/3 cup lower-sodium soy sauce or coconut aminos

1 teaspoon toasted sesame oil

Chopped peanuts and/or sesame seeds for garnish

  1. Heat canola oil in a large skillet or wok over medium high. Ad pork; cook until browned, 5 to 7 minutes, using a spatula to break up any large pieces.
  2. Add white part of the scallions, garlic, ginger and garlic chili oil to skillet; cook, stirring often, until fragrant, 1 to 2 minutes.
  3. Add coleslaw mix, stirring to incorporate. Cook, stirring often, until vegetables are tender, 5 to 7 minutes.
  4. Add soy sauce and sesame oil to skillet; stir to coat. Cook until all liquid is absorbed, 2 to 3 minutes. 
  5. Garnish with green part of scallions, peanuts and sesame seeds, if desired. 

Chocolate Covered Rice Krispie Treats

Snap, crackle and pop! Chef Ali’s version of Rice Krispie Treats seemed just the thing to celebrate Independence Day. Check out her blog for extra details, nutritional analysis. Also, you’ll find links to lots of her other yummy recipes on  Chef All Home page.


My mother's version of Chocolate Covered Rice Krispie Treats, called Scoch-A-Roos is also equally good. Instead of marshmallows, it uses corn syrup and butterscotch chips. 


Chocolate Covered Rice Krispie Treats  Yield: 8×12-inch pan that can be cut to your preferred size. 

1/4 cup unsalted butter

10 oz. bag mini marshmallows, approx. 5 cups 

1/2  cup creamy peanut butter

5  1/2 cups Rice Krispie cereal

1 1/3 cups chocolate chips, semi sweet or milk chocolate 

2 teaspoons vegetable or canola oil

  1. Spray a 8×12-inch pan with non-stick cooking spray. I lined mine with parchment for easy removal of the slab of krispie treats. 
  2. In a large saucepan over low heat, melt the butter, mini marshmallows and peanut butter, stirring gently.
    Above: Be sure to heat marshmallow mixture slowly at a low temperature.
    Below: Melted mixture is read to add to the cereal. 
  3. Remove from the heat and immediately fold in the Rice Krispies.
  4. Press the prepared rice krispie mixture into the greased pan; reserve.
  5. Meanwhile, in a medium-size microwave safe bowl, melt the chocolate chips with the vegetable oil on full power in 30-second intervals, stirring in between each one. Once the chocolate is fully melted, stir until smooth.
  6. Pour the melted chocolate over the rice krispie mixture in the pan and let harden at room temperature for approx. 1 1/2 – 2 hours.
  7. Once the chocolate has hardened, cut into squares. Store the chocolate covered rice krispie treats an airtight container.  
Recipe without photos . . . Chocolate Covered Rice Krispie Treats  Yield: 8×12-inch pan that can be cut to your preferred size. 

1/4 cup unsalted butter

10 oz. bag mini marshmallows, approx. 5 cups 

1/2  cup creamy peanut butter

5  1/2 cups Rice Krispie cereal

1 1/3 cups chocolate chips, semi sweet or milk chocolate 

2 teaspoons vegetable or canola oil

  1. Spray a 8×12-inch pan with non-stick cooking spray. I lined mine with parchment for easy removal of the slab of krispie treats. 
  2. In a large saucepan over low heat, melt the butter, mini marshmallows and peanut butter, stirring gently.
  3. Remove from the heat and immediately fold in the Rice Krispies.
  4. Press the prepared rice krispie mixture into the greased pan; reserve.
  5. Meanwhile, in a medium-size microwave safe bowl, melt the chocolate chips with the vegetable oil on full power in 30-second intervals, stirring in between each one. Once the chocolate is fully melted, stir until smooth.
  6. Pour the melted chocolate over the rice krispie mixture in the pan and let harden at room temperature for approx. 1 1/2 – 2 hours.
  7. Once the chocolate has hardened, cut into squares. Store the chocolate covered rice krispie treats an airtight container.  

Nutty Sourdough Waffles

I started a new batch of sourdough and am now looking for ways to use the excess. Click here for a  quick and simple recipe for sourdough. I did make a more complicate starter beginning with yeast spores captured from the air . . . which I will post at some point in time. I make half a batch for just two and even then there are extras for toasting and eating later. Waffles may also bee frozen. Note: This recipe relies on sourdough starter, baking powder and soda for leavening; no additional yeast is added. 

Yummy waffles! Fruits (such as blueberries, chopped apples, etc. may also be added to the batter. 


Nutty Sourdough Waffles  Makes about 1 1/2 dozen depending on the size of the waffle maker

2 cups sourdough starter, recently feed and refreshed 

2 eggs, beaten

1/2 cup cooking oil

1/2 cup milk

1/2 cup all-purpose flour

2 teaspoons baking powder

1/2 teaspoon salt

1/4 teaspoon baking soda

1 tablespoon granulated sugar

1 cup chopped pecans or walnuts

  1. In large mixing bowl measure out sourdough starter. Add eggs, oil, and milk; mix well. 
  2. In a separate bowl, mix together flour, baking powder, salt, baking soda and sugar. Add all at once to starter mixture; beat just until blended. Stir in nuts. 
  3. S[read batter (appoximaltly 1/4 to 1/3 cup depending on waffle maker size)  on lightly greased or sprayed, preheated waffle grids.
  4. Cook according to waffle maker directions, approximately 5 to 6 minutes. Repeat. 
    Step 1: Mixing the liquids.

    Step 3: Mixing the wet and dry ingredients. 

Marla's Chinese Chicken Salad

Minced garlic and ginger combine with sesame oil, soy sauce, rice vinegar and sweet chili sauce to create a distinctive and flavorful dressing for this Asian-style salad that is full of fresh vegetables and crispy toppings. 

My sister, Marla Payne, provided this recipe along with rave reviews for the salad.  It's become one of her favorites and now I understand why. We also give it RAVE REVIEWS.

For a casual "supper" I set out all the ingredients and let guests assembly their own salads, but generally I'd just follow the salad assembly in the directions included bellow.

Note: The mandarin oranges and craisins seemed like rather strange additions to me. But we all agreed that they added to the overall flavor profile. Try them, I think you'll like them!


Marla's Chinese Chicken Salad    Servings: 6 to 8

Dressing

1/3 cup rice vinegar 

1/4 cup low sodium soy sauce 

2 tablespoons Asian sweet chili sauce 

1 1/2 tablespoons sesame oil 

2 tablespoons granulated sugar

1/2-1 teaspoon sriracha, optional

1 1/2 teaspoons minced garlic

1 1/2 teaspoons freshly grated ginger

1/2 teaspoon salt 

1/2 teaspoon  pepper

3 tablespoons peanut oil or canola oil


Salad

3 cups shredded cooked chicken

1 small head Napa cabbage thinly shredded (about 6 cups, approx. 1 pound)

1/2 small red cabbage thinly shredded (approx. 3 cups)

1 cup matchstick. thinly julienned, or finely shredded carrots

3 oz. snow peas, ends trimmed and julienned (approx. 1 cup)

1 red bell pepper julienned then halved

1-2 11 oz. can(s) mandarin oranges in water drained

1/3 cup loosely packed cilantro, chopped

1/3 cup chopped green onions

1/2 cup craisins optional but recommended

2/3 cup sliced almonds or chopped peanuts more or less to taste 

1 1/2 cups fried wonton strips* or chow Mein noodles more or less to taste 

2 tablespoons sesame seeds or sunflower seeds more or less to taste 

  1. Dressing: Add all of the dressing ingredients to a mason jar with a tight fitting lid or a small bowl. Shake jar or whisk dressing vigorously. Remove 3 tablespoons dressing to a bowl with the chicken. Stir until evenly coated. Let chicken marinate while you prep the vegetables. Refrigerate the remaining dressing.
  2. Salad Assembly: Add all salad ingredients to a large bowl except for wonton strips IF you are expecting leftovers. Whisk/shake salad dressing and drizzle desired amount of dressing over salad and toss until well combined. Add wontons strips to individual servings if expecting leftovers.

*Fried Wonton Strips

1 package egg roll or wonton wrappers you will probably only use half

Canola, or peanut oil

  1. Cut wrappers into strips about 3/4-inch by 3 inches long. You can stack them to do this quickly. If using egg roll wrappers, you will want to cut them in half first and then into strips.
  2. Heat about 1 inch of oil in a large pan or Dutch oven. You want the oil to be around 360 degrees. Fry in batches, spreading them out so they don't stick. Remove with a slotted spoon when they turn golden brown. Drain on paper towel-lined plate. Note: Fried Wonton Strips should stay crispy in an airtight container for at least several days.

Bierocks

I first tasted Bierocks when a student teacher brought them for our lunch break at Abilene High School. I was sold! Over the years, I've adapted that original recipe just slightly. Bierocks have been the inspiration for many cooking classes and our a part of our fall menu . . . or anytime menu. We generally serve them with German Potato Salad and  Cucumber & Onion Salad with Apple Crisp for dessert. (Apple Crisp made from Apple Pie Filling & Crumb Topping recipes.)

Bierocks  

Filling  Enough filling for about 2 to 3 dozen medium to large bierocks 

1 large onion, finely chopped + a little oil for sautéing 

3 1/2 to 4 pounds lean ground beef

1 head cabbage, finely chopped  (cabbage size varies but

   our general guide is: allow 3 to 5 cups per 1 lb. meat)

1 tablespoon salt (approximately)

Pepper to taste

1 can of sauerkraut, drained (regular size or large can

   depending on your preference), optional

Flour - enough to slightly thicken mixture (2 to 4 T.)

-------------------------------------

1 batch roll dough (recipe follows or use your 
favorite bread dough recipe)


  1. Sauté onion in skillet in a little oil. Add meat and cook thorough; drain excess fat (should not be necessary if lean meat is used). Add chopped cabbage, salt and pepper.  
  2. Cover skillet with a lid and steam until cabbage is tender. Add sauerkraut, if desired. Mix in just enough flour to thicken and to create a cohesive mixture.  

This is a variable recipe that can be adjusted to your own taste. Also, ingredients can be varied: use part sausage rather than all ground beef; add grated carrots or potatoes, or chopped green pepper along with the cabbage; mix in grated cheese, ketchup and mustard or add a teaspoon of two of other seasonings of your choice; add a small cube of cream cheese to the mixture as you form the bierocks, etc. I've also left out the meat and made vegetarian bierocks for friends. 


Rapidmix Cool Rise Roll Dough  Makes about 2 to 3 dozen bierocks or shape into 2 1/2 to 3 dozen dinner rolls. ---adapted from Fleischmann’s Bake-it-easy Yeast Book, 1973 as printed in The Kirby House Cookbook, Meta Newell West, Nov. 2001.    

5 to 6 cups all-purpose flour, unsifted

2 packages (1/4 oz.) or scant 2 tablespoons yeast (active dry instant)

1/2 cup granulated sugar

1 1/2 teaspoons salt

1/2 cup butter (1 stick), cut into pieces

1 1/2 cups hot water (120° to 130°)

2 large eggs

Cooking oil

  1. Combine 2 cups flour, undissolved yeast, sugar and salt in large bowl.  Stir well to blend.  Add butter. Add hot water. Beat with electric mixer at medium speed for 2 minutes.  Scrape bowl occasionally. Add eggs and 2 cups more flour. Beat with electric mixer at high speed for 2 minutes or until thick and elastic. Gradually stir in just enough of remaining flour with wooden spoon (or dough hook of mixer) to make a soft dough which leaves sides of bowl. (Dough should be very soft and pliable without being sticky; too much flour will yield a tough dough that is hard to form and resists sealing when formed into a bierock.)
  2. Turn out onto floured board and knead 5 to 10 minutes or until dough is smooth and elastic (or continue process in mixing bowl, using a dough hook, if preferred). Place dough in a greased bowl (or extra large plastic resealable bag), turning to grease top.  
  3. Cover; let rise in warm place, free from drafts until doubled in size, about 30 minutes.  Dough may be used now or placed in refrigerator (make sure surface is well oiled and covered loosely with plastic wrap.  Refrigerate 2 to 24 hours. When ready to use, remove from refrigerator and let stand 10 to 15 minutes and proceed with recipe directions.


TO ASSEMBLE BIEROCKS: 

  1. Uncover dough; punch down. 
  2. Pinch or cut off dough balls about the size of a small orange (about 1/4 to 1/3 cup dough) and roll flat — we prefer a thin layer of dough, about 1/8” thickness. Be sure that the edges are very thin to avoid a large “wad” of dough at the closing point. Although I use a rolling pin, I also use my fingers to achieve the desired 1/8” thickness – my final round usually measures about 6 to 7” in diameter. 

  3. Put between 1/4  to 1/3 cup of the beef filling in the center and bring up all sides together and pinch. Be sure they are pinched and sealed securely to avoid bierocks that leak when baking. 
  4. Place on a sprayed baking sheet (I prefer to line the sheet with a silicon baking sheet or parchment paper) and then lightly flatten with your hand. 
  5. Bake in a preheated oven set at 375° to 400° for 15 to 20 minutes. 

Entertaining Ideas:

“Party-size” Bierocks – make mini bierocks and serve as an offering on a buffet along with other bite-size foods.

“Assemble Your Own” Bierock Party – have the bread dough made & portioned; portion the meat filling too. Cover and refrigerate both until right before guests arrive. Gather guests in the kitchen to roll and assemble their own bierocks. Line baking sheets with parchment paper and have markers available so everyone can label the bierocks they have made.


To reheat frozen bierocks:  

Microwave – Place 1 frozen (or slightly thawed) bierock in microwave & heat on high for approximately 1 1/2 minutes; check & continue to heat only if needed.

Oven – Place frozen (or slightly thawed) bierocks on a cookie sheet, cover with foil and heat @ 350° for approximately 20 to 30 minutes or until heated through.

Stove Top or Electric Skillet – Place slightly thawed bierock in skillet on low. Warm uncovered, adding lid near end of heating process.


------

Recipe without photos . . . Bierocks  

Filling  Enough filling for about 2 to 3  dozen medium to large bierocks 

1 large onion, finely chopped + a little oil for sautéing 

3 1/2 to 4 pounds lean ground beef

1 head cabbage, finely chopped  (cabbage size varies but

   our general guide is: allow 3 to 5 cups per 1 lb. meat)

1 tablespoon salt (approximately)

Pepper to taste

1 can of sauerkraut, drained (regular size or large can

   depending on your preference), optional

Flour - enough to slightly thicken mixture (2 to 4 T.)

-------------------------------------

1 batch roll dough (recipe follows or use your 
favorite bread dough recipe)


  1. Sauté onion in skillet in a little oil. Add meat and cook thorough; drain excess fat (should not be necessary if lean meat is used). Add chopped cabbage, salt and pepper.  
  2. Cover skillet with a lid and steam until cabbage is tender. Add sauerkraut, if desired. Mix in just enough flour to thicken and to create a cohesive mixture.  

This is a variable recipe that can be adjusted to your own taste. Also, ingredients can be varied: use part sausage rather than all ground beef; add grated carrots or potatoes, or chopped green pepper along with the cabbage; mix in grated cheese, ketchup and mustard or add a teaspoon of two of other seasonings of your choice; add a small cube of cream cheese to the mixture as you form the bierocks, etc. I've also left out the meat and made vegetarian bierocks for friends. 


Rapidmix Cool Rise Roll Dough  Makes about 2 to 3 dozen bierocks or shape into 2 1/2 to 3 dozen dinner rolls. ---adapted from Fleischmann’s Bake-it-easy Yeast Book, 1973 as printed in The Kirby House Cookbook, Meta Newell West, Nov. 2001.    

5 to 6 cups all-purpose flour, unsifted

2 packages (1/4 oz.) or scant 2 tablespoons yeast (active dry instant)

1/2 cup granulated sugar

1 1/2 teaspoons salt

1/2 cup butter (1 stick), cut into pieces

1 1/2 cups hot water (120° to 130°)

2 large eggs

Cooking oil

  1. Combine 2 cups flour, undissolved yeast, sugar and salt in large bowl.  Stir well to blend.  Add butter. Add hot water. Beat with electric mixer at medium speed for 2 minutes.  Scrape bowl occasionally. Add eggs and 2 cups more flour. Beat with electric mixer at high speed for 2 minutes or until thick and elastic. Gradually stir in just enough of remaining flour with wooden spoon (or dough hook of mixer) to make a soft dough which leaves sides of bowl. (Dough should be very soft and pliable without being sticky; too much flour will yield a tough dough that is hard to form and resists sealing when formed into a bierock.)
  2. Turn out onto floured board and knead 5 to 10 minutes or until dough is smooth and elastic (or continue process in mixing bowl, using a dough hook, if preferred). Place dough in a greased bowl (or extra large plastic resealable bag), turning to grease top.  
  3. Cover; let rise in warm place, free from drafts until doubled in size, about 30 minutes.  Dough may be used now or placed in refrigerator (make sure surface is well oiled and covered loosely with plastic wrap.  Refrigerate 2 to 24 hours. When ready to use, remove from refrigerator and let stand 10 to 15 minutes and proceed with recipe directions.


TO ASSEMBLE BIEROCKS: 

  1. Uncover dough; punch down. 
  2. Pinch or cut off dough balls about the size of a small orange (about 1/4 to 1/3 cup dough) and roll flat — we prefer a thin layer of dough, about 1/8” thickness. Be sure that the edges are very thin to avoid a large “wad” of dough at the closing point. Although I use a rolling pin, I also use my fingers to achieve the desired 1/8” thickness – my final round usually measures about 6 to 7” in diameter. 
  3. Put between 14  to 1/3 cup of the beef filling in the center and bring up all sides together and pinch. Be sure they are pinched and sealed securely to avoid bierocks that leak when baking. 
  4. Place on a sprayed baking sheet (I prefer to line the sheet with a silicon baking sheet or parchment paper) and then lightly flatten with your hand. 
  5. Bake in a preheated oven set at 375° to 400° for 15 to 20 minutes. 

Entertaining Ideas:

“Party-size” Bierocks – make mini bierocks and serve as an offering on a buffet along with other bite-size foods.

“Assemble Your Own” Bierock Party – have the bread dough made & portioned; portion the meat filling too. Cover and refrigerate both until right before guests arrive. Gather guests in the kitchen to roll and assemble their own bierocks. Line baking sheets with parchment paper and have markers available so everyone can label the bierocks they have made.


To reheat frozen bierocks:  

Microwave – Place 1 frozen (or slightly thawed) bierock in microwave & heat on high for approximately 1 1/2 minutes; check & continue to heat only if needed.

Oven – Place frozen (or slightly thawed) bierocks on a cookie sheet, cover with foil and heat @ 350° for approximately 20 to 30 minutes or until heated through.

Stove Top or Electric Skillet – Place slightly thawed bierock in skillet on low. Warm uncovered, adding lid near end of heating process.


Lemon Zucchini Bread - a new recipe for the season!

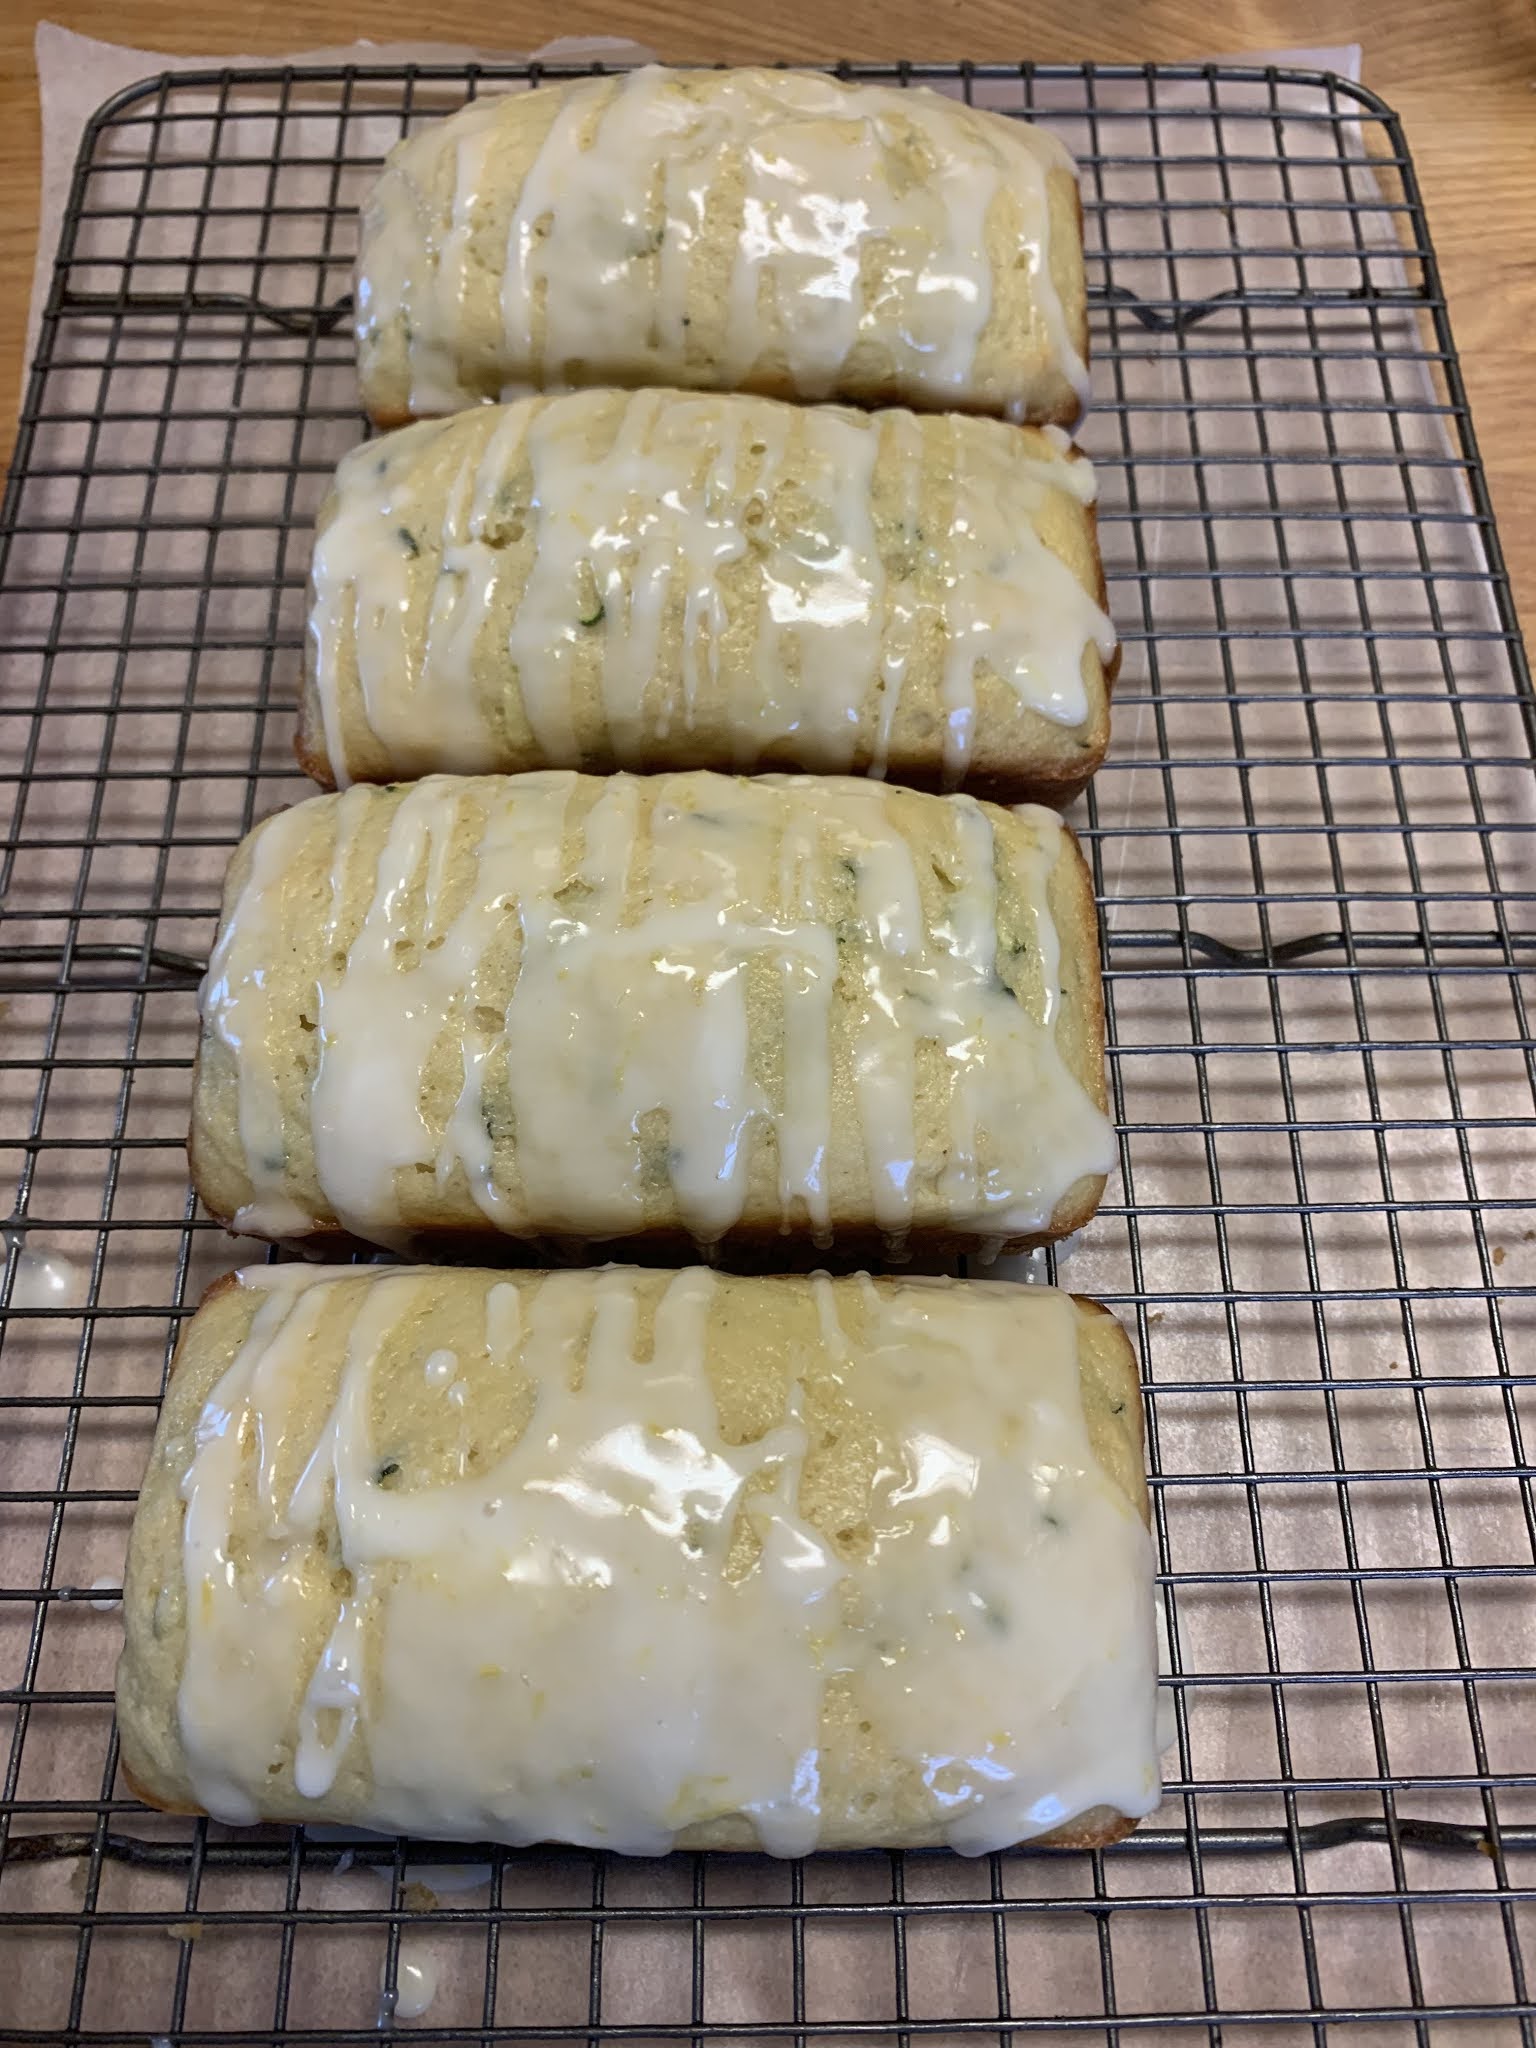
It’s zucchini season in Kansas and I tried a new recipe, one my sister Marla Payne suggested. It’s light and lemony tasting, moist with a cake-like consistency. We had a piece for dinner with a bowl of cherries. Actually,two pieces, maybe three but whose counting! “The loaf is small,” I kept telling myself.  


Lemon Zucchini Bread     Makes 4 mini loaves (6"x3 1/2") or one a 9”x5” loaf 


2 cups all-purpose flour

2 teaspoons baking powder

1/2 teaspoon salt

2 large eggs

1 cup granulated sugar

1/2 cup canola or vegetable oil

1/2 cup buttermilk (or use soured milk made by adding 1 1/2 tsp. white vinegar & filling cup to 1/2 cup mark with milk; allow to set a few minutes)

Zest of 1/2 large lemon

2 tablespoons fresh lemon juice about 1 lemon

1 cup shredded zucchini, gently blot dry to remove excess moisture


Lemon Glaze

1 cup powdered sugar, sifted

Zest of 1/2 large lemon

Juice of 1/2 large lemon

  1. Heat oven to 350°. Line 4 mini loaf pans (6"x3 1/2") or one (9”x5”) loaf pan with a strip of parchment (see photo below in step #6); spray pan and paper with pan release.
  2. In a small bowl combine the flour, baking powder, and salt. Stir to combine; set aside.

  3. In a large bowl of a stand mixer, beat the eggs for 30 seconds. Add the sugar and oil and beat together until mixture looks "fluffy" and pale in color, about 1 minute. 

  4. Add buttermilk, lemon zest, and lemon juice. Blend together until mixed in. 

  5. Add the shredded zucchini and the dry ingredients to the wet mixture; mix gently just until combined and no flour pockets remain. 

  6. Evenly divide the batter between the 4 mini loaf pans (or 9”x5” pan).
  7. Bake mini loaves for 30 minutes and the 9x5 loaf pan for 40 to 45 minutes—a toothpick inserted in the middle should come out clean.

  8. Using ends of parchment paper, remove the bread to a rack to cool.
  9. Lemon Glaze: Mix together the powdered sugar and lemon juice until combined—use enough lemon juice to achieve desired consistency you want. Milk could also be used to thin glaze if its too thick. 
  10. Drizzle/spoon the glaze over the bread using a back and forth motion. Note: Place a piece of waxed paper under the rack for easy clean up. 

    Recipe without photos . . . Lemon Zucchini Bread     Makes 4 mini loaves (6"x3 1/2") or one a 9”x5” loaf 


    2 cups all-purpose flour

    2 teaspoons baking powder

    1/2 teaspoon salt

    2 large eggs

    1 cup granulated sugar

    1/2 cup canola or vegetable oil

    1/2 cup buttermilk (or use soured milk made by adding 1 1/2 tsp. white vinegar & filling cup to 1/2 cup mark with milk; allow to set a few minutes)

    Zest of 1/2 large lemon

    2 tablespoons fresh lemon juice about 1 lemon

    1 cup shredded zucchini, gently blot dry to remove excess moisture


    Lemon Glaze

    1 cup powdered sugar, sifted

    Zest of 1/2 large lemon

    Juice of 1/2 large lemon

    1. Heat oven to 350°. Line 4 mini loaf pans (6"x3 1/2") or one (9”x5”) loaf pan with a strip of parchment (see photo below in step #6); spray pan and paper with pan release.
    2. In a small bowl combine the flour, baking powder, and salt. Stir to combine; set aside.

    3. In a large bowl of a stand mixer, beat the eggs for 30 seconds. Add the sugar and oil and beat together until mixture looks "fluffy" and pale in color, about 1 minute. 

    4. Add buttermilk, lemon zest, and lemon juice. Blend together until mixed in. 

    5. Add the shredded zucchini and the dry ingredients to the wet mixture; mix gently just until combined and no flour pockets remain. 

    6. Evenly divide the batter between the 4 mini loaf pans (or 9”x5” pan).
    7. Bake mini loaves for 30 minutes and the 9x5 loaf pan for 40 to 45 minutes—a toothpick inserted in the middle should come out clean.

    8. Using ends of parchment paper, remove the bread to a rack to cool.
    9. Lemon Glaze: Mix together the powdered sugar and lemon juice until combined—use enough lemon juice to achieve desired consistency you want. Milk could also be used to thin glaze if its too thick.
    10.  Drizzle/spoon the glaze over the bread using a back and forth motion. Note: Place a piece of waxed paper under the rack for easy clean up.  

Black Bean Fiesta in a Jar with Lime Cilantro Dressing

Recipes for Mason Jar salads are typically made in quart jars; one of those jars is more than enough for the two in our household so I’ve downsized this tasty salad mix for pint jars. Even then, the amounts are variable and can be adjusted as can the choice of ingredients.     

Salad jars are a nice picnic option for us. I make them the night before and we can grab-and-go the next day. 

The spicy dressing and addition of cilantro really boost the flavor of this salad! 

Salads in a Jar are a great way to add fiber, veggies & even some fun to daily meals.


Black Bean Fiesta in a Jar with Lime Cilantro Dressing      Fills 2 pint jars

Lime Cilantro Dressing—recipe follows 

About 2 to 3 tablespoons onion – yellow, white or red onion, chopped

About 1/3 cup shredded carrots

About 1/3 cup shredded purple or green cabbage

About 1/2 cup cooked quinoa (I flavored with a spicy Mexican blend while cooking)

1/2 to 3/4 cup cooked black beans, drained & rinsed 

About 1/2 cup corn kernels (fresh or frozen that has been thawed)

About 1/4 cup cherry or grape tomatoes, halved

About 2 to 3 tablespoons cilantro leaves, torn or whole

2 to 3 oz. of baby spinach or other greens

  1. Prepare dressing using recipe that follows.
  2. To build the mason jar salads: Grab two wide-mouth ping size mason jars and add about 2 tablespoons+ dressing to the bottom of each.  Adding the dressing to the bottom of the jar allows the sturdy vegetables to marinate in the mixture and help keep less sturdy greens from becoming soggy
  3. Add in onion, carrots and cabbage. 
  4. Add remaining ingredients in layers in whichever order you prefer: quinoa, black beans corn, tomatoes, cilantro leaves Top with with spinach. 
  5. Refrigerate jars overnight if desired. Place in chilled cooler if taking on a picnic. 
  6. To serve:  Pour jar onto a large plate or bowl, allowing dressing to mix with the remaining ingredients.

Lime Cilantro Dressing                  


Replay


Learn more


1/4 cup lime juice

2 tablespoons maple syrup

1 tablespoon cilantro

1 clove garlic

1/2 teaspoon salt

1/2 teaspoon ground pepper

1/2 cup+ vegetable oil (olive oil is tasty but solidifies when refrigerated so I used canola)


Make dressing by placing all ingredients expect oil into blender or food processor; blend until smooth and then drizzle in oil while blender/processor is on low, adding enough to achieve desired dressing consistency.


Marbled Rye Bread

While Barry smoked a turkey breast, I made Marbled Rye Bread using the recipe on Red Star Yeast’s websiteI followed their instructions but did omit the caraway seeds as we prefer rye bread without that addition + added 1 heaping tablespoon of vital gluten along with each measurement of rye flour to add to boost the protein level. I also made diagonal slashes in the loaves and brushed them with an egg wash right before baking.


Grilled Turkey and Swiss on Rye w/ More Than Mayo Sauce

COMPLETE ORIGINAL RECIPE can be found at Red Star Yeast's website  - Marbled Rye Bread

The following photos detail the process I followed and the changes I made: 


Marbled Rye Bread

Light Rye Dough

1 (0.25oz) package (7g) or 2 1/4 teaspoons active dry yeast 

2 cups bread flour, divided

1 1/2 teaspoons table salt

2 tablespoons granulated sugar

1 1/4 cups water (120° to 130°F)

4 1/2 teaspoons vegetable oil

1 1/3 cups medium rye flour + 1 tablespoon vital gluten 

Dark Rye Dough

1 (0.25oz) package (7g) or 2 1/4 teaspoons active dry yeast 

2 cups bread flour, divided

1 1/2 teaspoons table salt

2 tablespoons granulated sugar

2 tablespoons cocoa

1 1/4 cups water (120° to 130°F)

4 1/2 teaspoons vegetable oil

1 1/3 cups medium rye flour + 1 tablespoon vital gluten

  1. Light rye dough: Combine yeast, 1 cup bread flour, salt, and sugar; mix well. 
  2. Heat water and oil to 120° to 130°F; add to flour mixture. 
  3. Blend at low speed; beat about 3 minutes at medium speed. 
  4. Gradually stir in rye flour (plus a heaping tablespoon of vital wheat gluten if using) and enough of the remaining bread flour (I only used about 1/4 to 1/3 of the remaining cup of flour) to make a firm yet moist dough. 
  5. Knead with a dough hook or on a lightly floured surface for about 5 to 7 minutes until smooth and elastic. (More flour can be added if dough becomes sticky; mine did not need extra.)
  6. Place dough in lightly oiled bowl and turn to grease top. 
  7. Cover; let rise until dough is about double in size — to check, Gently stick two fingers in the risen dough; if the indentations remain the dough is and ready. 
  8. Dark rye dough: Repeat the process for light rye, adding the cocoa to the flour mixture.
  9. Shaping, rising baking: On lightly floured surface, divide each light and dark dough in half. 
  10. Roll or pat each half to approximately an 14 x 7-inch rectangle. 
  11. For a dark crust, place a light rye piece on top of a dark rye, or reverse for a lighter crust. 
  12. For a loaf baked in an 8x4-inch pan, start rolling from shorter side, roll up tightly, pressing dough into roll with each turn. My preference is to created a longer, baguette-style shape, so I started rolling from the log side, pressing dough into roll with each turn
  13. Pinch edges and ends to seal. 
  14. Working from the center of the loaf to the ends, gently roll the loaf back and forth to form a baguette shape approximately 14" long; back and forth rolling should close the seam where dough was pinched to seal.
  15. if using  8x4-inch loaf pans, spray 2 pans with pan release. Add loaves to prepared pans. If making longer loaves, arrange on silicon baking sheets.
  16. Cover loaves and allow to rise for about an hour.
  17. Make diagonal slashes across the top of each load; brush with an egg wash.
  18. Bake in a 375°F preheated oven for 40 to 45 minutes or until an internal temperature of 190°F. is reached.
  19. Remove from pan; cool on rack.