Showing posts with label Seasoning Blend. Show all posts

Tortilla-wrapped Brats on a stick

Tortilla-wrapped Brat with
Butternut Salad on the side.
When Barry told me what he was fixing for dinner, I was not too excited! But, I'm not one to "bite the hand that feeds me," so I made no negative comments. And, as it turned out, I am now a fan of his Tortilla-warpped Brats on a stick! They are a somewhat healthier version of the corn dogs I used to like when I was a teenager.
The recipe was inspired by something he saw in a magazine in the office of a doctor's waiting room . . . with his own twist.

Tortilla-wrapped Brats on a stick
7" whole wheat tortillas, either at room temp or slightly warmed so they are pliable
Grated cheese -- sharp Cheddar or a Cheddar blend
Fully cooked smoked brats (such as Johnsonville®)
Wooden skewers
Olive oil
Seasoning blend such as Freddy's® Famous Seasoning or you favorite brand
Dipping Sauce: Mix equal parts of ketchup and Dijon mustard
  1. Lay tortillas on a flat work surface.
  2. Sprinkle cheese down the center of each tortilla.
  3. Add a wooden skewer to one end of brat.
  4. Position each brat on top of a cheese-lined tortilla, lining up skewer end of brat close to one edge of the tortilla.
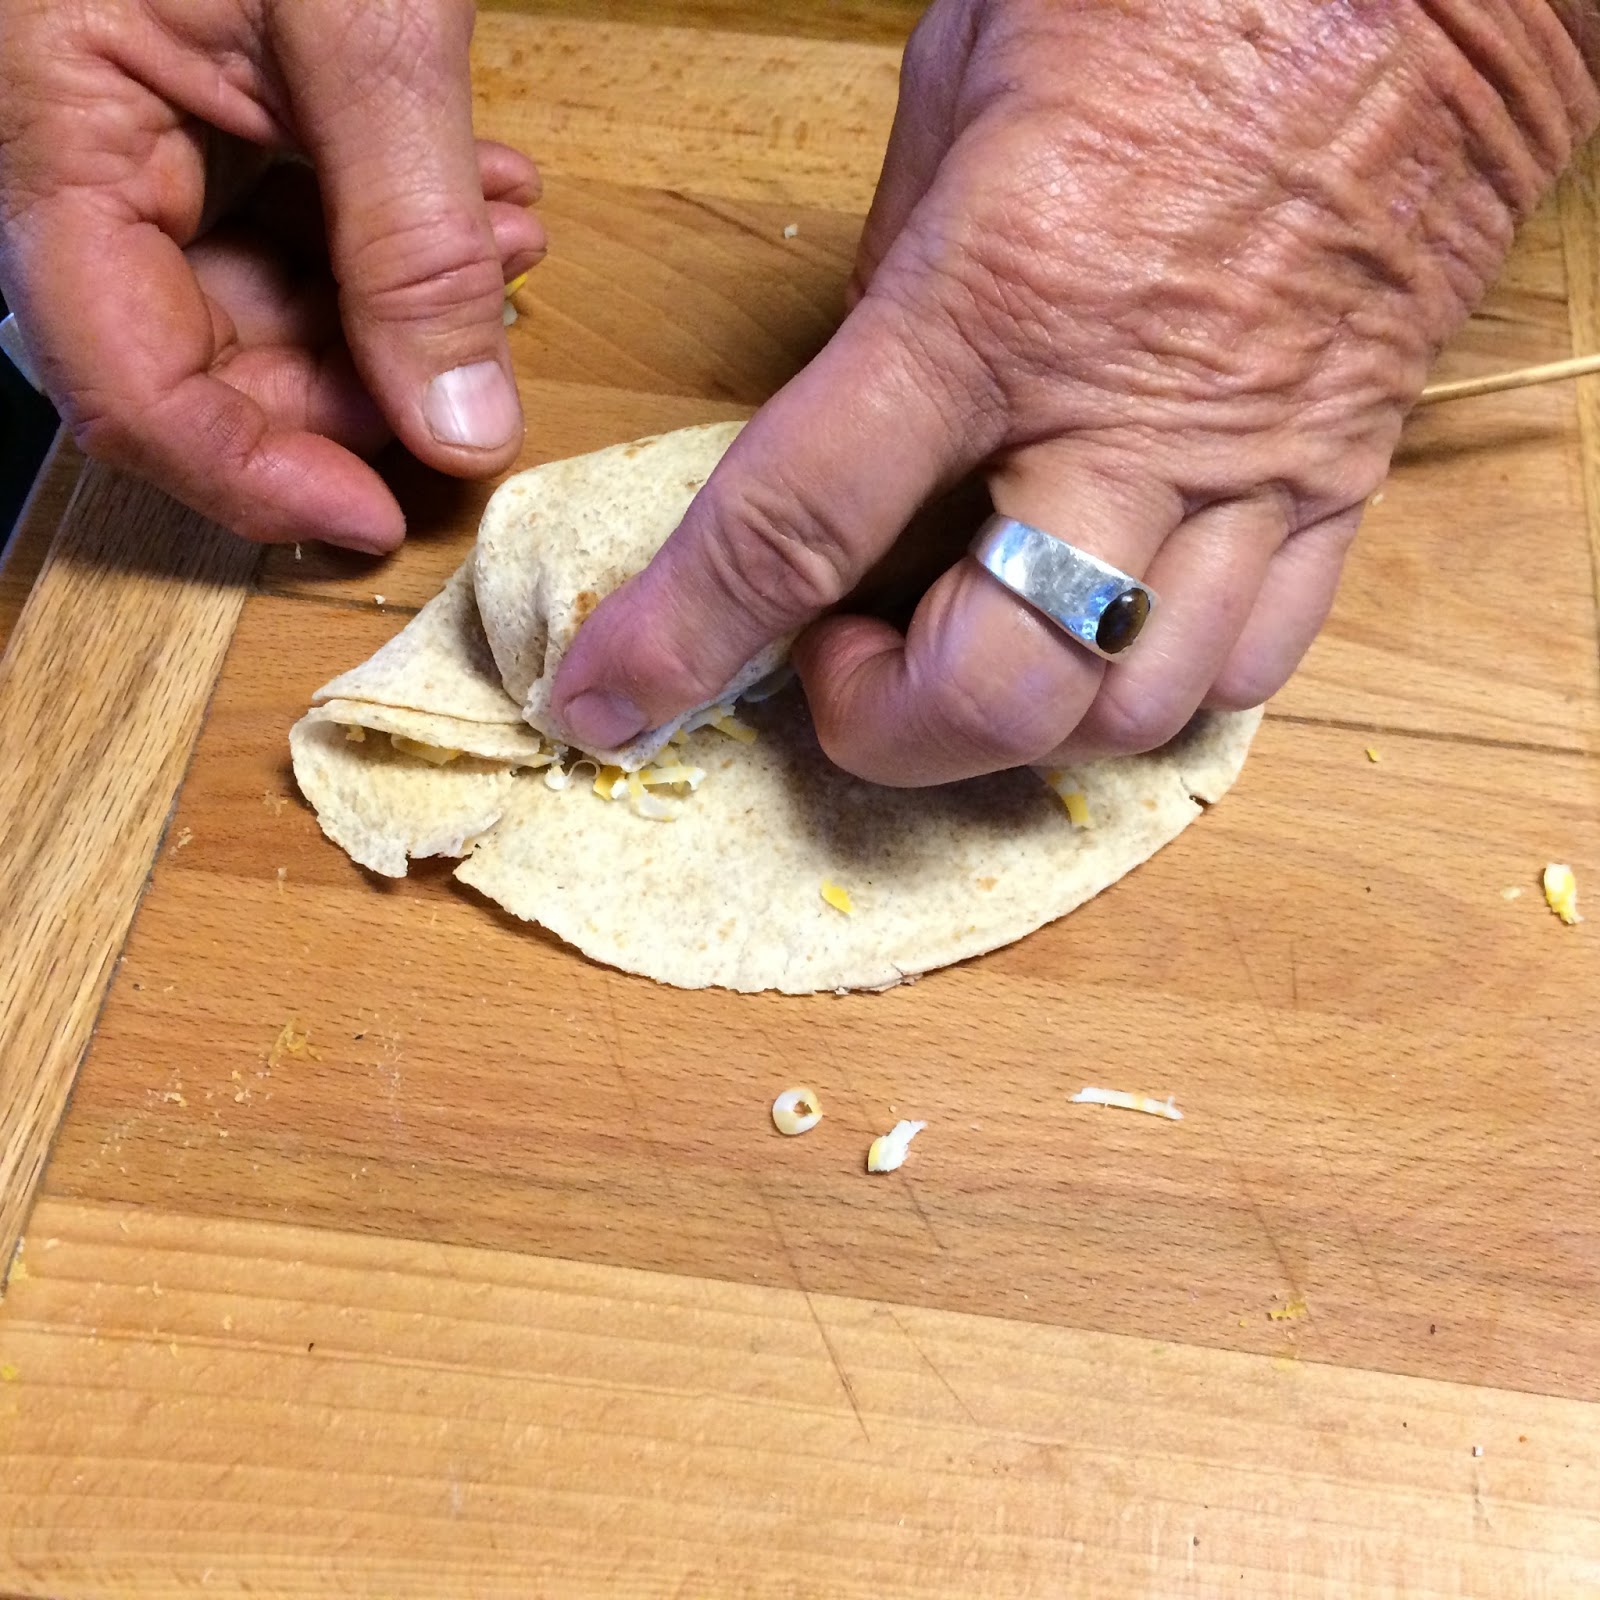
  5. Roll up each tortilla, tucking the end (the one opposite the skewered brat) in as you roll.


  6. Arrange on a parchment-lined baking tray. Brush each tortilla lightly with olive oil and sprinkle with seasoning.
  7. Bake in a preheated 400° oven for 10 to 15 minutes until tortilla is lightly browned.
  8. Serve with Dipping Sauce.
Recipe without photos . . .
Tortilla-wrapped Brats on a stick
7" whole wheat tortillas, either at room temp or slightly warmed so they are pliable
Grated cheese -- sharp Cheddar or a Cheddar blend
Fully cooked smoked brats (such as Johnsonville® )
Wooden skewers
Olive oil
Seasoning blend such as Freddy's® Famous Seasoning or you favorite brand
Dipping Sauce: Mix equal parts of ketchup and Dijon mustard
  1. Lay tortillas on a flat work surface.
  2. Sprinkle cheese down the center of each tortilla.
  3. Add a wooden skewer to one end of brat.
  4. Position each brat on top of a cheese-lined tortilla, lining up skewer end of brat close to one edge of the tortilla.
  5. Roll up each tortilla, tucking the end (the one opposite the skewered brat) in as you roll. 
  6. Arrange on a parchment-lined baking tray. Brush each tortilla lightly with olive oil and sprinkle with seasoning.
  7. Bake in a preheated 400° oven for 10 to 15 minutes until tortilla is lightly browned.
  8. Serve with Dipping Sauce.

Pulled Pork using pork loin cooked in the oven


Pulled Pork for 40.
Pulled pork sliders are on the menu for my weekend class reunion and here’s the recipe we used . . . however, I increased it to feed 40. It’s ideal since this recipe is actually better the day after. 
The inspiration for this recipe came from 101 Cooking ForTwo.
Just in case you might be interested in preparing pork sliders for a crowd . . .
Amount of pork for 40: Depending on the size of the bun, each slider will hold 2-3 ounces (cooked). So 25-30 pounds of raw pork will make 2 sliders per person maybe a few more.

 Pulled Pork using pork loin cooked in the oven    About 15 to 20 servings
About 5 lbs. center cut pork loin
Assorted herbs for the pork stock: sage, rosemary, thyme, parsley, etc. – either fresh or dried + salt & pepper
Seasoning salt (or your favorite rub)
Vegetable oil
1 large onion chopped
28 to 32 oz. homemade pork stock (could use purchased broth)
  1. Trim excess fat and any silverskin from pork loin (save the trimmings minus the silverskin).
  2. Add pork trimmings and herbs to a pot of water, bring to a boil and then simmer until you have a rich stock. Near the end, taste and add salt and pepper as needed. Cool and strain stock.
  3. Cut loin in half or thirds and rub all outer surfaces liberally with seasoning salt.
  4. Drizzle a skillet with vegetable oil and heat to medium-high temp; add the pork loin pieces and brown all surfaces.
  5. Remove loin pieces and cut each into about 2” slices cross grain. Add to an oven-safe pan that can be sealed shut, or use a Dutch oven.
  6. Add onion to skillet dripping and sauté. Top pork with the onions. (At this point, deglaze skillet with a little water to capture all the flavor still in the pan; add the liquid to the stock.)
  7. Pour pork stock over pork; if there is not enough stock to cover pork, add water.
  8. Seal with aluminum foil (or add lid) and place in 300°oven for 4 to 6 hours -- until pork falls apart when probed with a fork. (CROCKPOT ADAPTATION: Add ingredients to crockpot, set on high heat for 3 to 4 hours or cook on low all day.)

    Fork tender pork after long, slow cooking.
  9. Cool pork and then transfer to a platter or pan to cool. Reserve cooking liquid.
  10. After pork is cooled, hand shred. Add back enough of the cooking liquid to keep pork moist (we used it all). 
    Excess liquid will be absorbed as the pulled pork chills.
  11. If possible, refrigerate pork overnight. Note: Pulled pork is still good if served on the day of cooking, but a lot better is allowed to soak in cooking liquid overnight.)
Recipes for rolls/buns we used for the pork sliders:

Other reunion recipes:
Beer Cheese Dip 
Autumn Molasses Cookies—Gingersnaps

Recipe without photos . . .
Pulled Pork using pork loin cooked in the oven    15 to 20 servings
About 5 lbs. center cut pork loin
Assorted herbs for the pork stock: sage, rosemary, thyme, parsley, etc. – either fresh or dried + salt & pepper
Seasoning salt (or your favorite rub)
Vegetable oil
1 large onion chopped
28 to 32 oz. homemade pork stock (could use purchased broth)
  1. Trim excess fat and any silverskin from pork loin (save the trimmings minus the silverskin).
  2. Add pork trimmings and herbs to a pot of water, bring to a boil and then simmer until you have a rich stock. Near the end, taste and add salt and pepper as needed. Cool and strain stock.
  3. Cut loin in half or thirds and rub all outer surfaces liberally with seasoning salt.
  4. Drizzle a skillet with vegetable oil and heat to medium-high temp; add the pork loin pieces and brown all surfaces.
  5. Remove loin pieces and cut each into about 2” slices cross grain. Add to an oven-safe pan that can be sealed shut, or use a Dutch oven.
  6. Add onion to skillet dripping and sauté. Top pork with the onions. (At this point, deglaze skillet with a little water to capture all the flavor still in the pan; add the liquid to the stock.)
  7. Pour pork stock over pork; if there is not enough stock to cover pork, add water.
  8. Seal with aluminum foil (or add lid) and place in 300°oven for 4 to 6 hours -- until pork falls apart when probed with a fork. (CROCKPOT ADAPTATION: Add ingredients to crockpot, set on high heat for 3 to 4 hours or cook on low all day.)
  9. Cool pork and then transfer to a platter or pan to cool. Reserve cooking liquid.
  10. After pork is cooled, hand shred. Add back enough of the cooking liquid to keep pork moist (we used it all). 
  11. If possible, refrigerate pork overnight. Note: Pulled pork is still good if served on the day of cooking, but a lot better is allowed to soak in cooking liquid overnight.)

Barbecue Meatloaf Muffins — portion-controlled yummy morsels

Baking individual portions of meatloaf in muffin tins speeds cooking, controls serving size and produces a moist, delicious main dish. Bake them all at once in a muffin pan . . . or portion into custard cups baking some now, and freezing the rest for later use.

Barbecue Meatloaf Muffins    Approximately 8 to 12 servings
Vegetable oil or vegetable oil spray
1⅔ to 1¾ lbs. lean ground beef (about 80% lean)
1 medium onion, finely chopped
1 large egg plus a splash of milk,
1 cup plain bread crumbs
1 tablespoon + 1 teaspoon all-purpose seasoning blend  (such as Tex-Joy or Montreal Steak Seasoning by McCormick®)
¼ to ½ cup barbecue sauce (we prefer Gates BBQ Sauce)

1.  Preheat oven to 375°. Brush a 12-muffin tin (½-cup each) with vegetable oil or spray; this step could omitted if using stick-free coated muffin tins.
2.  Add ground beef and chopped onion to a mixing bowl.
3.  Add egg, milk, bread crumbs and all-purpose seasoning to the bowl; mix until ingredients are just combined (overmixing could cause meatloaf to be compact).

4.  Use a scoop (approximately ½ cup capacity) to help you fill meat into each tin.

5.  Top each meat loaf with a liberal squirt (we keep our barbecue sauce in a squeeze bottle).


6.  Place muffin tin on a baking sheet. Bake at 375° for 25 minutes or until a thermometer registers 160°. Let stand for 5 minutes.

Recipe without photos . . . 
Barbecue Meatloaf Muffins    Approximately 8 to 12 servings
Vegetable oil or vegetable oil spray
1⅔ to 1¾ lbs. lean ground beef (about 80% lean)
1 medium onion, finely chopped
1 large egg plus a splash of milk,
1 cup plain bread crumbs
1 tablespoon + 1 teaspoon all-purpose seasoning blend  (such as Tex-Joy or Montreal Steak Seasoning by McCormick®)
¼ to ½ cup barbecue sauce (we prefer Gates BBQ Sauce)

1.  Preheat oven to 375°. Brush a 12-muffin tin (½-cup each) with vegetable oil or spray; this step could omitted if using stick-free coated muffin tins.
2.  Add ground beef and chopped onion to a mixing bowl.
3.  Add egg, milk, bread crumbs and all-purpose seasoning to the bowl; mix until ingredients are just combined (overmixing could cause meatloaf to be compact).

4.  Use a scoop (approximately ½ cup capacity) to help you fill meat into each tin.

5.  Top each meat loaf with a liberal squirt (we keep our barbecue sauce in a squeeze bottle).


6.  Place muffin tin on a baking sheet. Bake at 375° for 25 minutes or until a thermometer registers 160°. Let stand for 5 minutes.

French-fried Eggplant — last of the summer-time indulgences


Crispy, and oh, so good! Although I usually try to curtail my consumption of fried foods, French-fried Eggplant is just impossible to resist!
Serve it as an appetizer or as a side.


French-fried Eggplant  About 4 servings
1 medium eggplant, peeled and sliced into wedges or sticks
1 to 2 eggs
1 cup panko
¼ cup all-purpose flour
2 to 3 teaspoons TexJoy steak seasoning or your favorite seasoning salt or blend
Frying oil

1.  In a bowl, mix egg(s) until well blended.
2.  In another low, flat bowl, combine panko, flour and TexJoy.
3.  Heat oil in frying pan or deep fat fryer (about 350°).
4.  Dip eggplant wedges/sticks into egg mixture and then panko mixture; repeat if needed to achieve a nice layer of coating.
5.  Place in oil, flipping regularly and fry about 3 minutes, or until golden brown.
6.  Drain on paper towels. Serve immediately.
Serve with Comeback Sauce or other seasoned mayo (we like to add basil or salsa to our mayo).

Recipe Notes . . .
·    As a general rule, small eggplants are sweeter than regular-sized eggplants, which can become bitter with age. The skin and flesh are more delicate, as well.
·    Eggplant discolors rapidly once it’s peeled, so take the skin off right before you’re going to cook it.
·    Be sure that your oil is hot. Eggplant is fairly absorbent (think sponge). Frying in oil that’s hot enough and coating the wedges/stick in flour will help keep the oil from soaking into the eggplant’s interior.
·    Fry in small batches so that the heat of the oil is maintained. Overcrowding will result in a drop of temperature.

French-fried Eggplant  About 4 servings
1 medium eggplant, peeled and sliced into wedges or sticks
1 to 2 eggs
1 cup panko
¼ cup all-purpose flour
2 to 3 teaspoons TexJoy steak seasoning or your favorite seasoning salt or blend
Frying oil

1.  In a bowl, mix egg(s) until well blended.
2.  In another low, flat bowl, combine panko, flour and TexJoy.
3.  Heat oil in frying pan or deep fat fryer (about 350°).
4.  Dip eggplant wedges/sticks into egg mixture and then panko mixture; repeat if needed to achieve a nice layer of coating.
5.  Place in oil, flipping regularly and fry about 3 minutes, or until golden brown.
6.  Drain on paper towels. Serve immediately.
Serve with Comeback Sauce or other seasoned mayo (we like to add basil or salsa to our mayo)