Fall-off-the-Bone Pork Steaks

Fall-off-the-Bone Pork Steaks -- essentially a 5-ingredient meal prepared in the slow cooker
Fall-off-the-bone tender, mouth-watering flavor and an aroma that made our house smell wonderful—this is definitely an easy one-pot meal that I'll make again! It is more of a technique than a specific recipe so I've written the directions in a conversational manner versus the usual recipe format
Even in the midst of stay-at-home COVID-19 orders, I needed a no-fuss evening meal as I had multiple Zoom meetings and several deadlines. So, I thought of the pork steaks that Barry purchased last week when they were on sale. We re-wrapped them so each was in it's own individual bag and put them in the freezer. I just grabbed a couple and without much thought and few expectations, I threw them into the slow cooker. They were so good (and easy) that I decided to create a post. These are the conversational directions . . .
  1. Place 2 pork steaks (frozen or thawed) side-by-side in an oval slow cooker. They could also be stacked if you are doing more than two.
  2. Sprinkle most of a 1 oz. envelope of Dry Onion Soup Mix over the steaks. Amount can vary according to  preference and number of steaks.
  3. Add enough chicken or pork broth or stock to almost cover steaks.
  4. Set on HIGH for a couple of hours or until steak becomes tender, then turn to LOW. 
  5. About 1 or 1 1/2 hours before ready to eat, add carrots and potatoes; season with salt & pepper. Add a cornstarch slurry and set on HIGH to finish cooking. I used carrot strips and smaller potato chunks so the veggies would cook in the time I allowed. To make a cornstarch slurry: Mix about 1 or 2 Tbsp. cornstarch with 2 to 3 Tbsp. of water.
    Above - Vegetables have been added to the pork steak.
    Below: Then a slurry was added and all the ingredients cooked on HIGH for another hour. 
The result was fall-on-the-bone tender pork steak that was packed with flavor and aroma . . .

Homemade Butterscotch Pudding

No artificial flavors! This pudding is homemade using Hildebrand whole milk, farm eggs and Texas pecans for a topping. It was still warm for last night’s dinner . . .  and oh-so-yummy!
Definitely another back-to-basics recipe; this one from the is from a first edition, fifth printing of Betty Crocker’s New Picture Cook Book, a wedding present we received in 1968. 

Homemade Butterscotch Pudding    Makes 4 serving
3/4 cup packed brown sugar
3 tablespoons cornstarch
1/2 teaspoon salt
2 cups whole milk
2 egg yolks, slightly beaten
3 to 4 tablespoons butter
1 teaspoon vanilla
Optional Topping: chopped pecans or walnuts
  1. Mix sugar, cornstarch and salt in a saucepan, whisking until all lumps are removed.
     
  2. Gradually stir in milk.

  3. Cook over medium heat, stirring constantly, until mixture thickens and boils. Boil 1 minute.
  4. Remove pan from heat. Temper slightly beaten eggs by adding, as you stir, hot pudding to eggs. Add several spoonsful of pudding. 
  5. Then blend tempered eggs into the hot mixture in saucepan. Return to heat. bring to boil; boil 1 additional minute, stirring constantly.
  6. Remove from heat. Blend in butter and vanilla.
  7. Pour into dessert dishes or serving bowl.
  8. Serve warm or chilled with chopped pecans or walnuts if desired.
    Pudding serving in Barry's wheel-thrown pottery ramekins.Recipe without photos . . .
Homemade Butterscotch Pudding    Makes 4 serving
3/4 cup packed brown sugar
3 tablespoons cornstarch
1/2 teaspoon salt
2 cups whole milk
2 egg yolks, slightly beaten
3 to 4 tablespoons butter
1 teaspoon vanilla
Optional Topping: chopped pecans or walnuts
  1. Mix sugar, cornstarch and salt in a saucepan, whisking until all lumps are removed. 
  2. Gradually stir in milk.
  3. Cook over medium heat, stirring constantly, until mixture thickens and boils. Boil 1 minute.
  4. Remove pan from heat. Temper slightly beaten eggs by adding, as you stir, hot pudding to eggs. Add several spoonsful of pudding. 
  5. Then blend tempered eggs into the hot mixture in saucepan. Return to heat. bring to boil; boil 1 additional minute, stirring constantly.
  6. Remove from heat. Blend in butter and vanilla.
  7. Pour into dessert dishes or serving bowl.
  8. Serve warm or chilled with chopped pecans or walnuts if desired.

Magic Custard Cake using TOP NOTCH LOCAL INGREDIENTS

TOP NOTCH LOCAL INGREDIENTS FOR A MAGIC CAKE! As the reality of COVID-19 sinks in, it is making me much more conscious of my food sources. Today I’m relying on two local and reliable food products — milk from Hilderbrand Dairy in rural Junction City and Pride of the Prairie Flour from Farmer Direct, Inc., New Cambria. 
The “magic” is that you prepare one cake batter and when you bake it, the cake separates into layers with —a golden crust on top, a thick custard-like vanilla center, a dense and cake-like layer at the bottom!

BEFORE YOU START: There are a few tricks to keep in mind before you start. Eggs separate best when cold but the whites whip to a higher volume if at room temp. So, ideally separate the eggs and then let them set. You can melt the butter and let it cool, warm the milk, measure other ingredients and prepare the pan while you wait on the eggs. Also it is essential that the mixing bowl and beater used for white be completely free of fat; whites will not whip to stiff peaks in the presence of any fat. That also means that if there is any yolk (which has fat) is present in the whites, they will not whip. 
Additional tips and helps are inserted in the recipe directions 

Magic Custard Cake   Make one 8-inch cake
1/2 cup butter, melted and slightly cooled
2 cups Hildebrand Milk, lukewarm
1 1/4 cups powdered sugar
4 eggs, separated
1 tablespoon water
1 cup  Pride of the Prairie all-purpose Flour
2 teaspoon vanilla 
Powdered sugar for dusting          
  1. Prepare the pan and oven: Coat an 8-inch square pan that is 2 inches deep with cooking spray. Cut 2 (8 by 12- to 16-inch) sheets of parchment paper. Lay one sheet in the pan, leaving an overhang of at least 2 inches on each side. Lay the second piece on top, across the first, leaving an overhangs on the other sides. These will be your “handles” when you take the cake out of the pan; set aside. (Of course, you can just spray or grease the pan if preferred.) Arrange a rack in the middle of the oven and heat to 325°F. (The center is a custard and needs slow baking to cook insure creaminess.) Note: References say an 8-inch square pan is essentiala larger size will be too shallow for the custard to form they suggest.
  2. Whip the egg whites until stiff peaks form, set aside.
  3. Beat the egg yolks and powdered sugar until pale yellow.
  4. Add melted butter and the tablespoon of water to egg yolks; mix until evenly combined, about 2 minutes.
  5. Mix in the flour until evenly incorporated.
  6. Slowly beat in the milk and vanilla extract until well combined. The resulting mixture will be thin.
  7. Gently, using a spatula, stir in stiffly beaten egg whites leaving plenty of small, fluffy, clumps unmixed—you don’t want the whipped egg white to dissolve completely. (You are not leavening or lightening the mixture so folding is not the technique of choice here.)
  8. Pour the batter into the pan and bake for 40 to 60 minutes, 50 to 55 minutes is typical; baking time might vary depending on your oven or pan you use, but start checking after 40 minutes. If the top browns too quickly before the minimum of 40 minutes, you can cover the cake with aluminum foil. Magic cake is done when the sides are set, the center wobbles a little, and the top is a warm brown. You will not be able to use a traditional cake tester or the tip of a sharp knife, since it will always come out a bit wet.
  9. Let the cake sit in the pan at room temperature until completely cooled. Loosely cover it with plastic wrap and refrigerate for at least 4 hours and up to 12 hours before serving. It can even be stored in the refrigerator for a few days (again, covered lightly). Unlike most cakes, it will not get stale in the refrigerator.
  10. Dust cake with powdered sugar once it has cooled.
THANK YOU TO THESE LOCAL PRODUCERS: 
tHilderbrand Dairy in rural Junction City.
Pride of the Prairie Flour from Farmer Direct, Inc., New Cambria.

Recipe without photos . . .
Magic Custard Cake   Make one 8-inch cake
1/2 cup butter, melted and slightly cooled
2 cups Hildebrand Milk, lukewarm
1 1/4 cups powdered sugar
4 eggs, separated
1 tablespoon water
1 cup  Pride of the Prairie all-purpose Flour
2 teaspoon vanilla 
Powdered sugar for dusting          
  1. Prepare the pan and oven: Coat an 8-inch square pan that is 2 inches deep with cooking spray. Cut 2 (8 by 12- to 16-inch) sheets of parchment paper. Lay one sheet in the pan, leaving an overhang of at least 2 inches on each side. Lay the second piece on top, across the first, leaving an overhangs on the other sides. These will be your “handles” when you take the cake out of the pan; set aside. (Of course, you can just spray or grease the pan if preferred.) Arrange a rack in the middle of the oven and heat to 325°F. (The center is a custard and needs slow baking to cook insure creaminess.) Note: References say an 8-inch square pan is essentiala larger size will be too shallow for the custard to form they suggest.
  2. Whip the egg whites until stiff peaks form, set aside.
  3. Beat the egg yolks and powdered sugar until pale yellow.
  4. Add melted butter and the tablespoon of water to egg yolks; mix until evenly combined, about 2 minutes.
  5. Mix in the flour until evenly incorporated.
  6. Slowly beat in the milk and vanilla extract until well combined. The resulting mixture will be thin.
  7. Gently, with a spatula, stir in stiffly beaten egg whites leaving plenty of small, fluffy, clumps unmixed—you don’t want the whipped egg white to dissolve completely. (You are not leavening or lightening the mixture so folding is not the technique of choice here.)
  8. Pour the batter into the pan and bake for 40 to 60 minutes, 50 to 55 minutes is typical; baking time might vary depending on your oven or pan you use, but start checking after 40 minutes. If the top browns too quickly before the minimum of 40 minutes, you can cover the cake with aluminum foil. Magic cake is done when the sides are set, the center wobbles a little, and the top is a warm brown. You will not be able to use a traditional cake tester or the tip of a sharp knife, since it will always come out a bit wet.
  9. Let the cake sit in the pan at room temperature until completely cooled. Loosely cover it with plastic wrap and refrigerate for at least 4 hours and up to 12 hours before serving. It can even be stored in the refrigerator for a few days (again, covered lightly). Unlike most cakes, it will not get stale in the refrigerator.
  10. Dust cake with powdered sugar once it has cooled. 

Springtime Risotto with Asparagus

With a few spears of asparagus from our garden, my thoughts turned to risotto. Barry gave this dish a thumbs up! Definitely another comfort food to add to our list of COVID 19 survival essentials! 
Amount of liquid and cooking time is variable, dependent on how al dente or tender you prefer your rice.
Arborio rice, a short grain Italian variety, is high in amylopectin starch, which is what gives risotto its creamy texture. The oval grains are about a quarter of an inch long and typically white. Brown (unrefined) Arborio rice is also available but it’s much more commonly sold as white rice, which is starchier.

Springtime Risotto with Asparagus   Serves 2-3 as a main course, or 4 as a side
About 6 cups+ chicken or vegetable broth or stock 
2 tablespoons butter + extra for finishing
1/2 cup chopped yellow or white onions
1 cup arborio rice (do not rinse as it can destroy the starch that causes this dish to be creamy)
1/4 cup dry white wine (or substitute 1 Tbsp. lemon juice and 3 Tbsp. water)
1/2 pound asparagus, trimmed, tough skins of the spears peeled if they are thick, and the spears cut into small pieces
1/2 cup freshly grated Parmesan cheese
Pepper to taste + salt if needed
  1. Heat the stock in a small saucepan until it comes to a low simmer.
  2. In a separate 3 or 4 quart saucepan, heat butter on medium heat. Add the onions and cook for a minute or two, until translucent and softened.

  3. Add the arborio rice and cook for 2 minutes more, stirring until nicely coated.
  4. Add the white wine. Slowly stir, allowing the rice to absorb the wine.
  5. Once the wine is almost completely absorbed, add 1/2 cup of hot stock to the rice. Continue to stir until the liquid is almost completely absorbed, adding more stock in 1/2 cup increments. Stir often to prevent the rice from sticking to the bottom of the pan.

  6. Continue cooking and stirring rice, adding a little bit of broth at a time, cooking and stirring until it is absorbed, until the rice is tender, but still firm to the bite, about 25 to 35  minutes depending on your preference. Near the end, add the end pieces of the asparagus, saving the tips for later.
  7. With the last ladle of stock, add the asparagus tips. Stir and cook for a couple of minutes, until the risotto has absorbed the stock, but is still loose, and the asparagus are just cooked through. Note: the stock amount given is approximate. You may need a little more or less. If you end up needing more stock and you find yourself without, just use water.

  8. Turn off the heat. Gently stir in the Parmesan cheese, a few slices of butter. Add pepper to taste; if needed, add salt but check first as the Parmesan adds a salty flavor 
  9. Serve immediately.
Recipe without photos . . .
Springtime Risotto with Asparagus   Serves 2-3 as a main course, or 4 as a side
About 6 cups+ chicken or vegetable broth stock 
2 tablespoons butter + extra for finishing
1/2 cup chopped yellow or white onions
1 cup arborio rice (do not rinse as it can destroy the starch that causes this dish to be creamy)
1/4 cup dry white wine (or substitute 1 Tbsp. lemon juice and 3 Tbsp. water)
1/2 pound asparagus, trimmed, tough skins of the spears peeled if they are thick, and the spears cut into small pieces
1/2 cup freshly grated Parmesan cheese
Pepper to taste + salt if needed
  1. Heat the stock in a small saucepan until it comes to a low simmer.
  2. In a separate 3 or 4 quart saucepan, heat butter on medium heat. Add the onions and cook for a minute or two, until translucent and softened.
  3. Add the arborio rice and cook for 2 minutes more, stirring until nicely coated.
  4. Add the white wine. Slowly stir, allowing the rice to absorb the wine.
  5. Once the wine is almost completely absorbed, add 1/2 cup of hot stock to the rice. Continue to stir until the liquid is almost completely absorbed, adding more stock in 1/2 cup increments. Stir often to prevent the rice from sticking to the bottom of the pan.
  6. Continue cooking and stirring rice, adding a little bit of broth at a time, cooking and stirring until it is absorbed, until the rice is tender, but still firm to the bite, about 25 to 35  minutes depending on your preference. Near the end, add the end pieces of the asparagus, saving the tips for later.
  7. With the last ladle of stock, add the asparagus tips. Stir and cook for a couple of minutes, until the risotto has absorbed the stock, but is still loose, and the asparagus are just cooked through. Note: the stock amount given is approximate. You may need a little more or less. If you end up needing more stock and you find yourself without, just use water.
  8. Turn off the heat. Gently stir in the Parmesan cheese, a few slices of butter. Add pepper to taste; if needed, add salt but check first as the Parmesan adds a salty flavor 
  9. Serve immediately.

One-Pot Italian White Bean Pasta (Pasta Faggioli) using on-hand ingredients

Even though I’m home during COVID-19, there are times I still want a quick meal with a minimum of fuss, and easy clean up. Combine that with the fact that our menus are mostly based on our well-stocked pantry and freezer . . . One-Pot White Bean Pasta seemed like a sensible choice. 
Everything is simply added to the pot, INCLUDING the uncooked pasta, and cold broth!  Bring it to a boil, then reduce to a simmer causing the starch to leach out of the pasta creating a rich, warm sauce for the noodles. The other ingredients cook right along with the pasta. IT REALLY WORKS!
There are many other variations—try Cheeseburger Pasta starting with cooked ground beef and adding macaroni to the pot. What about Mexican Pasta, Pizza Pasta or Tuna-Noodle? The ideas are endless for these easy-to-adapt recipe! Other One-Pot Pasta recipes on our blog:
By the way, Italian cuisine is more than oodles of pasta noodles. Beans have a long history and remain a staple in every province. .

One-Pot Italian White Bean Pasta (Pasta Faggioli) using on-hand ingredients
I cut down the original recipe (see One-Pot Pasta with Tomatoes) and it made 4 servings for us. Simply double it for a larger family size portion. Add two cans of beans or add cooked meat (such as chicken) in place of the second can of beans. 
6 oz. pasta – I used thin spaghetti
About 8 oz. diced tomatoes with liquid 
1/2 large yellow onion, cut in thin strips
Sliced mushrooms, about 4 oz.
1/2 cup sliced celery
2 cloves garlic, thinly sliced
½ teaspoon red pepper flakes
1 tablespoon fresh oregano leaves, chopped or torn
2+ cups vegetable (or chicken) broth + 1/2 to 1 tsp. kosher salt & 1/2 teaspoon pepper
1 (15.5 oz.) cannellini beans drained
Hand full of fresh spinach, optional 
1 tablespoons extra virgin olive oil
Salt & pepper for seasoning as needed
Parmesan cheese for garnish if desired
  1. Place pasta, tomatoes, onion, mushrooms, celery, garlic, red pepper flakes, oregano leaves in a large pot. Pour in vegetable broth + salt and pepper. Add beans and spinach. Drizzle top with oil.


  2. Cover pot and bring to a boil. Reduce to a low simmer and keep covered and cook for about 10 minutes, stirring every 2 minutes or so. Cook until almost all liquid has evaporated – I left about an inch of liquid in the bottom of the pot – but you can reduce as desired. Also check pasta for tenderness and continue to cook until it meets your specifications.
  3. Season with additional salt and pepper if needed and stir pasta several times to distribute the liquid in the bottom of the pot.
  4. Serve with Parmesan cheese if desired.
Recipe without photos . . .
One-Pot Italian White Bean Pasta (Pasta Faggioli) using on-hand ingredients
I cut down the original recipe (see One-Pot Pasta with Tomatoes) and it made 4 servings for us. Simply double it for a larger family size portion. Add two cans of beans or add cooked meat (such as chicken) in place of the second can of beans. 
6 oz. pasta – I used thin spaghetti
About 8 oz. diced tomatoes with liquid 
1/2 large yellow onion, cut in thin strips
Sliced mushrooms, about 4 oz.
1/2 cup sliced celery
2 cloves garlic, thinly sliced
½ teaspoon red pepper flakes
1 tablespoon fresh oregano leaves, chopped or torn
2+ cups vegetable (or chicken) broth + 1/2 to 1 tsp. kosher salt & 1/2 teaspoon pepper
1 (15.5 oz.) cannellini beans drained
Hand full of fresh spinach, optional 
1 tablespoons extra virgin olive oil
Salt & pepper for seasoning as needed
Parmesan cheese for garnish if desired
  1. Place pasta, tomatoes, onion, mushrooms, celery, garlic, red pepper flakes, oregano leaves in a large pot. Pour in vegetable broth + salt and pepper. Add beans and spinach. Drizzle top with oil.
  2. Cover pot and bring to a boil. Reduce to a low simmer and keep covered and cook for about 10 minutes, stirring every 2 minutes or so. Cook until almost all liquid has evaporated – I left about an inch of liquid in the bottom of the pot – but you can reduce as desired. Also check pasta for tenderness and continue to cook until it meets your specifications.
  3. Season with additional salt and pepper if needed and stir pasta several times to distribute the liquid in the bottom of the pot.
  4. Serve with Parmesan cheese if desired.

Christy Jordan’s Any Time, Any Kind Oatmeal Refrigerator Muffins

As I peruse old cookbooks, I ran across several versions of Six-Week Muffins, the kind that started with a box of bran cereal. Seemed like a good thing to have in the fridge during COVID-19 stay-at-home time. However, I wondered if I might find a similar idea using oatmeal on the internet. That’s when I found Christy Jordan’s Any Time, Any Kind Refrigerator Muffins on her Southern Plate  blog. Exactly what I had in mind and with all the different mix-in ideas, there is the opportunity for variety in every bake!

Christy Jordan’s Any Time, Any Kind Oatmeal Refrigerator Muffins  
Makes approximately 60 muffins. Batter can easily be halvedNote: Batter keeps for up to a month. Prepared muffins freeze well as does batter.

Muffin Mix:
6 cups old fashioned oats
5 cups all purpose flour
2 cups very hot water
1 cup butter, melted or use 1 cup vegetable oil, such as canola
2 cups granulated sugar
4 eggs
4 cups buttermilk
5 teaspoons baking soda
2 teaspoons cinnamon
2 teaspoons salt
-----
Mix-in ideas: Blueberries, diced apples, chopped banana, chopped strawberries or peaches, dried cranberries or cherries, other dried fruit or berries, sliced or slivered almonds, chopped walnuts or chopped pecans, sunflower seeds. Even . . . chocolate chips or M&M’s.
  1. Muffin Mix: In a medium bowl, place 2 cups oats and hot water. Stir and set aside.


  2. Place all remaining dry ingredients into a large bowl. Stir to combine. 
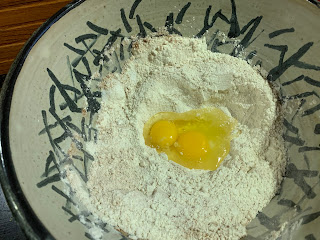
  3. Form a well in the center and crack eggs into the well while beating them lightly with a spoon. Add milk and stir batter well with large spoon until well combined.
  4. Pour melted butter or oil into hot oat mixture, stir. 
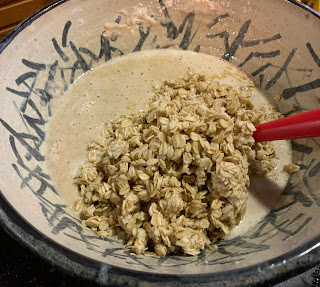
  5. Pour hot oats into batter and stir again until well combined. Cover and refrigerate at least overnight.

  6. To bake one batch or 4 muffins, use 1 cup Muffin Mix batter; add about 1/2 cup of mix-ins (see above ideas). 
  7. To bake only one muffin, use 1/4 cup Muffin Mix batter and approximately 2 tablespoons mix-ins (see above ideas).
  8. Bake in greased muffin tin or a muffin tin lined with cupcake papers at 400° for 15 to 20 minutes, or until lightly browned; or bake individual muffins in a greased or lined custard cup. 
Recipe without photos . . .
Christy Jordan’s Any Time, Any Kind Oatmeal Refrigerator Muffins  
Makes approximately 60 muffins. Batter can easily be halvedNote: Batter keeps for up to a month. Prepared muffins freeze well as does batter.

Muffin Mix:
6 cups old fashioned oats
5 cups all purpose flour
2 cups very hot water
1 cup butter, melted or use 1 cup vegetable oil, such as canola
2 cups granulated sugar
4 eggs
4 cups buttermilk
5 teaspoons baking soda
2 teaspoons cinnamon
2 teaspoons salt
-----
Mix-in ideas: Blueberries, diced apples, chopped banana, chopped strawberries or peaches, dried cranberries or cherries, other dried fruit or berries, sliced or slivered almonds, chopped walnuts or chopped pecans, sunflower seeds. Even . . . chocolate chips or M&M’s.
  1. Muffin Mix: In a medium bowl, place 2 cups oats and hot water. Stir and set aside.
  2. Place all remaining dry ingredients into a large bowl. Stir to combine. 
  3. Form a well in the center and crack eggs into the well while beating them lightly with a spoon. Add milk and stir batter well with large spoon until well combined.
  4. Pour melted butter or oil into hot oat mixture, stir. Pour hot oats into batter and stir again until well combined. Cover and refrigerate at least overnight.
  5. To bake one batch or 4 muffins, use 1 cup Muffin Mix batter; add about 1/2 cup of mix-ins (see above ideas). 
  6. To bake only one muffin, use 1/4 cup Muffin Mix batter and approximately 2 tablespoons mix-ins (see above ideas).
  7. Bake in greased muffin tin or a muffin tin lined with cupcake papers at 400° for 15 to 20 minutes, or until lightly browned; or bake individual muffins in a greased or lined custard cup. 

Virginia's Tuna-Vegetable Salad and other quick fixes . . .

I am committed to paring down both our pantry and freezer reserves. So when I discovered a can of tuna, I immediately thought of Virginia Hoffman's Tuna-Vegetable Salad. 
Years ago Virginia hosted a summer luncheon that featured this recipe that is loaded with veggies and crunchy shoestring potatoes. 
Virginia Hoffman dishes up recipes and tips that will get the cook out of the kitchen in no time!  Although she has her fair share of time-consuming recipes, Virginia is drawn to those that are quick to fix, such as this one . . .

Virginia's Tuna-Vegetable Salad    2+ servings
1 cup  grated carrots
1 cup diced celery
2 tablespoon grated onion (or very finely minced
1/2 cup salad dressing (or mayonnaise)
1 (6 oz.) can white tuna, drained (rinse if packed in oil; I actually used a 12 oz. can but kept all the other ingredients the same.
! cup shoestring potatoes (or add to individual servings if you are planning on leftovers)
  1. Mix together all ingredients expect shoestring potatoes.

  2. When ready to serve add the. shoestring potatoes.  
  3. Serve on a lettuce leaf along with sliced tomatoes and a dinner roll for a scrumptious luncheon meal. (I served with lightly steamed asparagus spears and a piece of crusty bread.
In the September, 2008 article, some of Virginia's other "Simple Recipes that take just Minutes to Prepare" were also featured :
  • Shrimp Scampi on Rice. Top cooked rice with frozen Shrimp Scampi (for the rice, use the instant variety or throw together the recipe that follows for Rice Mélange and stick it in the oven to bake; Virginia use Sea Pack® brand Shrimp Scampi). Add a salad and bread for a quick and elegant meal . . . with very little effort involved.
  • BT & C Sandwiches. Top toasted bread with cooked bacon, a large slice of tomato, and a slice of American cheese. Place under the broiler for just minutes, until cheese is melted. Don’t worry about spreading the toast with butter or mayonnaise as the melted cheese adds an extra layer of richness to this open-faced sandwich. 
  • Chicken Casserole. Mix together 2  (5 to 6 oz.) cans of chicken, 1 c. diced celery, 1 (10.75 oz.) can cream of chicken soup - undiluted, 1 (10.75 oz.) can chicken & rice soup – undiluted, 1 small can (5 oz. or 2/3 c.) of evaporated milk and, about 1 1/2 to 2 cups of Chinese chow mein noodles. Dump into a greased baking dish (9” x 9” or 7” x 11”) and top with buttered breadcrumbs. Bake in a preheated 350° oven for 45 minutes or until hot and bubbly.  Serves about 6.
  • Dressed-up Apricots. Melt white chocolate with a little cooking oil.  Spread over the top of dried apricots and top with a pecan half. Virginia makes a trip to Russell Stover’s outlet to stock up on off-season white chocolate bunnies.
  • Root Beer Float. Pour about 1/2 cup cold root beer into the bottom of a glass. Add one scoop of ice cream to each glass then fill with more root beer. These floats are a classic childhood treat and so quick to make – about 5 minutes prep time. Virginia often serves these in lieu of dessert.
  • Black Forest Trifle.  Break about 1/2 batch of brownies into chunks and sprinkle with Kahula, if desired. Make a batch of instant chocolate pudding. Add about half of the brownie chunks to the bottom of a trifle dish; follow with about half the pudding and then about half of a 21 oz. can of cherry pie filling and a layer of either whipped cream or Cool Whip®. Repeat layers and top with chopped nuts. Refrigerate for several hours before serving 
  • Springtime Strawberry Trifle. Layer chunked shortcake, vanilla pudding, sliced strawberries, whipped cream or topping; repeat layers and garnish top with fresh whole strawberries.  Refrigerate for several hours before serving.
  • Peaches & Cream . Preheat oven to 350°. Layer the following items in order in a greased or sprayed 9” x 13” cake pan: 1 (20 oz.) can crushed pineapple (do not drain), 1 (16 oz.) bag frozen peaches, 1 (18.25 oz.) package white cake mix, pecans – optional, 1/2 cup brown sugar.  Pour 1/2 cup (1 stick) melted butter over the top. Bake for 45 to 55 minutes. Serve the cobbler-like dessert warm with vanilla ice cream. This is not only a quick-to-make dessert but it is prepared and baked in the same pan.  

Recipe without photos . . .
Virginia's Tuna-Vegetable Salad    2+ servings
1 cup  grated carrots
1 cup diced celery
2 tablespoon grated onion (or very finely minced
1/2 cup salad dressing (or mayonnaise)
1 (6 oz.) can white tuna, drained (rinse if packed in oil; I actually used a 12 oz. can but kept all the other ingredients the same.
! cup shoestring potatoes (or add to individual servings if you are planning on leftovers)
  1. Mix together all ingredients expect shoestring potatoes.
  2. When ready to serve add the. shoestring potatoes.  
  3. Serve on a lettuce leaf along with sliced tomatoes and a dinner roll for a scrumptious luncheon meal. (I served with lightly steamed asparagus spears and a piece of crusty bread.