BBQ Green Beans — "Sweet & Spicy"

     Although my preference is fresh green beans, steamed, I’ve had several requests for this recipe that uses the canned variety. If you are cooking for a crowd and don’t have time for last minute vegetable preparation, this is a handy alternative; the beans also hold well in a hot box or in an oven turned on low. Although I’ve never prepared them in a slow cooker, it seems that would be another suitable cooking method.
     The recipe comes from my sister’s mother-in-law (Sal Payne) and then I adapted it for large groups (50). Although the recipe has you just add raw onions and bacon to the rest of the ingredients, I have always fried the bacon and then sautéed the onions in the bacon grease for additional flavoring. Also I have sometimes increased the temperature (to 350°) and decreased the baking time to about 1 hour+.

"Sweet & Spicy" BBQ Green Beans     Allow 1/2 cup per person serving size
3 cans cut green beans (approximately 15 oz. can size)
1 diced medium onion
1 cup catsup
1 cup brown sugar
5 slices uncooked bacon, diced

1. Combine ingredients; add to a (covered) baking dish.
2. Bake at 250°, covered for 3 to 4 hours

For 50 --  according to Food for 50, use 2 #10 cans of beans; double above ingredients. However, according to label on can, one would need 2 1/2 (#10) cans for 50.
.

Caribbean Chicken Salad

     Some meals are memorable. Barry and I both recall the picnic supper that his cousin, Patty Potter Patrick, prepared when we visited Washington D.C. in July 1984. She made an incredible Caribbean chicken salad and picked up freshly baked croissants from a Georgetown bakery. After spreading out a blanket on the grassy area near the Iwo Jima Memorial, we opened a bottle of wine (she even packed real wine glasses) and proceeded to toast the great meal and the opportunity to visit the sites in our nation’s capital and in nearby Virginia.
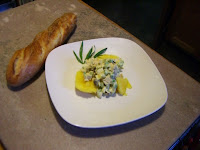
     Patty nestled the chicken salad in half of a seeded papaya. We could not find that tropical fruit in Abilene so we served ours alongside slices of mango. Loved the results – the fruit (raisins and mango) were a very nice complement to the curried chicken. But cantaloupe would work, too. Or, just forget the fruit and serve the chicken salad on a lettuce leaf or as a sandwich filling.

Caribbean Chicken Salad  4 servings
30 min. to prepare + allow time for chilling
2 whole chicken breasts
¾ cup fresh peas, cooked or frozen peas, defrosted
½ cup fresh jicama, peeled & diced or sliced & diced water chestnuts from the can
½ cup celery, diced
¼ cup raisins
1/3 cup mayonnaise
1 tablespoon white vinegar
1 heaping teaspoon curry powder
3 grinds freshly ground pepper
2 fresh papayas (skin should be golden yellow & have a slight give when squeezed), or mangos or cantaloupe

1.     Boil 1 ½” of water in large pot with a steamer insert. Add chicken breasts to steamer; cover turn heat to low and steam 25 minutes. (Or cook using your preferred method; canned chicken could also be used.)
2.     While chicken steams, combine in a medium-size bowl: peas, jicama or water chestnuts, celery and raisins. Mix well.
3.     In a measuring cup combine: mayonnaise, vinegar, curry and pepper. Mix well. Note—dressing can be made before or after chicken in done.
4.     As soon as the chicken is cool enough to touch, remove meat from bones and cut or tear into bite-size pieces (1” strips or ½” cubes). Add to pea mixture; pour dressing on top and mix well. Cover and chill until ready to serve.
5.     If using papayas—cut unpeeled fruit in half lengthwise; with a spoon, remove seeds. Fill each papaya half with curried chicken salad and serve with spoons. (You may stuff the papayas with salad before chilling but the papayas have more flavor if they are served at room temperature.
If using mango—cut in wedges and then run a spoon along the inside of the peel to remove the fruit ; serve alongside the chicken salad.
If using cantaloupe—peel and cut in wedges; serve alongside the chicken salad.

Chocolate Caramel Nut Bars – Mrs. Haas gives these bars high marks!


     When I interviewed Elinor Haas for my monthly food column (in the Abilene Reflector-Chronicle) she extolled the virtues of chocolate and suggested it might even qualify as another essential food group! That was in 2005 and she hasn’t changed her mind as evidenced by the latest recipe she shared with me.
    It also meets another one of her criteria — easy to make. As a matter of fact, the most difficult thing about this recipe is unwrapping the caramels. Aren’t you surprised that some company hasn’t yet marketed an unwrapped version?
     We both agree —this recipe is really rich so you may need to cut it into really small bars . . . or not.

Chocolate Caramel Nut Bars   Yield: one 13”x9” pan
1 (14 oz.) bag caramels
2/3 cup evaporated milk -- divided use
1 (18 ¼  oz.) 2-layer German chocolate cake mix
1 1/2 cups nuts, chopped  (walnuts, pecans, your choice) – divided use
1/2 cup (1 stick) butter or margarine, melted
1 (6 oz.) pkg. semi-sweet chocolate chips


1.     Melt caramels with 1/3 c. milk over low heat, stirring until smooth. Combine remaining milk, cake mix, and butter or margarine; mix well.  
2.     Press half of cake mixture into bottom of greased 13”x9” baking pan.
3.     Bake in a preheated 350° oven for 6 minutes.
4.     Sprinkle 1 cup nuts and the chocolate chips over crust; top with caramel mixture, spreading to edges of pan.
5.     Top with teaspoonfuls of remaining cake mixture; press gently into caramel mixture.
6.     Sprinkle with remaining nuts. Press lightly into top.
7.     Return to oven; bake at 350° for another 20 minutes.
8.     Cool slightly and then refrigerate.  Cut into bars to serve.

Peanut Butter Sheet Cake — Texas Sheet Cake made with peanut butter instead of chocolate!

    An extremely moist cake with a creamy cooked peanut butter frosting! It’s sure to be a hit at your next gathering. It certainly received rave reviews when Sandi Dutt made it for an Abilene High School pot-luck dinner years ago.
     The recipe came from her mother, Dorothy Bryan. Sandi said, “It’s one of her best recipes.” She also shared her mother’s tip for what to do with leftover buttermilk (it follows the recipe).
     AHS catering class students used this recipe for numerous projects. I later used it when I organized catered events for the Kirby House restaurant. It is one of those go-to recipes that you can always count on.

Peanut Butter Sheet Cake 
   2 cups all-purpose flour
   2 cups granulated sugar
   1 teaspoons baking soda
   ½ teaspoon salt
Mix above ingredients together.

Bring to a boil . . .
   1 cup water
   ½ cup crunchy peanut butter
   ½  cup vegetable oil
   1½  sticks (3/4 cup) butter or margarine
Remove from heat (after boiling) and pour over dry ingredients.  Mix well.

Then add . . .
   ½ cup buttermilk
   2 large eggs
   1 teaspoon vanilla
Spread  batter evenly in a sprayed and floured sheet cake pan (10”x15”x1” is the standard size for a jelly roll pan). Bake in a preheated 350° for 25 minutes or until cake springs back when touched in the center.

Frosting:
Bring to a boil:
   1/2 cup peanut butter
   1/3 cup milk
   1 teaspoon vanilla
   1 stick (1/2 cup) butter or margarine
Add 2 1/2 cup powdered sugar (sift if lumpy) and immediately spread on hot cake.

TIP – What to do with leftover buttermilk? Pour leftover buttermilk into freezer containers according to desired portion (½ cup portions for this recipe). Before making the recipe, thaw the buttermilk.

Cheers! Calpirinha- A Brazilian Rum Drink

My sister, Marla, introduced us to this refreshing drink while we were on a family vacation at Big Cedar Lodge in Missouri! We didn’t have a pestle for muddling but we managed – used the end of a meat pounder and it worked just fine. Regular ice cubes were also acceptable.

The Caipirinha Recipe
You will need:
Cachaca (light Brazilian Rum made from sugar can distillate)
Limes
Superfine sugar (buy it or make your own by blending granulated sugar in an electric blender)
Crushed ice
A “lowball,” “rocks” or “Old-Fashioned” glass
A pestle (from a mortar & pestle – or something similar) for the muddling

Preparation
1.     Cut the ends off the limes and discard.
Marla cutting limes in our log cabin @ Big Cedar.
2.     Cut the lime in half lengthwise and cut out the white pith in the middle.
3.     Cut the lime in half, and cut one half of the lime into four wedges and place in the glass. If your lime is small, you may need to add more lime to the glass.
4.     Add one to three tablespoons of sugar. The amount of sugar depends on your personal taste as well as the size of the lime you are using.
5.     Use the pestle to “muddle” the limes and sugar together. Basically, you want to crush the limes so that they mix in well with the sugar. Be careful not to break the skin of the lime. When you’ve gotten all the juice out of the lime, you’re done.
6.     Pack crushed ice in the glass all the way to the top.
7.     Add cachaca all the way to the top of the glass. (It’s really only about 2 oz.)

8.     Use a larger glass or bottom of a cocktail shaker and put it over the top of your drink. Pick up with two hands and shake very well for at least 15 seconds.
9.     Garnish with a wedge or slice of lime
10.  Drink . . . and enjoy the best caiprinha!

Several Dashes of Spice & A Little Folklore — Pepparkakor

This tree is the signature shape for the
cookies made at Big Cedar Lodge.
     Just home from a family vacation and already missing all of the special amenities! Each evening at Big Cedar Lodge the “cookie lady” delivers fresh baked gingersnaps to each cabin or room at the rural Missouri resort. They also provide a recipe card that includes stories about the folklore associated with the cookies . . .

The Wish Cookie: An Old Swedish Custom
Place a Swedish Pepparkakor in the palm of your hand. Then, make a wish. Using the index finger of your free hand, tap the cookie in the middle. Swedish tradition states that if the Pepparkakor breaks into three pieces, your wish will come true. If the Pepparkakor does not break into three pieces, you’ll just have to savor the cookie in smaller portions.

Eating Pepparkakor can make you a nicer person.
As early as the 19th century, it was already common knowledge in Sweden that eating Pepparkakor makes you a nicer person. Exactly why this is so is not known. Gastronomes (lovers of fine food) surmise that it has to do with the natural spices and fiber in the cookie, which aid in the digestive process by reducing acid in the stomach. Others, less scientific but perhaps equally as credible, suggest that keeping a person’s mouth occupied by savoring the taste of Pepparkakor leaves little room for idle conversation and adds to the peace and quiet Swedes are known to cherish. This certainly would seem to make some people nicer to be around.
It’s anybody’s guess. However Big Cedar speculates, “Regardless of the reason, you’ll feel better. And people who feel better are nicer people.”

Pepparkakor (Gingersnaps)  7 dozen
2/3 cup (packed) light brown sugar
2/3 cup light molasses
2 teaspoons ground ginger
1 teaspoon ground cardamom
½ teaspoon ground cloves
12 tablespoons butter, cut up (1½ sticks)
2 eggs
5½ cups all-purpose flour (approximately)
½ teaspoon baking soda

1.     Combine brown sugar, molasses, and spices in 1½ quart saucepan. Heat to boiling over medium-high heat, stirring constantly. Boil 1 minute, then remove from heat.
2.     Place butter in large mixing bowl; add hot sugar mixture and stir until butter melts. Blend in eggs.
3.     Stir 2 cups flour and the baking soda together. Gradually mix into the butter mixture. Mix in enough additional flour to make dough stiff. Shape dough into ball. Wrap in plastic wrap and refrigerate several hours or overnight.
4.     Cut dough into quarters. Shape one quarter at a time into balls (refrigerate other dough). Roll out and cut out desired shapes or, use a rounded teaspoonful of dough for each ball. Place on ungreased cookie sheets. Bake in preheated 350° oven until light brown, 10 to 12 minutes. Cool on wire racks. Store in airtight container.

Blackberry Cream Cheese Coffeecake

     Janis Pabst Monier was back in Abilene and we got together for coffee in celebration of the completion of her PhD orals related to rural economic development. She’s pursuing a doctoral degree in Sociology these days. But when I first met her she was a freshman at Abilene High School. I was a beginning teacher. Janis and a group of other girls were a memorial bunch! I still remember the hours we spent planning elaborate style shows and all of the effort they put into FHA (Future Homemakers of America). It’s been fun reconnecting with many of those students via social networks.
     It seemed like the perfect time to try out a new recipe, and since blackberries were available, Blackberry Cream Cheese Coffeecake was my choice. I had added it to my file sometime ago in anticipation of just such an event. Did add almonds to the top and also partially prepared the cake the night before.

Blackberry Cream Cheese Coffeecake   Makes 8 to 10 servings
Streusel Topping:
1/3 cup all-purpose flour
1/3 cup granulated sugar
½ teaspoon ground cinnamon
¼ cup cold butter, cut into pieces

1.     In a large bowl, mix together the flour, sugar, and ground cinnamon. 
2.     Cut in the butter with a pastry blender, fork or mixer just until it resembles coarse crumbs. 

Cream Cheese Filling:
8 oz. pkg. cream cheese, at room temperature
¼ cup granulated sugar
1 large egg
½ teaspoon vanilla
1 tablespoon grated lemon zest (peel)
1 tablespoon all purpose flour

1.  Cream cheese filling: In your electric mixer or food processor, beat the cream cheese until creamy and smooth. 
2.  Add the rest of the filling ingredients and beat until very smooth.

Cake Batter:
1 cup all-purpose flour
1 teaspoon baking powder
1/8 teaspoon salt
¼ cup (4 tablespoons) unsalted butter, room temperature
½ cup granulated sugar
1 large egg
1/2 teaspoon vanilla
1/3 cup milk
1 cup fresh blackberries, raspberries or blueberries or 1/2 cup raspberry preserves
3 to 4 tablespoons sliced almonds

1.  Preheat the oven to 350°. Spray or grease the bottom of a 9” springform pan.
2.  In a bowl, whisk together the flour, baking powder, and salt.
3.  In another mixing bowl (using an electric mixer) beat the butter until smooth and creamy. Add the sugar and beat until light and fluffy. Add the egg and vanilla and beat until incorporated. Add the flour mixture, alternately with the milk, and beat only until combined.
4.  Spread the batter onto the bottom, and slightly up the sides, of the prepared pan. 
5.  Next, spread the cream cheese filling over the cake batter. Scatter the fresh berries over the filling and top with the streusel and sliced almonds. 
6.  Bake for about 60 to 70 minutes or until the streusel is golden brown and a toothpick inserted in the center of the cake comes out clean. Remove from oven and place on a wire rack to cool slightly. 

To make the night before: Prepare streusel topping and refrigerate. Prepare the cream cheese filling and cake and assemble as directed but do NOT add the berries; cover and refrigerate overnight. In the morning, set cake out while the oven preheats. Right before baking add the berries, streusel topping and almonds; bake according to specified directions.

The History of Coffee Cakes (by Rob Carlton @ http://www.brewed-coffee.com)
Like most foods, coffee cake is an item that evolved over hundreds of years and across continents. People had been preparing honey cakes since biblical times. Gradually the French came up with galettes, the forerunner of the ubiquitous Christmas fruitcake. Galettes also lead to the invention of sweet yeast rolls that eventually resulted in Danish coffee cakes, which really did contain coffee, by the way.
For some reason, the Dutch and Germans in New York, New Jersey and Delaware became particularly famous for their coffee cakes. Their recipes from the colonial times are very similar to those used today. Meanwhile Scandinavians had introduced their versions as well as the concept of the coffee break — for which we are all ever grateful. The British have their own version that includes toffee.
By 1879, coffee cakes were well-known in America and there were already countless recipes for crumb cakes, streusel cakes and streusel/crumb-cake combinations. Streusel cakes have that swirl of cinnamon/brown sugar throughout the center while crumb cakes have a topping of crumbly flour, sugar and butter and cinnamon. However, food purists know that most Americans have these terms confused. Streusel (pronounced STROI-zuhl in German) means “granules” and actually refers to the crumb topping, not the swirl. Whichever way you pronounce it, the effect is still the same — delicious.