And the winners are . . .

Thanks to all who entered. And, the winners  are . . .
 Nicky Brockington and Nicole Lavigne! You have won a BeaterBlade! Please email info@beaterblade.com with your address and mixer type so they can mail you your prize.

Beat up your favorite holiday treats with the amazing BeaterBlade®! It replaces the flat blade of counter-style mixers and does a great job of mixing and scraping the sides and bottom of the mixing bowl – no more unmixed dough or batter left in the bottom of your work bowl.

To win a free one, go to BeaterBlade® Facebook page (www.facebook.com/beaterblade) and do the following:
  1.  Hit their “Like” button.
  2.  Post on their wall what holiday treats you plan to mix up with your new blade.

Contest Details:

  •  Contest runs from Dec. 9-15, 2011.
  •  One entry per person.
  • BeaterBlade® will do a random drawing and announce two winners on Friday, Dec. 16.  Check their FB page on Friday to see if you won. (Winners will contact the company to provide mailing information that will be treated in a confidential manner.)
  • Contest limited to those with a U.S. mailing address.
This holiday season, we’ve used our BeaterBlade® to mix up all sorts of goodies including Gingerbread Cut-Out Cookies, Decorator Buttercream Frosting, Cream Cheese Kringles, Peppernuts, and Pecan Snowballs.

Cream Cheese Kringles for Christmas

     Kringles have their roots in Scandinaia. Early Danish pastries were baked in a pretzel-like shape, but over time a simpler oval shape prevailed. They can be filled with cream cheese or almond paste, nuts and fruit and are a great Christmas treat.
    This recipe uses a no-rise yeast dough that can be made ahead. Assemble and bake right before it is to be served. It may look somewhat difficult but it is a relatively easy project.
     Last year our brother-in-law introduced us to Kringles which we all thought were quite delicious. Shortly after that I found this recipe in a Penzeys magazine . . . and with a few slight adjustments created them  for this year's holiday celebrations.

Cream Cheese Kringles
Dough:
   4 cups all-purpose flour
   1 cup (2 sticks) butter, softened
   2 tablespoons granulated sugar
   1 teaspoon salt
   1 pkg. (1 scant tablespoon) active dry yeast  
   2 eggs, beaten
   1 cup milk
Cream Cheese Filling:
   1 (8 oz.) pkg. cream cheese
   ½ cup granulated sugar
   1 teaspoon vanilla
   2 to 3 tablespoon seedless raspberry jelly
   1 cup chopped pecans
Glaze:
   2 2/3 cup powdered sugar
   2 tablespoons butter, softened
   4 tablespoons hot water
   1 tablespoon milk
   2 teaspoons vanilla

1.     Put the flour, butter, sugar and salt in a mixing bowl. Use either the flat blade of an electric mixer or a pastry blend, or your hands to blend together until the mixture is crumbly and the butter is incorporated into the dry ingredients – mixture should resemble coarse meal.
2.     In a separate bowl, mix the dry yeast, beaten eggs, and the milk. Don’t worry that the yeast remains cold as the dough does not go through a typical rise. Add milk mixture to dry ingredients. Mix (with fork or mixer blade) until all ingredients are blended – dough should pull away from the sides and form a ball. You may need to work the final flour into the dough with your hands. Divide it into two pieces, flatten into discs, wrap in plastic wrap and put them into the refrigerator overnight.
3.     Next day, preheat the oven to 350°.
4.     Beat together the cream cheese, sugar and vanilla.
5.     Lightly flour a work surface. Roll out each piece of dough into a rectangle shape (approximately 11” x 15”; 1/8” thick).
6.     Spread half of the cream cheese filling over each piece of dough; add half of the jelly to each and spread evenly over the surface; sprinkle with half the pecans.
7.     Starting from the short ends, roll each side to the center. Pinch the center together and roll the ends under. Carefully transfer to a parchment  or silicon lined cookie sheet (do not grease or spray the sheet).
8.     Bake for 20 to 25 minutes. Allow the baked kringles to set a few minutes before carefully transferring to cooling racks.
9.  Glaze: Mix ingredients together and whisk until smooth. Spread or drizzle over slightly cooled   
     kringles.

Decorator Buttercream Frosting

     This is the frosting I use to decorate cookies and cakes – it is the basic Wilton® recipe but I use all butter (they call for ½ cup shortening and ½ cup butter or margarine).  It is thick but creamy and ideal for decorating. Make it ahead and refrigerate or refrigerate leftovers; rewhip before using.
     For piping, the frosting should be soft enough to pipe but firm enough to hold it’s shape after piping. Frosting can also be thinned with milk or water to spreading consistency.

Decorator Buttercream Frosting
1 cup (2 sticks) butter, softened
1½ teaspoons vanilla
5 cups sifted powdered sugar
3 tablespoons milk

1.     In a large mixing bowl, cream butter with mixer. Add vanilla.
2.     Gradually add sugar, one cup at a time, beating well on medium speed. Scrape sides and bottom of bowl often.
3.     When all the sugar has been mixed in, icing will appear dry. Add milk and beat at high speed until light and fluffy.
If you’d like colored frosting, either food coloring concentrates or gels (rather than the jars of liquid food color) provide vivid colors without thinning the frosting.

For tips on how to use decorating bags, couplers and tips, go to . . .
http://www.wilton.com/decorating/decorating-basics/


Check out our recipes that use this frosting:
Gingerbread Cut-Out Cookies

Gingerbread Cut-Out Cookies


     I discovered this gingerbread recipe several years ago. The dough is full of spices that perfume the air and also help create a delicious flavor in the finished cookie.  Cut-outs also keep their shape while baking. The cookie recipe follows with some of my notes on decorating. I use Buttercream Frosting; it is essential that it be not too soft and not too firm in order to have the best results (soft enough to pipe but firm enough to hold it’s shape after piping). 

Gingerbread Cut-Out Cookies
1 cup shortening (Crisco®)
1 cup granulated sugar
1/2 teaspoon salt
1 egg
1 cup molasses
2 tablespoons vinegar
5 cups sifted all-purpose flour
1 1/2 teaspoons baking soda
1 tablespoon ground ginger
1 teaspoon ground cinnamon
1/2 teaspoon ground cloves

1.     Cream together shortening, sugar, and salt; beat in egg, molasses, and vinegar. Beat well.
2.     Into another bowl, sift together the flour, soda, ginger, cinnamon, and cloves. Stir dry ingredients into the creamed molasses mixture.
3.     Chill cookie dough for at least 3 hours.
4.     On a lightly floured surface, roll out to 1/8” thickness. Use cookie cutters to cut out desired shapes.
I cut out as many shapes as possible and then carefully remove the excess dough
 (leaving only the cut-outshape); then, using a metal spatula, I carefully
transfer the cookie shape to a greased cookie sheet.
6.    Place about 1” apart on greased baking sheets.
7.     Bake in preheated 375° oven for about 6 to 8 minutes.
8.     Cool slightly then remove from baking sheets.

9.     When cool, pipe on trim using Buttercream Frosting. (I use disposable bags and traditional cake decorating tips.
Snowflake: Used a round tip #7
Gingerbread boy: Round tip #7 and red hot buttons
Tree: Used leaf tip # 67 and sprinkle w/ colored jimmies
House: Used either round tip (#7) or star #18 or 29 to pipe snow
on roof, door & window outlines; leaf tip (#67) for trees &
evergreens w/ red hot accents

For tips on how to use decorating bags, couplers and tips, go to . . .

Ice Cooler & Champagne Bar


The ice cubes that I started with are still visible. 
    In the past, I've made ice bowls that were used to chill shrimp but this time I wanted to make a tall cooler for champagne. When making ice bowls, I partially filled a large bowl with water and then a added a smaller one that was filled with weights. Of course the smaller one will float so I secured it in place with duck tape. However, it was always tricky getting the smaller one centered exactly and invariably I'd end up with one section of the bowl being thick, another thin. So, this time I was determined to come up with a more viable solution.
   After several attempts, this is the method that worked for me . . .
 

To create a CHAMPAGNE (or wine) COOLER:
  • Select two varying sizes of taller plastic containers (the ones I used happened to originally hold commercial products) but any plastic, aluminum or stainless containers will work.
  • Add a  layer of ice cubes to the bottom of the large container.
  • Center the smaller container on top of the layer of ice; pack ice cubes around the sides to keep it centered.
  • Add a weight to the inside of the smaller container so that it will not float once water is added. I used a sack of rocks. 
  • Carefully add water to the ice and then inserted rosemary sprigs and orange sections around the top. Distilled water will create a cleared container but that was not important to me so I just used tap water. (Other possible additions: cranberries, lemons, limes, mint leaves, etc.)
  • Immediately put in freezer -- time depends on size of containers; mine froze completely overnight.
  • To unmold -- remove weights form smaller container and fill with hot water. After a couple of minutes, you should be able to easily remove the smaller container. Turn larger plastic container upside down and run hot water over bottom; the ice cooler should slide out.
  • Place ice cooler on a tray or in a bowl to catch drips. Insert chilled champagne. Ours set out for a couple of hours with minimal dripping. (I actually then refroze it for another use.)
2013 UPDATE -- I just did another cooler and this time I used a brick to hold the second container in place and did not have to use tape to hold it down.

This time, I also added more decorative items and froze in layers: 
First I added several inches of water and cranberries. 
Once that was frozen I added another few inches of water and sprigs of rosemary and set the cooler back in the freezer. 
The third layer consisted of water and more cranberries. 
This took longer but I like the effect.


To create a CHAMPAGNE BAR:
We had the following additions ready to pour into the bottom of the glasses. Champagne was then added and we were ready to toast the holiday!
     * Fresh squeezed orange juice
     * Pomegranate syrup
     * Creme de Cassis (blackberry liquor)
     Other suggestions: Cranberry Juice, Grand Marnier or other liquors

Another dramatic use for an ice cooler -- add a candle to the depression to create an icy glow.

Peppernuts, Pepper Nuts, Pfeffernuss, Pfeffernusse, Pfeffernuesse, Peppernoten, Pebernodder, Pimpernusse . . . The Little Cookie with the BIG Christmas Taste!

     These spicy little cookies are believed to have come to America with
immigrants sometime in the 19th century. There are lots of recipes for peppernuts – some even do contain pepper and others are laced with ground almonds or walnuts.
     I’d never even heard of peppernuts until we went to a teacher’s gathering at the Wedel’s home following a December basketball game some years ago. Cindy had a big bowl of them in the kitchen . . . I had one (actually quite a few) and have been making them ever since.
     And every time I make them, I am also reminded of a story that Cindy told about the cookies. It seems she baked a batch to take to a Christmas party at the bank where she worked. Obviously it was bank president Ernie Morris’ first encounter with peppernuts, too as he said, “Who brought the dog biscuits?” Well, the shape may be somewhat similar, but their spicy taste is addictive and the aroma, while baking, fills the house with the scents of Christmas.
    
Molasses "Kiss" Peppernuts
2/3 cup molasses
1/2 cup boiling water
1 teaspoon baking soda
The molasses & water will begin to
fizz when soda is added.
1 cup shortening
1 cup brown sugar
1 cup granulated sugar
3 eggs
2 tablespoons ground cinnamon
1 tablespoon ground cloves
1/2 tablespoon ground nutmeg
1 tablespoon vanilla
4 1/2 cups all-purpose but may need more

1. Mix the molasses and boiling water together; add the soda. Add remaining ingredients using enough flour so that  the dough doesn’t stick to fingers.  Cover and refrigerate overnight for improved flavor. 

    
2. The next day, if dough is a little sticky, work in additional flour. Working with small batches of dough, roll into pencil thin snakes and cut off very small portions.  
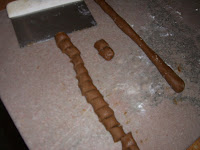
I use a bench knife to quickly portion the rolls into bite-size pieces.
      I place on silicon or parchment-lined jelly roll pans (fairly close together)

3.  Bake for 10 to 15 minutes in a preheated 350° oven.

4.  After removing from the oven, let them set a few minutes; then gently push them off onto a cooling rack. They crisp up as they cool.

Historically, ladies used to take pride in how small they could make these cookies – ideally about the size of a hazelnut or dime but a really skilled baker could make them as small as a large pea.


Other peppernut recipes on this blog include: 
Peppernuts: Hint-of-Anise

Recipe without photos  . . .
Molasses "Kiss" Peppernuts
2/3 cup molasses
1/2 cup boiling water
1 teaspoon baking soda
1 cup shortening
1 cup brown sugar
1 cup granulated sugar
3 eggs
2 tablespoons ground cinnamon
1 tablespoon ground cloves
1/2 tablespoon ground nutmeg
1 tablespoon vanilla
4 1/2 cups all-purpose but may need more 

1. Mix the molasses and boiling water together; add the soda. Add remaining ingredients using enough flour so that  the dough doesn’t stick to fingers.  Cover and refrigerate overnight for improved flavor. 
2. The next day, if dough is a little sticky, work in additional flour. Working with small batches of dough, roll into pencil thin snakes and cut off very small portions. 
3.  Bake for 10 to 15 minutes in a preheated 350° oven.
4.  After removing from the oven, let them set a few minutes; then gently push them off onto a cooling rack. They crisp up as they cool.

Gumdrop Tree – a fun project for kids of all ages

Gumdrop trees are a fun project for kids and they make great gifts, too.. Make them in a variety of sizes and fill a table or sideboard with a forest of trees. Our Christmas tablescape includes just one.

Gumdrop Tree
Styrofoam cone
Gumdrop candies, smaller size -- for a 6" tree it will take about 14 oz.
Toothpicks

1.     Cut or break the toothpicks in half. If your toothpicks are splintering when you cut them, you can try using whole toothpicks but be carful that the points don't stick out of the gumdrop.
2.     Put the cut end of the toothpick into the flat side of a gumdrop then push the pointy end of the toothpick into the Styrofoam cone.

3.     Begin at the bottom of the cone  and work your way around and up the cone. Place gumdrops as close together as possible.
4.     When starting the next row, place the toothpick above the “V” area of the gumdrop row below. (Since the gumdrops are not exactly the same size, this won’t always work but it does cut down on the amount of white apace showing through.)
5.     Continue up the tree to the top. You may need a full toothpick to attach the final gumdrop on top of the tree.