Woks For Dinner? Chicken Stir-Fry


    We had a bin full of fresh veggies and we always keep chicken tenders on hand (in the freezer) so Stir-Fry Chicken seemed to be the perfect answer to “What’s for dinner tonight?”
    As I was contemplating stir-fry, I immediately thought of this recipe. Years ago Barry and I were on a social committee with Mel Shurson and his wife Dottie. The meeting was early evening (before dinner) and as we were leaving, Mel asked us to come over for an impromptu dinner. Of course we said “yes”. He opened a bottle of wine, distributed knives, pulled out a wok and we all chopped and cooked, creating an extremely tasty and memorable dish.
     I was so impressed with his skills and knowledge that I asked him to come and demonstrate for one of my high school foods classes! He did . . . and based on his verbal instructions, I recorded it all on paper. Of course, the students got involved with the chopping and stir-frying and it was a smashing success. Mel continued to make yearly, sometime bi-yearly, visits to my classes and the students continued to enjoy his presentation as they learned new skills.
    So, whenever I stir up this dish, I’m stirring up lots of memories, too!

A couple of notes before you start stir-frying:
·      A wok is not essential but a pan with sloping sides makes it easy to move around the veggies as they cook. However, make sure the cooking container is large to accommodate all the ingredients.
·      Advance preparation is essential! The actual cooking goes fast BUT the prep work takes awhile . . . and once the wok is hot, there’s no time to stop and chop. I prefer to chop or slice all the veggies and even the meat in advance. Also the thickening sauce needs to be made before you heat the wok for frying.
·      And, in the spirit of Mel – have fun, be creative and enjoy the end product!
o   Substitute other meats or leave them out.
o   Add any veggies of your choice.

Stir-Fry Chicken  Serves 2 to 3
2 tablespoons oil (peanut oil is ideal because it has a high smoking point; 
but olive or canola also work)

Ingredients assembled & prepped.
1 to 2 boneless, skinless chicken breasts, cut into thin chunks, preferably on the diagonal; marinate in soy sauce if time allow (if partially frozen, chicken breasts are easier to slice on a diagonal)
2 small cloves of garlic, peeled & minced

Vegetables of your choice – see step 2 below; prep veggies in advance so they are ready to add to hot wok. (Mel always told my students to have veggies cut into similar sized shapes so they’d cook evenly.)

Ingredients for thickening sauce: 2 Tbsp. cornstarch ½ tsp. granulated sugar, 4 Tbsp. soy sauce, 1 tsp. chicken concentration or a bouillon cube (optional), 1 cup cold water – mix cornstarch with sugar and then add remaining ingredients and have ready for step 4.
1.     Heat 2 tablespoons oil in wok over medium high heat until hot (almost smoking). Add meat and garlic. Stir fry, stirring almost constantly, until meat loses its color (this takes only minutes; about 4). Remove from pan and set aside.
2.     Add vegetables (of your choice) in order of needed cooking time; cook and stir (almost constantly) until just tender-crisp.                                       
a.     Add 1st : green or red peppers – cut into strips / carrots – cut into thin slices or julieened / onions – cut into thin slices / broccoli florets / cauliflower florets. Note – when cooked properly, peppers & onions will look “blistered”; other veggies will become bright in color.
b.     2nd addition – add about halfway through cooking: celery – cut thin on a diagonial.
c.     Add tender veggies the end: zucchini – cut into thin slices, mushrooms – sliced; sugar snap peas, bean sprouts.
3.     Add chicken back to vegetables once they are tender-crisp
4.     Add the thickening sauce (see ingredient list above) to the chicken and veggies; let mixture boil and thicken, stirring and watching closely. Lid may be placed on wok to steam the food; watch carefully and don’t overcook. Add more water if sauce becomes too thick.
5.     Serve over hot rice or Chinese noodles.

Better, by far, than a mix . . . Homemade Pudding!

Homemade pudding tastes a whole lot better than a mx, costs less and takes just a little bit longer to make. (How much time does it take to measure sugar, cornstarch, salt and a few other ingredients?)
     The recipe is pretty standard. I have always used the one in Betty Crockers’s New Picture Cookbook, 1961 edition. (Guess it’s is not so new anymore!)
    Add the pudding to dishes and serve it as dessert, either warm or chilled. Use it to fill an 8” or 9” baked pie shell, layer it with cake to create an English trifle, or do what I did -- spoon it into cream puffs.

Chocolate Cream Pudding
1 cup granulated sugar (could reduce to 3/4 cup)
2 tablespoons cornstarch
½ teaspoon salt
1/3 cup unsweetened cocoa powder or 2 squares (2 oz.) of unsweetened chocolate, cut up (I used dark cocoa powder)
2 cups milk (I prefer whole)
2 egg yolks, slightly beaten
2 teaspoons butter 
1 teaspoons vanilla
                        1 

1.    Mix sugar, cornstarch, salt, and cocoa (if using chocolate squares, add them with the milk in step 2) in saucepan.
Before mixing the dry ingredients (above) & after mixing (below).
Mixing the sugar with the cornstarch & cocoa helps keep the starch from clumping when liquid is added.

2.    Gradually stir in milk. Cook over medium heat, stirring constantly, until thickens and boils. Boil 1 minute. Remove from heat.
The pudding has thickened & boiled for 1 minute.
3.    Temper the egg yolks (to keep them from scrambling) by adding a little of the hot mixture to the yolks and mixing thoroughly. Then, gradually stir the tempered yolk mixture into hot mixture.
Adding a little of the hot mixture to the beaten yolks "tempers" them
by gradually introducing them to heat), keeping them from scrambling.
The tempered yolk are then added back to the hot mixture.
4.    Over medium heat, bring the mixture back to boiling; boil 1 minute, stirring constantly.
5.    Remove from heat; stir in butter and vanilla.
Butter & vanilla have been added.
6.   Serve warm of refrigerate to chill.
If not eating the pudding right away, cover with a sheet of
plastic wrap to keep a "skin" from forming on the surface of the pudding
By the way -- the "skin" is simply a layer of protein that coagulates on the top
of the pudding. It is actually edible but just not very appetizing.
Vanilla Cream Pudding
Follow instructions above but reduce sugar to ½ cup; omit cocoa.

Butterscotch Cream Pudding  
Follow instruction above but use these ingredients . . .
¾ cup packed brown sugar
3 tablespoons cornstarch
½ teaspoon salt
1¼ cups milk
¼ cup (1/2 stick) butter
2 egg yolks, slightly beaten
1 teaspoon vanilla

Additions
·    Bananas, crushed pineapple (drained) or toasted coconut in vanilla pudding.
·    Toasted walnuts in butterscotch or chocolate.
·    Of course, whipped cream is great on any kind of pudding or pudding filling.

Bloody Mary Mix . . . make ahead and it’s ready for a party!

For a recent brunch, I made Bloody Mary Mix several days ahead and put it in the refrigerator to chill. On the day of the party I mixed with a pitcher of tomato juice and set it out with vodka, gin, ice cubes and accruements, including rimmed glasses. It makes a pretty presentation!

Bloody Mary Mix
This amount of mix is added to 3 cups of tomato juice; double or triple for larger batches.
3 tablespoons fresh lemon juice
3 tablespoons fresh lime juice
1 tablespoon prepared horseradish
1 tablespoon+ Worcestershire Sauce
1 teaspoon minced garlic
1/2 teaspoon hot sauce (such as Tabasco®), or to taste
3/4 teaspoon Kosher salt
1/2 teaspoon coarsely ground black pepper

1.  Mix all ingredients; put in a covered container and refrigerate until thoroughly chilled, at least 2 hours or up to 2 days in advance.
2.  When ready to serve, mix with 3 cups of tomato juice in a large pitcher.
3.  To make the actual Bloody Mary: fill an 8 oz. glass (that has been dipped in Rimming Salt*) with ice, add about 1 oz. of vodka or gin to glass and then fill with seasoned tomato juice. Add a rib of celery or a skewer of veggies (we alternated marinated mushrooms and green olives) and stir.

Rimming Salt -- Mix these ingredients and store in covered container:
1 tablespoon celery salt
2 tablespoons granulated garlic
1 tablespoon smoked paprika
2 teaspoons black pepper

Here’s how I rimmed a glass:
Put a small amount of lemon juice in a round plastic container (large enough to just fit the diameter of the glass you plan to salt). Dip top edge of glass into the juice.
Put a small amount of the rimming salt in a similar sized plastic container. Now, dip the glass (that has already been dipped in juice) into the salt mixture.

We served our Bloody Mary's with Spicy Saltines and Oven-Baked Potato Chips.

Signs of Springtime —Thai Iced Coffee


    Yes, I’m enjoying the cherry blossoms, and the fragrant bouquets of freshly picked lilacs and iris, but I am especially enjoying this tall, icy glass of coffee.
     I’ve always been a fan of the stuff but when Chef Angela McKeller posted this recipe for Thai Iced Coffee on a LinkedIn Cookbook Writers discussion group, I just knew I had to try it. And, I wasn’t disappointed. As a matter of fact, I will offer it at our upcoming Easter brunch.

Thai Iced Coffee
Ready to brew the coffee & spice blend.
1 (10 cup) pot of brewed coffee (the stronger the better); in addition to the coffee grounds, add the following spices to the brewing basket:
½ teaspoon ground cinnamon
1/8 teaspoon ground nutmeg
½ teaspoon ground cardamom
¼ teaspoon ground ginger
Simple Syrup*
LOTS of ice
Half-and-Half or substitute Almond Milk

1.     Cool the coffee and store in the fridge.
I added the brewed coffee to canning jars and put them in the refrigerator.
2.     In a tall glass, pour in as much simple syrup as you like for as much sweetness as you want, add lots of ice and coffee until glass is about 3/4 full; fill the rest of the way with half-and-half (I substituted almond milk and used about the same proportions – it was delicious. However, this is what Angela suggested, “I have tried it with almond milk and if you aren't expecting the richness of a true Thai Iced Coffee, I think you will still enjoy it much the same. I just might use a 50/50 ratio of almond milk to coffee rather than a 1:4 (half-and-half to coffee).” Stir and serve. I garnished mine with a sprig of chocolate mint.
Ingredients are ready to blend.
According to Angela’s suggestion, I plan to set out all the ingredients  (Thai Iced Coffee Bar style) and let anyone or everyone mix up their own
Ingredients & Supplies for a Thai Iced Coffee Bar
Tall Glasses
Chilled Thai-flavored Coffee
Chilled Simple Syrup
Lots of Ice
Half-and-Half &/or Almond Milk
Iced Tea Spoons
Mint Leaves, optional
And, maybe some Whipped Cream, too

Yum!

By the way, Angela invites everyone to visit her website http://www.angelamckeller.com/, where you can also sign up for a free copy of her book, "Cooking 101: From No Way! to Easy Gourmet".


To make SIMPLE SYRUP*: 
Combine equal amounts of granulated sugar and water in a saucepan. I threw in a chocolate mint leaf, too.
Heat on about medium heat until sugar dissolves and a thin, clear syrup remains; discard mint.
It does not take long for the syrup to form! Use to sweeten drinks or as a glaze on cakes, etc.

Green Eggs – Poached Eggs on a Bed of Spinach


Not only will this dish help you break the fast, it is low in carbs and packed with nutrition, too. It is one of those recipes that is not really a recipe because it is so simple and variable . . . so I am just providing general guides. It’s also important to remember that spinach has a very high water content so it cooks way down. Consequently, the general rule is to use more than you think you’ll need.

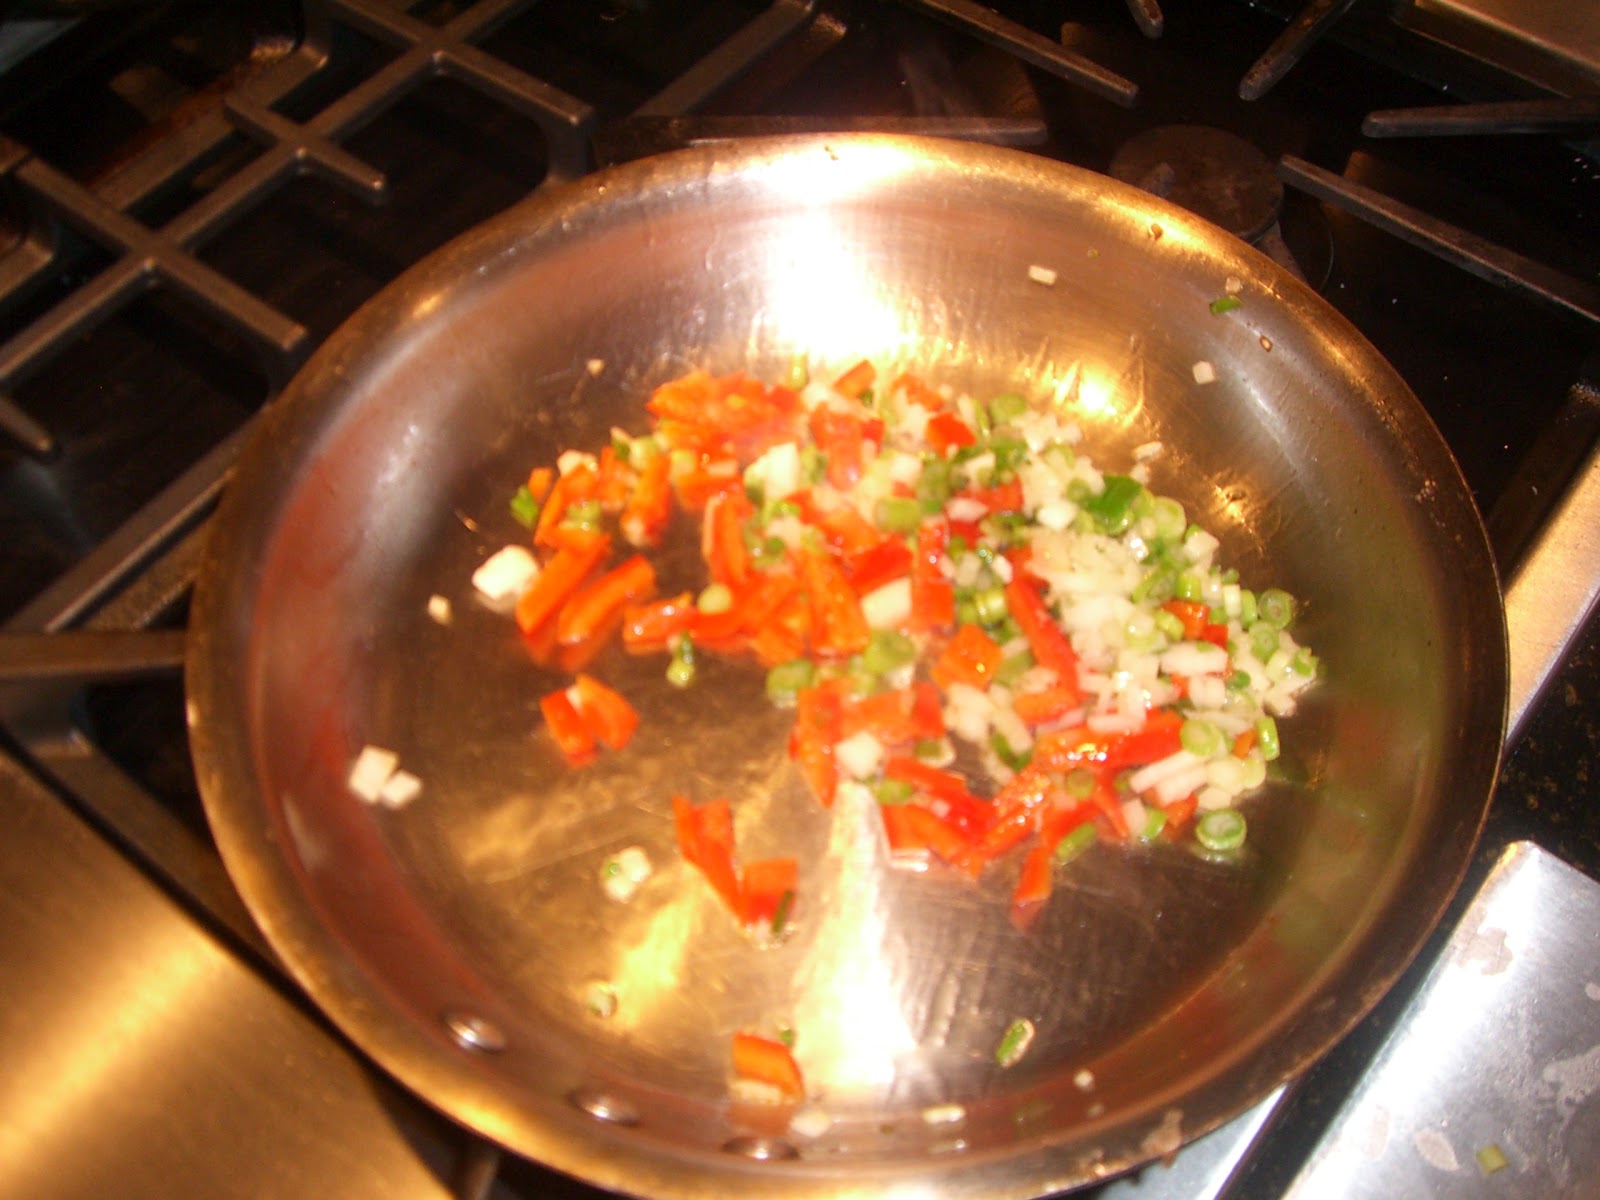
Barry chopped the onions & scallions
+ sliced the red peppers before
starting on the actual
step-by-step preparation.


Poached Eggs on a Bed of Spinach   Enough for a couple of servings
Olive oil – about a tablespoon+
Onion – yellow 2 to 3 tablespoons, more or less
Spring onions (scallions), chopped – about 3
Red peppers, cut into thin slices – about ¼ or less of a pepper
Spinach – 1 giant handful+ per person
Dash of cayenne pepper
Kosher salt and coarsely pepper to taste
Poached egg(s)* – allow 1 or 2 per person


1.     Heat olive oil in a medium sized skillet on medium-high heat. Add  onions and peppers and sautĆ© (if using other vegetables, add in order of whatever takes longest to cook).
Veggies are being sautƩed.
2.     Add spinach and herbs/spices and cook until spinach is wilted.
Spinach has just been added to the pan.
After cooking the spinach loses it's natural water content and wilts way down.
3.     Meanwhile poach the egg(s)*.
4.     Lift egg(s) from water with slotted spoon and set gently onto the bed of spinach. Salt and pepper to taste.
Poached egg on sautƩed spinach is now ready to eat!

Other Possible Additions:
o   Mushrooms – sautĆ© with other veggies
o   Grated cheese
o   Other herbs & spices, or blends – lemon pepper, cumin, thyme, etc.
o   Cooked & crumbled bacon

How Barry poaches eggs using silicon cups – instructions come from ehow.com  
1.     Add about 2” of water to a saucepan.


2.     Spray the silicone egg cups with cooking spray. This will help you remove the cooked eggs more easily.


3.     Float the egg cups in the water.


4.     Bring the water to a boil.


5.     Crack one egg into each egg cup, taking care not to break the yolk.


Eggs are ready to cover and cook.
6.     Cover the saucepan.


7.     Allow the egg to cook from 2 to 4 minutes, depending on the desired level of doneness. Three minutes will usually yield a medium to firm yolk.


8.     Remove the egg poaching cups from the water, using a pair of tongs if necessary.


9.     Run a spoon around the edge of the egg to dislodge the egg from the cup.


Ready in 20 Minutes — Easy Baked Rice

So easy, so fast, so versatile (vary the veggies, add favorite herbs, or use beef or vegetable broth), good too. We used Easy Baked Rice as a side dish for our 5 Nights, 5 EntrĆ©es class. It can also be assembled ahead and refrigerated; pop it in the oven as the rest of the meal is prepared (allow about 10 extra minutes baking time if the dish goes straight from fridge to oven). 

Easy Baked Rice   2 to 6 servings 
Total Time: 40 min. (Prep10 min. prep / / 30 min. cook & bake)
Ingredients
2
6
Olive oil or butter
1 Tbsp.+
3 Tbsp.+
Onions (yellow), chopped
3 to 4 Tbsp.
½ to ¾ cup
Button mushrooms, sliced
Little less than 3 oz.
8 oz.
Cloves of garlic, minced
1 or less
2-3
White, long-grained rice
1/3 cup
1 cup
Kosher salt & coarsely ground black pepper
To taste
To taste
Chicken stock or broth
2/3 cup
2 cups

1.     Preheat the oven to 350° to 375°.
2.     Over moderately-high temperature, in an ovenproof saucepan, heat oil or melt butter. Add the onions and mushrooms; saute´ until golden brown, 4 to 5 minutes. Add the garlic and stir until fragrant, about 1 minute. Add the rice and stir constantly until the rice is coated and lightly toasted. Season with salt and pepper. Add the chicken stock and bring up to a boil.
Onions, mushrooms and garlic are sautƩeing.
Rice has been added and tossed to coat with oil; cook just a few minutes to lightly brown.
Chicken stock has been added and mixture will be allowed to come to a boil
3.     Cover with a tight fitting lid (or transfer to a baking dish and cover with foil); bake on the middle rack in the oven until all the liquid is absorbed and the rice is tender, 17 to 20 minutes.
Rice has been transferred to a casserole dish and will be covered with heavy duty foil.
4.     Remove from the oven and let stand, covered, 5 minutes. Fluff with a fork before serving.

Make Ahead Tip: Complete steps 1 and 2 above and refrigerate. Later, bake as specified, allowing about 10 minutes extra if dish goes directly from refrigerator to oven.
At Home 5 Night, 5 EntrƩes Class through Abilene Parks & Recreation

Rice is commercially classified by size: long, medium or short grain.
·       Long-grain rice is 4-5 times its width and is available in white and brown varieties, which are light, dry grains that separate easily when cooked. Basmati rice is a perfumy East Indian variety of long-grain rice.
·       Short-grain rice has fat, almost round grains that have a higher starch content. When cooked, it tends to be quite moist and viscous, causing the grains to stick together. Also called pearl rice or glutinous rice (although it's gluten-free). Arborio (used in making risotto) is a variety of a  short-grain rice.
·       Medium-grain rice has a size and character in between the other two.
Rice can be further divided into two other broad categories: brown and white. Brown rice is the entire grain with only the inedible outer husk removed. The nutritious, high-fiber bran coating gives it a light tan color, nutlike flavor and chewy texture. Brown rice takes slightly longer to cook. White rice has had the husk, bran and germ removed. Regular white rice is sometimes referred to as polished rice. Converted par-boiled white rice is boiled or steamed before it is processed, which forces some vitamins and minerals into the kernel from the bran so it is higher in nutrients than plain white rice; scientific advice varies as to whether the par-boiled shortens or lengthens the cooking time. Instant or quick white rice has been fully or partially cooked before being dehydrated and packaged.

Dinner & a Movie – Evening in Paris! Casserole-roasted Pork w/ Cabbage

Instead of an evening out, we opted for an evening in . . . complete with a French-inspired movie, Midnight in Paris, and menu. Don’t be too impressed by the name of our entrĆ©e -- RĆ“ti de Porc aux Chou is simply Casserole-roasted Pork with Cabbage. It might even be considered peasant-fare but it was mighty good, and not all that complicated to prepare.
The recipe came from Mastering the Art of French Cooking by Julia Child, Louisette Betholle and Simone Beck. Yes, I’m having fun perusing the pages of the cookbook as I recall the foods we ate while in France a couple of years ago. No, I have no plans to make all of the recipes in the book nor will I devote a large part of this blog to those recipes!
Using the French-themed dishes that a friend gave me for my last birthday (thanks Judy!), I even created a French bistro-inspired tablescape to go along with the menu. Barry was impressed and it added to the ambience of the evening.

RƓti de Porc aux Chou (Casserole-roasted Pork with Cabbage) 6 servings
Julia’s recipe w/ my adjustments . . .
3 lb. roast of pork (I used a Boston-butt cut)
4 tablespoons cooking oil or bacon grease (I used a little of both)
1 large yellow or white onion, sliced
5 to 6 carrots, peeled & cut into thick chunks
2 to 3 cloves of garlic, peeled
1 teaspoon Kosher salt
¾ teaspoon coarsely ground pepper
1 bay leaf
1 tablespoon dried parsley flakes or about 4 sprigs fresh
5 to 6 sprigs of fresh thyme or about 1 teaspoon dried
1 lb. (about 6 cups) green/white cabbage, cut into 1/2” slices and a kettle containing 7 to 8 quarts of rapidly boiling water with 1½ teaspoons salt per quart of water
Salt & pepper, to taste

1.  Preheat oven to 325°. Dry the pork roast thoroughly with paper towels. Heat the oil in a large ovenproof casserole. When oil is almost smoking (set fire/burner to moderately high heat), place pork, fat side down in the casserole and brown on all sides. This will take about 10 minutes. (As this cooks, complete step #4.) Remove pork to a side dish.
Pork has been browned on all sides.
2.  Pour all but 2 spoonsful of fat out of the casserole. Stir in onions, carrots and garlic; add bay leaf, parsley and thyme sprigs. Cover, reduce heat and cook slowly for about 5 minutes.
Veggies and herbs have been cooked for 5 minutes.
3.  Place the pork back in the casserole, fattiest side up. Season with salt and pepper. Cover and put in preheated oven for about 1 to 1½ hours.
Browned pork is re-added to the casserole. It is not necessary to add any
liquid as the pork will release fat and juices as it bakes (covered) in the oven.
4.  Drop the cabbage into the boiling water. Bring rapidly to the boil and boil uncovered for 2 minutes. Immediately drain in a colander, and run cold water over the cabbage for a minute or two. Drain thoroughly and set aside.
Cabbage is cooking in pot of boiling & salted water.
5.  After the pork has cooked for 1 to 1½ hours, arrange the cabbage around it. Season with additional salt and pepper and baste with the juices that have accumulated in the casserole. Cover, bring to a simmer on stove top and then return it to the oven until the pork in done and the cabbage is tender (about another hour). Baste the cabbage several times with the meat juices during this period.

Pork as it is baking and being basted during the last hour of cooking.

6.  Transfer pork to a platter; remove bay leaf and thyme stems. Lift the cabbage and carrots out of the casserole with a fork and spoon so it will drain, and arrange it around the meat. Season with salt and pepper if necessary. Pour the juices (au jus) in the casserole over the cabbage or put in a small bowl and several on the side. Decorate the platter with sprigs of fresh thyme, if desired.
Pork is done; it is fork tender; notice the au jus that has formed.
French-inspired Menu:
Spinach & Tomato Salad w/ Celery Seed Dressing
RƓti de Porc aux Chou (Casserole-roasted Pork with Cabbage)
Crusty French-style Bread
Barry is ready to eat!