Stollen (German Christmas Bread)


Stollen was my challenge . . . after binge watching The British Baking Show, I decided I needed to try something newThis was my first time to make Stollen and the first time to make marzipan. Actually the first time to taste Stollen and I think it is incredible . . . just to be sure I polished off four slices right after it cooled enough to eat.

The authentic German recipe came from The Daring Gourmet.  I did play around with the flavors—added cranberries and using less candied citrus, relying on just candied orange. 

It was a lot of work and I was a bit worried when the internal temperature was only 160° at the end of the baking time; the bottom of the loaves were also soft. So, I covered it with foil and put it back in the oven. It baked at least 15 more minutes in order to brown on the bottom. I also realized that I had to be careful to place the temperature probe so that it was not positioned in the log of marzipan in the middle of the loaf. 

Stollen (German Christmas Bread)   Makes 2 large or 3 medium Stollen.

Fruits & Nuts:

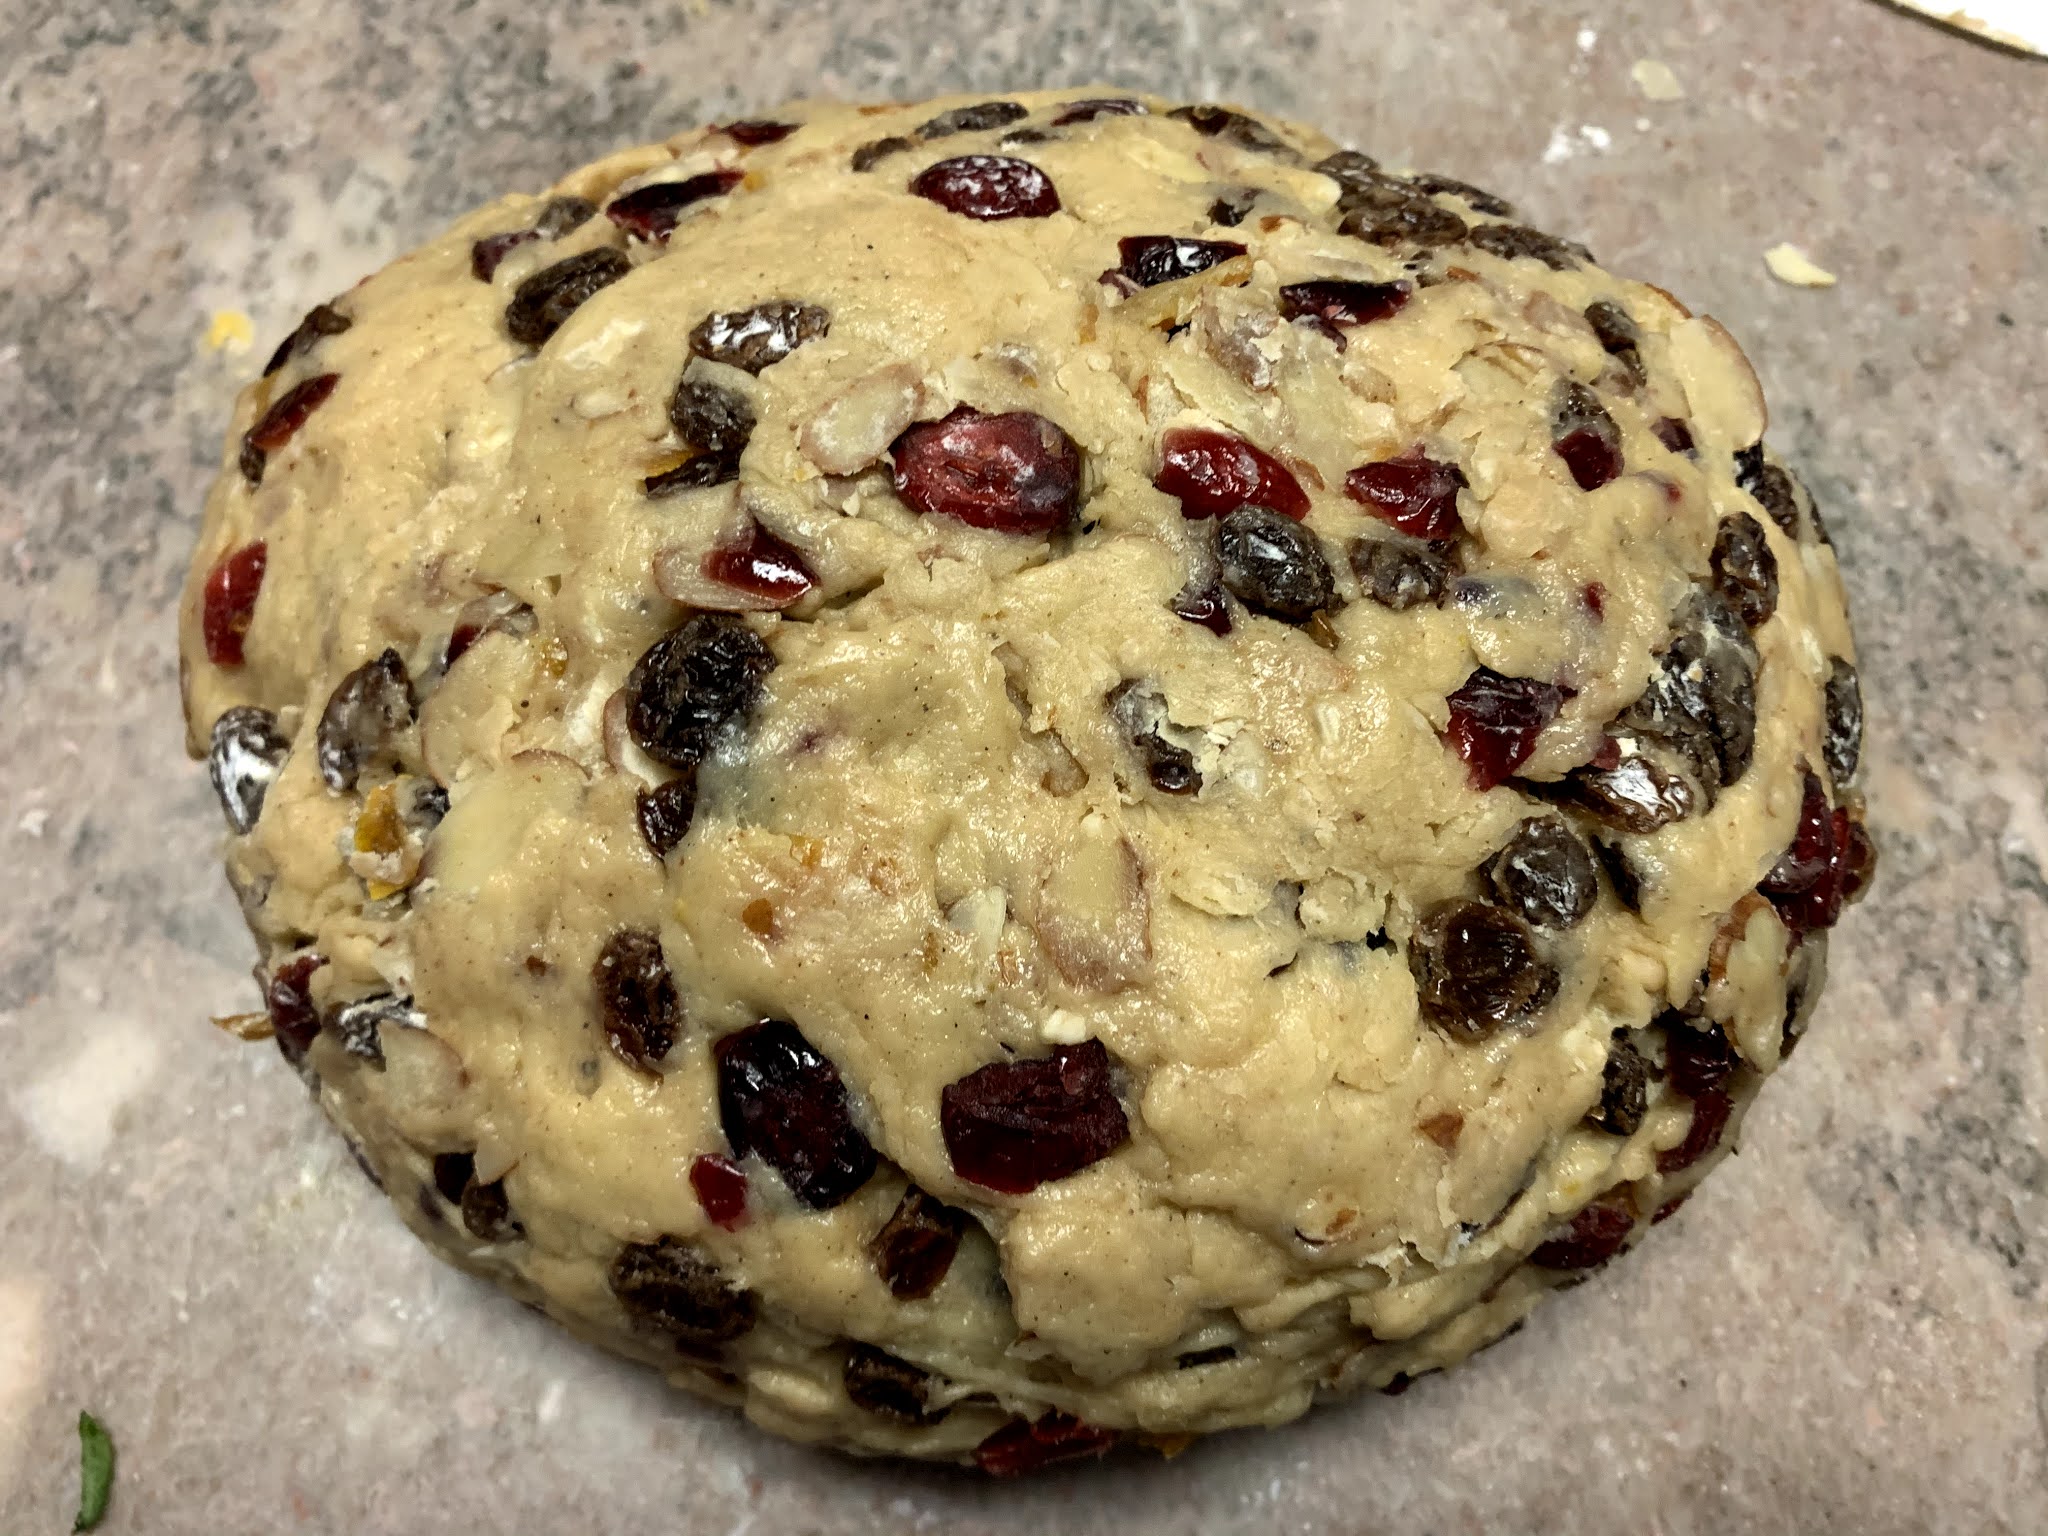
2 cups raisins & raisins

3/4 cups lightly packed candied orange peel (about 3 ozs., finely diced  (homemade recipe follows)

3/4 blanched slivered or sliced almonds , finely chopped

1/3 cup quality dark rum (or could substitute orange juice)

Dough:

1 cup lukewarm whole milk (110 – 115°)

1 tablespoon active dry yeast

1/2 cup granulated sugar

About 4 cups all-purpose flour 

1 large egg

2 large egg yolks

3/4 cup softened butter (1 1/2 sticks) 

2 teaspoons vanilla 

1 teaspoon salt

3/4 teaspoon ground cardamom

3/4 teaspoon ground nutmeg

1/2 teaspoon ground cinnamon

8 ounces Marzipan/Almond Paste (homemade recipe follows), divided in half 

Glaze & Dusting:

1/2 to 1 stick butter, melted (original recipe called for 1 cup but both loaves were saturated with butter)

Lots of powdered sugar for generous dusting

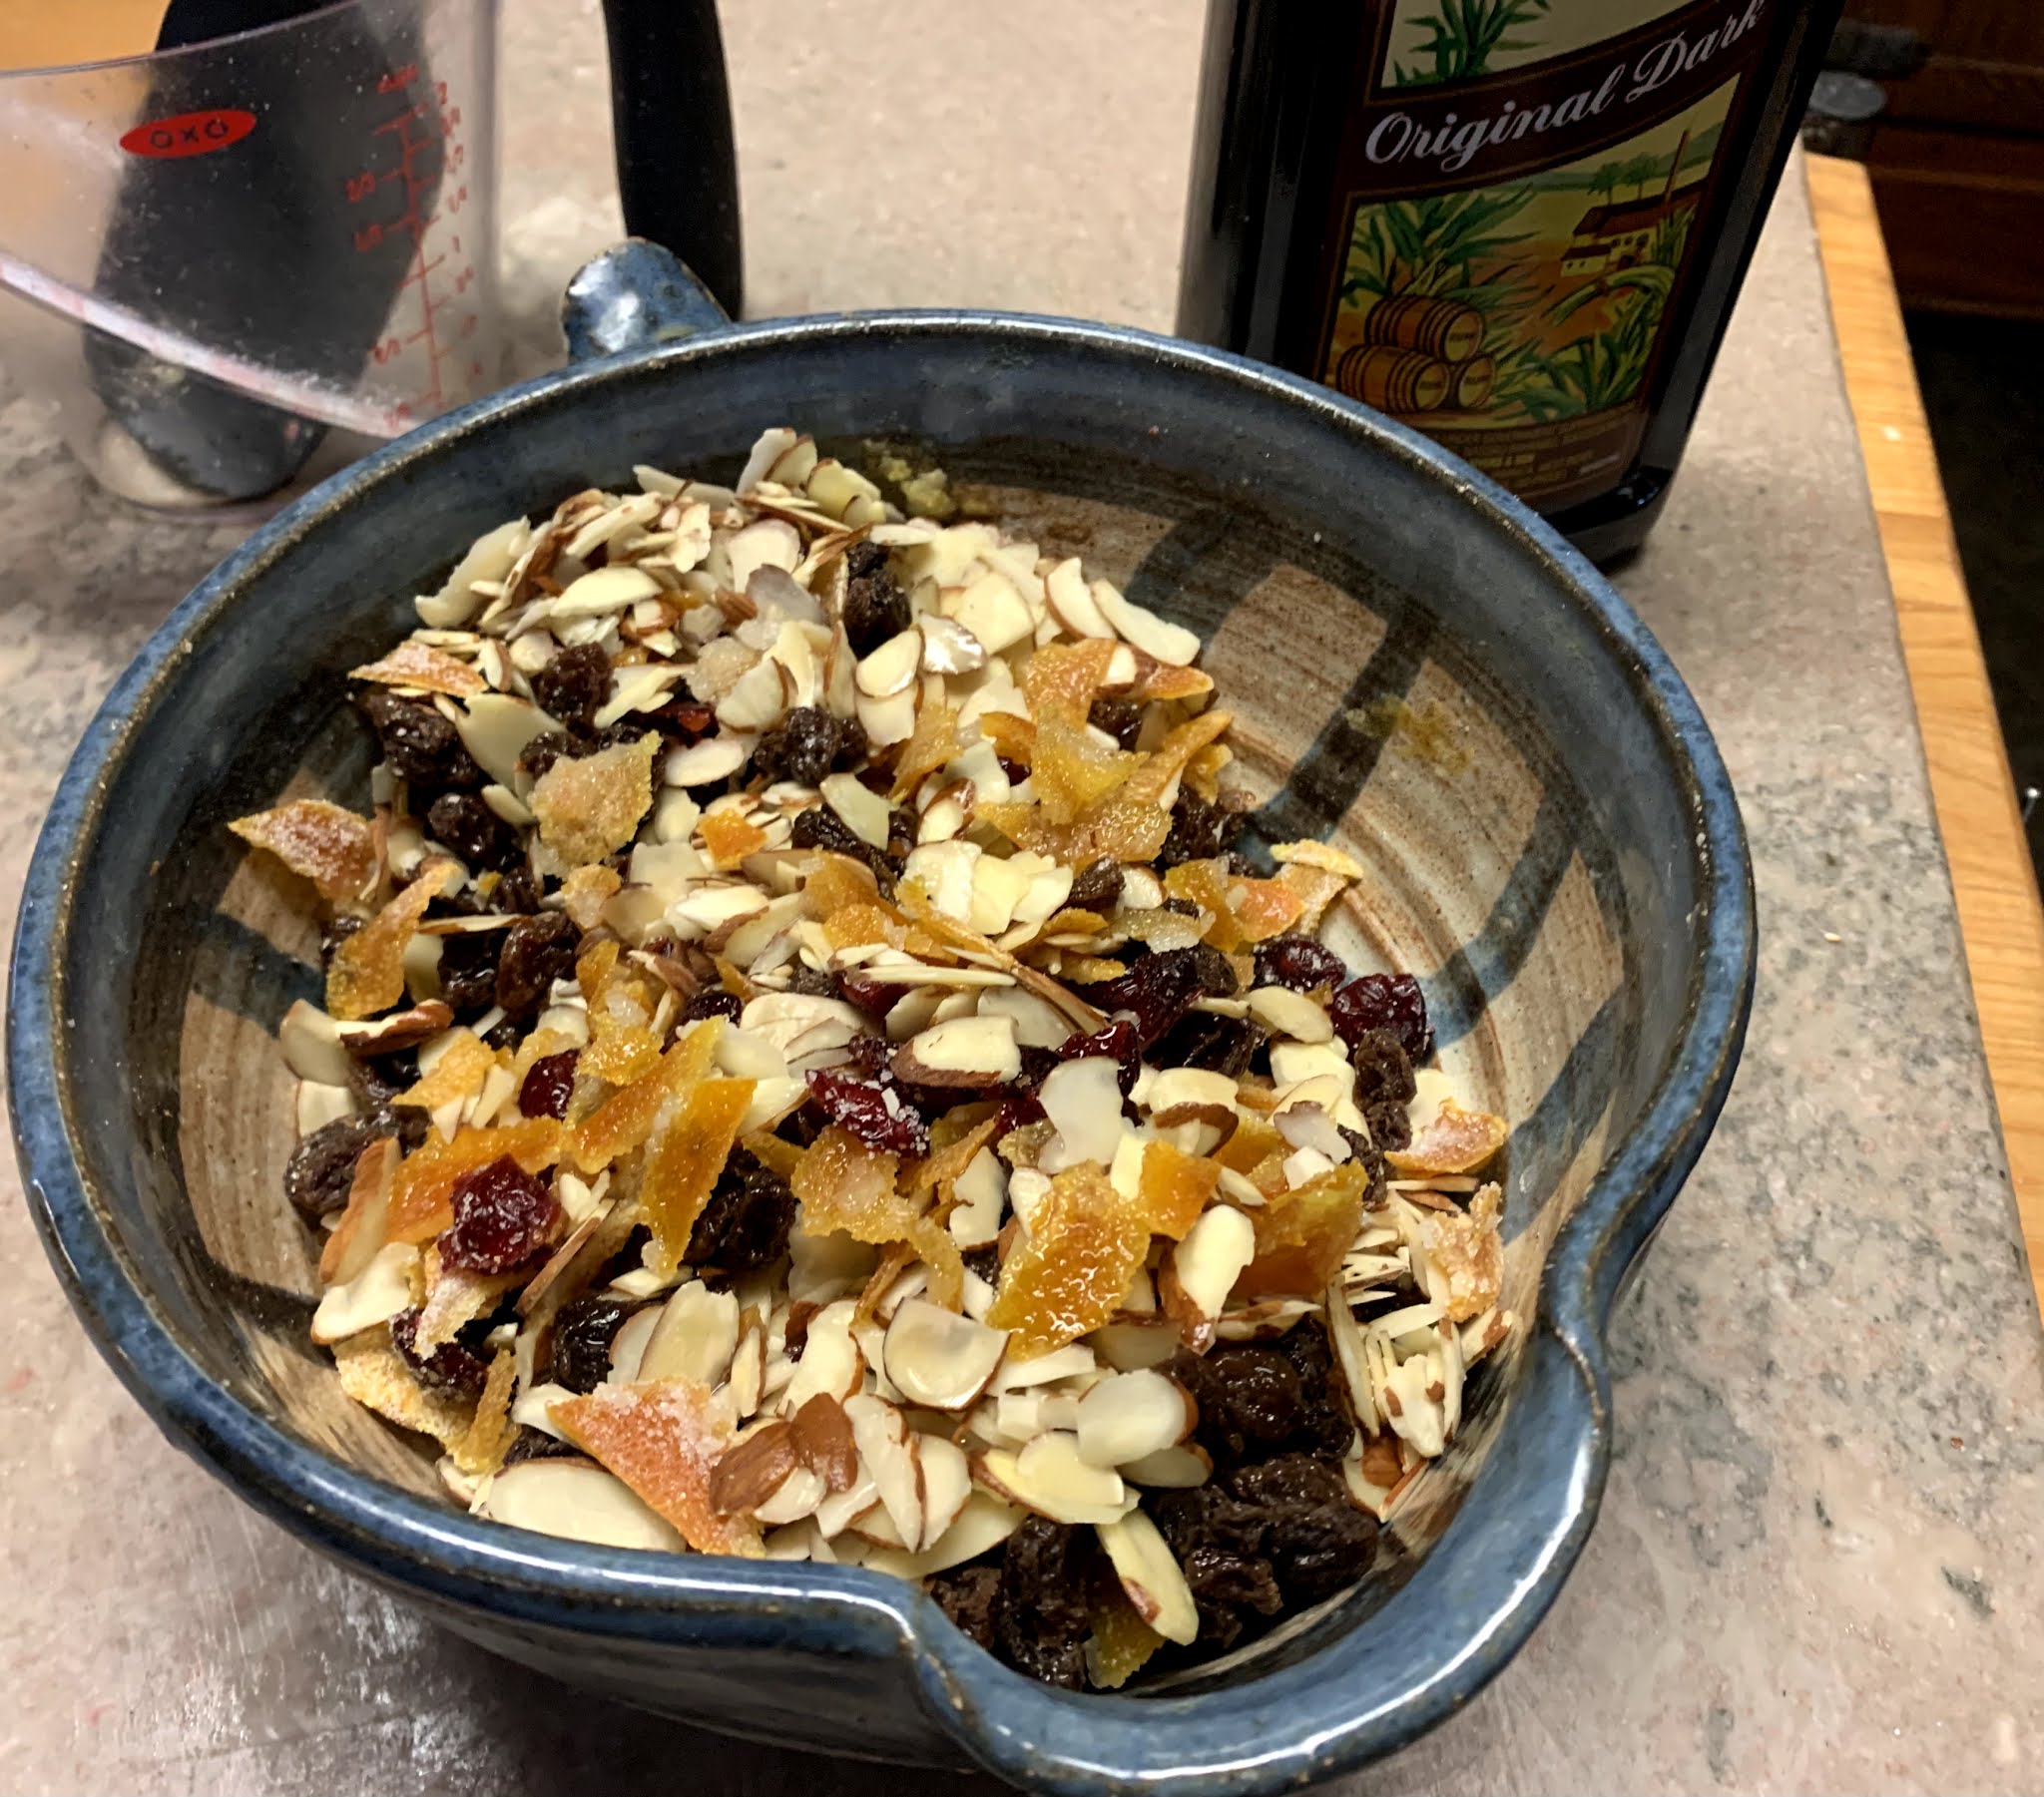
  1. Place the raisins, craisins, candied citrus peel and almonds in a medium bowl. |Pour the rum over them and stir to combine. Set aside and let the fruit mixture soak in the rum while the dough rises.
  2. Stir the yeast and 2 tablespoons of the sugar into the lukewarm milk and let sit in a warm place for 10 to 15 minutes until very frothy.
  3. Place 3 cups of flour, remaining sugar, egg, egg yolks, butter, vanilla extract, lemon zest, salt, cardamom, mace and cinnamon in the bowl of a stand mixer fitted with a dough hook. Add the yeast/milk mixture.  Use a spoon to stir the mixture until it comes together.  
  4. Knead the dough for 7 to 8 minutes.  
  5. Remove the dough ball, lightly spray the bowl with a little oil, return the dough ball, cover loosely with plastic wrap and place it in a warm place or lightly warmed oven (just barely warm), to rise until nearly doubled in size, at least 1 hour.
  6. Punch down the dough and add the soaked fruit/nut mixture to the dough (it should have absorbed all the rum by now but if there is excess liquid, pour it out before adding the mixture to the dough). Using the dough hook, knead the fruit/nut mixture into the dough until combined. If the dough is too wet to handle, add a little bit of flour until the dough pulls away from the sides of the bowl.  
  7. Turn the dough out onto a floured work surface and cut it in two equal halves. Press or roll each piece into an oval to about 1 inch thickness.  

  8. Roll each piece of marzipan into a log the length of the oval. Press the marzipan gently into the middle of the dough.  
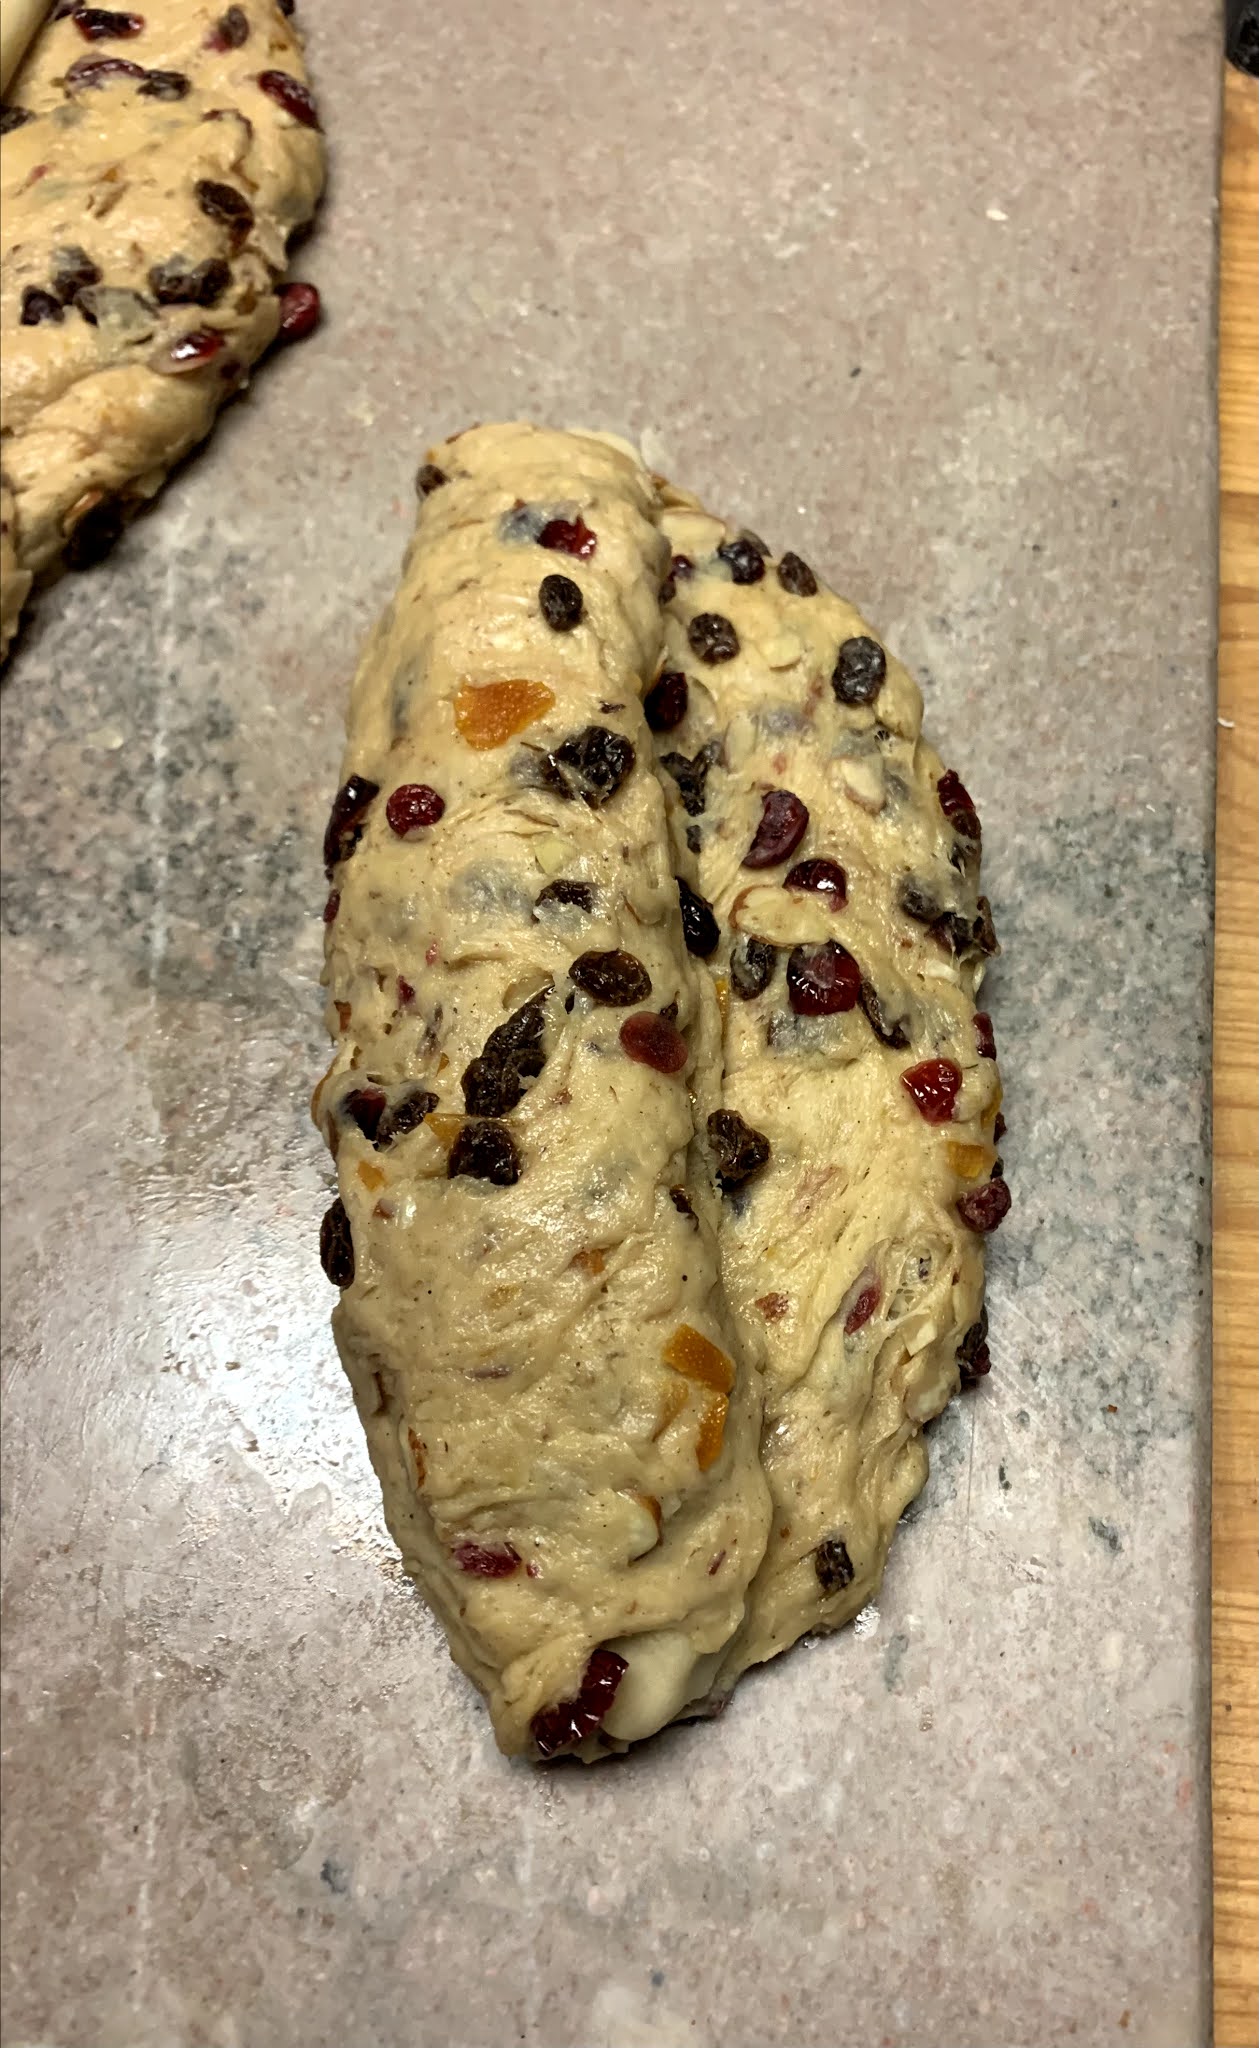
  9. Fold the left side of the dough over to cover the marzipan, then fold right side over on top of the left side so that the edge of it sits just left of the middle of the stolen. In other words, don't fold the right side all the way over to the left edge of the stollen. Pinch and tuck the top and bottom ends of the stollen to cover the marzipan.  
  10. Use the bottom edge of your hand to press down along the length of the stollen towards the right of the center to create a divot and characteristic hump.
  11. Place the stollen on a silicon lined baking sheet (or use sprayed parchement). Cover the stollen loosely with plastic wrap and let them rest in a warm place or lightly warmed oven for 40 to 60 minutes until puffy. At that point you can pick off any raisins that are sticking out of the dough (they will burn during baking).  
  12. Towards the end of the last rise, preheat the oven to 350° and bake the stollen for 30 to 40 minutes or until an instant read thermometer registers at 190°— the bread should be golden on top and should yield a hollow sound when tapped on the bottom. (It took mine an additional 15 minutes to bake. Note: Be sure to place the thermometer in the bread and not in the log of marzipan in the center of the loaf.)
  13. Let the bread sit for 5 minutes, then use a toothpick to poke holes all over the stollen (this will allow the butter to seep in), then generously brush the stollen with the melted butter while the stollen are still warm. 
  14. Immediately sprinkle with a generous amount of powdered sugar, rubbing it into the creases and down the sides. Let the stollen cool completely. Dust again with powdered sugar once loaves have cooled.
  15. The stollen can be sliced and eaten now or wrapped tightly (wrap in plastic wrap then foil) and left to "ripen" in a cool place for 2 weeks. The liquid from the dried fruits will further penetrate the dough for more flavor and moisture. Stollen can also be frozen for longer storage.

Homemade Marzipan or Almond Paste  Yield: 12 to 13 ounces

1 1/2 cups very finely ground blanched almond flour/meal or blanch, grind and dry your own almonds - I recommend the bought almond meal to ensure it's finely ground and sufficiently dry

1 1/2 cups powdered sugar

2 teaspoons quality pure almond extract

1 teaspoon quality food grade rose water (use vanilla if rose water is not available)

1 egg white (vegan: use egg substitute 3+ tablespoons corn syrup)

  1. Place the almond flour and powdered sugar in a food processor and pulse until combined and any lumps are broken up. Add the almond extract and rose water and pulse to combine. Add the egg white and process until a thick dough is formed. If the mass is still too wet and sticky, add more powdered sugar and ground almonds. Keep in mind that it will become firmer after it's been refrigerated.
  2. Turn the almond marzipan out onto a work surface and knead it a few times. Form it into a log, wrap it up in plastic wrap and refrigerate.
  3. Will keep for at least a month in the refrigerator or up to 6 months in the freezer. Bring to room temperature before using in any recipe.

NOTES: If concerned about raw egg, use pasteurized egg whites in the carton instead. 

DIFFERENCE between Marzipan vs. Almond Paste: Almond paste is softer and is used in baked goods. Marzipan is firmer and is used in making candies/chocolates or as fondant for cakes. Marzipan also uses rose water. To adjust this recipe according to what you're using it for, follow this recipe as instructed for almond paste (I still include the rose water because it tastes amazing), or add an extra 1/4 cup or more of almond flour/meal until you reach a firmer consistency (one that you can roll out with a rolling pin without it sticking) for marzipan.


Candied Citrus Peel   Yield: approximately 8 ounces

Candied citrus peel is easy to make yourself, contains no chemicals or additives, and tastes MUCH better than store-bought!

3 Valencia or Naval oranges and 4 lemons (can also use 4 lemons or the equivalent of grapefruits, Meyer lemons and limes, or any citrus of your choice) thoroughly washed and scrubbed

2 cups granulated sugar

1 cup water

Fine granulated sugar for coating (granulated sugar can be whirled in blender to make it finer)

  1. Slice both ends of the citrus fruits. Cut the peel on each into 4 or more vertical segments, depending on the size of the fruit. Peel off each segment of rind. (You can remove a little of the white pith, though not necessary. The pith is bitter but the blanching process below will help reduce the bitterness. Note that if you remove the white pith, the thinner the peels are the harder and more leathery they will be when they’re candied.) 
  2. Slice the peels into 1/4 inch wide strips. (Keep the peeled citrus for eating, cooking, juicing, etc.)

  3. Boil the peels in a pot of water for 15 minutes. Drain the peels in a colander, rinse and then drain again. Discard the water from the pot.

Repeat this process one or two more times to reduce the bitter flavor.

  4. Add the 1 cup of fresh water and the sugar to the pot and bring it to a boil. Boil it for a couple of minutes until the sugar is dissolved. Add the citrus peels, reduce the heat to low and simmer for 45 to 60 minutes, stirring occasionally, until the peels become translucent and the syrup becomes lightly syrupy (on a candy thermometer this will be be approximately soft ball stage).

  5. Use a slotted spoon to remove a few of the peels at a time and let the excess syrup drip off for a few seconds. Place the hot, wet peels in a bowl of sugar or a ziplock bag with sugar in it and toss/shake to coat.

  6. Spread the candied citrus peels out on a wire rack to cool and dry completely— 1 to 2 days.
  7. Stored in an airtight container in a cool, dry place, the candied citrus peel will keep for at least a month. They'll keep even longer in the fridge and for a few months frozen.


NOTES:  If candied citrus peel gets hard after a while don't worry - they will soften up  as they bake.


To keep the candied peels softer, you can limit the drying time, skip the final sugar coating step and put the peels in a ziplock bag and either refrigerate or freeze them.


Recipe without photos . . .

Stollen (German Christmas Bread)   Makes 2 large or 3 medium Stollen.

Fruits & Nuts:

2 cups raisins & raisins

3/4 cups lightly packed candied orange peel (about 3 ozs., finely diced  (homemade recipe above)

3/4 blanched slivered or sliced almonds , finely chopped

1/3 cup quality dark rum (or could substitute orange juice)

Dough:

1 cup lukewarm whole milk (110 – 115°)

1 tablespoon active dry yeast

1/2 cup granulated sugar

About 4 cups all-purpose flour 

1 large egg

2 large egg yolks

3/4 cup softened butter (1 1/2 sticks) 

2 teaspoons vanilla 

1 teaspoon salt

3/4 teaspoon ground cardamom

3/4 teaspoon ground nutmeg

1/2 teaspoon ground cinnamon

8 ounces Marzipan/Almond Paste (homemade recipe above), divided in half 

Glaze & Dusting:

1/2 to 1 stick butter, melted (original recipe called for 1 cup but both loaves were saturated with butter)

Lots of powdered sugar for generous dusting

  1. Place the raisins, craisins, candied citrus peel and almonds in a medium bowl. |Pour the rum over them and stir to combine. Set aside and let the fruit mixture soak in the rum while the dough rises.
  2. Stir the yeast and 2 tablespoons of the sugar into the lukewarm milk and let sit in a warm place for 10 to 15 minutes until very frothy.
  3. Place 3 cups of flour, remaining sugar, egg, egg yolks, butter, vanilla extract, lemon zest, salt, cardamom, mace and cinnamon in the bowl of a stand mixer fitted with a dough hook. Add the yeast/milk mixture.  Use a spoon to stir the mixture until it comes together.  
  4. Knead the dough for 7 to 8 minutes.  
  5. Remove the dough ball, lightly spray the bowl with a little oil, return the dough ball, cover loosely with plastic wrap and place it in a warm place or lightly warmed oven (just barely warm), to rise until nearly doubled in size, at least 1 hour.  
  6. Punch down the dough and add the soaked fruit/nut mixture to the dough (it should have absorbed all the rum by now but if there is excess liquid, pour it out before adding the mixture to the dough). Using the dough hook, knead the fruit/nut mixture into the dough until combined. If the dough is too wet to handle, add a little bit of flour until the dough pulls away from the sides of the bowl.  
  7. Turn the dough out onto a floured work surface and cut it in two equal halves. Press or roll each piece into an oval to about 1 inch thickness.  
  8. Roll each piece of marzipan into a log the length of the oval. Press the marzipan gently into the middle of the dough.  
  9. Fold the left side of the dough over to cover the marzipan, then fold right side over on top of the left side so that the edge of it sits just left of the middle of the stolen. In other words, don't fold the right side all the way over to the left edge of the stollen. Pinch and tuck the top and bottom ends of the stollen to cover the marzipan.  
  10. Use the bottom edge of your hand to press down along the length of the stollen towards the right of the center to create a divot and characteristic hump.
  11. Place the stollen on a silicon lined baking sheet (or use sprayed parchement). Cover the stollen loosely with plastic wrap and let them rest in a warm place or lightly warmed oven for 40 to 60 minutes until puffy. At that point you can pick off any raisins that are sticking out of the dough (they will burn during baking).  
  12. Towards the end of the last rise, preheat the oven to 350° and bake the stollen for 30 to 40 minutes or until an instant read thermometer registers at 190°— the bread should be golden on top and should yield a hollow sound when tapped on the bottom. (It took mine an additional 15 minutes to bake. Note: Be sure to place the thermometer in the bread and not in the log of marzipan in the center of the loaf.)
  13. Let the bread sit for 5 minutes, then use a toothpick to poke holes all over the stollen (this will allow the butter to seep in), then generously brush the stollen with the melted butter while the stollen are still warm. 
  14. Immediately sprinkle with a generous amount of powdered sugar, rubbing it into the creases and down the sides.  Let the stollen cool completely.  Dust again with powdered sugar once loaves have cooled.
  15. The stollen can be sliced and eaten now or wrapped tightly (wrap in plastic wrap then foil) and left to "ripen" in a cool place for 2 weeks. The liquid from the dried fruits will further penetrate the dough for more flavor and moisture. Stollen can also be frozen for longer storage.
Old-Fashioned Rice Custard

Sometimes I crave custard. Old-fashioned custard pie or Pyrex dishes full of baked custard – just like Grandma Richardson and Mom used to make. Story has it that Grandma used to make custard pies so that Mom could pack them in Dad’s lunches. He worked in the oil fields in the early days of their marriage and those pies (she made raisin) were a welcome addition to the toil involved in “roughnecking" days. So for me, custard is satisfying to the taste buds and evokes precious memories as well.

The problem is that Barry is not a custard fan. However, he does like rice pudding. And, what is rice pudding other than cooked rice in custard. 

This recipe is a little more complicated than usual but with lots of extra “pandemic” time on my hands, I gave it a try. Also, I liked the name of the recipe -- Old-Fashioned Rice Custard!

For me, rice pudding is not only dessert but breakfast food, too. Grain, dairy + fruit (if you add raisins) & nuts for protein = a great way for me to break the fast!

Old-Fashioned Rice Custard      6 to 8 servings        Recipe from busymomblogs  

1/2 uncooked long-grain rice

4 cups whole milk, divided

1/4 cup butter 

3 eggs

3/4 cup granulated sugar

1 teaspoon vanilla 

1/4 teaspoon salt

1/2 teaspoon ground cinnamon

1/2 cup raisins, optional

Optional Topping: About 1/2 cup toasted almonds or other nuts of your choice

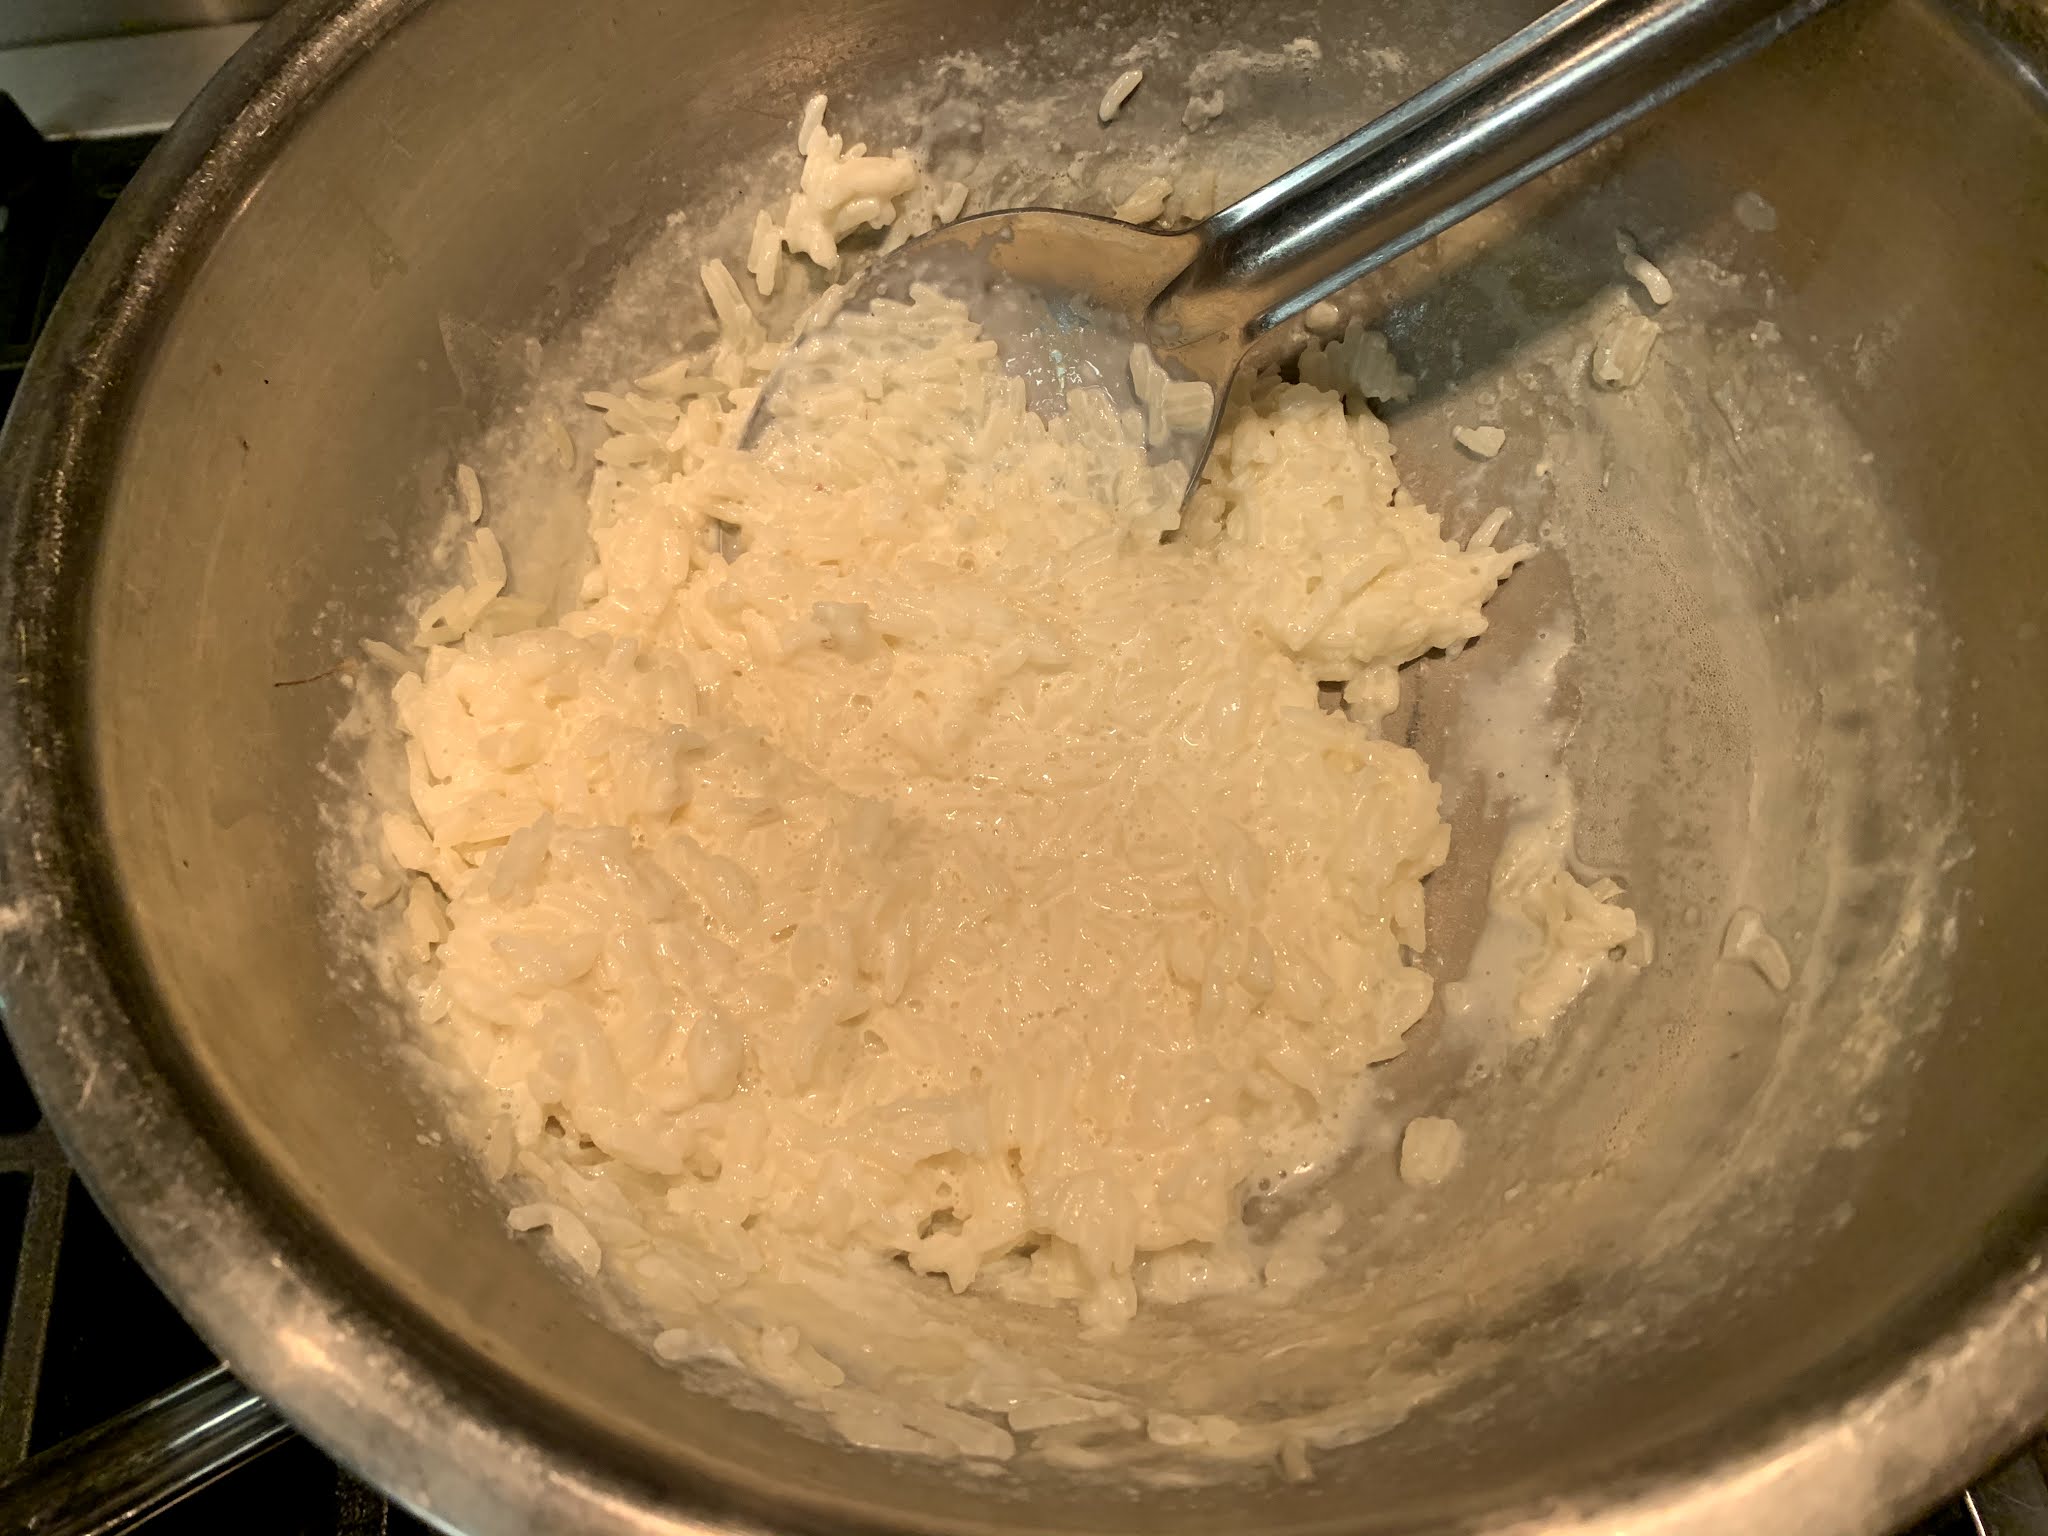
  1. In the top of a double boiler*, combine rice and 2 cups milk. Cook, stirring occasionally, over boiling water until rice is tender (check water in pan occasionally to make sure it has not all evaporated), about 45 to 50 minutes. Stir in butter.


  2. In a mixing bowl, beat eggs; blend in sugar, vanilla, salt and remaining milk. Stir into the hot rice mixture; add raisins if desired. (I added part of the cinnamon to the mixture.)
  3. Pour into a lightly greased 2-qt. casserole and top with (remaining) cinnamon. 
  4. Bake at 350° degrees for 50 minutes or until firm.  
  5. Top with toasted almonds or other nuts if desired.

* To make a make-shift double boiler: Fill a saucepan about half way with water. Set a stainless steel or Pyrex mixing bowl on saucepan—water should not touch bottom of bowl. 


Recipe without photos . . .

Old-Fashioned Rice Custard      6 to 8 servings        Recipe from busymomblogs  

1/2 cup uncooked long-grain rice

4 cups whole milk, divided

1/4 cup butter 

3 eggs

3/4 cup granulated sugar

1 teaspoon vanilla 

1/4 teaspoon salt

1/2 teaspoon ground cinnamon

1/2 cup raisins, optional

Optional Topping: About 1/2 cup toasted almonds or other nuts of your choice

  1. In the top of a double boiler*, combine rice and 2 cups milk. Cook, stirring occasionally, over boiling water until rice is tender (check water in pan occasionally to make sure it has not all evaporated), about 45 to 50 minutes. Stir in butter.
  2. In a mixing bowl, beat eggs; blend in sugar, vanilla, salt and remaining milk. Stir into the hot rice mixture. (I added part of the cinnamon to the mixture.)
  3. Pour into a lightly greased 2-qt. casserole and top with (remaining) cinnamon. 
  4. Bake at 350° degrees for 50 minutes or until firm.  
  5. Top with toasted almonds or other nuts if desired.

* To make a make-shift double boiler: Fill a saucepan about half way with water. Set a stainless steel or Pyrex mixing bowl on saucepan—water should not touch bottom of bowl. 

Quick & Easy Graham Cracker Toffee or Nelda Horan's Hot Rods - 2 similar recipes

Just five ingredients in this quick and easy version of toffee but it tastes a lot like  traditional homemade toffee. This tasty, stress-free toffee can be whipped up in no time, which makes it the perfect treat for the holidays. 

This recipe reminds me on Nelda Horan’s Hot Rods. Back in the 1960s and 70s Nelda, the area representative for KPL (Kansas Power and Light), used to schedule periodic visits to my Home Economics classes at Abilene High School to demonstrate the wonders of the electric range and oven. Her Hot Rods recipe was a favorite of the students and is posted below the Quick & Easy Graham Cracker Toffee. Her recipe is quite similar but uses much less butter.


Quick & Easy Graham Cracker Toffee

15 sheets honey graham crackers

1 cup (2 sticks) butter

1 cup packed brown sugar

1 1/2 cups+ chocolate chips (I used dark but semi-sweet or milk chocolate will work)

1 cup chopped nuts (I used chopped pecans on one end and almonds on other)

  1. Preheat oven to 350° F. Line a large half  sheet  baking pan with a Silpat baking mat, parchment paper, or aluminum foil. If you are using aluminum foil, spray lightly with nonstick cooking spray. Place graham crackers in a single layer, touching, on the large baking sheet, cutting crackers to fit as needed. Set aside.
  2. In a medium saucepan, melt butter and brown sugar together over medium-high heat. Bring butter and brown sugar mixture to a boil. Simmer for 4 minutes, stirring constantly. 

  3. Pour mixture evenly over graham crackers. 
  4. Bake for 8 minutes.
  5. Remove the pan from the oven and immediately sprinkle chocolate chips evenly over the top of the graham crackers. Let the chocolate chips sit for 2 minutes so they have a chance to melt. Spread melted chocolate with a knife or rubber spatula. 

  6. Sprinkle almonds or pecans on top.
  7. Let the graham cracker toffee sit for about 2 hours or until the chocolate hardens. If you are in a hurry, you can refrigerate the toffee for an hour, or freeze for 30 minutes. 
  8. When chocolate is set up, break the toffee into pieces. 

Nelda Horan’s Hot Rods    48 bars    Recipe from KPL Electric Kitchens.   

24 honey graham crackers

1 cup packed light brown sugar

1/2 cup butter or margarine

1 cup chopped pecans 

  1. Grease a 15 1/2 x 10 1/2 x 1” jelly roll pan.
  2. Line pan with whole graham crackers.
  3. Place brown sugar and butter in small saucepan.  Bring to a rolling boil and 
  4. cook for 1 1/2 minutes.
  5. Remove from heat and add nuts. Spread mixture over graham crackers.
  6. Bake at 350° F. for 8 minutes. Cool and cut into bars.

Recipe without photos . . .

Quick & Easy Graham Cracker Toffee

15 sheets honey graham crackers

1 cup (2 sticks) butter

1 cup packed brown sugar

1 1/2 cups chocolate chips (I used dark but semi-sweet or milk chocolate will work)

1 cup chopped nuts (I used chopped pecans on one end and almonds on other)

  1. Preheat oven to 350° F. Line a large half  sheet  baking pan with a Silpat baking mat, parchment paper, or aluminum foil. If you are using aluminum foil, spray lightly with nonstick cooking spray. Place graham crackers in a single layer, touching, on the large baking sheet, cutting crackers to fit as needed. Set aside.
  2. In a medium saucepan, melt butter and brown sugar together over medium-high heat. Bring butter and brown sugar mixture to a boil. Simmer for 4 minutes, stirring constantly. 
  3. Pour mixture evenly over graham crackers. 
  4. Bake for 8 minutes.
  5. Remove the pan from the oven and immediately sprinkle chocolate chips evenly over the top of the graham crackers. Let the chocolate chips sit for 2 minutes so they have a chance to melt. Spread melted chocolate with a knife or rubber spatula. 
  6. Sprinkle almonds or pecans on top.
  7. Let the graham cracker toffee sit for about 2 hours or until the chocolate hardens. If you are in a hurry, you can refrigerate the toffee for an hour, or freeze for 30 minutes. 
  8. When chocolate is set up, break the toffee into pieces.

Pecan Tassies -- bite-sized versions of pecan pie

Pecan Tassies, bite-sized versions of pecan pie, are always a welcome holiday dessert. With a their rich, flakey crusts and  sweet creamy filling, they will satisfy Barry's dessert cravings.  


Pecan Tassies     Makes 2 dozen

Dough Cups:

1/2 cup (1 stick) butter, at room temperature

3 ounces cream cheese, at room temperature

1 cup all-purpose flour, plus more for the tamper

Filling:

1 large egg

3/4 cup packed light brown sugar

1 tablespoon butter, at room temperature

1 teaspoon vanilla 

1/2 teaspoon ground cinnamon

1/2 teaspoon nutmeg, freshly grated

Pinch kosher salt

1/2 to 3/4 cup chopped pecans

  1. For the dough cups: Add the butter and cream cheese to the bowl of a stand mixer fitted with the paddle attachment. Cream together until smooth and combined, 3 to 5 minutes. 
  2. Mix in the flour until just combined. 
  3. Chill the dough in the refrigerator for 2 hours.
  4. When the dough is cold and firm, portion it into 2 dozen balls. 
    I divided dough in half, formed each in a ball and then cut each ball into 6 pieces.
  5. Add each ball to a mini muffin pan—I add strips of sprayed parchment to each muffin cup for each removal after baking. Using a tamper dipped in flour, press the dough so that it forms a cup.
  6. Refrigerate the dough cups for 30 minutes. (Or freeze if you prefer.)
  7. To make the filling: Cream the egg, brown sugar, butter, vanilla, cinnamon, nutmeg and salt in a large bowl with an electric mixer until smooth, 2 to 3 minutes. 
  8. Transfer the filling to a liquid measuring cup for easy pouring.
  9. Sprinkle most of the pecans evenly among the refrigerated dough cups. 
  10. Pour the filling evenly over the pecans and top with a few additional pecan pieces. 
  11. Place in a preheated oven and bake at 350° F until golden brown and bubbly, 20 to 25 minutes. Immediately fransfer to a cooling rack.
Recipe without photos . . . Pecan Tassies     Makes 2 dozen

Dough Cups:

1/2 cup (1 stick) butter, at room temperature

3 ounces cream cheese, at room temperature

1 cup all-purpose flour, plus more for the tamper

Filling:

1 large egg

3/4 cup packed light brown sugar

1 tablespoon butter, at room temperature

1 teaspoon vanilla 

1/2 teaspoon ground cinnamon

1/2 teaspoon nutmeg, freshly grated

Pinch kosher salt

1/2 to 3/4 cup chopped pecans

  1. For the dough cups: Add the butter and cream cheese to the bowl of a stand mixer fitted with the paddle attachment. Cream together until smooth and combined, 3 to 5 minutes. 
  2. Mix in the flour until just combined. 
  3. Chill the dough in the refrigerator for 2 hours.
  4. When the dough is cold and firm, portion it into 2 dozen balls. 
  5. Add each ball to a mini muffin pan—I add strips of sprayed parchment to each muffin cup for each removal after baking. Using a tamper dipped in flour, press the dough so that it forms a cup.
  6. Refrigerate the dough cups for 30 minutes. (Or freeze if you prefer.)
  7. To make the filling: Cream the egg, brown sugar, butter, vanilla, cinnamon, nutmeg and salt in a large bowl with an electric mixer until smooth, 2 to 3 minutes. 
  8. Transfer the filling to a liquid measuring cup for easy pouring.
  9. Sprinkle most of the pecans evenly among the refrigerated dough cups. 
  10. Pour the filling evenly over the pecans and top with a few additional pecan pieces.
  11. Place in a preheated oven and bake at 350° F until golden brown and bubbly, 20 to 25 minutes. Immediately transfer to a cooling rack.

Slow Cooker White Chicken Chili . . . a creamy soup that will take the chill out of winter!

The aroma of this southwestern spiced, super creamy and cheesy soup greeted us when we arrived at my sister’s home recently. It’s rich, hearty and oh, so good! Add the ingredients to a slow cooker and with a minimum of work, you’ll have a soup that will take the chill out of winter. Marla Payne discovered this recipe at Spicy Southern Kitchen

Slow Cooker White Chicken Chili    6 servings

1 small onion, chopped

1 jalapeno, finely chopped

2 boneless, skinless chicken breasts

1 small (4 oz.) can diced green chiles

1 (1.25 oz.) packet taco seasoning (or about 2 tablespoons homemade)

1 (14.5-ounce) can chicken broth

2 (15.8 oz.) cans northern beans, drained and rinsed

1 (8 oz.) block cream cheese @ room temperature 

1 cup shredded cheddar cheese (I saved some of this cheese to use on top)

1 cup shredded Monterey Jack cheese

Soup toppings: sliced green onions & Frito chips

  1. Place onion and jalapeno in bottom of slow cooker. Put chicken on top.
  2. Add green chiles, taco seasoning, chicken broth, and beans. Cover slow cooker and cook on LOW for 5 to 6 hours or HIGH for 2 1/2 to 3 hours.
  3. Dice cream cheese and stir into hot ingredients in slow cooker; cook on LOW for 1 more hour.
  4. Add shredded cheese and stir until cheese melts, shredding the chicken as you stir. If cheese doesn't melt all the way, cover for 5 to 10 minutes.
  5. Serve with green onions and Frito chips.

Recipe without photos . . .

Slow Cooker White Chicken Chili    6 servings

1 small onion, chopped

1 jalapeno, finely chopped

2 boneless, skinless chicken breasts

1 small (4 oz.) can diced green chiles

1 (1.25 oz.) packet taco seasoning (or about 2 tablespoons homemade)

1 (14.5-ounce) can chicken broth

2 (15.8 oz.) cans northern beans, drained and rinsed

1 (8 oz.) block cream cheese @ room temperature 

1 cup shredded cheddar cheese (I saved some of this cheese to use on top)

1 cup shredded Monterey Jack cheese

Soup toppings: sliced green onions & Frito chips

  1. Place onion and jalapeno in bottom of slow cooker. Put chicken on top.
  2. Add green chiles, taco seasoning, chicken broth, and beans. Cover slow cooker and cook on LOW for 5 to 6 hours or HIGH for 2 1/2 to 3 hours.
  3. Dice cream cheese and stir into hot ingredients in slow cooker; cook on LOW for 1 more hour.
  4. Add shredded cheese and stir until cheese melts, shredding the chicken as you stir. If cheese doesn't melt all the way, cover for 5 to 10 minutes.
  5. Serve with green onions and Frito chips.

Buttercream Decorator Icing/Frosting

This is basically the Wilton recipe for decorator icing/frosting but I use all butter instead of half shortening. Although shortening helps stabilize the frosting and helps avoid separation in hot weather, I do NOT want to eat shortening! This all butter icing/frosting tastes SO much better. Great for Old-Fashioned Sugar Cookies, cakes and cinnamon rolls or other frosted pastries. 


Buttercream Decorator Icing/Frosting    Makes 3 ½ cups

1 cup (2 sticks) softened butter

1 1/2 teaspoons vanilla 

5 cups powdered sugar (sift if lumpy)

Milk – begin with about 2 or 3 tablespoons

  1. Cream butter with an electric mixer.  Add vanilla. 
  2. Gradually add powdered sugar (low speed of mixer) and mix well. Scrape sides and bottom of bowl often. 
  3. Add enough milk for either spreading or piping consistency. Turn mixer to medium high to high and beat until icing/frosting is light and fluffy. Keep frosting covered with a damp cloth while frosting. Or, refrigerate in an air-tight container for up to 1 week; rewhip before using.
  4. Note: Add a little corn syrup if icing cookies for a glossy appearance.