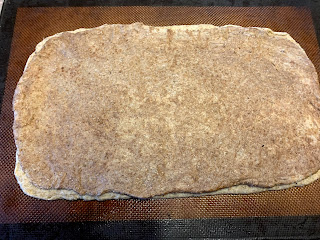
Marbled Rye Bread

While Barry smoked a turkey breast, I made Marbled Rye Bread using the recipe on Red Star Yeast’s websiteI followed their instructions but did omit the caraway seeds as we prefer rye bread without that addition + added 1 heaping tablespoon of vital gluten along with each measurement of rye flour to add to boost the protein level. I also made diagonal slashes in the loaves and brushed them with an egg wash right before baking.


Grilled Turkey and Swiss on Rye w/ More Than Mayo Sauce

COMPLETE ORIGINAL RECIPE can be found at Red Star Yeast's website  - Marbled Rye Bread

The following photos detail the process I followed and the changes I made: 


Marbled Rye Bread

Light Rye Dough

1 (0.25oz) package (7g) or 2 1/4 teaspoons active dry yeast 

2 cups bread flour, divided

1 1/2 teaspoons table salt

2 tablespoons granulated sugar

1 1/4 cups water (120° to 130°F)

4 1/2 teaspoons vegetable oil

1 1/3 cups medium rye flour + 1 tablespoon vital gluten 

Dark Rye Dough

1 (0.25oz) package (7g) or 2 1/4 teaspoons active dry yeast 

2 cups bread flour, divided

1 1/2 teaspoons table salt

2 tablespoons granulated sugar

2 tablespoons cocoa

1 1/4 cups water (120° to 130°F)

4 1/2 teaspoons vegetable oil

1 1/3 cups medium rye flour + 1 tablespoon vital gluten

  1. Light rye dough: Combine yeast, 1 cup bread flour, salt, and sugar; mix well. 
  2. Heat water and oil to 120° to 130°F; add to flour mixture. 
  3. Blend at low speed; beat about 3 minutes at medium speed. 
  4. Gradually stir in rye flour (plus a heaping tablespoon of vital wheat gluten if using) and enough of the remaining bread flour (I only used about 1/4 to 1/3 of the remaining cup of flour) to make a firm yet moist dough. 
  5. Knead with a dough hook or on a lightly floured surface for about 5 to 7 minutes until smooth and elastic. (More flour can be added if dough becomes sticky; mine did not need extra.)
  6. Place dough in lightly oiled bowl and turn to grease top. 
  7. Cover; let rise until dough is about double in size — to check, Gently stick two fingers in the risen dough; if the indentations remain the dough is and ready. 
  8. Dark rye dough: Repeat the process for light rye, adding the cocoa to the flour mixture.
  9. Shaping, rising baking: On lightly floured surface, divide each light and dark dough in half. 
  10. Roll or pat each half to approximately an 14 x 7-inch rectangle. 
  11. For a dark crust, place a light rye piece on top of a dark rye, or reverse for a lighter crust. 
  12. For a loaf baked in an 8x4-inch pan, start rolling from shorter side, roll up tightly, pressing dough into roll with each turn. My preference is to created a longer, baguette-style shape, so I started rolling from the log side, pressing dough into roll with each turn
  13. Pinch edges and ends to seal. 
  14. Working from the center of the loaf to the ends, gently roll the loaf back and forth to form a baguette shape approximately 14" long; back and forth rolling should close the seam where dough was pinched to seal.
  15. if using  8x4-inch loaf pans, spray 2 pans with pan release. Add loaves to prepared pans. If making longer loaves, arrange on silicon baking sheets.
  16. Cover loaves and allow to rise for about an hour.
  17. Make diagonal slashes across the top of each load; brush with an egg wash.
  18. Bake in a 375°F preheated oven for 40 to 45 minutes or until an internal temperature of 190°F. is reached.
  19. Remove from pan; cool on rack.


More than Mayo Sauce

Inspired by several other mayo-based sauces, this one earns it's tangy flavor from BBQ sauce and mustard. It is great on sandwiches or as a dip for fries.


Grilled sausage with cheese & an avocado on a homemade English Muffin
slathered with More than Mayo Sauce. YUM!

More than Mayo Sauce

1/2 cup mayonnaise

2 tablespoons BBQ sauce (purchased or homemade version of Gates)

2 teaspoons yellow mustard

2 teaspoons honey

2 teaspoons dry Ranch dressing mix


Combine all ingredients and mix well. Store in refrigerator.

Vegetable Beef & Barley Soup

Hearty and health Vegetable Beef & Barley Soup is made with stew meat, whole grain pearl-style barley and fresh veggies. Slow simmering helps meld the flavors and yields tender meat We paired it with chewy Hot Bread Kitchen's Nan-e Barbari (Persian Flatbread)

Vegetable Beef & Barley Soup 4 to 6 servings 
1 lb. chuck or arm roast, trimmed of excess chunks of fat, cut into 3/4-inch cubes 
About 1/3 to 1/2 cup seasoned flour (all-purpose flour seasoned with salt, pepper, paprika, garlic and onion powder) 
2 to 3 tablespoons olive oil, divided use 
1/2 cup chopped celery (about 1 rib) 
1 cup chopped yellow onion (1 small to medium) 
2 cloves of garlic, minced 
2 tablespoons tomato paste 
3/4 to 1 cup chopped carrots (about 2), cut into chunks 
5 to 6 cups beef broth, divided 
1 bay leaf
1 teaspoon minced fresh rosemary, or 1/4 tsp. dried 
 1 teaspoon minced fresh thyme, or 1/4 tsp. dried (I actually tied sprigs of fresh rosemary together & added to the soup) 
Kosher salt & pepper to taste 
1/4 cup pearl barley 
1/2 to 3/4 cup thinly sliced or chopped cabbage 
3/4 to 1 cup chopped carrots (about 2), cut into chunks 
1 large Russet potato, peeled and cut into chunks 
1/2 to 3/4 cup thinly sliced or chopped cabbage 
1/2 cup frozen peas 
  1. Dredge stew meat in seasoned flour to coat. 
  2. Heat 1 to 2 tablespoon olive oil in a large pot over medium-high heat. Add meat and sear until golden brown on bottom, about 3 minutes then flip and cook about 1 minute longer. 
  3. Add 1 tablespoon oil to now empty pot. Add celery and onion and sauté 3 minutes. 
  4. Add garlic and tomato paste; cook 1 minute longer. 
  5. Pour in 4 cups broth, bay leaf, rosemary and thyme, scraping bottom of pan to release any bits that have baked onto bottom of the pan. Return beef to pot. 
  6. Bring mixture to a simmer then reduce heat to low, cover and simmer until beef is fairly tender, about 45 to 60 minutes. Taste and adjust seasonings as needed. 
  7. Add barley, cover and simmer until cooked through and beef is tender, about 45 to 60 minutes longer. Taste and adjust seasonings as needed. 
  8. Stir in 1 or 2 more cups of broth as needed. Bring to a boil and stir in carrots, potatoes and cabbage; reduce heat and cook another 30 minutes of so until veggies are tender. Taste and adjust seasonings as needed. 
  9. Add peas and cook just until they are hot.

Recipe without photos . . .
Vegetable Beef & Barley Soup 4 to 6 servings 
1 lb. chuck or arm roast, trimmed of excess chunks of fat, cut into 3/4-inch cubes 
About 1/3 to 1/2 cup seasoned flour (all-purpose flour seasoned with salt, pepper, paprika, garlic and onion powder) 
2 to 3 tablespoons olive oil, divided use 
1/2 cup chopped celery (about 1 rib) 
1 cup chopped yellow onion (1 small to medium) 
2 cloves of garlic, minced 
2 tablespoons tomato paste 
3/4 to 1 cup chopped carrots (about 2), cut into chunks 
5 to 6 cups beef broth, divided 
1 bay leaf
1 teaspoon minced fresh rosemary, or 1/4 tsp. dried 
 1 teaspoon minced fresh thyme, or 1/4 tsp. dried (I actually tied sprigs of fresh rosemary together & added to the soup) 
Kosher salt & pepper to taste 
1/4 cup pearl barley 
1/2 to 3/4 cup thinly sliced or chopped cabbage 
3/4 to 1 cup chopped carrots (about 2), cut into chunks 
1 large Russet potato, peeled and cut into chunks 
1/2 to 3/4 cup thinly sliced or chopped cabbage 
1/2 cup frozen peas 
  1. Dredge stew meat in seasoned flour to coat. 
  2. Heat 1 to 2 tablespoon olive oil in a large pot over medium-high heat. Add meat and sear until golden brown on bottom, about 3 minutes then flip and cook about 1 minute longer. 
  3. Add 1 tablespoon oil to now empty pot. Add celery and onion and sauté 3 minutes. 
  4. Add garlic and tomato paste; cook 1 minute longer. 
  5. Pour in 4 cups broth, bay leaf, rosemary and thyme, scraping bottom of pan to release any bits that have baked onto bottom of the pan. Return beef to pot. 
  6. Bring mixture to a simmer then reduce heat to low, cover and simmer until beef is fairly tender, about 45 to 60 minutes. Taste and adjust seasonings as needed. 
  7. Add barley, cover and simmer until cooked through and beef is tender, about 45 to 60 minutes longer. Taste and adjust seasonings as needed. 
  8. Stir in 1 or 2 more cups of broth as needed. Bring to a boil and stir in carrots, potatoes and cabbage; reduce heat and cook another 30 minutes of so until veggies are tender. Taste and adjust seasonings as needed. 
  9. Add peas and cook just until they are hot.

Marie Fiebach’s Almond Cake with Strawberries and Cream as featured in KANSAS! Magazine & on KAKE-TV

The latest 2021 issue of KANSAS! Magazine (VOL 77 / Issue 2) features an article titled “The Cooking Shows”. It includes info about Kansas produced cooking shows—both past and present. Marie Fieback who appear on KAKE-TVevery Monday with her  “Feed Your Family Tonight” show was featured in both the story and the photo shoot. She provided the recipe that was included in the article, describing her cake as being very dense, “It has the texture of a really good brownie or blondie with crisp edges and chewy interior. A small sliver is all you need because it is very rich.” She suggests pairing it with strawberries and whipped cream for a taste of springtime.

Photos for the story were taken by Justin Leister.
Above: Marie's Almond Cake
Below: Marie in her home kitchen where she has been taping since COVID.

The inspiration for this story and a bit of Kansas 

TV history follows the recipe.


Marie Fiebach’s Almond Cake with Strawberries and Cream  Yield: 1 nine-inch round cake; 12 to 16 servings 

1 pound fresh strawberries, hulled and sliced

1 1/4 cups granulated sugar plus 3 teaspoons, divided

3 tablespoons slivered almonds

3/4 cup (1 1/2 sticks) unsalted butter, melted

1 teaspoon almond extract

1 teaspoon vanilla 

1/4 teaspoon salt

2 large eggs

1 1/2 cups all purpose flour

Cooking spray

Whipped cream for serving

  1. MACERATE THE STRAWBERRIES: In a medium bowl, mix sliced strawberries with 2 teaspoons of sugar. Leave at room temperature for 1 to 2 hours, then refrigerate.
  2. FOR THE CAKE: Preheat the oven to 350 degrees Fahrenheit.
  3. Place slivered almonds on a microwave safe plate and microwave on high for 2 minutes. Stir. If they are not starting to brown, microwave up to 1 more minute in 20 second intervals until just beginning to brown. Set aside.
  4. In a medium bowl, mix melted butter, 1 1/4 cups sugar, almond extract, vanilla, and salt. Add eggs and mix well. Add flour and mix until incorporated. Do not over mix.
  5. Prepare a 9-inch round cake pan, by spraying with cooking spray, lining with parchment paper, and spraying over the parchment paper.
  6. Pour the cake batter into the prepared cake pan. Sprinkle it with toasted almonds and a final teaspoon of sugar. Bake at 350 degrees F. for 30 to 35 minutes until the edges are golden brown and the top is starting to brown.
  7. Let the cake cool for 10 minutes in the pan, then run a knife around the edge of the cake and invert onto a plate. Remove the parchment paper and then flip the cake over onto a cake plate or cutting board so the almonds are back on top. 
  8. Cut into 12 to 16 slices and top each slice with macerated strawberries and whipped cream.  

The cooking show story was actually inspired by ESTHER WOMER who hosted a daily cooking show on KARD-TV from 1957-58. Her daughter, my Chi Omega sorority sister, Sally Women Lankas shared the story of her amazing mom who balanced work and family. After feeding her family a home-cooked breakfast, Esther would prep for he daily show, shop for groceries and then carry it  all into the Wichita station where she would then set up for her “Food Fiesta” segment. She did all this clad in the latest fashions and her trademark high heels! 

Although no photos of Esther appeared in the article, these are a few from Sally’s collection that she did share with me. 

Above: Fashionably dressed Mrs. Womer demonstrating the finer points of outdoor
grilling on KARD-TV's “Food Fiesta” segment. Circa late 1950s.
Below left: Mrs. Womer on-the-set with one of the TV station's sponsors.
Below right: Mrs.Womer at home with her husband in their Wichita kitchen.


Hot Bread Kitchen's Nan-e Barbari (Persian Flatbread)

King Arthur’s #ExtraordinaryBread challenge has inspired me to try all kinds of new breads including this Persian flatbread. Their website describes it this way . . .a chewy (definitely CHEWY), flavorful flatbread, brushed with an interesting oil-and-flour glaze and topped with two kinds of seeds. Higher-protein unbleached bread flour, plus lots of water in the dough, give the bread wonderfully light texture. Next time I might divide the dough into thirds and make 3 flatbreads.

King Arthur Baking Company recommends this bread as a accompaniment to a Middle Easter meal but it was delicious with Vegetable Beef & Barley Soup — a Persian-American fusion of tastes. 

Hot Bread Kitchen's Nan-e Barbari (Persian Flatbread)   Yield: 2 loaves

PREP =20 mins / BAKE =15 to 18 mins / TOTAL - 2 hrs 5 min

INGREDIENTS

Dough

1 2/3 to 1 3/4 cups (379g to 397g) water, lukewarm*

2 1/4 teaspoons active dry yeast or instant yeast

4 cups + 3 tablespoons (510g) King Arthur Unbleached Bread Flour

1 1/2 teaspoons (9g) salt

Semolina flour, for dusting (optional)

*Use the smaller amount of water in summer, or when it's humid; the larger amount during the winter, or in a dry climate.

Glaze

2 teaspoons King Arthur Unbleached All-Purpose Flour or King Arthur Unbleached Bread Flour

1/2 teaspoon granulated sugar

1/2 teaspoon vegetable oil

1/3 cup (74g) water, cool

Topping

1 teaspoon sesame seeds

1 teaspoon nigella (black onion) seeds*

*Substitute poppy seeds or the seeds of your choice if you can't find nigella seeds.


INSTRUCTIONS

1.  To make the dough: Mix the water, yeast, flour, and salt until well combined. 

2.   Knead the mixture — using your hands, a stand mixer, or your bread machine set on the dough cycle — until you've made a smooth, fairly soft dough (about 5 to 8 minutes if kneading by hand). The dough should barely clean the inside of the bowl, if you're using a stand mixer, perhaps sticking just a bit at the bottom.

3.   Put the dough in a lightly greased large bowl, cover the bowl, and let the dough rise until it's nearly doubled in size, about 1 hour.

After rising.

4.  Transfer the dough to a lightly floured work surface. Gently deflate the dough, and divide it into two pieces.

5.   Shape each piece into a rough log about 9" long. Tent (gently cover) the logs with lightly greased plastic wrap, and allow them to rest for 30 minutes.

6.   Preheat the oven to 450°F. If using a baking sheet, position a rack in the middle of the oven OR, if you prefer using a pizza stone, set it on the lowest rack or oven floor. 

7.   To prepare the glaze: Combine the flour, sugar, oil, and water in a small saucepan, bring to a bare boil, and cook over medium heat, stirring constantly, until the mixture thickens and coats the spoon; this should take less than a minute. Remove the glaze from the heat, and set it aside.

8.   Working with one piece at a time, gently deflate the dough and pat/flatten it into a 14" x 5" rectangle. I shaped it on a sheet of sprayed parchment for easy transfer to my baking sheet. King Arthur says—If you're using a pizza stone, transfer the dough to a semolina-dusted surface (a baker's peel is helpful here) or a piece of parchment paper. 

9.  Use your fingers (or the handle of a long wooden spoon) to press five lengthwise grooves into the dough. Press firmly, but don't cut through the bottom of the dough.

10. Spread half the glaze onto the dough, rubbing it all over. Sprinkle with half the seeds.

11. Transfer the parchment to the baking sheet and bake for 15 to 18 minutes, until it’s golden brown.  

       OR, slide the bread onto the stone and bake it for 15 to 18 minutes.

12. While the first loaf is baking, prepare the second loaf. Bake as directed.

13. Remove the bread, and cool it on a rack.

14. Serve warm, or at room temperature; traditional accompaniments are olives, cucumbers, and feta cheese.

15. Store leftovers, well wrapped, for several days at room temperature; freeze for longer storage.

Explanation from KA: What's with the flour/water glaze? This is a traditional solution to "steaming" your oven. The roomal (flour paste) applies moisture directly to the surface of the bread as it bakes, allowing it to rise fully; it also gives the crust a satiny shine.


Recipe without photos . . .Hot Bread Kitchen's Nan-e Barbari (Persian Flatbread)   Yield: 2 loaves

PREP =20 mins / BAKE =15 to 18 mins / TOTAL - 2 hrs 5 min

INGREDIENTS

Dough

1 2/3 to 1 3/4 cups (379g to 397g) water, lukewarm*

2 1/4 teaspoons active dry yeast or instant yeast

4 cups + 3 tablespoons (510g) King Arthur Unbleached Bread Flour

1 1/2 teaspoons (9g) salt

Semolina flour, for dusting (optional)

*Use the smaller amount of water in summer, or when it's humid; the larger amount during the winter, or in a dry climate.

Glaze

2 teaspoons King Arthur Unbleached All-Purpose Flour or King Arthur Unbleached Bread Flour

1/2 teaspoon granulated sugar

1/2 teaspoon vegetable oil

1/3 cup (74g) water, cool

Topping

1 teaspoon sesame seeds

1 teaspoon nigella (black onion) seeds*

*Substitute poppy seeds or the seeds of your choice if you can't find nigella seeds.

INSTRUCTIONS

1.   To make the dough: Mix the water, yeast, flour, and salt until well combined. 

2.   Knead the mixture — using your hands, a stand mixer, or your bread machine set on the dough cycle — until you've made a smooth, fairly soft dough (about 5 to 8 minutes if kneading by hand). The dough should barely clean the inside of the bowl, if you're using a stand mixer, perhaps sticking just a bit at the bottom.

3.   Put the dough in a lightly greased large bowl, cover the bowl, and let the dough rise until it's nearly doubled in size, about 1 hour.

4.  Transfer the dough to a lightly floured work surface. Gently deflate the dough, and divide it into two pieces.

5.   Shape each piece into a rough log about 9" long. Tent (gently cover) the logs with lightly greased plastic wrap, and allow them to rest for 30 minutes.

6.   Preheat the oven to 450°F. If using a baking sheet, position a rack in the middle of the oven OR, if you prefer using a pizza stone, set it on the lowest rack or oven floor. 

7.   To prepare the glaze: Combine the flour, sugar, oil, and water in a small saucepan, bring to a bare boil, and cook over medium heat, stirring constantly, until the mixture thickens and coats the spoon; this should take less than a minute. Remove the glaze from the heat, and set it aside.

8.  Working with one piece at a time, gently deflate the dough and pat/flatten it into a 14" x 5" rectangle. I shaped it on a sheet of sprayed parchment for easy transfer to my baking sheet. King Arthur says—If you're using a pizza stone, transfer the dough to a semolina-dusted surface (a baker's peel is helpful here) or a piece of parchment paper. 

9.  Use your fingers (or the handle of a long wooden spoon) to press five lengthwise grooves into the dough. Press firmly, but don't cut through the bottom of the dough.

10. Spread half the glaze onto the dough, rubbing it all over. Sprinkle with half the seeds.

11. Transfer the parchment to the baking sheet and bake for 15 to 18 minutes, until it’s golden brown.  

       OR, slide the bread onto the stone and bake it for 15 to 18 minutes.

12. While the first loaf is baking, prepare the second loaf. Bake as directed.

13. Remove the bread, and cool it on a rack.

14. Serve warm, or at room temperature; traditional accompaniments are olives, cucumbers, and feta cheese.

15. Store leftovers, well wrapped, for several days at room temperature; freeze for longer storage.

Explanation from KA: What's with the flour/water glaze? This is a traditional solution to "steaming" your oven. The roomal (flour paste) applies moisture directly to the surface of the bread as it bakes, allowing it to rise fully; it also gives the crust a satiny shine.

Cuisine’s English Muffins made with bread flour

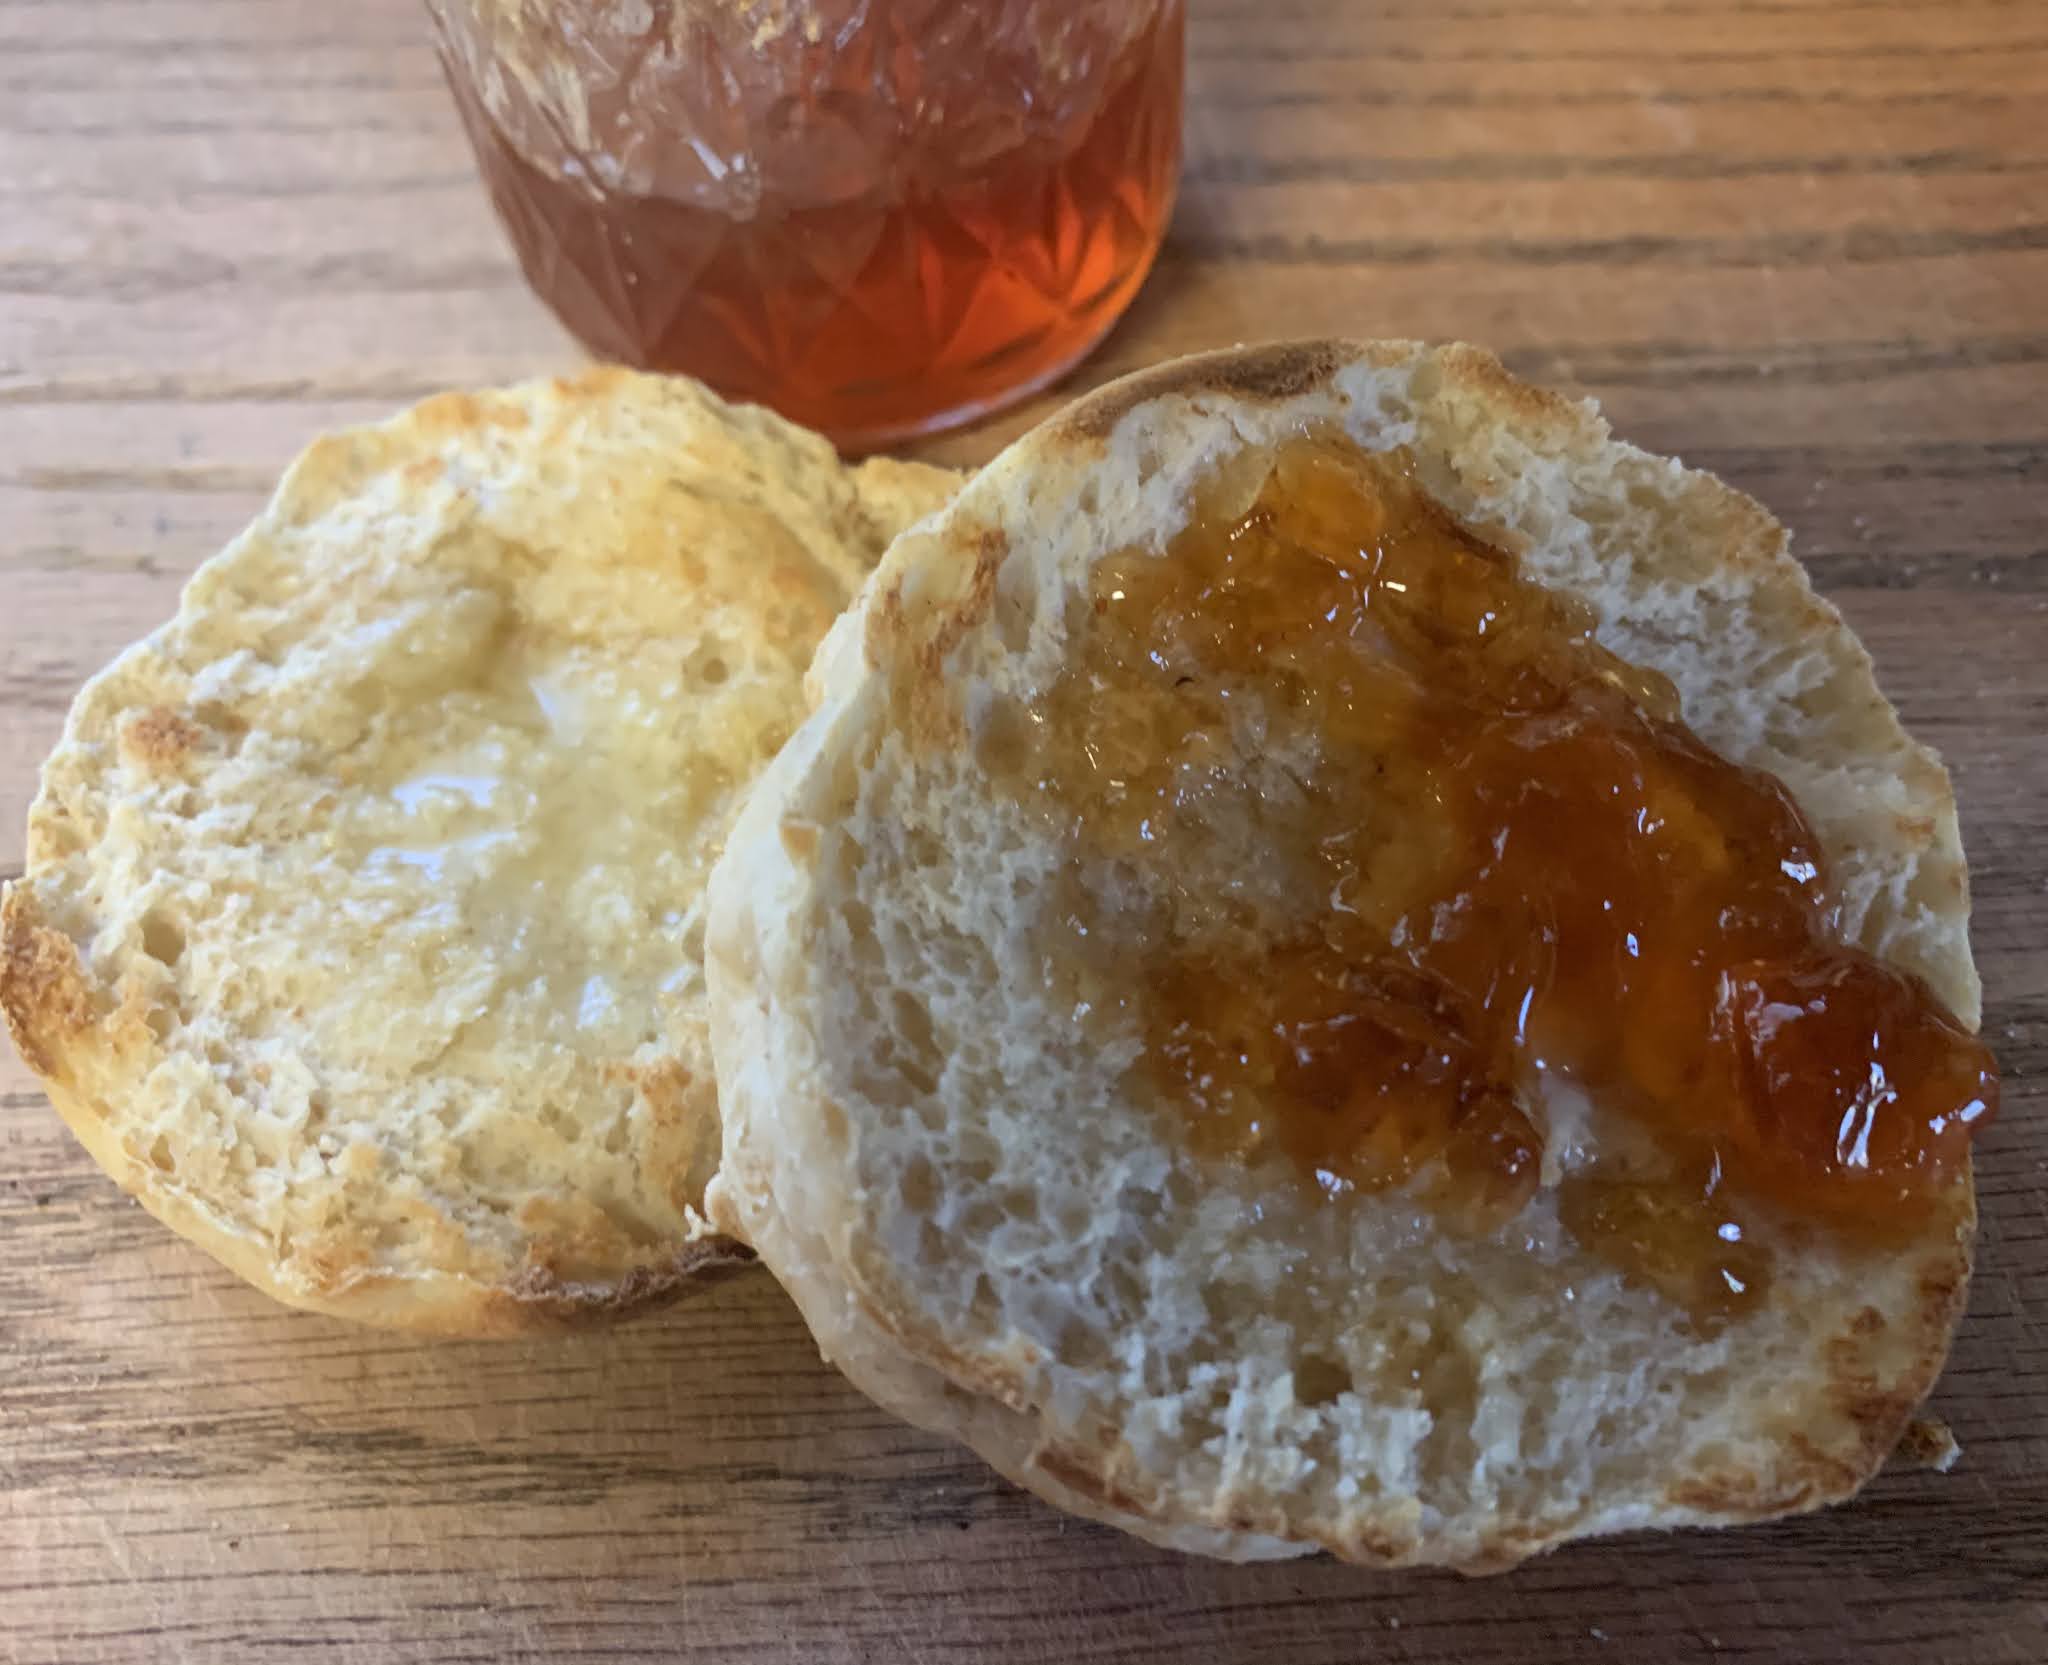
Toasted English Muffins slathered with butter and jelly — a great way to start the month of March!  When Barry dog-eared a recipe in the latest Cuisine At Home magazine (Spring 2021), it inspired our Sunday afternoon project. I’ve made English Muffins before but he thought he’d like to try his hand. Normally he’s not a bread baker but the top-of-the-oven dry frying appealed to him. 


Marching into March with a freshly toasted English Muffin w/ butter & Sand Plum Jelly.

Cuisine recommends using bread flour. Here’s why. Using bread flour aids in giving the muffins a chewy texture. Plus, you’re only using the minimal amount of flour, which means there’s optimal hydration, resulting in a soft dough that helps ensure the development of those desirable nooks and crannies. 


Cuisine’s English Muffins    Original recipe make 12 muffins using a 3” cutter; we used a 2 1/2" cutter for a yield of 15. 

1 1/2 cup lukewarm milk (I heated it to 120° F)

1 egg, lightly beaten 

3 3/4 cups unbleached bread flour + more for dusting work surface (we replaced 1/2 cup with whole wheat flour)

2 tablespoons unsalted butter

4 teaspoons granulated sugar

2 teaspoons instant yeast

1 teaspoon table salt

Semolina or farina flour (we used semolina but cornmeal could be used if you these are not available)

  1. Combine milk, egg, bread flour, butter, sugar, yeast and salt in the bowl of a stand mixer fitted with the paddle attachment; beat on medium-high speed until dough starts pulling away from the sides of the bowl and is smooth and shiny, about 5 minutes. (When you lift the paddle attachment from the bowl, the dough should be stretchy and soft.)
  2. Transfer dough to a lightly greased/oiled bowl, cover and let rise in a warm place until doubled in size 1 to 2 hours (ours was ready in 1 hour).
    Above: Before rise. Below: After rise.
  3. Generously dust a baking sheet with semolina flour.
  4. Lightly dust work surface with bread flour and semolina. 
  5. Gently deflate dough and either 1) roll the dough until 1” thick; cut dough with 3” round cutters, rerolling if needed to yield 12 muffins (we used a 2 1/2” cutter and cut 15) OR 2) divide dough into 12 equal pieces. Shape each dough piece into a smooth ball, then flatten into a 3 to 3 1/2" disk, about 1” thick. 

  6. Place muffins on prepared baking sheet and sprinkle tops with semolina. 
  7. Cover muffins with a sheet of parchment and let rest 30 minutes (muffins will puff slightly).
  8. Preheat oven to 350°. Heat a griddle or cast-iron skillet over low; generously coat with semolina. (We eventually turned our griddle up to medium and watched the muffins carefully; we saw little browning at the low setting.)
  9. Cook muffins, in two or three batches, on griddle until golden brown and sides aren’t squishy, 8 to 12 minutes per side. (We used 2 griddles and cooked them all at once.)

  10. Muffins are fully cooked when a thermometer inserted into centers registers about 200° F. If muffin exteriors are browned but the interior isn’t to temp, place them in the oven and bake muffins until fully cooked, 8 to 10 minutes. (It took more like 10 to 20 minutes for our muffins to get up to temp.)
  11. Transfer muffins to a cooling rack to cool completely.
  12. And finally, here’s how to prepare an English Muffin – USE A FORK, not a knife, to split open your muffins. Using a fork keep those coveted nooks and crannies for butter, knife cut muffins won’t.

Recipe without photos  . . . Cuisine’s English Muffins    Original recipe make 12 muffins using a 3” cutter; we used a 2 1/2" cutter for a yield of 15. 

1 1/2 cup lukewarm milk (I heated it to 120° F)

1 egg, lightly beaten 

3 3/4 cups unbleached bread flour + more for dusting work surface (we replaced 1/2 cup with whole wheat flour)

2 tablespoons unsalted butter

4 teaspoons granulated sugar

2 teaspoons instant yeast

1 teaspoon table salt

Semolina or farina flour (we used semolina but cornmeal could be used if you these are not available)

  1. Combine milk, egg, bread flour, butter, sugar, yeast and salt in the bowl of a stand mixer fitted with the paddle attachment; beat on medium-high speed until dough starts pulling away from the sides of the bowl and is smooth and shiny, about 5 minutes. (When you lift the paddle attachment from the bowl, the dough should be stretchy and soft.)
  2. Transfer dough to a lightly greased/oiled bowl, cover and let rise in a warm place until doubled in size 1 to 2 hours (ours was ready in 1 hour).
  3. Generously dust a baking sheet with semolina flour.
  4. Lightly dust work surface with bread flour and semolina. 
  5. Gently deflate dough and either 1) roll the dough until 1” thick; cut dough with 3” round cutters, rerolling if needed to yield 12 muffins (we used a 2 1/2” cutter and cut 15) OR 2) divide dough into 12 equal pieces. Shape each dough piece into a smooth ball, then flatten into a 3 to 3 1/2" disk, about 1” thick. 
  6. Place muffins on prepared baking sheet and sprinkle tops with semolina. 
  7. Cover muffins with a sheet of parchment and let rest 30 minutes (muffins will puff slightly).
  8. Preheat oven to 350°. Heat a griddle or cast-iron skillet over low; generously coat with semolina. (We eventually turned our griddle up to medium and watched the muffins carefully; we saw little browning at the low setting.)
  9. Cook muffins, in two or three batches, on griddle until golden brown and sides aren’t squishy, 8 to 12 minutes per side. (We used 2 griddles and cooked them all at once.)
  10. Muffins are fully cooked when a thermometer inserted into centers registers about 200° F. If muffin exteriors are browned but the interior isn’t to temp, place them in the oven and bake muffins until fully cooked, 8 to 10 minutes.  (It took more like 10 to 20 minutes for our muffins to get up to temp.)
  11. Transfer muffins to a cooling rack to cool completely.
  12. And finally, here’s how to prepare an English Muffin – USE A FORK, not a knife, to split open your muffins. Using a fork keep those coveted nooks and crannies for butter, knife cut muffins won’t.