Cuisine at Home's Naturally Leavened Sourdough Starter

I’ve made a simple sourdough starter over the years . . . a quick mix of all-purpose flour, water and yeast that ferments overnight. But, I had never made naturally leavened sourdough starter (Quick Overnight Sourdough Starter). Upon receiving our latest issue (spring 2023, issue #154), I read with care the rather daunting instructions for the preparation of their version of starter . . . and then I put it aside. But, obviously I did not forget it as several weeks ago, I began on a naturally leavened sourdough starter journey . . . and it is a journey! As instructed I mixed rye flour (1 cup) with 1/2 cup water, a mess that I equated more to cement than the possibility of starter! However, I loosely covered it and l left it overnight with the expectation that I’d throw away my experiment in the a.m. Low and behold, it was bubbly the next morning. For a week I fed and discarded the excess, once and then eventually twice a day. It may have been a tedious process but it created an outstanding sourdough that I continue to care for—just once a week these days. Currently I’ve made several recipes using the “discard” and continue to amass a file of recipes on Pinterest. It’s been an interesting process. I might add, we've subscribed to Cuisine at Home for years and have most of their magazines. There easy-to-follow recipes are inspiring. Recipes run the spectrum from easy to complicated and challenging . . . but the later are always accompanied by step-by-step instructions. It is the one cooking magazine we've continued to subscribe to over the years. 


Recipes I've made using this starter . . . these recipes rely only on starter with 

no added commercial yeast: 

Nutty Sourdough Waffles

Cuisine at Home's Naturally Leavened Sourdough Bread

Sourdough Cinnamon Rolls

Sourdough Focaccia

Easy Naturally Leavened Sourdough Bread Recipe


I did wonder about using rye flour for the initial flour in the starter so looked it up and here's what I found — Naturally rich in amylases, nutrients, and microbes, rye flour enables a starter to quickly convert sugars for faster, more efficient fermentation.


Cuisine at Home's Naturally Leavened Sourdough Starter 

Starter:

113 grams (1 cup) organic rye flour

113 grams (1/2 cup) water


Standard Feeder:

113 grams (1 cup) unbleached all-purpose flour

113 grams (1/2 cup) water


Day 1: Stir together 113g (1 c.) rye and 113g water until there’s no dry flour; loosely cover and let rest at room temp (70° F.) for 24 hours.


Day 2: You might see bubbles, but it’s OK if you don’t. Discard half the starter (113g/1/2 cups); add standard feed (113g or 1 cup flour + 113g or 1/2 cup water) and mix well. Cover starter; let rest at room temp for 24 hours.


Day 3: You’ll probably begin to see some bubbling, smell a fresh, fruity aroma, and see some expansion. Start feeding twice a day (about every 12 hours). Begin each feeding with 113g starter or 1/2 cup (discard excess) + standard feeder. Cover starter; let rest at room temp.


Day 4-7 (or more): Your starter should be doubled with lots of bubbles by end of day 5. If not, don’t worry. Continue to discard and feed starter every 12 hours on days 4-7 (or more) until vigorous.


Once vigorous, discard all by 113g/1/2 cup starter; feed it and let rest at room temp 6-8 hours. Remove starter needed for recipe (if more than 1 cup needed, add standard feeder without discarding a couple times until you have enough for the recipe plus 113g/1/2 cup to keep and feed again).


Reserve 113g/1/2 cup starter in its permanent home (vessel). Feed it and  let it rest at room temp several hours before covering; store in the refrigerator and feed it once per week (for longer storage, freeze and don’t feed it). 


Cuisine at Home's Naturally Leavened Sourdough Bread

Cuisine at Home's Naturally Leavened Sourdough Bread is made from their starter and utilizes a no-knead, stretch-and-pull procedure. Like their sourdough starter recipe, this takes a big chunk of a day and a bit of effort. It does include an option that allows you to prepare the bread one day and bake it the next. 

Cuisine at Home's Naturally Leavened Sourdough Bread   Yield: 1 round loaf

500 grams bread flour with a 12-13% protein count, such as King Arthur brand

350 grams (1 1/2 cups) water

50 grams (1/4 cup) sourdough starter

10 grams (1 1/2 tsp.) kosher salt

All-purpose or rice flour

  1. Combine bread flour, water, starter and salt in a bowl until it comes together into a rough, shaggy dough; cover and let rise 30 minutes.
  2. Pull, lift and stretch a small handful of dough from one edge across the rest of the dough; slightly turn bowl. Repeat pulling, lifting and stretching dough and turning bowl until dough feels less sticky and forms an almost smooth ball. 
  3. Cover dough; let rest in a warm place for 45 minutes.
  4. Repeat pulling, lifting and stretching dough, and turning bowl procedure every 45 minutes for a total of 3 times. (The dough should be bouncy and smooth.)
  5. Place dough (after the last set of procedures) back in a warm place to rise until doubles is size, about 3 hours. 
  6. Sprinkle banneton with a combination of all-purpose and rice flour or sprouted wheat flour* (or add a liner) once dough doubles in size.
  7. Turn dough onto floured surface; shape by pulling edges together to form a ball.
  8. Transfer dough to prepared banneton, smooth side down. Sprinkle sides and top of dough with all-purpose flour; cover and refrigerate 3 to 24 hours. 
  9. Preheat oven to 450°F with a 5- to 7-quart covered Dutch oven inside for at least 30 minutes before dough is ready.
  10. Remove dough from refrigerator; uncover. Place parchment over dough, flip onto parchment and set on counter. Score top of dough with lame or sharp knife, cutting about 3/8” deep. 
  11. Carefully remove Dutch oven from oven; remove lid. Transfer dough with parchment to Dutch oven, allowing excess parchment to hang over edges. Cover Dutch oven.
  12. Bake bread 40 minutes; carefully remove lid and continue baking until center registers 207-209° (on an instant read thermometer), about 10 minutes more.
  13. Carefully remove bread from Dutch oven; discard parchment. 
  14. Transfer bread to a rack to cool completely, about 2 hours.
*All-purpose flour tend to absorb too much of the moisture and make the dough stick to the banneton. A 50/50 blend of rice flour and all-purpose flour or sprouted wheat flour is the ideal combination for dusting. 

Recipe without photos . . . Cuisine at Home's Naturally Leavened Sourdough Bread   Yield: 1 loaf

500 grams bread flour with a 12-13% protein count, such as King Arthur brand

350 grams (1 1/2 cups) water

50 grams (1/4 cup) sourdough starter

10 grams (1 1/2 tsp.) kosher salt

All-purpose or rice flour

  1. Combine bread flour, water, starter and salt in a bowl until it comes together into a rough, shaggy dough; cover and let rise 30 minutes.
  2. Pull, lift and stretch a small handful of dough from one edge across the rest of the dough; slightly turn bowl. Repeat pulling, lifting and stretching dough and turning bowl until dough feels less sticky and forms an almost smooth ball. 
  3. Cover dough; let rest in a warm place for 45 minutes.
  4. Repeat pulling, lifting and stretching dough, and turning bowl procedure every 45 minutes for a total of 3 times. (The dough should be bouncy and smooth.)
  5. Place dough (after the last set of procedures) back in a warm place to rise until doubles is size, about 3 hours. 
  6. Sprinkle banneton with a combination of all-purpose and rice flour or sprouted wheat flour (or add a liner) once dough doubles in size.
  7. Turn dough onto floured surface; shape by pulling edges together to form a ball.
  8. Transfer dough to prepared banneton, smooth side down. Sprinkle sides and top of dough with all-purpose flour; cover and refrigerate 3 to 24 hours. 
  9. Preheat oven to 450°F with a 5- to 7-quart covered Dutch oven inside for at least 30 minutes before dough is ready.
  10. Remove dough from refrigerator; uncover. Place parchment over dough, flip onto parchment and set on counter. Score top of dough with lame or sharp knife, cutting about 3/8” deep. 
  11. Carefully remove Dutch oven from oven; remove lid. Transfer dough with parchment to Dutch oven, allowing excess parchment to hang over edges. Cover Dutch oven.
  12. Bake bread 40 minutes; carefully remove lid and continue baking until center registers 207-209° (on an instant read thermometer), about 10 minutes more.
  13. Carefully remove bread from Dutch oven; discard parchment. 
  14. Transfer bread to a rack to cool completely, about 2 hours.
*All-purpose flour tend to absorb too much of the moisture and make the dough stick to the banneton. A 50/50 blend of rice flour and all-purpose flour or sprouted wheat flour is the ideal combination for dusting. 

CREAMY MANGO-MARMALADE PULLED CHICKEN SLIDERS/Sandwiches or served over rice

Barry received a couple of jars of mango-pepper jelly and this recipe from fraternity brother Greg Stuart . . . along with this recipe he printed from J.M. Hirsch, Associated Press. We served the chicken filling on toasted sourdough bread. In addition, we served the filling over rice the next day. Both were yummy.  

Sandwich version


Chicken Mixture served over rice with sliced radishes and cilantro garnishes.


CREAMY MANGO-MARMALADE PULLED CHICKEN SLIDERS/Sandwiches
Ingredients:
2 1/2 pound boneless, skinless chicken breasts
4 cups chicken broth
13 1/2-ounce jar mango-pepper jelly 

1/2 cup orange marmalade
1/4 cup apple cider vinegar
1 teaspoon ground cumin
1 teaspoon sweet or smoked paprika
1 teaspoon garlic powder
1 teaspoon salt
1/2 teaspoon ground black pepper
1 cup sour cream
16-ounce package shredded cabbage coleslaw mix
2/3 cup mayonnaise
Hot sauce, to taste
12 dinner rolls or other small buns, split

  1. In a large saucepan over medium-high, combine the chicken, broth, jelly, marmalade, vinegar, cumin, paprika, garlic powder, salt and pepper. Bring to a simmer, then cook, uncovered, for 45 minutes. Transfer the chicken to a cutting board. Continue cooking the sauce for another 10 minutes, or until considerably reduced and thickened.
  2. Meanwhile, use 2 sets of tongs or 1 set and a fork to pull apart and shred the chicken breasts. Once the liquid has reduced, return the chicken to the saucepan and mix with the sauce. Simmer until heated through, then remove the pan from the heat.
  3. Stir in the sour cream, then set aside.
  4. In a medium bowl, mix together the coleslaw mix, mayonnaise and hot sauce.
  5. Serve the chicken on the buns topped with coleslaw.


Greek Summer Salad

Light, refreshing and a recipe that allows us to use garden produce. I halved this recipe and serviced it with sandwiches for a light summer supper. 

 Assembed salad, ready to refrigerate.
Salad Dressing mixture.


Greek Summer Salad

Vegetables:

1 English cucumber

1 orange, yellow or red bell pepper, diced

1 cup cherry tomatoes, halved

1/2 red onion, thinly sliced

1/2 cup pitted kalamata olives

A few torn pieces of fresh oregano, optional

Salad Dressing:

1/2 cup olive oil

1/4 cup red wine vinegar

1 lemon, juiced

3 cloves garlic, minced

1 teaspoon Dijon mustard 

2 to 3 teaspoons fresh oregano, chopped or 1 tsp. dried

1 teaspoon kosher salt

1/2 teaspoon cracked pepper

  1. Vegetables: Slice the cucumber in half lengthwise and then into chunks.
  2. Add the cucumber to a mixing bowl along with the diced peppers, cherry tomatoes, sliced onion, olives, and oregano leaves.
  3. Dressing: Whisk together all of the ingredients for the dressing and taste for flavor. Adjust seasonings to taste. 
  4. Assemble: Pour dressing over the vegetables and toss to combine.
  5. Cover and refrigerate for one hour or longer to allow flavors to develop. 
  6. Serve cold or at room temperature.

A good book and a recipe — Mrs. Santa’s Crunchy Cheese Cracker found in “Forget What You Know”

It’s always fun for me to discover a recipe at the end of a good book. As I read Christina Dodd’s “Forget What You Know,” crunchy cheese crackers repeatedly were mentioned so I was thrilled to discover a link to the recipe at the end of the book. Despite already having several recipes for really good cheese crackers, I was intrigued by the addition of corn flakes to the usual cheese cracker ingredients, the addition that adds the crunch. Another positive about these cheesy delights is the fact that they are slice and bake crackers so can be made ahead (unbaked logs can even be frozen) and then bakeds on an as needed basis. 

Dodd’s description preceding the recipe includes: In the small town of Gothic, California, Mrs. Santa’s tearoom is decorated (or over-decorated) in Christmas dĆ©cor: “walls covered with framed Christmas prints, Christmas-themed ceramics, English porcelain Christmas-painted plates on decorative hangers. Santas decorated the light switches. Painted evergreen branches climbed the table legs and Christmas tree bulbs dotted the wallpaper.” Mrs. Santa serves the usual tearoom fare: delicate sandwiches with no crusts, curried chicken salad, scones with clotted cream and lemon curd and, of course, steaming hot tea served in Santa teapots. Her piĆØce de rĆ©sistance is a Santa plate filled with her famous cheese wafers. They have a special crunch."


The recipe appears exactly as printed on Dodd’s website. Check out her other recipes, too. 


Mrs. Santa’s Crunchy Cheese Cracker

1 ½ cups shredded extra sharp cheddar cheese (1/3 lb.)

½ cup unsalted butter, softened—Mrs. Santa uses Kerrygold

1 cup all purpose flour

½ teaspoon salt

½ teaspoon dried mustard

½ teaspoon cayenne (less or more depends on your taste)

1 teaspoon Worcestershire sauce

1 ½ cups corn flakes cereal, crushed

Ice water 

  1. Process cheese and butter in food processor until blended. 
  2. Add flour, salt, dried mustard and cayenne. Pulse until blended. 
  3. Add cereal, process until blended. Add Worcestershire sauce.
  4. Here’s the tricky part. Add ice water, one tablespoon at a time, and toss lightly. How much?Depends on where you live and the time of year. Humidity makes a huge difference. What you’re looking for is the mixture to cling together when you press it between your palms. If you make your own pie dough, think of that. 

  5. I divided the dough into 2 logs. 
    Once you get that consistency, roll it into a one inch diameter log, wrap it in plastic wrap and refrigerator for at least four hours.
  6. When you’re ready to bake, heat oven to 350 ° F. 
  7. Cut log with a serrated knife into wafers. 
  8. Bake on a sheet 12 to 14 minutes until lightly browned. Cool on wire rack. Store in airtight container (they are fragile!) and serve them on a Santa plate to your best friends.
  9. When you’re ready to bake, heat oven to 350 degrees Fahrenheit. Cut log with a serrated knife into wafers. Bake on a sheet 12-14 minutes until lightly browned. Cool on wire rack. Store in airtight container (they are fragile!) and serve them on a Santa plate to your best friends.Mrs. Santa’s crackers freeze well, make delightful gifts. 
Recipe without photos . . . Mrs. Santa’s Crunchy Cheese Cracker

1 ½ cups shredded extra sharp cheddar cheese (1/3 lb.)

½ cup unsalted butter, softened—Mrs. Santa uses Kerrygold

1 cup all purpose flour

½ teaspoon salt

½ teaspoon dried mustard

½ teaspoon cayenne (less or more depends on your taste)

1 teaspoon Worcestershire sauce

1 ½ cups corn flakes cereal, crushed

Ice water 

  1. Process cheese and butter in food processor until blended. 
  2. Add flour, salt, dried mustard and cayenne. Pulse until blended. 
  3. Add cereal, process until blended. Add Worcestershire sauce.
  4. Here’s the tricky part. Add ice water, one tablespoon at a time, and toss lightly. How much?Depends on where you live and the time of year. Humidity makes a huge difference. What you’re looking for is the mixture to cling together when you press it between your palms. If you make your own pie dough, think of that. 
  5. Once you get that consistency, roll it into a one inch diameter log, wrap it in plastic wrap and refrigerator for at least four hours.
  6. When you’re ready to bake, heat oven to 350 ° F.t. 
  7. Cut log with a serrated knife into wafers. 
  8. Bake on a sheet 12 to 14 minutes until lightly browned. Cool on wire rack. Store in airtight container (they are fragile!) and serve them on a Santa plate to your best friends.
  9. When you’re ready to bake, heat oven to 350 degrees Fahrenheit. Cut log with a serrated knife into wafers. Bake on a sheet 12-14 minutes until lightly browned. Cool on wire rack. Store in airtight container (they are fragile!) and serve them on a Santa plate to your best friends.Mrs. Santa’s crackers freeze well, make delightful gifts. 

Virginia Hoffman’s Favorite Banana Bread

Virginia describes this recipe as a favorite. I’ve actually had this recipe since 2008 but I just made it recently after Virginia mentioned it again. It’s a favorite she says because it is so simple and always turns out just right. Truthfully, I have (make that had) a fear of banana bread! Past experiences tended to yield unevenly baked loaves with sunken centers . . . for some unidentifiable reason! Taking Virginia at her word, I made her recipe and now I can say that I’ve mastered banana bread. The recipe is truly easy and delicious, too. 

Loaf is almost ready to deliver to Virginia. Her hand written recipe is in the forefront. 

Virginia Hoffman’s Favorite Banana Bread     Makes one 8” x 4” loaf .

3 ripe bananas (or 4 if small)

1 cup granulated sugar

1 egg

1 1/2 cups all-purpose flour

1/4 cup (or 1/2 stick) melted margarine/butter

1 teaspoon baking soda

1/2 teaspoon salt

1/2 cup chopped nuts

  1. Preheat oven to 325°.
  2. Mash bananas in a mixing bowl and then add remaining ingredients and mix.  
    I mixed the quick bread by hand in a mixing bowl.
  3. Pour into a greased 8” x 4” loaf pan. 
  4. Bake in preheated oven for 1 hour or until toothpick inserted in the center comes out clean. Note: In order to be sure the center is done—insert an instant read thermometer into the center of the loaf; it should register an internal temperature between 200 to 205° F. 
    I did line the loaf pan with sprayed parchment paper that I cut to overhang the pan . . . for easy removal of the loaf. 

    Also check out Virginia's Cheese Pie recipe on the post celebrating her 101st birthday!

Recipe without photos . . . Virginia Hoffman’s Favorite Banana Bread     Makes one 8” x 4” loaf .

3 ripe bananas (or 4 if small)

1 cup granulated sugar

1 egg

1 1/2 cups all-purpose flour

1/4 cup (or 1/2 stick) melted margarine/butter

1 teaspoon baking soda

1/2 teaspoon salt

1/2 cup chopped nuts

  1. Preheat oven to 325°.
  2. Mash bananas in a mixing bowl and then add remaining ingredients and mix.  
  3. Pour into a greased 8” x 4” loaf pan. 
  4. Bake in preheated oven for 1 hour or until toothpick inserted in the center comes out clean. Note: In order to be sure the center is done—insert an instant read thermometer into the center of the loaf; it should register an internal temperature between 200 to 205° F. 

Strawberry Cake Roll

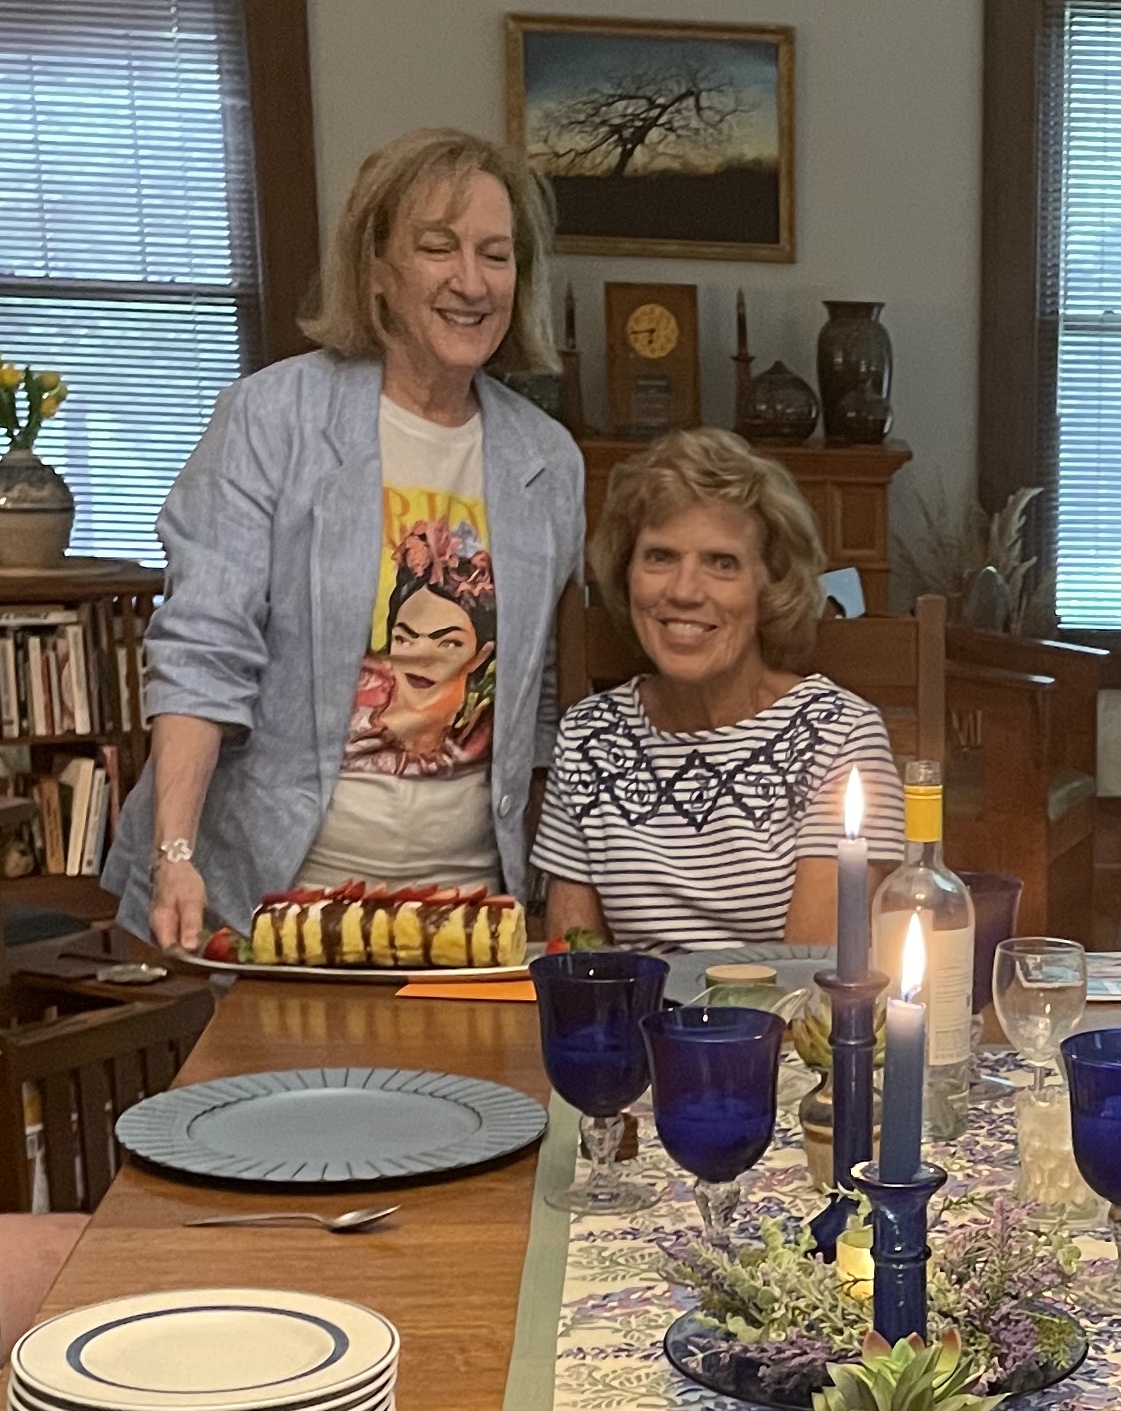
The summertime cake is light, laden with strawberries and a great way to celebrate a birthday! 


Strawberry Cake Roll

Cake

5 egg yolks room temperature

2 tablespoons vegetable oil

3 tablespoons milk

1 teaspoon vanill

1 cup granulated sugar divided

1 tablespoons lemon zest

¾ cup all purpose flour

2 tablespoons cornstarch

1 teaspoon baking powder

¼ teaspoon salt

4 egg whites room temperature


Filling

1 (8 oz. pkg.) cream cheese, softened

4 tablespoons butter, softened

1 cup powdered sugar

2 teaspoons maple syrup

1 teaspoon vanilla 

!/2 cup finely diced  strawberries


Garnishing &/or Serving

Additional Strawberries (could also include blueberries, etc. 

Fresh Mint 

Ice Cream or Sweetened whipped Cream

  1. Preheat oven to 350°F
  2. Cake: Spray a 12x17-inch rimmed baking sheet and line with parchment paper. Grease the parchment paper with butter. Set aside.
  3. In a medium bowl, whisk together the egg yolks, oil, milk, vanilla extract, two-thirds cup of sugar, and lemon zest if using.
  4. In a small bowl, whisk together the flour, cornstarch, baking powder and salt.
  5. Stir dry ingredients into the wet just until combined.
  6. In a medium bowl, beat egg whites on med-high until soft peaks form (1 to 2 minutes). Add the remaining one-third cup of sugar and continue beating on med-high speed until stiff peaks form (another 1 to 2 minutes).
  7. Fold egg whites into the batter until fully incorporated.
  8. Pour batter onto prepared baking sheet and bake for 15 minutes or until the top of the cake is light brown. Let cool completely.
    Cake batter ready to go into the oven. 

  9. Filling: Using an electric mixer, beat the cream cheese, powdered sugar, maple syrup and butter. until light and fluffy. 
  10. Spread filling over cooled cake evenly, leaving about 1/2 inch on the border. Sprinkle with strawberries.
  11. Carefully, roll the cake, starting from the short end. Peel away or remove the parchment paper as you roll.
  12. Once rolled, position the seam so it is on the bottom; sprinkle with a little extra powdered sugar and then wrap the cake with plastic wrap and chill in refrigerator for about 1 hour. Or, cover and freeze if preferred. 
  13. Once chilled, unwrap the roll. Cut ends with a sharp knife. Dust with confectioner's sugar and top with strawberries and fresh mint. Serve with ice cream or sweetened whipped cream.


Recipe without photos . . .Strawberry Cake Roll

Cake

5 egg yolks room temperature

2 tablespoons vegetable oil

3 tablespoons milk

1 teaspoon vanilla

1 cup granulated sugar divided

1 tablespoons lemon zest

¾ cup all purpose flour

2 tablespoons cornstarch

1 teaspoon baking powder

¼ teaspoon salt

4 egg whites room temperature


Filling

1 (8 oz. pkg.) cream cheese, softened

4 tablespoons butter, softened

1 cup powdered sugar

2 teaspoons maple syrup

1 teaspoon vanilla 

!/2 cup finely diced  strawberries


Garnishing &/or Serving

Additional Strawberries (could also include blueberries, etc. 

Fresh Mint 

Ice Cream or Sweetened whipped Cream

  1. Preheat oven to 350°F
  2. Cake: Spray a 12x17-inch rimmed baking sheet and line with parchment paper. Grease the parchment paper with butter. Set aside.
  3. In a medium bowl, whisk together the egg yolks, oil, milk, vanilla extract, two-thirds cup of sugar, and lemon zest if using.
  4. In a small bowl, whisk together the flour, cornstarch, baking powder and salt.
  5. Stir dry ingredients into the wet just until combined.
  6. In a medium bowl, beat egg whites on med-high until soft peaks form (1 to 2 minutes). Add the remaining one-third cup of sugar and continue beating on med-high speed until stiff peaks form (another 1 to 2 minutes).
  7. Fold egg whites into the batter until fully incorporated.
  8. Pour batter onto prepared baking sheet and bake for 15 minutes or until the top of the cake is light brown. Let cool completely.
  9. Filling: Using an electric mixer, beat the cream cheese, powdered sugar, maple syrup and butter. until light and fluffy. 
  10. Spread filling over cooled cake evenly, leaving about 1/2 inch on the border. Sprinkle with strawberries.
  11. Carefully, roll the cake, starting from the short end. Peel away or remove the parchment paper as you roll.
  12. Once rolled, position the seam so it is on the bottom; sprinkle with a little extra powdered sugar and then wrap the cake with plastic wrap and chill in refrigerator for about 1 hour. Or, cover and freeze if preferred. 
  13. Once chilled, unwrap the roll. Cut ends with a sharp knife. Dust with confectioner's sugar and top with strawberries and fresh mint. Serve with ice cream or sweetened whipped cream.