Pumpkin-Pecan Scones made using the grated butter technique

Barry dog-eared this recipe that came in the mail as a part of a cookbook promo for Taste of Home. Thought it might appeal to my pumpkin cravings . . . and it does! I made it almost as is with these notable exceptions: 1) I cut the recipe in half to make just eight scones, 2) instead of cutting in the butter, I grated a frozen stick and lightly mixed it into the flour for a flakey scone, 3) whole milk was used instead of 2%,4) I added pecans. 

Pumpkin is not just a fall ingredient; I use frozen homemade pumpkin puree throughout the year and these moist scones will now be a year round treat.


Pumpkin-Pecan Scones     Make 8 scones 

2 1/4 cups all-purpose flour

1/4 cup packed brown sugar

2 teaspoons baking powder

1/4 teaspoon baking soda

1/4 teaspoon salt

1 1/2 teaspoons pumpkin pie spice 

1/2 teaspoon ground cinnamon

1 stick (1/2) cup frozen butter

1 large egg, room temperature

1/2 cup + 2 tablespoons canned pumpkin or pumpkin puree

1/4 cup whole milk + another tablespoon or more for brushing scone tops

Glaze:

1 cup powdered sugar

1 to 1 1/2 tablespoons whole milk

Dash of pumpkin pie spice

  1. In a large bowl, combine the first 7 dry ingredients.
  2. Grate a stick of butter straight from the freezer as quickly as possible. Immediately add to the flour mixture and lightly toss to combine.

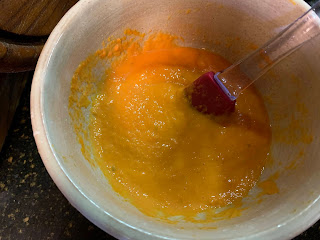
  3. In another bowl, whisk the egg, pumpkin and milk.
  4. Gently stir wet ingredients into dry just until moistened. 
  5. Turn dough onto a lightly floured surface; knead gently 10 times.
  6. Pat dough into an 8” circle. Cut into 8 wedges.

  7. Separated wedges and place 1” apart on ungreased baking sheets. Brush with additional milk.
  8. Bake in a preheated 400°F oven for 12 to 15 minutes or until golden brown; to make sure the scones are baked through, insert an instant read thermometer—it should register 200°F.
  9. Transfer scones to a cooling rack and cool for 10 minutes.
  10. Combine the glaze ingredients. Drizzle over scones. 
  11. Serve warm.

Recipe without photos . . .

Pumpkin-Pecan Scones     Make 8 scones 

2 1/4 cups all-purpose flour

1/4 cup packed brown sugar

2 teaspoons baking powder

1/4 teaspoon baking soda

1/4 teaspoon salt

1 1/2 teaspoons pumpkin pie spice 

1/2 teaspoon ground cinnamon

1 stick (1/2) cup frozen butter

1 large egg, room temperature

1/2 cup + 2 tablespoons canned pumpkin or pumpkin puree

1/4 cup whole milk + another tablespoon or more for brushing scone tops

Glaze:

1 cup powdered sugar

1 to 1 1/2 tablespoons whole milk

Dash of pumpkin pie spice

  1. In a large bowl, combine the first 7 dry ingredients.
  2. Grate a stick of butter straight from the freezer as quickly as possible. Immediately add to the flour mixture and lightly toss to combine.
  3. In another bowl, whisk the egg, pumpkin and milk.
  4. Gently stir wet ingredients into dry just until moistened. 
  5. Turn dough onto a lightly floured surface; knead gently 10 times.
  6. Pat dough into an 8” circle. Cut into 8 wedges.
  7. Separated wedges and place 1” apart on ungreased baking sheets. Brush with additional milk.
  8. Bake in a preheated 400°F oven for 12 to 15 minutes or until golden brown; to make sure the scones are baked through, insert an instant read thermometer—it should register 200°F.
  9. Transfer scones to a cooling rack and cool for 10 minutes.
  10. Combine the glaze ingredients. Drizzle over scones. 
  11. Serve warm.

Cheesy Sausage Penne -- a make ahead "hot dish"

I made this "hot dish" ahead so it was ready for tonight's dinner.  So handy to have dishes like this ready for busy days. 

Served our "hot dish" with Copycat Olive Garden Breadsticks & a green salad

Cheesy Sausage Penne    Serves 6 to 8

1/2 pound penne pasta

3/4 pounds ground sausage

1/2 medium to large onion, finely diced

1 garlic clove, minced 

1 tablespoons olive oil 

Pinch of crushed red pepper flakes

2 teaspoons Italian seasoning

1 (25 oz.) jar marinara sauce (click here for homemade version)

8 oz. shredded mozzarella cheese 

1/4 cup grated Parmesan 

Minced fresh parsley, for optional garnish 

  1. Bring a large pot of salted water to a boil. Cook the rigatoni according to the package instructions; drain and set aside to cool.
  2. Brown the sausage in a skillet over medium heat; add onion after sausage loses pink color, adding olive oil if needed. Add garlic, the crushed red pepper and Italian seasoning and cook for a couple of minutes. Add the marinara sauce, mix everything together and cook for 5 to 7 minutes. Set aside to cool.
  3. To assemble, add about 2 spoonsful of the sauce--just enough to coat the bottom--to a baking dish. Then layer half of the cooled noodles, half of the mozzarella and half of the remaining sauce. Repeat the process: layer the remaining noodles, mozzarella and sauce, then top with the Parmesan. 
  4. Cover and put in the fridge or freezer until ready to cook.
  5. When ready to cook, preheat the oven to 350°F. Cook the rigatoni until heated through and bubbling, 25 minutes straight from the fridge, or 2 hours straight from the freezer. Garnish with minced parsley before serving if desired. Or, this dish can also be cooked immediately after assembling in a preheated oven for 20 to 25 minutes at 350°F.

Recipe without photos . . .

Cheesy Sausage Penne    Serves 6 to 8

1/2 pound penne pasta

3/4 pounds ground sausage

1/2 medium to large onion, finely diced

1 garlic clove, minced 

1 tablespoons olive oil 

Pinch of crushed red pepper flakes

2 teaspoons Italian seasoning

1 (25 oz.) jar marinara sauce (click here for homemade version)

8 oz. shredded mozzarella cheese 

1/4 cup grated Parmesan 

Minced fresh parsley, for optional garnish 

  1. Bring a large pot of salter water to a boil. Cook the rigatoni according to the package instructions; drain and set aside to cool.
  2. Brown the sausage in a skillet over medium heat; add onion after sausage loses pink color, adding olive oil if needed. Add garlic, the crushed red pepper and Italian seasoning and cook for a couple of minutes. Add the marinara sauce, mix everything together and cook for 5 to 7 minutes. Set aside to cool.
  3. To assemble, add about 2 spoonsful of the sauce--just enough to coat the bottom--to a baking dish. Then layer half of the cooled noodles, half of the mozzarella and half of the remaining sauce. Repeat the process: layer the remaining noodles, mozzarella and sauce, then top with the Parmesan. 
  4. Cover and put in the fridge or freezer until ready to cook.
  5. When ready to cook, preheat the oven to 350°F. Cook the rigatoni until heated through and bubbling, 25 minutes straight from the fridge, or 2 hours straight from the freezer. Garnish with minced parsley before serving if desired. Or, this dish can also be cooked immediately after assembling in a preheated oven for 20 to 25 minutes at 350°F.

Copycat Olive Garden Breadsticks

We agree with Ruth Friesan! After trying this copycat recipe from Taste of Home’s website, she posted that the breadsticks were “fabulous, so soft and (have) a clean bite”. I decided to try out this copycat recipe posted on Taste of Home’s website


Copycat Olive Garden Breadsticks . . . in just about 60 minutes    Makes 12

1/4 cup unsalted butter

1 cup whole milk

2 tablespoons instant yeast or active dry yeast

1 tablespoon granulated sugar

1/2 teaspoon salt

1 large egg

2- 1/2 to 3-1/2 cups high quality all-purpose flour or bread flour

For the garlic butter topping:

4 tablespoons unsalted butter

1 teaspoon popcorn salt (popcorn salt is regular iodized salt that is finely ground; to make your own, add table salt to a spice grinder or grind in a mortar and pestle)

1/2 teaspoon garlic powder

  1. Prepare pan: line a 9×13-inch baking sheet with parchment paper. Set aside.
  2. Melt butter and warm milk: In a small saucepan, melt the butter over medium heat. Then, stir in the milk and warm to 105-112°F. Alternatively, melt and warm the milk in the microwave for 30-60 seconds at 50% power. (Don’t overheat the milk mixture as doing so may kill the yeast and inhibit your dough from rising sufficiently.)
  3. Combine with yeast and sugar: Add the yeast and sugar to the bowl of a stand mixer fitted with a dough hook. Slowly add the warmed milk to the yeast and sugar and gently stir to combine. (If you’re using instant yeast, you can move onto the next step. If using active dry yeast, let the yeast, sugar and milk/butter mixture proof for five minutes until foamy. Then, proceed to the next step.)
  4. Add egg and dry ingredientsUsing a stand mixer set on its lowest speed, stir in the egg and salt before adding in 2-1/2 cups (300g) of flour. Continue to mix, adding only as much of the remaining 1 cup (120g) of flour as needed to create a dough that clings to the hook, and the sides of the bowl are clean; the dough should be smooth and soft.
  5. Knead: Increase mixer to second speed and knead dough for 3-4 minutes. Alternately, knead by hand for 6-8 minutes on a lightly oiled surface.
  6. ShapeWith lightly floured hands, divide the dough into 12 equal pieces, approximately 65 grams each. (If dough is difficult to shape, cover pieces with plastic wrap or a towel and allow them to rest/relax for about 10 minutes—this relaxes the gluten and makes it easier to shape.) Shape each piece into a round ball and then roll out into a breadstick shape. 


  7. Preheat & Proof: Preheat oven to 400° F. To proof, cover breadsticks loosely with a tea towel or plastic wrap, and let the dough proof for 10-15 minutes in a warm place. The breadsticks should rise and puff slightly during this period.
  8. BakeUncover the breadsticks and transfer to the preheated oven. Bake for about 10-12 minutes, or until golden brown.
  9. Make the garlic butterWhile the breadsticks are baking, prepare the garlic butter by melting the butter on your stovetop or in the microwave. Remove from heat and then stir in the salt and garlic powder. Set aside.
  10. BasteRemove the breadsticks from the oven when golden, and immediately baste with the melted garlic butter. Serve warm.

Recipe without photos . . .

Copycat Olive Garden Breadsticks . . . in just about 60 minutes    Makes 12

1/4 cup unsalted butter

1 cup whole milk

2 tablespoons instant yeast or active dry yeast

1 tablespoon granulated sugar

1/2 teaspoon salt

1 large egg

2- 1/2 to 3-1/2 cups high quality all-purpose flour or bread flour

For the garlic butter topping:

4 tablespoons unsalted butter

1 teaspoon popcorn salt (popcorn salt is regular iodized salt that is finely ground; to make your own, add table salt to a spice grinder or grind in a mortar and pestle)

1/2 teaspoon garlic powder

  1. Prepare pan: line a 9×13-inch baking sheet with parchment paper. Set aside.
  2. Melt butter and warm milk: In a small saucepan, melt the butter over medium heat. Then, stir in the milk and warm to 105-112°F. Alternatively, melt and warm the milk in the microwave for 30-60 seconds at 50% power. (Don’t overheat the milk mixture as doing so may kill the yeast and inhibit your dough from rising sufficiently.)
  3. Combine with yeast and sugar: Add the yeast and sugar to the bowl of a stand mixer fitted with a dough hook. Slowly add the warmed milk to the yeast and sugar and gently stir to combine. (If you’re using instant yeast, you can move onto the next step. If using active dry yeast, let the yeast, sugar and milk/butter mixture proof for five minutes until foamy. Then, proceed to the next step.)
  4. Add egg and dry ingredientsUsing a stand mixer set on its lowest speed, stir in the egg and salt before adding in 2-1/2 cups (300g) of flour. Continue to mix, adding only as much of the remaining 1 cup (120g) of flour as needed to create a dough that clings to the hook, and the sides of the bowl are clean; the dough should be smooth and soft.
  5. Knead: Increase mixer to second speed and knead dough for 3-4 minutes. Alternately, knead by hand for 6-8 minutes on a lightly oiled surface.
  6. ShapeWith lightly floured hands, divide the dough into 12 equal pieces, approximately 65 grams each. (If dough is difficult to shape, cover pieces with plastic wrap or a towel and allow them to rest/relax for about 10 minutes—this relaxes the gluten and makes it easier to shape.) Shape each piece into a round ball and then roll out into a breadstick shape.
  7. Preheat & Proof: Preheat oven to 400° F. To proof, cover breadsticks loosely with a tea towel or plastic wrap, and let the dough proof for 10-15 minutes in a warm place. The breadsticks should rise and puff slightly during this period.
  8. BakeUncover the breadsticks and transfer to the preheated oven. Bake for about 10-12 minutes, or until golden brown.
  9. Make the garlic butterWhile the breadsticks are baking, prepare the garlic butter by melting the butter on your stovetop or in the microwave. Remove from heat and then stir in the salt and garlic powder. Set aside.
  10. BasteRemove the breadsticks from the oven when golden, and immediately baste with the melted garlic butter. Serve warm.

Slow Cooker Marinara Sauce

As Barry prepares the summer garden, I’m using up last summer’s frozen tomatoes. Since canning lids were not available back then we froze extra tomatoes with a few peppers and onions thrown into each bag. I dumped those thawed bags in the slow cooker with a few other ingredients, and now I have marinara ready for Cheesy Sausage Penne Casserole. 

Slow Cooker Marinara Sauce

2 (28oz.) cans crushed tomatoes or equivalent amount of frozen tomatoes 

1 6 oz. can tomato paste 

1 yellow onion 

1/2 tablespoon garlic, minced

2 whole bay leaves 

1 Tbsp dried basil +1/2 Tbsp dried oregano (or 1 1/2 Tbsp. dried Italian seasoning)

1 tablespoon brown sugar 

1 tablespoon balsamic vinegar

Salt and pepper to taste 

  1. Cut the onion into a small dice and mince the garlic (or use pre-minced garlic from a jar). Place both in the slow cooker. Also add the crushed tomatoes, tomato paste, brown sugar, balsamic vinegar, bay leaves, basil, oregano, salt and pepper. Stir well to combine. If your slow cooker tends to lose moisture and dry things out, add 1/2 to 1 cup of water as well.
  2. Secure the lid on your slow cooker and cook on low for 8 hours.
  3. Remove the lid on the slow cooker, stir the sauce, and remove the bay leaves. Taste and adjust seasonings as needed. 

Tender Brown Rice . . . How to Cook Instant Pot Rice—brown & white

We like whole grain brown rice but even cooking it in a rice cooker often yielded rice that had a little more “bite” than I prefer; even extra cooking time did not change the result. However, the Instant Pot method yielded tender brown rice! I found this basic recipe at Simply Recipes blog and followed it as listed below except that I cut it in half, making 4 servings — enough for one-time leftovers. Yes, I could freeze the excess if I’d followed her original recipe, but the beauty of the Instant Pot is that I can make fresh rice without a lot of extra work.  

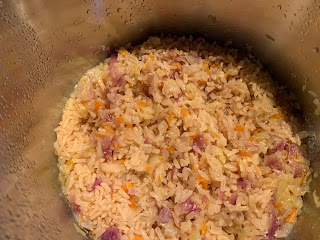
I also added an optional step at the beginning—sautéing veggies in the Instant Pot before adding the rice and water. This added another level of flavor and more vegetables to our meal. 

Tender brown rice topped with Chicken West  

Basic Instant Pot Rice in 3 qt. pot   4 servings 

1 cup rice (brown or white)

1 cup water

1/4 teaspoon salt


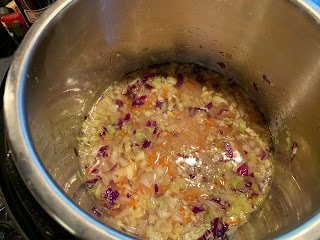
Optional veggie addition: Heat about 1 tablespoon+ olive oil to the inner pot  and push Sauté button; add about 1/2 to 3/4 cup of finely chopped veggies (onions, peppers, celery, cabbage, etc.). Sauté until veggies are tender; once this is done proceed with step #1.

  1. Rinse the rice: In a fine wire mesh colander, rinse the rice under cold running water for about 30 seconds, until the water is less cloudy (it won't be quite clear). Drain off the excess water for a minute or so, until water is no longer dripping from the colander. (Note: If you’re using brown rice, you can skip this rinsing step.)
  2. Add the rice and water to the pot: Add the rice to the inner pot of the Instant Pot, along with the 1 cup of water and salt. Swivel the inner pot a little bit so that the rice settles into an even layer in the pot. 
  3. Secure the lid with the release valve in its “Sealing” position.
  4. Cook the rice on low pressureIf cooking white rice, select the “Rice” button on its low pressure setting. (This default “rice” button  will automatically set the cooking time for 15 minutes on low pressure.)
  5. If cooking brown rice, select the “Multigrain,” “Pressure Cook,” or “Manual” setting and set the cooking time for 20 minutes at high pressure for chewy, separate grains of rice. For slightly softer rice, increase the cooking time to 22 minutes.
  6. Let the pressure naturally release for 10 minutes: When the cooking program ends, let the pressure release naturally for 10 minutes, then move the pressure release valve to its “Venting” position to release the remaining steam.
  7. Finally: Open the pot, fluff the rice with a fork, and serve. 
     

Recipe without photos . . . Basic Instant Pot Rice in 3 qt. pot   4 servings 

1 cup rice (brown or white)

1 cup water

1/4 teaspoon salt


Optional veggie addition: Heat about 1 tablespoon+ olive oil to the inner pot  and push Sauté button; add about 1/2 to 3/4 cup of finely chopped veggies (onions, peppers, celery, cabbage, etc.). Sauté until veggies are tender; once this is done proceed with step #1.

  1. Rinse the rice: In a fine wire mesh colander, rinse the rice under cold running water for about 30 seconds, until the water is less cloudy (it won't be quite clear). Drain off the excess water for a minute or so, until water is no longer dripping from the colander. (Note: If you’re using brown rice, you can skip this rinsing step.)
  2. Add the rice and water to the pot: Add the rice to the inner pot of the Instant Pot, along with the 1 cup of water and salt. Swivel the inner pot a little bit so that the rice settles into an even layer in the pot. 
  3. Secure the lid with the release valve in its “Sealing” position.
  4. Cook the rice on low pressureIf cooking white rice, select the “Rice” button on its low pressure setting. (This default “rice” button  will automatically set the cooking time for 15 minutes on low pressure.)
  5. If cooking brown rice, select the “Multigrain,” “Pressure Cook,” or “Manual” setting and set the cooking time for 20 minutes at high pressure for chewy, separate grains of rice. For slightly softer rice, increase the cooking time to 22 minutes.
  6. Let the pressure naturally release for 10 minutes: When the cooking program ends, let the pressure release naturally for 10 minutes, then move the pressure release valve to its “Venting” position to release the remaining steam.
  7. Finally: Open the pot, fluff the rice with a fork, and serve. 

Instant Pot Rice Pudding using a 3-quart pot

No muss, no fuss — about 5 minutes prep time, 20 minutes cook time + 10 minutes+ for cooling; the Instant Pot makes Rice Pudding with no pot watching or stirring and there’s no sticky rice!

Instant Pot Rice Pudding using a 3-quart pot – makes 4 servings 

½  cup basmati or long grain rice

1 cups whole milk  

1/2 cup + 2 tablespoons water  

3 tablespoons maple syrup or honey

Pinch of kosher or seal salt teaspoon 

3 to 4 tablespoons heavy cream or coconut cream

1 teaspoon vanilla 

3/4 teaspoon ground cinnamon

1/4 teaspoon ground nutmeg

1/3 cup craisins or raisins

3 to 4 tablespoons sliced almonds, toasted (toast at 350° about 3 to 4 min.)

  1. Place rice in fine mesh colander. Rinse well in several changes of water; the  place in Instant Pot.
  2. Add water, milk, maple syrup, and sea salt.
  3. Stir briefly.
  4. Add lid, seal and close vent.
  5. Press the Porridge button. This button is preset for 20 minutes—the time it takes to cook the rice. 
  6. When the timer beeps, allow the pressure to do a natural release for 10 minutes. 
  7. After 10 minutes, press the Cancel button and open vent.
  8. When de-pressurized, open lid.
  9. Add cream, vanilla, cinnamon and nutmeg. Stir in craisins and almonds or use them as toppings. 
  10. Stir until well mixed.
  11. Serve with more cream, whipped cream, or yogurt. Set out extra maple syrup and toppings if desired. 

Tortilla Folds – Joining the tortilla folding trend

Tortilla folding is trending.  It’s the newest food fad and bloggers and cooks are getting creative with fillings for the latest in  hand-held sandwiches. I decided it was time to join their ranks. There are so many options. I started out with a taco-inspired fold and then tried a few other flavors. Plus I’ve added a few others I've tried + ideas for future reference. 

They're FAST & FUN!
Taco Tortilla Fold  Note: Ingredient amounts are variable; some recipes suggest about 1/4 cup of meat/protein and cheese and 2 tablespoons to 1/4 cup fillers but I just used what looked like the “right” amount – not enough to overfill but enough for a nicely filled sandwich.

1 tortilla burrito sized or larger (or use a smaller size for an individual serving)

Refried beans

Cooked taco-flavored sausage or ground beef (click here for homemade taco flavoring)

Refried beans

Shredded cheese

Thinly sliced peppers and onions, sautéed peppers until onions are transparent

Refried beans 

Butter (1 tsp to 1 Tbsp)

  1. Cut the tortilla in a straight line to the center of the tortilla. 

  2. Using the cut as a guide, arrange each ingredient—refried beans in first quarter / taco meat in 2nd quarter—we discovered it stays in place best if you place it on a thin layer or bean paste, shredded cheese in 3rd quarter, peppers & onions in 4th quarter. I tried to arrange them so the spreadable items would be folded over things that would easily move (i.e. cheese, onions & peppers).
  3. Starting at one of the quarters that borders the cut tortilla, fold the tortilla up.

  4. Fold the tortilla across the top. 
  5. Fold the tortilla down to finish the tortilla fold. 

  6. Heat a griddle or skillet over medium low heat. Melt the butter into the pan.

  7. Place the tortilla fold into the heated pan. Fry for about 1 to 2 minutes (exact time will depend on how hot your pan is) and then flip the tortilla and repeat on the remaining side. 
  8. Cut burrito sized tortilla folds in half and serve. 


OTHER IDEAS

Lunchtime/Supper Tortilla Folds

Crunchwrap Supreme Tortilla Foldsour cream / shredded lettuce & diced tomatoes / queso, cooked taco meat & tortilla chips / shredded cheese

BLT Tortilla Fold: More than Mayo Sauce or Come Back Sauce / shredded lettuce / crisp bacon halves / shredded lettuce / diced tomatoes


Pepperoni Pizza Tortilla Fold: pizza sauce / shredded mozzarella cheese / pepperoni / sliced black olives &/or sliced mushrooms


French Dip Tortilla Fold: softened cream cheese / shredded deli-style roast beef / Swiss cheese—a thin slice or shredded / caramelized onions 


Turkey Pesto Tortilla Fold: pesto, fresh spinach leaves & a few slices of raw red onion, deli turkey and a thin slice of Swiss cheese 

Creamy Florentine Chicken Tortilla Fold: softened cream cheese sprinkled with garlic powder / shredded & seasoned cooked chicken breast / spinach leaves / grated Parmesan cheese


Breakfast Tortilla Folds

Scrambled Egg Ole’ Tortilla Fold: refried beans / scrambled eggs / grated Cheddar, Pepper-Jack or Mexican cheese / salsa or sautéed peppers & onions


Eggs & Bacon Tortilla Fold: mashed or sliced avocado, or guacamole, crisp bacon halves / scrambled eggs / grated cheese


Dessert Tortilla Folds 

Nutella Delight Tortilla Fold: Nutella / sliced strawberries / more Nutella with chopped hazelnuts if available / cinnamon & sugar

Apple Pie Tortilla Fold: caramel sauce / thinly sliced apples sautéed in butter with a sprinkling of brown sugar / chopped pecans or walnuts / cinnamon & sugar


Recipes without photos . . .

Taco Tortilla Fold

Note: Ingredient amounts are variable; some recipes suggest about 1/4 cup of meat/protein and cheese and 2 tablespoons to 1/4 cup fillers but I just used what looked like the “right” amount – not enough to overfill but enough for a nicely filled sandwich.


1 tortilla burrito sized or larger (or use a smaller size for an individual serving)

Refried beans

Cooked taco-flavored ground pork or beef (click here for homemade taco flavoring)

Refried beans

Shredded cheese

Thinly sliced peppers and onions, sautéed peppers until onions are transparent

Refried beans (about a teaspoon)

Butter (1 tsp to 1 Tbsp)

  1. Cut the tortilla in a straight line to the center of the tortilla. 

  2. Using the cut as a guide, arrange each ingredient—refried beans in first quarter / taco meat in 2nd quarterwe discovered it stays in place best if you place it on a thin layer or bean paste shredded cheese in 3rd quarter, peppers & onions in 4th quarter. I tried to arrange them so the spreadable items would be folded over things that would easily move (i.e. cheese, onions & peppers).
  3. Starting at one of the quarters that borders the cut tortilla, fold the tortilla up.

  4. Fold the tortilla across the top. 
  5. Fold the tortilla down to finish the tortilla fold. 

  6. Heat a griddle or skillet over medium low heat. Melt the butter into the pan.

  7. Place the tortilla fold into the heated pan. Fry for about 1 to 2 minutes (exact time will depend on how hot your pan is) and then flip the tortilla and repeat on the remaining side. 
  8. Cut burrito sized tortilla folds in half and serve. 


OTHER IDEAS

Lunchtime/Supper Tortilla Folds

Crunchwrap Supreme Tortilla Fold: sour cream / shredded lettuce & diced tomatoes / queso, cooked taco meat & tortilla chips / shredded cheese


BLT Tortilla Fold: More than Mayo Sauce or Come Back Sauce / shredded lettuce / crisp bacon halves / shredded lettuce / diced tomatoes


Pepperoni Pizza Tortilla Fold: pizza sauce / shredded mozzarella cheese / pepperoni / sliced black olives &/or sliced mushrooms


French Dip Tortilla Fold: softened cream cheese / deli-style shredded roast beef / Swiss cheese—a thin slice or shredded / caramelized onions 


Turkey Pesto Tortilla Fold: pesto, fresh spinach leaves & a few slices of raw red onion, deli turkey and a thin slice of Swiss cheese 


Creamy Florentine Chicken Tortilla Fold: softened cream cheese sprinkled with garlic powder / shredded & seasoned cooked chicken breast / spinach leaves / grated Parmesan cheese


Breakfast Tortilla Folds

Scrambled Egg Ole’ Tortilla Fold: refried beans / scrambled eggs with green chilies / grated Cheddar, Pepper-Jack or Mexican cheese / salsa or sautéed peppers & onions


Eggs & Bacon Tortilla Fold: mashed or sliced avocado, or guacamole, crisp bacon halves / scrambled eggs / grated cheese


Dessert Tortilla Folds 

Nutella Delight Tortilla Fold: Nutella / sliced strawberries / more Nutella with chopped hazelnuts if available / cinnamon & sugar


Apple Pie Tortilla Fold: caramel sauce / thinly sliced apples sautéed in butter with a sprinkling of brown sugar / chopped pecans or walnuts / cinnamon & sugar


YOGURT for just 2— COOKING for two in a 3-quart Instant Pot

What do two people do with a half-gallon of yogurt? That's why I've been on the look out for a 3-quart Instant Pot. Had a heck of a time but I finally found one, seems they think it is a seasonal item (go figure).  The smaller size was hard to find but just right for the two of us . . . for both yogurt making and other recipes, too. Now I am chronicling how to adjust/adapt recipes to the smaller size . . . instructions that will guide me in the future. Also, it allows me to condense the other blog references I used that often include lots and lots and lots of ads and stories!

Plain yogurt with a swirl of Lemon Curd.

A couple of notes  . . . 

  • Minimum fill on a 3-quart Instant Pot is 1 cup
  • Ratio of milk to yogurt: 1 quart milk to 1 (heaping) tablespoon yogurt
  • If you have used the Instant Pot for savory dishes, the inner pot needs to be sanitized using boiling, soapy water, then wipe the sealing ring with a vinegar solution . . . otherwise those savory flavors may infiltrate the yogurt. 

YOGURT for 2   Yield: 1 quart  (main info condensed from A Mind Full Mom blog

·    1 quart milk (I use whole milk from Hildebrand Dairy)

·    1 heaping tablespoon plain yogurt with live & active cultures (The label on the yogurt will say Lactobacillus bulgaricus or Streptococcus thermophiles) 

Step 1: Heating the milk in the Instant Pot to 180’: 

a)   Pour 1 quart milk into the inner pot of the Instant, add lid. Vent can be sealed or not sealed in this function. Hit Yogurt button and then adjust button until it says Boil. You may need to hit the Yogurt button a couple of time. 

b)  When the Instant Pot beeps, this part of the process is finished so remove the lid and test the temperature to be sure the milk has reached 180°. Let inner pot remain in Instant Pot about 5 minutes and then remove to a counter. (Note: If milk did not reach 180° after the Boil cycle, turn to Sauté function for a few minutes, watching VERY closely until it reaches the 180° mark.)

Step 2: Cool the milk to approximately 105-115°: Remove the inner pot of milk to cool on a counter top for about 45 minutes or until it reaches a temperature of approximately105-115° Or, speed the process by placing the inner pot into a large mixing bowl filled with ice water—this shorten cooling time to about 15-20 minutes.

Step 3: Remove the “skin” from the milk. Once milk has reached 105-115°, gently skim off “skin” that has formed on top of the milk. This helps insure creamy yogurt.

Step 4: Whisk in the yogurt.

Step 5: Allow the yogurt to incubate in the Instant Pot: 

a)   Place the inner pot back (be sure to dry it off if an ice bath was used for cooling) into the Instant Pot and add lid. Again, it doesn’t matter which way the valve is set.

b)  Hit Yogurt button again. Adjust until it read 8:00 or 8 hours. The pressure should also read normal—if it reads less, hit adjust again until normal is lit up. (If you would like tangier yogurt, set an incubation period to 10 hours instead of 8 hours.) Yogurt was a nice consistency at this point and then firmed up a little more as it cooled.

c)  Once yogurt beeps that it is complete, remove the inner pot from the inner pot and cover with plastic wrap. Refrigerate for 8 hours before transfering to individual containers.

Step 6: Add yogurt to jars and refrigerate. Transfer to glass jars and refrigerate. It will generally last 10 to 14 days in the refrigerator. 

Plain yogurt mixed with a splash of vanilla, drizzled with honey
and sprinkled with Add-A-Sweet Crunch Topping.

And DON’T FORGET: Be sure to save a tablespoon of this prepared yogurt for the next batch. Or FREEZE several tablespoons of yogurt (in sectioned areas of an ice cube tray or other small containers) immediately after fresh yogurt is made. Then just thaw the yogurt cubes in the refrigerator and they are ready to add to a new batch of Instant Pot Yogurt.

To turn your yogurt into Greek Yogurt

·     Place prepared yogurt (from above recipe) into a cheesecloth lined colander that has been place over a large mixing bowl.

·      Allow the yogurt to drain overnight.

·      Scoop out the thick yogurt into containers to store and discard the cheesecloth.

·      Note: You can either discard the whey (the drained liquid) or you can use it in smoothies, oatmeal, protein shakes, etc. It will be filled with protein and probiotics.

To sweeten a batch of yogurt, wait until after the it has set up in the fridge for at least 8 hours, or after straining if making Greek Yogurt.  


Instructions without photos . . .YOGURT for 2   Yield: 1 quart 

·    1 quart milk (I use whole milk from Hildebrand Dairy)

·    1 heaping tablespoon plain yogurt with live & active cultures (The label on the yogurt will say Lactobacillus bulgaricus or Streptococcus thermophiles)  

Step 1: Heating the milk in the Instant Pot to 180’: 

a)   Pour 1 quart milk into the inner pot of the Instant, add lid. Vent can be sealed or not sealed in this function. Hit Yogurt button and then adjust button until it says Boil. You may need to hit the Yogurt button a couple of time. 

b)  When the Instant Pot beeps, this part of the process is finished so remove the lid and test the temperature to be sure the milk has reached 180°. Let inner pot remain in Instant Pot about 5 minutes and then removing to a counter. (Note: If milk did not reach 180° after the Boil cycle, turn to Sauté function for a few minutes, watching VERY closely until it reaches the 180° mark.)

Step 2: Cool the milk to approximately 105-115°: Remove the inner pot of milk to cool on a counter top for about 45 minutes or until it reaches a temperature of approximately105-115° Or, speed the process by placing the inner pot into a large mixing bowl filled with ice water—this shorten cooling time to about 15-20 minutes.

Step 3: Remove the “skin” from the milk. Once milk has reached 105-115°, gently skim off “skin” that has formed on top of the milk. This helps insure creamy yogurt.

Step 4: Whisk in the yogurt

Step 5: Allow the yogurt to incubate in the Instant Pot: 

a)   Place the inner pot back (be sure to dry it off if an ice bath was used for cooling) into the Instant Pot and add lid. Again, it doesn’t matter which way the valve is set.

b)  Hit Yogurt button again. Adjust until it read 8:00 or 8 hours. The pressure should also read normal—if it reads less, hit adjust again until normal is lit up. (If you would like tangier yogurt, set an incubation period to 10 hours instead of 8 hours.) ogurt was a nice consistency at this point and then firmed up a little more as it cooled.

c)  Once yogurt beeps that it is complete, remove the inner pot from the inner pot and cover with plastic wrap. Refrigerate for 8 hours before transfering to individual containers.

Step 6: Add yogurt to jars and refrigerate. Transfer to glass jars and refrigerate. It will generally last 10 to 14 days in the refrigerator. 

And DON’T FORGET: Be sure to save a tablespoon of this prepared yogurt for the next batch. Or FREEZE several tablespoons of yogurt (in sectioned areas of an ice cube tray or other small containers) immediately after fresh yogurt is made. Then just thaw the yogurt cubes in the refrigerator and they are ready to add to a new batch of Instant Pot Yogurt.