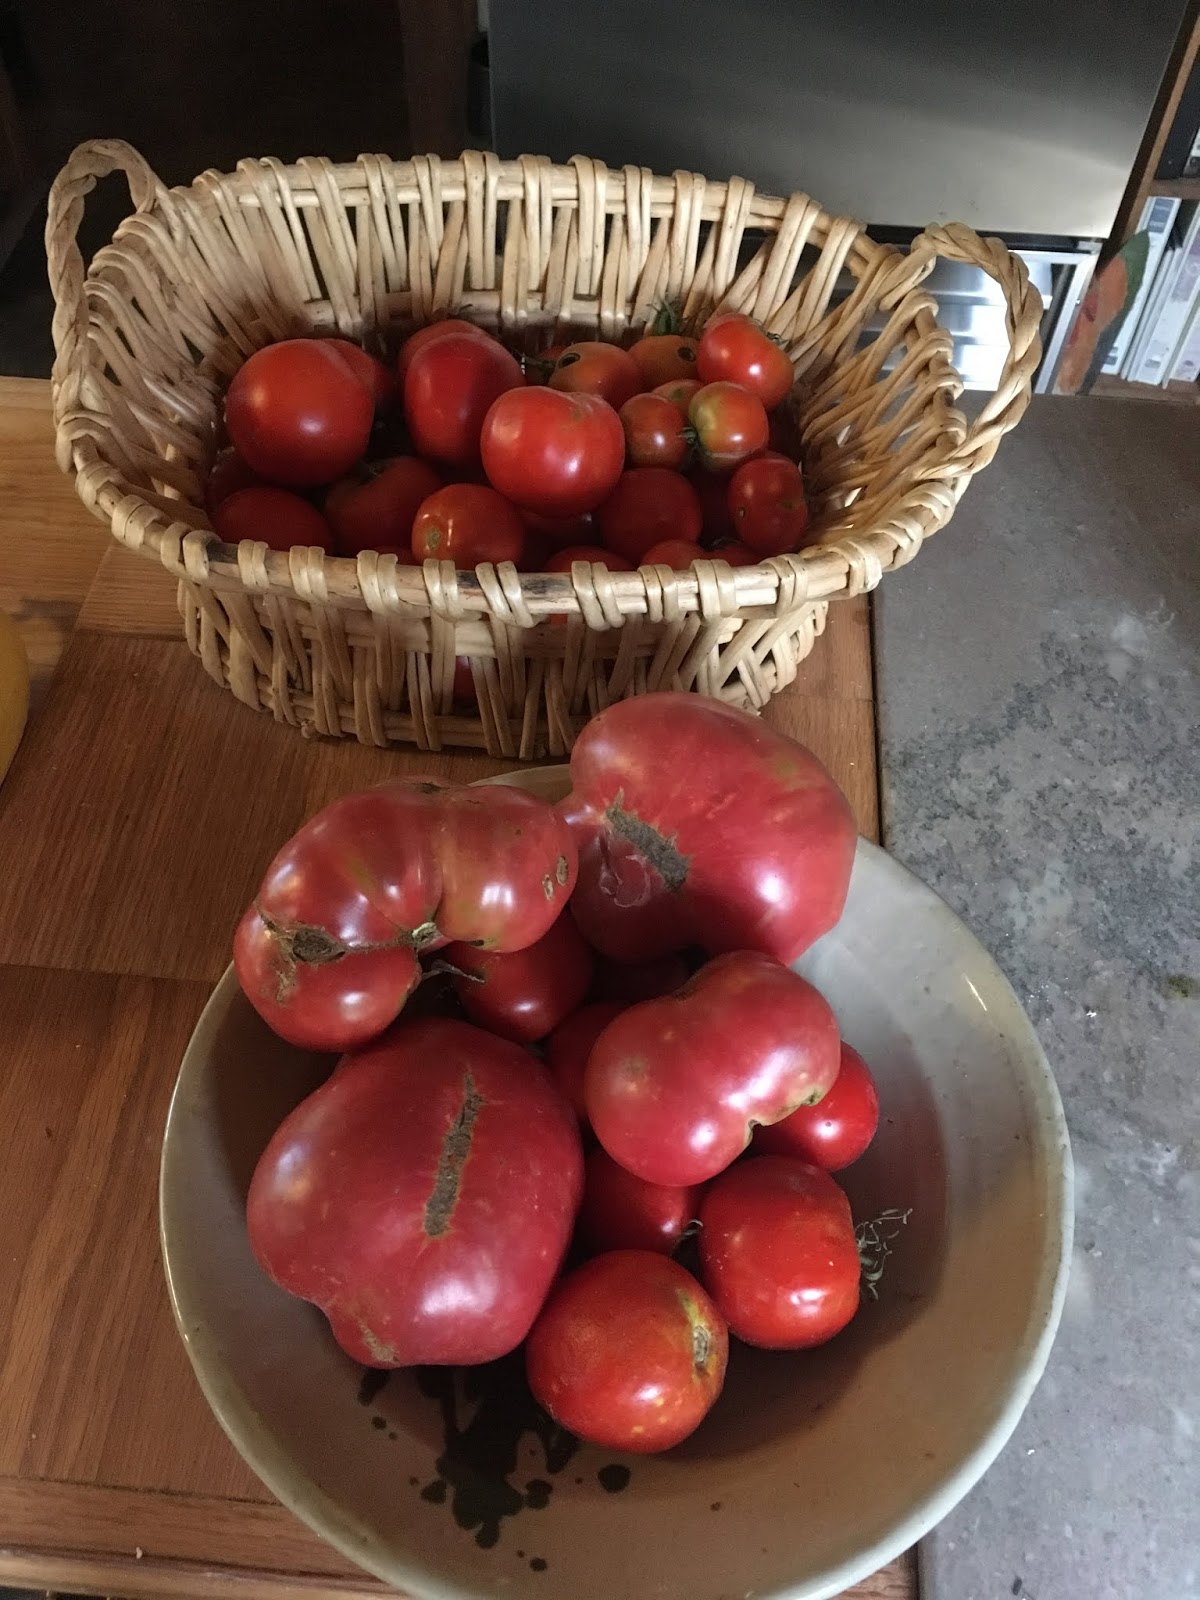
Home Canned Italian-style Tomatoes

Barry is back in the kitchen . . . canning tomatoes. This time he made a batch of Italian-style tomatoes that will be perfect for soups and as spaghetti sauce.

Home Canned Italian-style Tomatoes   Makes 6 to 8 pints 
About 20 tomatoes, cored and peeled
1 to 1 ½ cups chopped peppers
1 to 1 ½ cups chopped onions
4 to 5 garlic cloves, minced
2 to 3 bell peppers
2 tablespoons tomato paste
1 ( 8 oz.) can tomato sauce
Fresh parsley, rosemary, thyme & sage (about 1 cup total) 
1 teaspoon granulated sugar
Salt & pepper to taste + dried Italian seasoning if desired

  1. Cut an X in the bottom of tomatoes (for easy peeling) and then we blanch (add to a pot of boiling water for a couple of minutes, just until their skins started to break). Plunge them into cold water; peel (skins should just slip off. 
  2. Combine all ingredients in a large pot; bring to a boil and simmer for 20 to 30 minutes. Use a potato masher to break up mixture slightly.
  3. Pour into sterilized jars, seal and process in a water bath -- 20 minutes for pint jars @ 0 to 1,000’ altitudes).

For detailed instructions and guidelines for safe home canning, from jar sterilization to choosing the right canning method (water bath vs. pressure cooking) to testing jar seals, go to the USDA Complete Guide to Home Canning and Preserving.

Recipe without photos . . .
Home Canned Italian-style Tomatoes   Makes 6 to 8 pints 
About 20 tomatoes, cored and peeled
1 to 1 ½ cups chopped peppers
1 to 1 ½ cups chopped onions
4 to 5 garlic cloves, minced
2 to 3 bell peppers
2 tablespoons tomato paste
1 ( 8 oz.) can tomato sauce
Fresh parsley, rosemary, thyme & sage (about 1 cup total) 
1 teaspoon granulated sugar
Salt & pepper to taste + dried Italian seasoning if desired

  1. Cut an X in the bottom of tomatoes (for easy peeling) and then we blanch (add to a pot of boiling water for a couple of minutes, just until their skins started to break). Plunge them into cold water; peel (skins should just slip off. 
  2. Combine all ingredients in a large pot; bring to a boil and simmer for 20 to 30 minutes. Use a potato masher to break up mixture slightly.
  3. Pour into sterilized jars, seal and process in a water bath -- 20 minutes for pint jars @ 0 to 1,000’ altitudes).
For detailed instructions and guidelines for safe home canning, from jar sterilization to choosing the right canning method (water bath vs. pressure cooking) to testing jar seals, go to the USDA Complete Guide to Home Canning and Preserving

Bean-filled Tamales

One morning last week I went to Neighbor to Neighbor to help make tamales—assembly line style. Sister Loretta reported later that we had made 19 dozen in all! Once they were all steamed, she vacuum sealed them; they will be sold at upcoming fundraisers. 
Although I’ve watched others make tamales, studied several recipes and had lots of good intentions, this was the first time I actually had a hands-on tamale experience. 
Decided that I better capitalize on this experience so stopped at Zey’s on the way home and purchased all the necessary ingredients.
I made a half batch (included the recipe for the full batch) and ended up with about 2 ½ dozen; it took me as long to make them as it took a whole crew to assemble the 19 dozen at Neighbor to Neighbor. It is definitely a group project!
My technique was not the best (a few had leakage issues and the filling on some were not totally encased in masa) but overall I was please with the results and thought I better commit this to our blog for later reference.
We made bean tamales at Neighbor to Neighbor so that’s what I made at home but did add some of the ham hock meat and also fresh corn to some as well.

Bean Filled Tamales   Makes about 5 dozen
Bean Filling
2 lbs. dry pinto beans
Several jalapeno peppers, seeds and stems removed
2 bay leaves
1 ham hock (that’s what I used, but Katie who made the beans for N to N, added 1 lb. of uncooked bacon instead; she said it cooked completely by the time the bean were soft)
Seasonings of your choice such as salt and pepper, chili powder, cumin, onion &/or garlic powder
  1. Follow package directions for cooking beans. 
  2. Drain off most of the liquid (and reserve) and remove bay leaves; I also removed the ham hock; Katie left the bacon in with the beans however.
  3. Use a mixer or an immersion blender and blend beans until smooth. If bean mixture is too stiff, stir in some of the cooking liquid.
Masa Dough
2 cups lard (1-lb. box)
6 cups masa harina
2 teaspoons salt
2 teaspoons baking powder
2 tablespoons powdered cumin
3 tablespoons chili powder
2 tablespoons onion powder
5 cups chicken broth 
  1. In a large bowl beat lard until creamy and fluffy.
  2. Add masa harina, salt, baking powder and seasonings and mix to blend. 
    Sister Loretta mixes up masa @ Neighbor to Neighbor 

  3. Add broth and blend. Allow mixture to sit for 20 minutes to soften, then beat until a soft dough forms. (We actually used the masa mixture right away at N to N.) This can be covered and stored in the refrigerator even overnight. It can also be frozen and thawed for use later.
Preparing the Corn Husks
Corn husks
  1. Place husks in a large bowl and cover them with hot water. Set a heavy item (like a heavy bowl) on top of the husks to keep them submerged. Allow husks to soak for an hour or until they have rehydrated and become pliable.
  2. Use only the larger and medium-sized husks to wrap the tamales; tear the smaller ones into strips for tying tamales. 
  3. Remove the husks from the water and pat dry as tamales are assembled.
Assemble Tamales
  1. Lay a husk on a flat surface.
  2. Use the back of a metal spoon to spread the dough evenly down the center of husk (1/4-inch thick) leaving an empty space at the top and bottom of the husk and along both sides. 
    Donna sperdo masa down the center of the husk, leaving space at both ends and the sides.
  3. Place filling down the center of the masa, leaving a margin of masa all the way around. Fold the narrow end of husk up over the masa and filling.

  4. Fold one long side over to the other; begin tucking and rolling. 

  5. Fold the broad end over down over the tamale and secure with a tie. 
Cooking the Tamales
  1. Set a rack inside a steamer; add water just to the top of the rack. Then, set extra corn husks on top of rack.
  2. Set tamales upright in the steamer. 
  3. Bring water to a boil, lower temperature, add lid and steam for about 1 hour 45 minutes. 
  4. Let tamales cool, still in the steamer, for at least an hour before serving; they will firm up during this time. Tamales may also be frozen or refrigerated and reheated later.
Recipe without photos . . .
Bean Filled Tamales   Makes about 5 dozen
Bean Filling
2 lbs. dry pinto beans
Several jalapeno peppers, seeds and stems removed
2 bay leaves
1 ham hock (that’s what I used, but Katie who made the beans for N to N, added 1 lb. of uncooked bacon instead; she said it cooked completely by the time the bean were soft)
Seasonings of your choice such as salt and pepper, chili powder, cumin, onion &/or garlic powder
  1. Follow package directions for cooking beans. 
  2. Drain off most of the liquid (and reserve) and remove bay leaves; I also removed the ham hock; Katie left the bacon in with the beans however.
  3. Use a mixer or an immersion blender and blend beans until smooth. If bean mixture is too stiff, stir in some of the cooking liquid.
Masa Dough
2 cups lard (1-lb. box)
6 cups masa harina
2 teaspoons salt
2 teaspoons baking powder
2 tablespoons powdered cumin
3 tablespoons chili powder
2 tablespoons onion powder
5 cups chicken broth 
  1. In a large bowl beat lard until creamy and fluffy.
  2. Add masa harina, salt, baking powder and seasonings and mix to blend.  
  3. Add broth and blend. Allow mixture to sit for 20 minutes to soften, then beat until a soft dough forms. (We actually used the masa mixture right away at N to N.) This can be covered and stored in the refrigerator even overnight. It can also be frozen and thawed for use later.
Preparing the Corn Husks
Corn husks
  1. Place husks in a large bowl and cover them with hot water. Set a heavy item (like a heavy bowl) on top of the husks to keep them submerged. Allow husks to soak for an hour or until they have rehydrated and become pliable.
  2. Use only the larger and medium-sized husks to wrap the tamales; tear the smaller ones into strips for tying tamales. 
  3. Remove the husks from the water and pat dry as tamales are assembled.
Assemble Tamales
  1. Lay a husk on a flat surface.
  2. Use the back of a metal spoon to spread the dough evenly down the center of husk (1/4-inch thick) leaving an empty space at the top and bottom of the husk and along both sides. 
  3. Place filling down the center of the masa, leaving a margin of masa all the way around. Fold the narrow end of husk up over the masa and filling.
  4. Fold one long side over to the other; begin tucking and rolling. 
  5. Fold the broad end over down the tamale and secure with a tie. 
Cooking the Tamales
  1. Set a rack inside a steamer; add water just to the top of the rack. Then, set extra corn husks on top of rack.
  2. Set tamales upright in the steamer. 
  3. Bring water to a boil, lower temperature, add lid and steam for about 1 hour 45 minutes. 
  4. Let tamales cool, still in the steamer, for at least an hour before serving; they will firm up during this time. Tamales may also be frozen or refrigerated and reheated later.

Cheesy Mac & Corn -- made in the microwave

Years ago one of the churches in Solomon had a covered dish dinner for female teachers and facility wives (Barry taught art). Linda Carlson (Solomon Home Ec teacher) and I always attended. Our all-time favorite dish was  Cheesy Mac & Corn. Eventually Linda discovered who had whipped up the concoction and that person shared the recipe. We were both surprised to discover it was simply a "dump" casserole cooked in the microwave! This unusual recipe is really simple and really good. I normally try to avoid overly processed cheese but I make an exception in this case

Cheesy Mac & Corn -- made in the microwave
1 (14.5-15 oz,) can corn, undrained
1 (14.5-15 oz,) can creamed corn
1 cup macaroni, uncooked
1 cup Velvetta cheese, cut into cubes
-----
Milk to thin, only if needed
  1. Combine all ingredients in a large microwave-safe bowl; stir.
  2. Microwave in 5-minute intervals for a total of about 20 minutes, stirring every 5 minutes. Cook just until macaroni is tender; add milk it it is too thick. 
Recipe without photos . . .
Cheesy Mac & Corn -- made in the microwave
1 (14.5-15 oz,) can corn, undrained
1 (14.5-15 oz,) can creamed corn
1 cup macaroni, uncooked
1 cup Velvetta cheese, cut into cubes
-----
Milk to thin, only if needed
  1. Combine all ingredients in a large microwave-safe bowl; stir.
  2. Microwave in 5-minute intervals for a total of about 20 minutes, stirring every 5 minutes. Cook just until macaroni is tender; add milk it it is too thick. 

Sweet Cinnamon Flavored Oatmeal Drink ("Horchata")

Several years ago I watched Marcela Valladolid make this drink on Food Network (Mexican Make Easy). I was intrigued so gave it a try and found it to be refreshing.
Forgot all about it until the other day when a friend and I were talking about adventuresome beverages. A little online research indicates that this Mexican drink is usually made with rice or rice flour and other sweetened with condensed milk. I like this version. Definitely serve it ice cold!

Sweet Cinnamon Flavored Oatmeal Drink ("Horchata")
1 cup old fashioned rolled oats
1 (4") cinnamon stick, broken into tiny pieces
4 cups water
Agave or sugar as needed (I used 2 to 3 tablespoons agave)
Option--ground cinnamon for garnish
  1. In a large container, soak the oats, cinnamon and water for a minimum of 30 minutes.
  2. Blend the mixture (including the cinnamon) in a blender.
  3. Strain.
  4. Sweeten with agave or sugar.
  5. Serve well-chilled over ice. Sprinkle with a bit of ground cinnamon if desired.


Recipe without photos . . .
Sweet Cinnamon Flavored Oatmeal Drink ("Horchata")
1 cup old fashioned rolled oats
1 (4") cinnamon stick, broken into tiny pieces
4 cups water
Agave or sugar as needed (I used 2 to 3 tablespoons agave)
Option--ground cinnamon for garnish
  1. In a large container, soak the oats, cinnamon and water for a minimum of 30 minutes.
  2. Blend the mixture (including the cinnamon) in a blender.
  3. Strain.
  4. Sweeten with agave or sugar.
  5. Serve well-chilled over ice. Sprinkle with a bit of ground cinnamon if desired.

KANSAS! Magazine—Hoffman Gristmill’s Classic American Cobbler

The fall 2018 issue of KANSAS! Magazine was just released and includes a story I wrote about  Hoffman Gristmill in Enterprise, Kansas. It includes this history of the first mill built by Christian Hoffman in 1868 on the Smoky Hill River in Enterprise and details the twists and turns, including people, places and trains, that made today's mill a reality. 
The recipe included with the story, is an adaptation of one my mom (Phyllis Newell) has made for years. This version uses “sifted wheat flour” which has 80% of the bran removed from the whole wheat flour. It is not as fine as all-purpose flour but can be used interchangeably. The mill uses Turkey Red heritage wheat, the same variety brought to Kansas in 1873 by the Mennonites. This non-hybridized wheat is locally produced in the Navarre area. 

Cover of the fall 2018 issues of KANSAS!
KANSAS! Magazine website: https://www.travelks.com/ks-mag/
Page from the story (A Kansas Staple—Enterprise's Hoffman Gristmill, pp. 30-35)
 Above -- Joe Minick running a piece of equipment he engineered  in today's Hoffman Grist Mill. It was Joe's vision and hard work that was responsible for the recreation of the 1868 mill
In color -- Joe on the left; Reed Hoffman, grandson of Christian who build and operated the first mill. Reed provided funds for rebuilding  the mill.
Photo by Emily Barnes, Abilene KS
Classic American Cobbler  
With available ingredients, including freshly ground wheat flour and fruit from the orchard or foraged berries, early settlers created cobbler, a dessert that is now considered to be an American classic. 

INGREDIENTS
1 cup granulated sugar + extra for sprinkling on top
1 cup Hoffman Grist Mill sifted wheat flour
1 stick butter, softened 
2 large eggs
Fruit: fresh fruit cut to cover bottom half of pan & sweetened to taste with sugar. Could also use sweetened frozen fruit or a (30-ounce) can of pie filling

DIRECTIONS    
  1. Preheat oven to 375°. Grease or spray an 8-9-inch round or square pan.
  2. In a mixing bowl, mix together the sugar, flour, butter and eggs to make a thick batter. 
  3. Arrange fruit in bottom of prepared pan
  4. Spoon dollops of batter over fruit; spread to partially cover the fruit. Sprinkle with additional sugar if desired.
  5. Bake around 45 minutes until lightly brown.          

Summer Sampler--Preserved Veggies & Jellies

A bounty of produce from Barry's garden this summer has kept us quite busy preparing recipes that are "tried and true." Below is a sampling of his garden veggies + a link to our trusty recipes. Instead of canning the pickled okra and beets this year, I  simply refrigerated them. Along with the refrigerated pickles, we've had ready made relishes/salads all summer long!


A few of our "tried & true" caniing/preserving recipes include . . .
Pickled Okra— this year I just make refrigerator okra by adding all the ingredients 
to a saucepan and heating for about 8 minutes and then just adding to a refrigerator jar 
Pickled Beets -- also did refrigerator-style avoiding the canning process
Salsa -- Barry makes this & uses about half the sugar called for in Sandi's recipe

Italian Pizza with pesto & truffle oil

With ingredients straight from Italy, this is indeed an Italian pizza! Thank you Debbe Roesler for sharing your trip, food inspirations and a jar of basil pesto and truffle oil, even a kitchen towel. Debbe feasted on pesto pasta with a drizzle of truffle oil. I used our ingredients to create a pizza  (plan to try to pasta later).  It was truly a pizza Christmas in July thanks to Debbe!

Italian Pizza with pesto & truffle oil
Prepared pizza dough
Basil pesto
Cooked & shredded chicken
Sliced mushrooms
Sliced olives (black or kalamata)
Chopped fresh herbs (basil, oregano, parsley) or dried Italian seasoning blend
Fresh mozzarella cheese, torn into pieces or sliced
Truffle oil
Olive oil
  1. Roll out dough and place on sprayed pizza pan (or prepare for a baking stone).
  2. Spread with a thin layer of person.
  3. Add toppings: shredded chicken, sliced mushrooms, sliced olives, fresh or dried herbs and fresh mozzarella and a drizzle of truffle oil—a little dab with do ya as it's potent stuff.Drizzle with olive oil too, if desired. 
  4. Bake at 450° for 10 to 15 minutes or until crust is crisp and cheese is brown. (Cheese can be added near end of baking period if preferred.)
Recipe without photos . . .
Italian Pizza with pesto & truffle oil
Prepared pizza dough
Basil pesto
Cooked & shredded chicken
Sliced mushrooms
Sliced olives (black or kalamata)
Chopped fresh herbs (basil, oregano, parsley) or dried Italian seasoning blend
Fresh mozzarella cheese, torn into pieces or sliced
Truffle oil
Olive oil
  1. Roll out dough and place on sprayed pizza pan (or prepare for a baking stone).
  2. Spread with a thin layer of person.
  3. Add toppings: shredded chicken, sliced mushrooms, sliced olives, fresh or dried herbs and fresh mozzarella and a drizzle of truffle oil—a little dab with do ya as it's potent stuff.Drizzle with olive oil too, if desired. 
  4. Bake at 450° for 10 to 15 minutes or until crust is crisp and cheese is brown. (Cheese can be added near end of baking period if preferred.)