Oatmeal Bread

This almost picture perfect loaf of Oatmeal Bread comes from a recipe at the King Arthur website.  The protein content of many brands of flour can fluctuate, thus typically recipes call for variable amounts of flour. King Arthur flours have a consistent protein content so their recipes call for adding all the flour at one time. Bakers who choose to use another brand of flour may discover that the flour to liquid content is off if they are using a King Arthur recipe (this is because the amount of liquid can vary according to the protein content of the flour). Since I used a combination of types of flour and brands, I’ve included instructions on how I added the flour versus the way it is added using the King Arthur method.    


Oatmeal Bread     Makes 1 loaf
Dough
3 cups (361g) King Arthur flour / I used 1 cup white whole wheat, 1 cup bread flour & 1 cup all-purpose + 2 tablespoons dough/gluten enhancer that is optional (it just helps strengthen the dough and aids in the rise)
1 cup (99g) rolled oats (old-fashioned oats)
2 tablespoons (28g) butter
1 1/2 teaspoons salt
3 tablespoons (40g) brown sugar or 3 tablespoons (63g) honey
2 teaspoons instant yeast or use active dry yeast – see notes below about yeast 
1 1/4 cups (283g) lukewarm milk
Topping
1 large egg white
1 tablespoon (14g) cold water
1 to 2 tablespoons (6g to 12g) rolled oats (old-fashioned oats)
Weigh your flour; or measure it by gently spooning it into a cup, then sweeping off any excess.
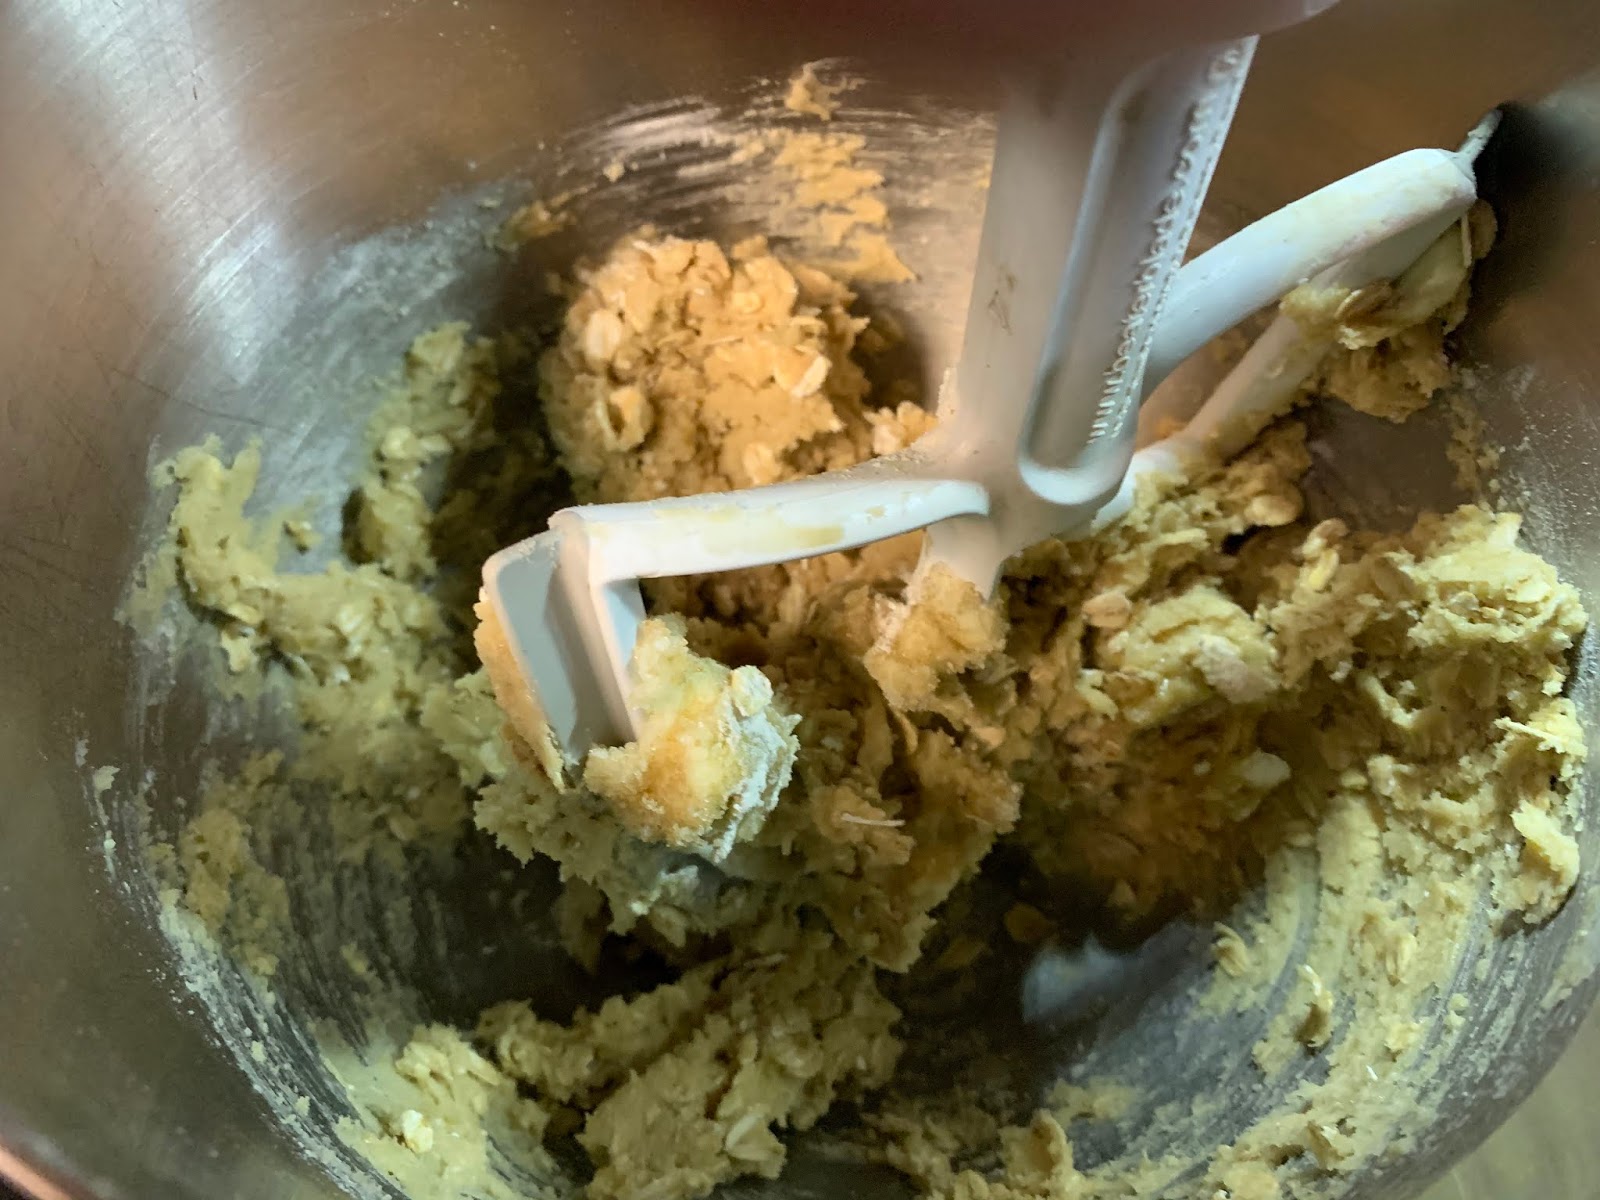
  1. To make the dough: In a large mixing bowl, or in the bowl of a stand mixer, mix together all of the ingredients to form a rough, shaggy dough. Note: I added only 2 to 2 1/2 cups of the flour initially and added more as the dough was being kneaded. 

  2. Knead the dough, by hand or mixer, until it's springy though still somewhat soft, about 5 to 7 minutes. The dough may feel quite sticky at the beginning; don't be tempted to add more flour, as additional flour will make the loaf dry. Note: Since I only added 2 to 2 1/2 cups initially, I added just enough flour at this point to create a soft but slightly sticky dough. If you're kneading by hand, try kneading on a lightly greased work surface rather than a floured surface. 
  3. Place the dough in a lightly greased bowl, cover, and allow it to rise at room temperature for 1 hour; it'll become quite puffy, though it may not double in bulk. If your kitchen is particularly cold (below 65°F), place the bowl of dough in your turned-off oven with the oven light on.
  4. To shape the dough: Transfer the dough to a lightly oiled surface. Flatten the dough into a 6” x 8” rectangle. 
  5. Fold the top down to the center (like you were folding a letter), pressing it firmly with the heel of your hand to seal. Pull the upper left and right corners into the center, pressing to seal. Repeat the first step (folding the top to the center and sealing) three or four more times, until you’ve created a 9” to 10” log. Tuck the ends under slightly, and turn the log over so its seam is on the bottom.
  6. Place the log in a lightly greased 9" x 5" loaf pan, and tent the pan with lightly greased plastic wrap or the cover of your choice. 

  7. Allow the dough to rise for 1 to 1 1/2 hours, until it's crested about 1" over the rim of the pan.
  8. Towards the end of the rising time, preheat your oven to 350°F with a rack in the center.
  9. To add the topping: Uncover the risen loaf. Beat the egg white with the cold water. Brush the beaten white all over the top crust (you won't need it all), then sprinkle with the rolled oats.
  10. To bake the bread: Bake the bread for 35 to 40 minutes, until it's golden brown. If the bread appears to be browning too quickly, cover it lightly with aluminum foil for the final 10 minutes of baking. When done, a digital thermometer inserted into the center of the loaf will register 190°F. If you don't have a thermometer, slide the bread out of its pan and tap its bottom with your fingers: you should hear a hollow thump.
  11. Remove the bread from the oven and turn it out of the pan onto a rack to cool. Cool completely before slicing. Note—For a satiny, buttery finish: When the bread is done take it out of the oven and brush the top with melted butter, either before or after you turn it out of the pan. This will both soften and flavor the crust. 
  12. Store, well wrapped, at room temperature for several days; freeze for longer storage.

Types of Yeast —What is the difference between Active Dry Yeast, Instant Yeast,  and, Rapid or Quick Rise Yeast?
  • Active Dry Yeast is activated shortly after being hydrated or combined with water (sometimes referred to as “blooming”). It works slower but eventually catches up with the instant.
  • (Active Dry) Instant Yeast becomes active the “instant” it contacts moisture. It is ideally suited to the Rapidmix method of yeast dough preparation (where the yeast is added directly to the flour) but will not be harmed if added directly to water in the Traditional mixing method. Instant yeast does make the bread rise a bit faster than plain active dry yeast. THIS IS WHAT I PREFER. It is interchangeable with Active Dry; both can be used in recipes that don’t specify the type of yeast to use.
  • Rapid or Quick Rise Yeast (“Fast-Rising” or “Fast-Acting”) is more granulated and can cut the rising time in half. Like instant yeast, it is ideally suited to the Rapidmix method and can shorten the rising time of traditional recipes by as much as 50%. To adapt a recipe that calls for either of the above two types of yeast — mix the “Fast-Rising” yeast with dry ingredients and heat liquids to 130°.
Recipe without photos . . .
Oatmeal Bread     Makes 1 loaf
Dough
3 cups (361g) King Arthur flour / I used 1 cup white whole wheat, 1 cup bread flour & 1 cup all-purpose + 2 tablespoons dough/gluten enhancer that is optional (it just helps strengthen the dough and aids in the rise)
1 cup (99g) rolled oats (old-fashioned oats)
2 tablespoons (28g) butter
1 1/2 teaspoons salt
3 tablespoons (40g) brown sugar or 3 tablespoons (63g) honey
2 teaspoons instant yeast or use active dry yeast – see notes below about yeast 
1 1/4 cups (283g) lukewarm milk
Topping
1 large egg white
1 tablespoon (14g) cold water
1 to 2 tablespoons (6g to 12g) rolled oats (old-fashioned oats)
Weigh your flour; or measure it by gently spooning it into a cup, then sweeping off any excess.
  1. To make the dough: In a large mixing bowl, or in the bowl of a stand mixer, mix together all of the ingredients to form a rough, shaggy dough. Note: I added only 2 to 2 1/2 cups of the flour initially and added more as the dough was being kneaded. 
  2. Knead the dough, by hand or mixer, until it's springy though still somewhat soft, about 5 to 7 minutes. The dough may feel quite sticky at the beginning; don't be tempted to add more flour, as additional flour will make the loaf dry. Note: Since I only added 2 to 2 1/2 cups initially, I added just enough flour at this point to create a soft but slightly sticky dough. If you're kneading by hand, try kneading on a lightly greased work surface rather than a floured surface. 
  3. Place the dough in a lightly greased bowl, cover, and allow it to rise at room temperature for 1 hour; it'll become quite puffy, though it may not double in bulk. If your kitchen is particularly cold (below 65°F), place the bowl of dough in your turned-off oven with the oven light on.
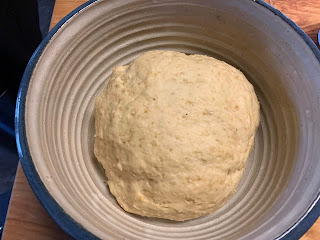
  4. To shape the dough: Transfer the dough to a lightly oiled surface. Flatten the dough into a 6” x 8” rectangle. 
  5. Fold the top down to the center (like you were folding a letter), pressing it firmly with the heel of your hand to seal. Pull the upper left and right corners into the center, pressing to seal. Repeat the first step (folding the top to the center and sealing) three or four more times, until you’ve created a 9” to 10” log. Tuck the ends under slightly, and turn the log over so its seam is on the bottom.
  6. Place the log in a lightly greased 9" x 5" loaf pan, and tent the pan with lightly greased plastic wrap or the cover of your choice. 
  7. Allow the dough to rise for 1 to 1 1/2 hours, until it's crested about 1" over the rim of the pan.
  8. Towards the end of the rising time, preheat your oven to 350°F with a rack in the center.
  9. To add the topping: Uncover the risen loaf. Beat the egg white with the cold water. Brush the beaten white all over the top crust (you won't need it all), then sprinkle with the rolled oats.
  10. To bake the bread: Bake the bread for 35 to 40 minutes, until it's golden brown. If the bread appears to be browning too quickly, cover it lightly with aluminum foil for the final 10 minutes of baking. When done, a digital thermometer inserted into the center of the loaf will register 190°F. If you don't have a thermometer, slide the bread out of its pan and tap its bottom with your fingers: you should hear a hollow thump.
  11. Remove the bread from the oven and turn it out of the pan onto a rack to cool. Cool completely before slicing. Note—For a satiny, buttery finish: When the bread is done take it out of the oven and brush the top with melted butter, either before or after you turn it out of the pan. This will both soften and flavor the crust. 
  12. Store, well wrapped, at room temperature for several days; freeze for longer storage.

Milk Bread Honey Buns

I am on a bread baking binge! The day before it was Oatmeal Bread. Today it is Milk Bread Honey Buns . . . and I have a folder full of other bread recipes I want to try. 
We were first introduced to Milk Bread at the 2019 National Festival of Breads in Manhattan KS. Since then I’ve noticed that it is trending on the internet and the method is used in rolls and fancy loaves. Milk Bread incorporates a Japanese “tangzhong” — a technique that creates a milk-flour paste.
That demonstration in Manhattan was sponsored by Red Star Yeast, and that’s where I found today's recipe. The website also includes a very informative video by Gesine Prado. I would recommend it for all but especially those not familiar with Milk Bread. 
These honey buns are light, fluffy, tender and soft, but despite their softness they do have body and an interesting, somewhat dense texture. 
After the National Festival of Breads, I made  Japanese Milk Bread loaves and have included some of the information about the technique immediately following the recipe. 

Recipe without photos . . .
Milk Bread Honey Buns   Makes 16 buns
For the Tangzhong (Makes 250 grams)
½ cup (60 grams) all-purpose flour  (I used Pride of the Prairie Flour from Farmer Direct, Inc., New Cambria) 
½ cup (120 milliliters) whole milk (I used milk from Hilderbrand Dairy)
½ cup (120 milliliters) water
For the dough
3 ½ cups plus 3 tablespoons (444 grams) all-purpose flour
1 packet (¼-ounce, 7g) Platinum Yeast
½ cup (120 milliliters) lukewarm (105˚F) whole milk  
1 large egg, room temperature
3 tablespoons (63 grams) honey OR ⅓ cup (66 grams) granulated sugar
1 teaspoon (4 grams) fine sea salt
4 tablespoons (56 grams) softened, not melted, unsalted butter
1 egg plus 1 tablespoon water, whisked together, for egg wash


  1. For the Tangzhong: In a saucepan, add the flour, then while whisking, add the water and milk. Whisk constantly over medium-low heat until the mixture thickens into a smooth paste. Mixing time is approximately 3 ½ minutes. 

  2. Transfer the mixture to a stand mixer bowl and allow to cool to room temperature.
  3. For the dough: In another mixing bowl, add the flour (I added 3 cups at this point) and Platinum Yeast. Stir to combine and set aside briefly. 
  4. To the lukewarm milk, add the egg, stir, then add it to the Tangzhong. 
  5. Add the honey and salt; then add the flour-yeast mixture. 
  6. Mix on medium-low speed with the dough hook until the mixture comes together (it should also have time to begin forming the structure of the bread). (I added the remaining 1/2 cup + 3 tablespoons of flour at this point.)
  7. Add the butter, a small piece at a time, until incorporated. Raise the mixer speed to medium.
  8. The mixture will be very soft, and shaggy at first, sticking to the bottom and sides of the bowl. Continue mixing until the mixture pulls away from the sides of the bowl and is smooth and shiny, about 10 to 15 minutes. 
  9. Transfer the dough to an oiled bowl and turn the dough over to coat the dough in oil. 
  10. Cover the bowl with plastic wrap and allow to rise at room temperature until the dough almost doubles in size. (See note below for overnight rise option.) 
  11. Place the dough in the refrigerator to firm up for shaping, about ½ hour. Note: the dough is very soft and slack, but by cooling it in the refrigerator, the butter in the dough seizes and the dough firms enough to shape more easily, much like brioche dough.
  12. Punch down dough and turn out onto a lightly greased counter. 
  13. Divide dough into 16 equal pieces. 
    Above: Dough is divided in half.
    Below: Each half is divided into 8 sections.

  14. Flatten each dough piece slightly to remove excess air and to also form a round shape. Then pinch the edges of dough to the underside and using the “claw” method, roll each bun into a tight ball. 


  15. Place on a parchment-lined sheet pan, seam side down, a few inches apart (8 rolls per pan), and cover loosely with plastic wrap. 
  16. Preheat oven to 350˚F. 
  17. Allow buns to rise in a warm area, no warmer than 90˚F, for 40 to 50 minutes or until about doubled in size and pass the ripe test (an indent remains after lightly touching dough with finger tip). 
  18. Brush with egg wash.
  19. Bake until golden brown and the internal temperature reads 190˚F, about 25 to 27 minutes.
  20. Transfer to a cooling rack. 
Note—For overnight rise: Place covered dough in refrigerator overnight, remove from refrigerator and continue with shaping directions.

King Arthur Flour’s website has this to say about TANGZHONG:This Japanese technique cooks a small percentage of the flour and liquid (water or milk) in a yeast recipe very briefly before combining the resulting thick slurry with the remaining ingredients.
How does this technique affect yeast dough? It pre-gelatinizes the starches in the flour, meaning they can absorb more water. In fact, flour will absorb twice as much hot water or milk as it does the cool/lukewarm water or milk you’d usually use in yeast dough.
Not only does the starch in the flour absorb more liquid; since heating the starch with water creates structure, it’s able to hold onto that extra liquid throughout the kneading, baking, and cooling processes. Which in turn means:
• Since there’s less free (unabsorbed) water in the dough, it’s less sticky and easier to knead;
• The bread or rolls may rise higher, due to more water creating more internal steam (which makes bread rise in the oven — along with the carbon dioxide given off by the yeast);
• Having retained more water during baking, bread and rolls will be moister, and will stay soft and fresh longer.


Milk Bread Honey Buns   Makes 16 buns
For the Tangzhong (Makes 250 grams)
½ cup (60 grams) all-purpose flour  (I used Pride of the Prairie Flour from Farmer Direct, Inc., New Cambria) 
½ cup (120 milliliters) whole milk (I used milk from Hilderbrand Dairy)
½ cup (120 milliliters) water
For the dough
3 ½ cups plus 3 tablespoons (444 grams) all-purpose flour
1 packet (¼-ounce, 7g) Platinum Yeast
½ cup (120 milliliters) lukewarm (105˚F) whole milk  
1 large egg, room temperature
3 tablespoons (63 grams) honey OR ⅓ cup (66 grams) granulated sugar
1 teaspoon (4 grams) fine sea salt
4 tablespoons (56 grams) softened, not melted, unsalted butter
1 egg plus 1 tablespoon water, whisked together, for egg wash
  1. For the Tangzhong: In a saucepan, add the flour, then while whisking, add the water and milk. Whisk constantly over medium-low heat until the mixture thickens into a smooth paste. Mixing time is approximately 3 ½ minutes. 
  2. Transfer the mixture to a stand mixer bowl and allow to cool to room temperature.
  3. For the dough: In another mixing bowl, add the flour (I added just 3 cups at this point ) and Platinum Yeast. Stir to combine and set aside briefly. 
  4. To the lukewarm milk, add the egg, stir, then add it to the Tangzhong. 
  5. Add the honey and salt; then add the flour-yeast mixture. 
  6. Mix on medium-low speed with the dough hook until the mixture comes together (it should also have time to begin forming the structure of the bread). (I added the remaining 1/2 cup + 3 tablespoons of flour at this point.)
  7. Add the butter, a small piece at a time, until incorporated. Raise the mixer speed to medium.
  8. The mixture will be very soft, and shaggy at first, sticking to the bottom and sides of the bowl. Continue mixing until the mixture pulls away from the sides of the bowl and is smooth and shiny, about 10 to 15 minutes. 
  9. Transfer the dough to an oiled bowl and turn the dough over to coat the dough in oil. 
  10. Cover the bowl with plastic wrap and allow to rise at room temperature until the dough almost doubles in size. (See note below for overnight rise option.) 
  11. Place the dough in the refrigerator to firm up for shaping, about ½ hour. Note: the dough is very soft and slack, but by cooling it in the refrigerator, the butter in the dough seizes and the dough firms enough to shape more easily, much like brioche dough.
  12. Punch down dough and turn out onto a lightly greased counter. 
  13. Divide dough into 16 equal pieces. 
  14. Flatten each dough piece slightly to remove excess air and to also form a round shape. Then pinch the edges of dough to the underside and using the “claw” method, roll each bun into a tight ball. 
  15. Place on a parchment-lined sheet pan, seam side down, a few inches apart (8 rolls per pan), and cover loosely with plastic wrap. 
  16. Preheat oven to 350˚F. 
  17. Allow buns to rise in a warm area, no warmer than 90˚F, for 40 to 50 minutes or until about doubled in size and pass the ripe test (an indent remains after lightly touching dough with finger tip). 
  18. Brush with egg wash.
  19. Bake until golden brown and the internal temperature reads 190˚F, about 25 to 27 minutes.
  20. Transfer to a cooling rack. 
Note—For overnight rise: Place covered dough in refrigerator overnight, remove from refrigerator and continue with shaping directions.

Kentucky Hot Brown Sandwiches - a Kansas version

I was introduced to Hot Brown Sandwiches during our last trip to Kentucky when we met Colonel Bob and Cora Jane Spiller for lunch at a downtown restaurant in Bowling Green. 
We enjoyed a leisurely lunch with lots of conversation including the story about the origin of the sandwich.
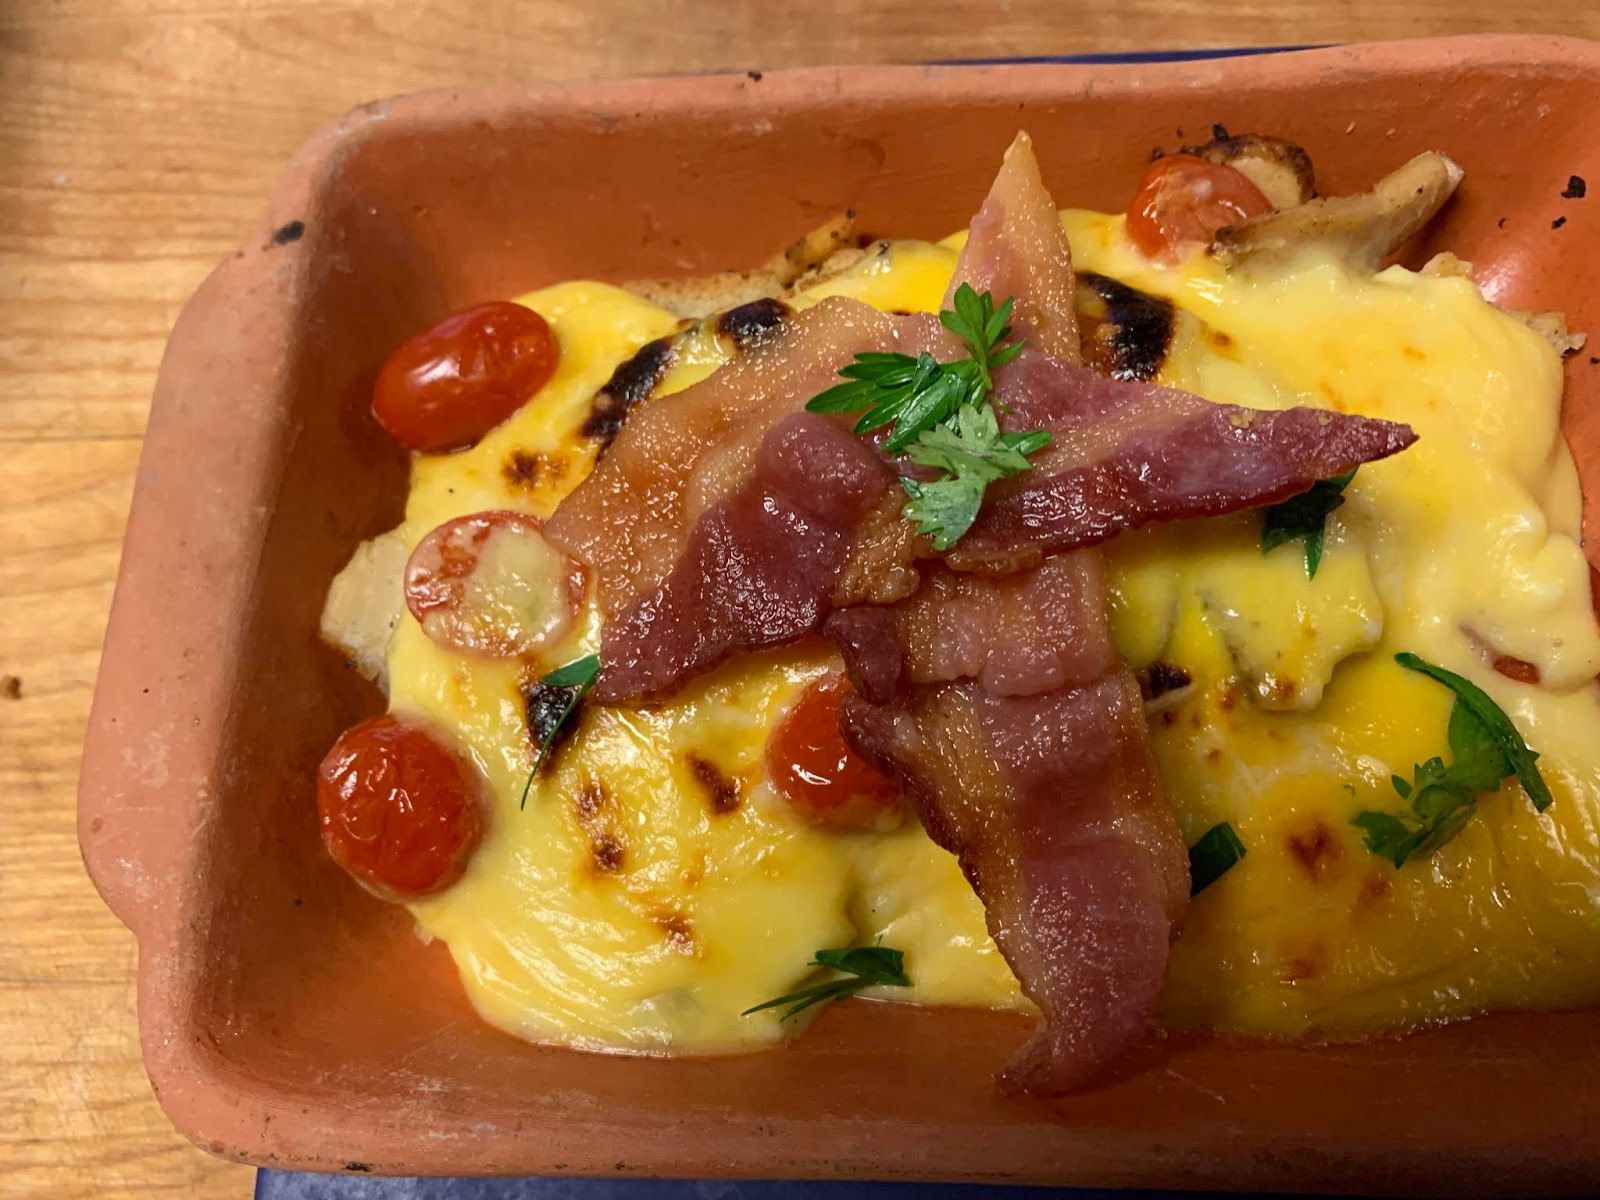
This is my “loose” interpretation of that turkey, bacon and cheese sandwich bathed in a cheesy sauce . . . using what I have on hand, my Kansas version. There are many variations of the “original” recipe; the types of cheese used in the sauce varies from regular to white Cheddar to all Parmesan. The “original: recipe that I found at allrecipe.com includes specific amounts; my version is more of a general guideline. The original calls for roasted turkey; I used thin slices of Barry’s roasted turkey breast. It allows two slices of toast and two pieces of bacon per person, we used only one of each per serving. I omitted the egg and heavy cream that the original added to the white sauce and just used a basic sauce with cheese. Also used cherry tomatoes in place of the traditional slice. It was a delicious rendition of the lovely time we shared with the Spillers back in June of 2013.

Kentucky Hot Brown Sandwich 
1 slice of bread per person, toasted and cut in 2 triangles
Thinly sliced smoked turkey or roasted turkey
Cherry tomatoes, cut in half or 1 tomato slice per sandwich
Cheese sauce (basic white sauce with Cheddar cheese added)
Parmesan cheese – enough to add a little to the cheese sauce & to sprinkle over the top of the sandwich
1 slice of crisp bacon per sandwich 
Parsley or chives for garnish if desired
  1. Preheat the oven's broiler. 
  2. For each hot brown, place toast triangles in the bottom of an individual sized casserole dish. 
  3. Cover with a liberal amount of roasted turkey and cherry tomato halves.
  4. Spoon sauce over the top of each one and sprinkle Parmesan cheese. 
  5. Place the dishes under the broiler and cook until the top is speckled brown, about 5 minutes. 
  6. Remove from the broiler and arrange two slices of bacon in a cross shape on top of each sandwich. 
  7. Garnish with parsley or chives if desired and serve immediately with a fork!
STORY OF THE SANDWICH: The Kentucky Hot Brown  was originally created in 1926 at the Brown Hotel in Louisville, Kentucky. Chef Fred K. Schmidt came up with the sandwich to feed late-night revelers at the hotel, which was a hotspot for live music and dancing in the 1920s. When the musicians took a break at midnight, the crowds would flock to the restaurant for sustenance to keep them going for the rest of the night.

Recipe without photos . . .
Kentucky Hot Brown Sandwich 
1 slice of bread per person, toasted and cut in 2 triangles
Thinly sliced smoked turkey or roasted turkey
Cherry tomatoes, cut in half or 1 tomato slice per sandwich
Cheese sauce (basic white sauce with Cheddar cheese added)
Parmesan cheese – enough to add a little to the cheese sauce & to sprinkle over the top of the sandwich
1 slice of crisp bacon per sandwich 
Parsley or chives for garnish if desired
  1. Preheat the oven's broiler. 
  2. For each hot brown, place triangle toast in the bottom of an individual sized casserole dish. 
  3. Cover with a liberal amount of roasted turkey and cherry tomato halves.
  4. Spoon sauce over the top of each one and sprinkle Parmesan cheese. 
  5. Place the dishes under the broiler and cook until the top is speckled brown, about 5 minutes. 
  6. Remove from the broiler and arrange two slices of bacon in a cross shape on top of each sandwich. 
  7. Garnish with parsley or chives if desired and serve immediately with a fork!

Fig Jam Bars - my version of commercial Fig Bars

A fancy jar of fig-walnut jam, a Christmas gift from a niece and nephew, was the inspiration for this recipe—my homemade version of commercial Fig Bars. Barry loves these but if you are not a fig fan, I think raspberry jar would be delightful. Of course pecans could be subsisted for the walnuts or nuts could be omitted altogether.

Fig Jam Bars       Makes an 8x8-inch pan
1 cup all-purpose flour
1/2 cup chopped walnuts
1 cup rolled old-fashioned oats 
1/2 cup packed brown sugar
1/4 teaspoon ground cinnamon
1/2 teaspoon salt
1 stick butter, softened
2 cups fig jam
  1. Preheat oven to 350°. Line a 8x8 pan with parchment paper, leaving a 2-inch overhang on the sides; set aside.
  2. In a mixing bowl, whisk together flour, walnuts, oats, sugar, cinnamon and salt.
  3. Use a fork or your fingers to work in the softened butter; mixture should eventually appear as small crumbs.

  4. Transfer two-thirds of mixture to prepared pan and press it down, covering the entire bottom of the pan.
  5. Bake for 25 to 30 minutes, or until crust is light brown.
  6. Remove from oven and spread the fig jam across the top.
  7. Sprinkle the reserved oat mixture evenly over the jam.
  8. Bake for 35 to 40 minutes, or until golden brown.
  9. Cool completely in the pan.
  10. Remove and cut into bars.
Recipe without photos . . .
Fig Jam Bars       Makes an 8x8-inch pan
1 cup all-purpose flour
1/2 cup chopped walnuts
1 cup rolled old-fashioned oats 
1/2 cup packed brown sugar
1/4 teaspoon ground cinnamon
1/2 teaspoon salt
1 stick butter, softened
2 cups fig jam
  1. Preheat oven to 350°.Line a 8x8 pan with parchment paper, leaving a 2-inch overhang on the sides; set aside.
  2. In a mixing bowl, whisk together flour, walnuts, oats, sugar, cinnamon and salt.
  3. Use a fork or your fingers to work in the softened butter; mixture should eventually appear as small crumbs.
  4. Transfer two-thirds of mixture to prepared pan and press it down, covering the entire bottom of the pan.
  5. Bake for 25 to 30 minutes, or until crust is light brown.
  6. Remove from oven and spread the fig jam across the top.
  7. Sprinkle the reserved oat mixture evenly over the jam.
  8. Bake for 35 to 40 minutes, or until golden brown.
  9. Cool completely in the pan.
  10. Remove and cut into bars.

Grain Bowls . . . a Building Blueprint

Grain bowls are a healthy meal alternative, a way to offer variety and to even use up leftovers. During a recent show on Food Network’s Kitchen, a visiting chef mentioned she prepared a variety of ingredients ahead of time, and then let her family create their own “custom-made-bowls.”  Since then, I’ve followed her lead. There are so many things to use, so this is just a general . . .

Grain Bowl Building Blueprint
Grains: rice, quiona, farro . . . 
Produce: asparagus, broccoli, green beans. sweet potatoes, onions or scallions, spinach leaves, lettuce, kale, thinly sliced cabbage, carrots, cucumbers, radishes, red peppers, tomatoes, avocado, mushrooms . . .
Protein: salmon, chicken, turkey, hard-cooked eggs, beans or lentils, nuts . . .
Salad Dressing: Mom's Celery Seed Dressing: Mom's Celery Seed Dressing, "Shake & Serve" Dressing, Sunflower Oil Dressing . . . 

Above: Offerings for a recent Grain Bowl included: spinach leaves, lightly steamed asparagus, hard cooked eggs, baked salmon, chopped tomatoes, sliced carrots, roasted sweet potatoes, cooked faro and basmati rice with dressing choices that  Mom's Celery Seed dressing and a commercial product. 

Other themed grain bowls on this site include:

Cinco de Mayo Mexican Tortilla Stack

This is a rough interpretation of a dish I made tonight for Cinco de Mayo. It has the flavors of an enchilada in stackable form . . . think Mexican lasagna.
Since I made it for just two, I used small tortillas. I did just three layers of tortilla and two of filling but it could be stacked higher.
Ingredients could vary -- I used green enchilada sauce but red would work. I used ground pork seasoned cooked with onions and seasoned with chili powder and cumin but ground beef or turkey combined with taco seasoning would work, or leave out the meat and go with just beans . . . any kind including refried. Use Mexican cheeses or blends or just stick with Cheddar. I added some green chilis as I had a can open, leftover from another recipe. The ideas are endless!
A springform pan is not essential, a round cake pan works if you want to stick to a round shape.

Cinco de Mayo Mexican Tortilla Stack
3 or more flour or corn totillas
Green or red enchilada sauce
Cooked ground pork, beef or turkey seasoned with chili powder & cumin or taco seasoning
Cooked beans -- black, pinto, or refried
Grated cheese -- Cheddar or Mexican
Corn -- frozen or canned
Other possibilities: green chilies, sautƩed red peppers
Topping Ideas: Lettuce, tomatoes, cilantro, salsa, sour cream, avocado slices
  1. Brush both sides of a tortilla with enchilada sauce and position in the bottom of a springform or cake pan.
  2. Add a layer of toppings such as seasoned cooked meats, beans, cheese, corn, chilies, etc.
  3. Add a 2nd tortilla and brush top with enchilada sauce. Add another layer of topping.
  4. Finally top with a 3rd tortilla (unless you wish to build a higher stack) and brush liberally with enchilada sauce. 
  5. Cover top loosely with foil and bake for about 30 to 40 minutes removing foil the last 10 minutes and adding more cheese to the top.( I set the springform pan on a baking sheet in case of seepage.)
  6. Garnish with the toppings of your choice and serve extras on the side. Cut in wedges to serve.
Recipe without photos . . .
Cinco de Mayo Mexican Tortilla Stack
3 or more flour or corn totillas
Green or red enchilada sauce
Cooked ground pork, beef or turkey seasoned with chili powder & cumin or taco seasoning
Cooked beans -- black, pinto, or refried
Grated cheese -- Cheddar or Mexican
Corn -- frozen or canned
Other possibilities: green chilies, sautƩed red peppers
Topping Ideas: Lettuce, tomatoes, salsa, cilantro, sour cream, avocado slices
  1. Brush both sides of a tortilla with enchilada sauce and position in the bottom of a springform or cake pan.
  2. Add a layer of toppings such as seasoned cooked meats, beans, cheese, corn, chilies, etc.
  3. Add a 2nd tortilla and brush top with enchilada sauce. Add another layer of topping.
  4. Finally top with a 3rd tortilla (unless you wish to build a higher stack) and brush liberally with enchilada sauce. 
  5. Cover top loosely with foil and bake for about 30 to 40 minutes removing foil the last 10 minutes and adding more cheese to the top. ( I set the springform pan on a baking sheet in case of seepage.)
  6. Garnish with the toppings of your choice and serve extras on the side. Cut in wedges to serve.

Cowboy Cookies . . . maybe the best chocolate chip cookie ever!

We went on a picnic! And what’s a picnic without cookies? It was the perfect opportunity to try a new recipe and this is the one I’ve been thinking about for some time. 
This recipe uses ingredients that are usually on hand in my kitchen but I did cut it in half . . . for splurge control!
I also used a 1/4-cup capacity scoop for giant cookies.
Barry says these maybe the best chocolate chips ever!


Cowboy Cookies   Makes 2 dozen 1/4-cup size cookies
1 cup (2 sticks) butter, softened
1 cup granulated sugar
1 cup packed brown sugar
2 eggs
1 teaspoon baking soda
1/2 teaspoon baking powder
1/2 teaspoon salt
1 teaspoon vanilla
2 cups all-purpose flour  (Pride of the Prairie flour from Farmer Direct Foods, New Cambria, KS)
2 cup uncooked oatmeal, old-fashioned or quick
2 cups of chocolate chips (I used half dark chocolate & half semi-sweet but milk chocolate would work, too)
Chopped walnuts to taste (about 1 cup+ for a full recipe)
  1. Preheat oven to 350°. Spray cookie sheets or line cookie sheet with parchment paper and spray.
  2. Cream together butter and sugars.
  3. Add 2 eggs and mix.
  4. Add baking soda, baking powder, salt, vanilla, flour and oatmeal; mix to blend. 
  5. Stir in chocolate chips and walnuts.
  6. Drop by large spoon on cookie sheet; I used a 1/4 cup scoop.
  7. Bake in preheated oven for 12 to15 minutes – cookies should be lightly browned but still soft.
  8. Let them stand a few minutes until completely set and then transfer to a cooling rack.
Our picnic was a part of a road trip . . . an escape from being cooped up in our house for weeks.  Just like the road trips of my youth, we packed a lunch to take with us! Back in those days, eating out was not the norm; Mom’s cooking was. Guess the old saying, “What goes around, comes around!” We haven’t had a meal out since March 7th. Like this picnic and roadtrip, it’s been an adventure!


Recipe without photos . . .
Cowboy Cookies   Makes 2 dozen 1/4-cup size cookies
1 cup (2 sticks) butter, softened
1 cup granulated sugar
1 cup packed brown sugar
2 eggs
1 teaspoon baking soda
1/2 teaspoon baking powder
1/2 teaspoon salt
1 teaspoon vanilla
2 cups all-purpose flour (Pride of the Prairie flour from Farmer Direct Foods, New Cambria, KS)
2 cup uncooked oatmeal, old-fashioned or quick
2 cups of chocolate chips (I used half dark chocolate & half semi-sweet but milk chocolate would work, too)
Chopped walnuts to taste (about 1 cup+ for a full recipe)
  1. Preheat oven to 350°. Spray cookie sheets or line cookie sheet with parchment paper and spray.
  2. Cream together butter and sugars.
  3. Add 2 eggs and mix.
  4. Add baking soda, baking powder, salt, vanilla, flour and oatmeal; mix to blend.
  5. Stir in chocolate chips and walnuts.
  6. Drop by large spoon on cookie sheet; I used a 1/4 cup scoop. 
  7. Bake in preheated oven for 12 to15 minutes – cookies should be lightly browned but still soft.
  8. Let them stand a few minutes until completely set and then transfer to a cooling rack.