Tribulations & Hesitations in the Kitchen – Spicy Saltine Crackers

     Isn’t it funny how we (or at least me) sometimes don’t hesitate to tackle insurmountable tasks and then get overcome by those that are simple? What could be so hard about seasoning already made saltine crackers?
     Barry loves Seasoned Oyster Crackers and so when a friend told me about a similar recipe for saltines, I couldn’t wait to try them . . . until I read the recipe.
     Two years passed and I still hadn’t made them. Why? Well it had to do with the recipe – I just could not visualize drenching crackers in seasoned oil and then shaking them at intervals until that oil was all absorbed! Yes, that’s kind of how the oyster crackers are made . . . but then they are at least baked in the microwave.
     Can’t tell you how many times I’ve almost grabbed a box of saltines, determined to at least give the recipe a try. Sometimes I’ve even had the box in my grocery cart, only to return it to the shelf.
     But, yesterday I resolved to finally give the recipe a try. With the saltines on the counter, I searched for my two-year-old recipe – I knew where it used to be but must have moved it to a new “safe” place! Never fear -- a quick Internet search rewarded me with several options. Using those, I created my own version — it’s a whole lot like our Seasoned Oyster Cracker with the addition of spicy peppers.
   Barry gave the crackers a “thumbs up” and I’m left wondering why it took me so long to give this recipe a try.


We shared this recipe with Chattering Kitchen -- check out Mehereen's blog by clicking on her blog name and see what she's done with our recipe + access her recipe collection.

Spicy Saltine Crackers
1 (16 oz.) pkg. saltine crackers
1 cup canola oil (I try to stick with just 1 cup but you can increase to 1 1/4 cups if you prefer)
1 (1 oz.) pkg. Ranch-style dry dressing mix (the pkg. is equivalent to 3 Tbsp.; I generally use 4 Tbsp.)
1 to 2 tablespoons crushed red pepper flakes (Barry prefers 1 tbsp. but I’d go with 2 if they were just for me)
2 teaspoons dried dill weed
2 teaspoons dried Italian seasoning blend

1.  Place crackers in rows on their edges (not lying flat) in a container with a sealable lid. 
Crackers fit nicely in a 8 1/2" by 12" plastic container.
2.  In a bowl, whisk oil, dry dressing mix and seasonings together; pour mixture evenly over rows of crackers. 
Crackers have been drenched in oil!
3.  Replace lid, ensure a tight seal and invert back and forth slowly and gently several times. Let container sit upside down for 15 minutes then right-side-up for 15 minutes. Repeat this process every 15 minutes for one hour.
Crackers have been inverted.
After multiple inversions, lots of shaking and a brief stint in the microwave,
the crackers are done . . . and quite delicious (even if I do say so myself). 
4. Store in a sealed container.

Another Winter Soup – Beef & Barley Soup

     A hearty beef soup that’s loaded with nutritious ingredients; great for cold winter nights.
     We started with a base of sautéed onions, carrots and celery to which we added cooked ground beef mix and whole barley (you can use the quick-cooking variety to reduce cooking time but we like hulled or pearled as these varieties are chewier and have more fiber)

Beef & Barley Soup    4 servings / makes about 6 cups
2 tablespoons olive oil
1 cup diced onion
1 cup diced carrots
1 cup sliced celery
1 (12 oz.) pkg. mushrooms, coarsely chopped
½ cup uncooked barley (pearled, hulled or quick-cooking)
½ to 1 cup cooked Ground Beef Mix (if you don’t keep this on hand, simply brown the beef in the skillet before you add the veggies)
2 cups beef broth
3 to 4 cups water (start with 3 cups and add more if needed)
1 teaspoon Kosher salt
¼ teaspoon coarsely ground black pepper
                         
1.     Heat oil in a large pot over medium heat. Add onion and carrots; cook, mixing occasionally, until onion is softened, about 7 minutes. Add mushrooms; cook, mixing occasionally, until liquid evaporates and mushrooms are tender, about 8 minutes.  
2.     Add barley, broth, water, salt and pepper; stir to combine. Cover and bring to a simmer; reduce heat and simmer 40 minutes or until barley is tender.

Check out our other soups in the Index that appears at the right.

AN INTERNATIONAL BREAKFAST COMPETITION and my Baked Cran-Walnut Oat Casserole from Kansas

      Our breakfast menu varied but it was almost always hot! I grew up on a farm in Kansas eating eggs, sausage, bacon, or fresh side, pancakes, waffles, French toast, sometimes a bowl of oatmeal.
     Oatmeal was one of those “stick to the ribs” dishes. My mom served it as a main dish with sugar and thick, heavy cream, skimmed from the top of our own pasteurized milk. However, it was merely an add-on, along with the standard fried eggs, bacon and toast, at my paternal grandparent’s table.
     I’ve “fancied” up this oatmeal dish, a tribute to my 1950s era childhood breakfasts, for an international contest -- “Breakfast around the world” at Very Good Recipes. This site is home to over 11,000 food blogs from all around the world; it is under the direction of Stéphane Gigandet.
    Very Good Recipes sponsors monthly competitions that are overseen by ten judges from around the world and, I am honored to be one of them. Other judges and links to their sites follow:

- Drina – Eaternal Zest
- Françoise – A French Cook Diary 
- Judy – Jude’s Juice 
- Leslie – Cooking Memoirs 
- Marie-Claire – Half a Century of Recipes 
- Mimi – Mimi Cooks 
- Simona – Briciole 

To participate in the Breakfasts of the World contest all you will have to do is publish a breakfast dish recipe; it can be sweet or savory. Please submit only one dish, not the whole breakfast buffet! To make it more a challenge, you can prepare a breakfast dish from a different country than your own, or you can add your twist to a traditional dish from your country. For more information on how to participate, go to the Breakfasts of the World Challenge page. Please take the challenge, be creative and have fun! 
Rules:
·      There must be at least one picture in your recipe, and both the recipe and picture need to be your own. If your recipe is inspired by another, please mention it in your recipe.
·      You cannot use an already published recipe to participate in the challenge, you need to publish a new recipe (otherwise there's no challenge!)
·      We would love to have participations from all around the world, including from blogs in languages other than English. Please do include an English translation of your recipe in your post though. If you need help with the translation (proofreading etc.), we will be glad to help if we can.

Contest runs from Monday, January 9, 2012 through Monday, January 30, 2012.

Here’s my example . . .

Baked Cran-Walnut Oat Casserole    6 servings
2 cups half-and-half or milk or almond milk
¼ cup brown sugar, more or less to taste
1 tablespoon butter
½ teaspoon salt
1 cup regular or quick-cooking oats
1 tablespoon ground cinnamon
½ to 3/4 cup chopped dried cranberries (or dried apricots, raisins or cherries, etc.)
¼ cup chopped walnuts (or other nuts) + additional nuts for sprinkling

1.     Preheat the oven to 350°. Grease or spray 6 individual casseroles or custard cups.
3 of the 6 individual casseroles have been misted with non-stick pan spray.
2.     Combine the half-and-half or milk, brown sugar, butter and salt in a heavy saucepan over medium heat. Simmer until the butter is melted and the mixture is smooth.
Misture is heating.
3.     Remove from heat; stir in the oats, dried cranberries and walnuts. Ladle into prepared casseroles and sprinkle with additional chopped nuts. 
Mixture is ready to ladle into prepared casserole dishes.
It will be thin and runny at the point but will thicken as it bakes.
4.     Place casseroles on a baking sheet and put in oven. Bake for 20 to 30 minutes. Remove from the oven and serve.
Casseroles are ready to go into the oven.
U.S. Map

Kansas is located smack-dab in the United State’s Midwest region.

OATMEAL. According to a CBS news story,  “Americans didn't start growing oats in quantity until the 19th century. Quaker Oats was registered as a cereal trademark in 1877 and, by 1885 oats were being sold in boxes, not just in bulk. ‘Quick Oats’ were introduced in 1922, and ‘Instant’ Oatmeal in 1966. In the 1970s, flavored oatmeal arrived.
The Victorians used to cook their oatmeal forever. Marion Harland, whose massive cooking tome was published in 1903, commented, ‘Four hours of boiling makes oatmeal good; eight hours makes it better; twenty-four hours makes it best’ The original oatmeal was made with ‘groats,’ the hulled and crushed grain itself, cut into pieces and often soaked overnight before cooking.” 

Marla's Overnight Baked French Toast


     Late morning breakfast: French toast, bacon, French press coffee . . . and time to leisurely read the Sunday paper — what a treat! And the best thing, I prepped the French toast last night so just had to pop it in the oven this morning.
    This is my sister’s recipe and we always look forward to it on visits to Texas. Marla’s recipe actually calls for macadamia nuts (which are really yummy) but I usually make it with sliced almonds; any nuts will work.
     I reduced the recipe for us this morning but used to make it in large batches for catering and even included it in The Kirby House Cookbook.

Marla’s Overnight Baked French Toast   About 6 servings
4 large eggs, lightly beaten
1/4 cup granulated sugar
1/4 teaspoon ground nutmeg
2/3 cup orange juice
1/3 cup whole milk (I made it with almond milk this morning)
1/2 teaspoon vanilla
1 loaf French bread, cut into 1” slices (I use homemade sourdough French bread)
2/3 cup butter, melted
1/2 cup chopped or slivered nuts (almonds, pecans, macademia nuts, etc.)

1.   In a mixing bowl, combine eggs, sugar, nutmeg, orange juice, milk and vanilla; stir well. 
2.   Fit bread slices in a single layer into a 13 x 9” baking dish. 
3.   Pour egg mixture over bread slices and turn bread to make sure that slices are completely covered with the egg mixture. Let mixture set long enough to absorb liquid or, cover and refrigerate overnight.
A small batch of French toast ready to go into the fridge overnight.
The excess egg-milk mixture will be absorbed by morning.
4. When ready to bake, pour melted butter into a jelly roll pan; place bread slices in a single layer. 
I actually put the butter on the  jelly roll pan,  put it in the oven to melt
and then place the soaked bread on the hot pan -- saves on dishes & mess.
5.   Bake at 400° for 10 minutes; sprinkle with nuts and bake another 10 minutes.  (If bread is not brown on the underside when the first 10 minutes are up, it could be turned — if turning, be sure to do this before adding the nuts.)
I almost always turn the toast after the first 10 minutes, add the nuts and then
put back in the oven for another 10 minutes. This photo shows the finished product. 
6.   Serve with syrup or sprinkle with powdered sugar and freshly ground nutmeg.

Barry’s First Canning Experience -- Sandi’s Salsa


     This is an update to a post added last fall after I interviewed Sandi Dutt for my monthly cooking column that appears in the Abilene Reflector-Chronicle. During the interview she gave me a pint jar of her Salsa. We served it with quesadilla and a pork carnitas dinner, and liked the salsa so much that I posted the recipe and even noted, “If I had 22 “good” tomatoes I’d be in the kitchen trying to duplicate her recipe.”
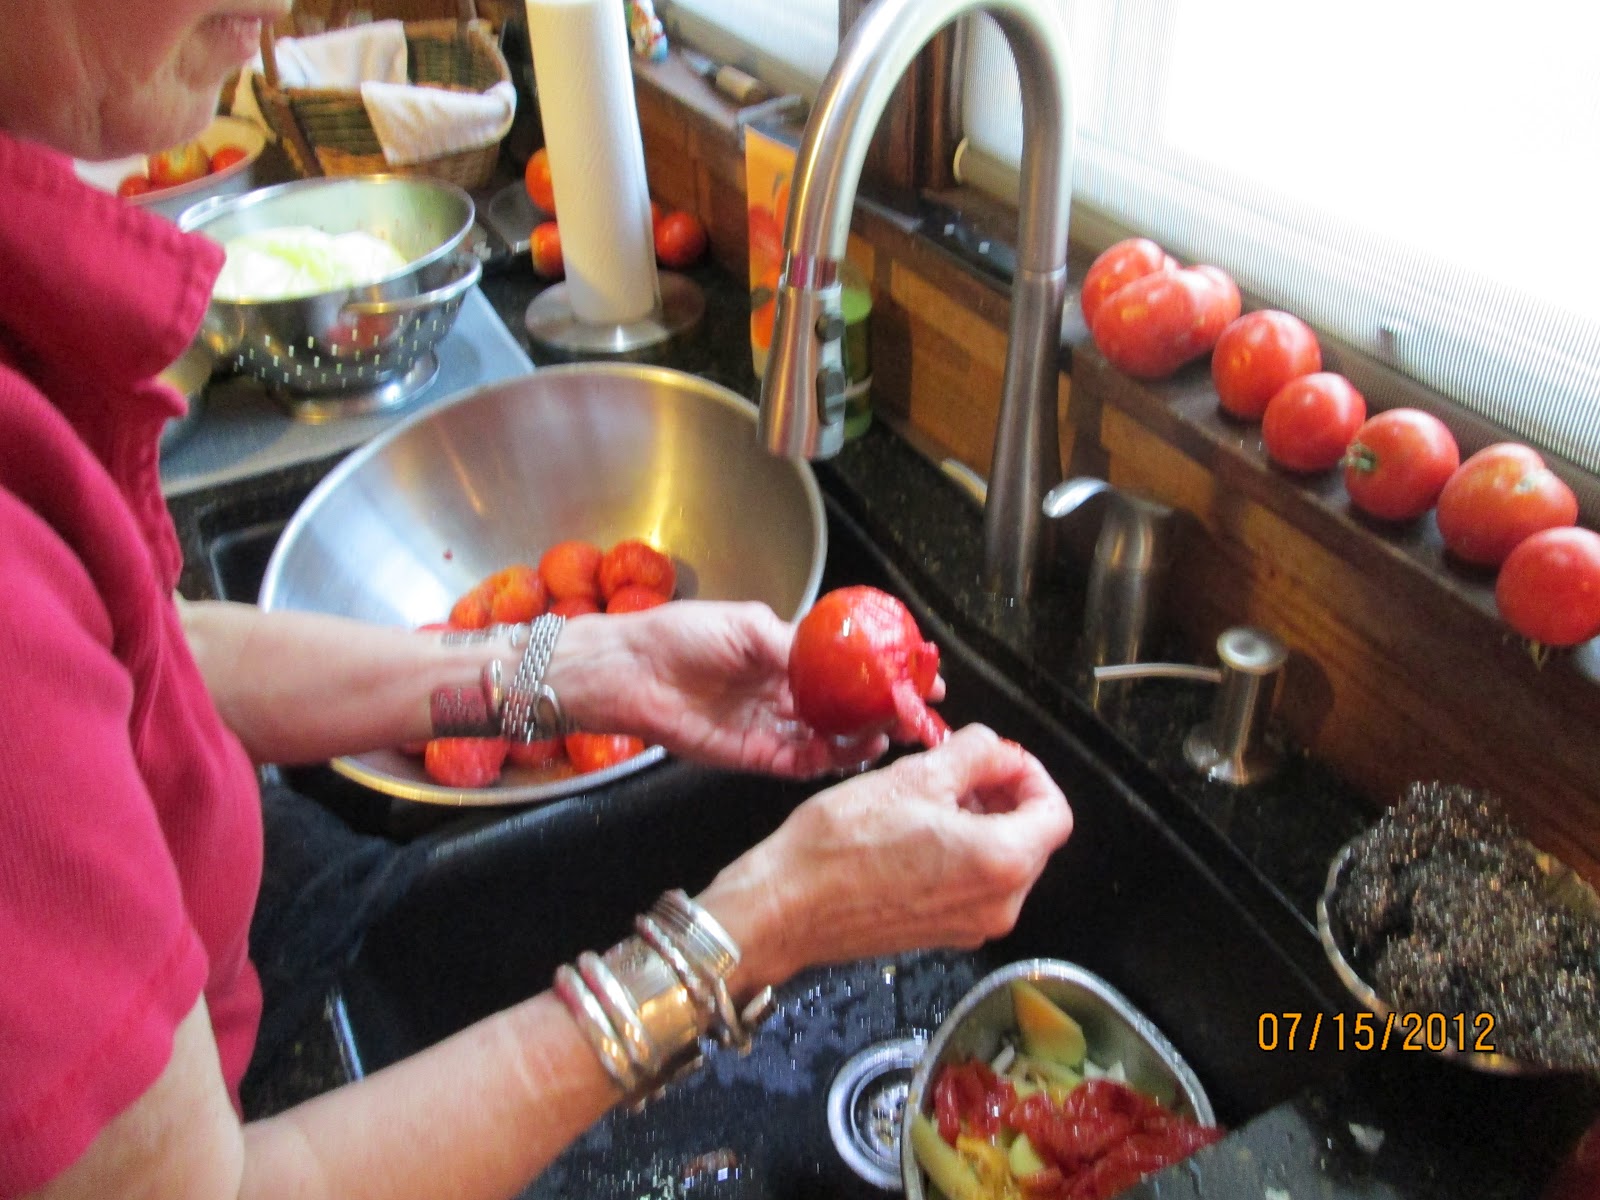
     Well we now have LOTS of “good” tomatoes and Barry wanted to try his hand at canning – this was his first experience so I’ve added some photos detailing the process.
     I even learned something along the way. In preparation for the canning process, I grabbed a couple of quart jars and some pints, too. When it was time to set the timer for water bathing the salsa, I noticed the recipe did not list a processing time for quart jars. Checked the USDA website and they had no times listed either.
     After more checking I found out the Extension service no longer recommends water bathing quart jars of salsa. Why? Salsa is a mixture of acid and LOW-acid ingredients and recent testing indicates there is a chance that bacteria may develop in quart jars of salsa that have been water bathed. Since salsa in usually eaten straight from the jar, canning quart jars of the stuff is no longer recommend! So, our quarts of salsa are now in the  fridge while the pints are stored in the pantry.
     By the way, my original blog story follows Sandi’s recipe. And, we continue to “umm and ahh” over her recipe!

Sandi’s Salsa   Makes 8 pints (do not use quart jars – see explanation above)
22 tomatoes
5 large onions
2 to 3 bell peppers
9 to 11 jalapeno peppers or as desired 
1 cup white vinegar 
½ to ¾ cup granulated sugar or less
1/3 cup salt
2 to 3 small (6 oz.) cans tomato paste
Cilantro, chopped to taste, optional

1.  Core each tomato and cut an X shape into the bottom surface of each. Blanch by immersing a few of the tomatoes into a pot of boiling water just until skin starts peeling (do not let them linger too long or they will cook.)

Barry first cored the tomatoes & then we blanched them ( added them to a pot of boiling water for a couple of minutes , just until their skins started to break) and then, after plunging them into cold water, I peeled them (the peels are easily removed after blanching). Then Barry added the peeled tomatoes to the food processor and pulsed them until chunky.
2.  Cut tomatoes in half and remove at least a few of the seeds. Squeeze out excess liquid.
3.  Run tomatoes through a food processer. pulsing just until chunky. 
3.  Combine all ingredients in a large pot; bring to a boil and cook for 20 to 30 minutes
Thick and chunky, this salsa already looks and smells good. Time to get out the chips!
4.  Ladle salsa into jars, leaving about a 1” headspace. Wipe the top of each jar with a clean cloth and added a lid & band to each jar.

Barry ladles salsa into sterilized jars.
Next he wiped the top of each jar with a clean cloth and added a lid & band to each jar
 before immersing them in the hot water bath
. 
5.  To water bath — Place each jar in a pot of hot water—make sure jars and lids are completely immersed in the water. Bring pot of water to a boil and then begin timing. Process 15 minutes for pint jars @ 0 to 1,000’. For detailed instructions and guidelines for safe home canning, from jar sterilization to choosing the right canning method (water bath vs. pressure cooking) to testing jar seals, go to the USDA Complete Guide to Home Canning and Preserving.

Recipe without photos . . . Sandi’s Salsa   Makes 8 pints (do not use quart jars) 

22 tomatoes

5 large onions

2 to 3 bell peppers

9 to 11 jalapeño peppers or as desired  

1 cup white vinegar 

½ to ¾ cup granulated sugar or less

1/3 cup salt

2 to 3 small (6 oz.) cans tomato paste

Cilantro, chopped to taste, optional

1.   Core each tomato and cut an X shape into the bottom surface of each. Blanch by immersing a few of the tomatoes into a pot of boiling water just until skin starts peeling (do not let them linger too long or they will cook.)

2.   Cut tomatoes in half and remove at least a few of the seeds. Squeeze out excess liquid.

3.   Run tomatoes through a food processer. pulsing just until chunky. Barry first cored the tomatoes & then we blanched them

4.   Chop onions and peppers.

5.   Combine all ingredients in a large pot; bring to a boil and cook for 20 to 30 minutes. 

6.   Ladle salsa into jars, leaving about a 1” headspace. Wipe the top of each jar with a clean cloth and added a lid & band to each jar.

7.   To water bath — Place each jar in a pot of hot water—make sure jars and lids are completely immersed in the water. Bring pot of water to a boil and then begin timing. Process 15 minutes for pint jars @ 0 to 1,000’. For detailed instructions and guidelines for safe home canning, from jar sterilization to choosing the right canning method (water bath vs. pressure cooking) to testing jar seals, go to the USDA Complete Guide to Home Canning and Preserving.


STORY WITH ORIGINAL POST – fall 2011
We “ummed & ahhed” through the entire pint – Sandi’s Salsa     
Mike Jantz told me that Sandi Dutt was a really good cook and bragged, “She makes the BEST salsa.” Mike and Sandi are both educators at Abilene High School and Sandi assists Mike with his championship volleyball team.
     Based on his recommendation I interviewed Sandi and her daughter, Abby Dutt Markley, for my November 2011 cooking column that runs monthly in Abilene’s newspaper. Sandi shared her salsa recipe for that column and also gave me a pint of salsa to take home.
    It set on the shelf in our pantry until Barry made cheese and chicken quesadillas the other day. Pace® is our usual brand of salsa/picante sauce but we were out so he opened Sandi’s jar.
    We like to spoon salsa over the top or our quesadilla wedges; in no time we had gobbled down half of the jar!  Have to admit there wasn’t much talking, just a lot of “umming and ahhing” going on. Barry finally took a breath to proclaim, “This is the BEST salsa I’ve ever tasted!” I was in total agreement! When we’d had our fill, it was time to securitize. Here’s our analysis of the salsa . . .
 . . .a hint of heat (enough to satisfy by spicy heat cravings yet mild enough for Barry) with a sweet undertone;
. . . perfect consistency, not to thick but not too runny – “it was just right”;
. . . fantastic combination of flavors;
. . . Barry’s other comment say’s it all, “This tastes like MORE!”
  Sandi’s Salsa has definitely set a new standard for salsa in our household. And, if I had 22 “good” tomatoes I’d be in the kitchen trying to duplicate her recipe. We will definitely make it this summer or whenever we find a batch of summer-like tomatoes.
Sandi's Salsa w/ quesadillas.
Fall 2011

Pass The Stew and Polenta – a recipe and book recommendation

Served with a green salad, this is
a complete and comforting meal.
     Pass The Polenta by Teresa Lust is on my list as an all-time favorite book. I’ve read it, reread it and even reviewed it for my local literary group. Claiming a prominent place on my cookbook shelf (so it can be quickly located), it is full of sticky notes and lots of hot pink highlighted text.
    The book cover reads, “Teresa Lust intended to write a conventional cookbook, but she soon found that each recipe evoked a remembrance, each ingredient carried with it an anecdote.” It’s my kind of book – full of family recipes, tips and lots and lots of family stories.
    Ms. Lust provides insights into the secrets of scone making, explores varying opinions about how to make strawberry shortcake, and explains risotto preparation. However, my favorite recipe is the one included below and, I think of the story about her mother’s polenta every time I take a bite of this delicious peasant dish.

P.S. I’m finally using the rest of the stew meat I cut from the chuck roast when I prepared Pot Roast in the Slow Cooker a month ago.

Stew and Polenta    Serves 4
For the Stew
2 lbs. chuck roast or other stewing meat, trimmed & cut into chunks
All-purpose flour for dredging meat [I add salt, pepper & paprika to create a seasoned flour]
2 to 3 tablespoons oil 
1 large onion, cut into thick crescents
4 to 5 small cloves garlic, peeled & slivered
1 bay leaf
1 good pinch each of oregano, thyme & rosemary
1 glass of red wine [I used about 1 cup]
16 oz. jar of canned tomatoes, roughly cut, including their liquid [I used diced tomatoes in the can]
2 to 3 stalks of celery, including their leaves, slices
2 carrots, peeled & sliced
Quartered mushrooms, 1 cup or so, optional
1 turnip, peeled & slices, optional [I diced the turnip]
Salt & pepper to taste

1. Dredge the pieces of meat in [seasoned] flour.
Working in batches, cubes of neat are added to seasoned flour and tossed to "dredge".
2. Heat the oil in a heavy stewpot. Add the meat and cook over medium heat until the pieces are browned on all sides. 
Meat at the top of the photo has just been turned after being browned in oil.
      Stir in the onion, garlic, bay leaf, and herbs, and continue cooking until the onion is translucent. Add the wine and tomatoes, and let the stew simmer slowly, covered, for about 2 hours [or until meat in fork tender – I let it cook for about 2½ to 3 hours]. Check the pot occasionally and add water if the liquid has evaporated.
Braising is  the cooking method employed in this recipe  -- cooking meat by browning in
fat and then simmering in a closed container. This method, along with the inclusion of acids from
the tomatoes and wine, helps break down the connective tissues this less-tender cut of beef. 
3. Towards the end of the cooking time (about 30 to 40 minutes before serving), stir in the remaining vegetables and continue braising gently until the vegetables are tender [I didn't add mushroom until after the other veggies had cooked for about 15 minutes]. Season with salt and pepper [if needed].
Note: Can be made ahead and reheated.
All of veggies have been added except mushrooms  which I added
 after the denser vegetables had a chance to cook awhile.
For the Polenta
1 cup polenta (coarsely ground cornmeal)
1 teaspoon salt
4 cups cold water (you can substitute 1 cup stock or milk for part of the water [I used part beef broth]
Salt & pepper
A few handfuls freshly grated Parmesan cheese

1. Stir water, polenta, and 1 teaspoon salt together in a heavy saucepan. Place over a low flame and stir slowly with a wooden spoon, scraping the bottom and sides of the pot to keep the polenta from sticking. Cook until the mixture thickens and pulls cleanly away from the sides of the pot, and the cornmeal feels tender on the tongue, 30 to 40 minutes [Mine was done in about 20 minutes – the mixture tends to “spurt and splatter” so it is important that a low heat is used.]
Cook over low heat, stirring with a wooden spoon.
2. Add freshly ground pepper and more salt, if needed, to taste.


To Assemble and Serve at Table    
· Put thin slices of mozzarella, provolone, and Gorgonzola cheese on a serving plate – 8 ounces of cheese, total, is ample. Gruyère, fontina or Roquefort work well in this dish, too. [I just used thin slices of Parmesan.]
· Place the cheese plate on the table, along with the pot of stew and the dish of polenta.
· Diners serve themselves by spooning a mound of polenta onto their plate, followed by slices of the assorted cheeses and spoonfuls of stew.

Pass The Polenta: And Other Writings From The Kitchen, With Recipes by Teresa Lust; Steerforth Press (South Royalton, Vermont), 1998. This book is very reasonable priced and still available at Biblio.com and at other internet sites.